
When I first learned to cook, desserts always felt like a distant dream—too delicate, too precise, too easy to mess up. But then I discovered a recipe that changed everything: pistachio pudding tarts. These cheerful little treats look elegant, taste rich and creamy, and—best of all—they’re surprisingly simple to make. Whether you’re brand new to the kitchen or just looking for a light, plant-forward dessert, this recipe checks all the boxes.
Print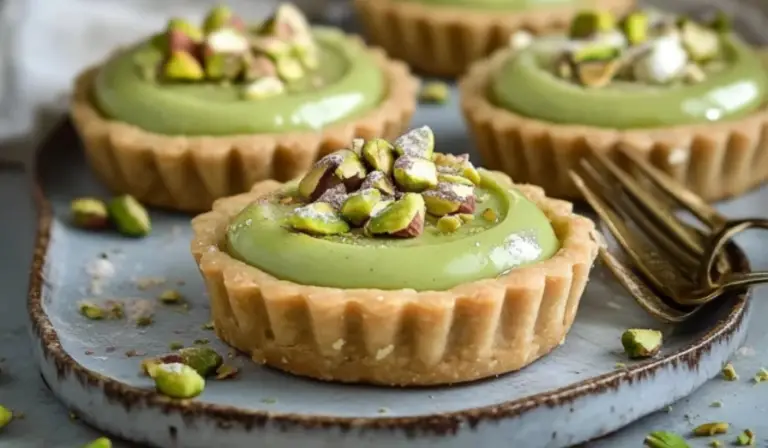
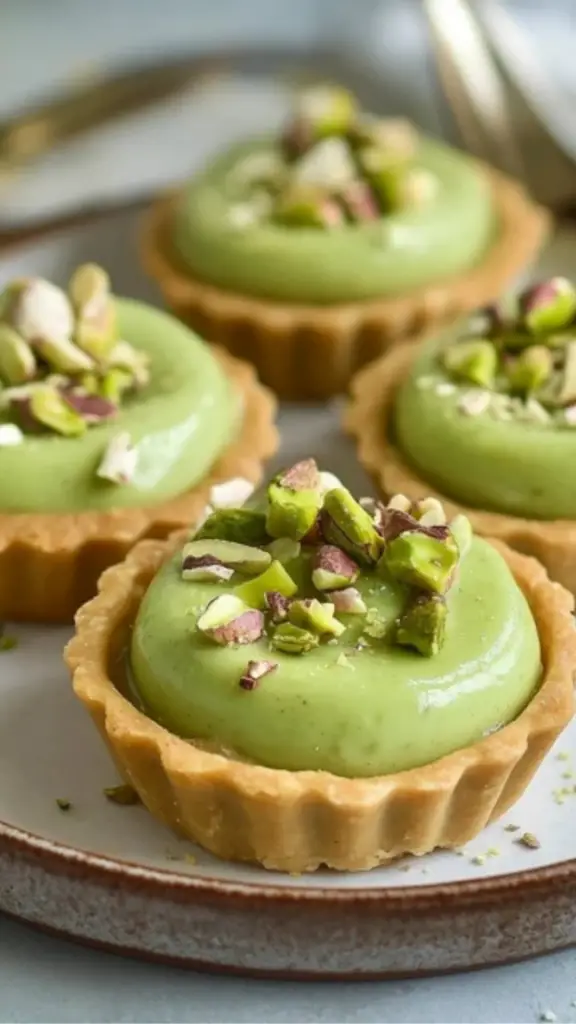
Pistachio Pudding Tarts: A Delightful No-Stress Dessert for Beginners
Buttery tart shells filled with creamy pistachio pudding—these no-fuss treats are sweet, nutty, and totally beginner-friendly! Perfect for any occasion! 🟢🥧💫
- Total Time: 48 minutes active, 2 hours 48 minutes total
- Yield: 5 tarts 1x
Ingredients
- Pistachio Pudding
- 1 cup pistachio milk (can substitute almond or oat milk for a similar result)
- ¼ cup maple sugar (or coconut sugar for a deeper flavor)
- ¼ cup packed fresh spinach (adds color, not flavor)
- 1 tablespoon cassava flour (can sub arrowroot powder or cornstarch as a thickener)
- ⅛ teaspoon almond extract
- Pinch of fine sea salt
- ½ cup dairy-free whipped cream (or traditional whipped cream if dairy is not a concern)
Garnish (Optional)
- 2 tablespoons raw, unsalted pistachios, chopped
- ¼ cup additional dairy-free whipped cream for topping
This recipe makes about 5 tarts, with 8 tart shells total. The extra shells can be stored in the freezer for next time.
Instructions
1. Preheat and Prepare the Shells
Preheat your oven to 350°F (175°C). If you’re making graham cracker dough from scratch, prepare it according to your trusted recipe. Roll the dough out evenly and cut into 4½-inch circles. You should get about 8 circles from one batch.
Transfer each dough circle into a 4-inch mini tart pan, pressing it into the bottom and up the sides. Use a fork to poke the bottom a couple of times—this helps prevent bubbling during baking.
Place the tart pans on a baking sheet and bake for 15–18 minutes, or until the crust edges start turning a light golden brown. Remove from the oven and let them cool completely.
2. Make the Pistachio Pudding
In a high-powered blender, combine:
- Pistachio milk
- Maple sugar
- Fresh spinach
- Cassava flour
- Almond extract
- Sea salt
Blend until completely smooth and the spinach is fully pulverized—this gives the pudding a naturally beautiful green hue without artificial dyes.
Pour the mixture into a small saucepan with a heavy bottom. Place it over medium heat, and stir constantly to prevent lumps or sticking. You’ll notice the mixture start to thicken as it warms. Once it reaches a pudding-like consistency (thick enough to coat the back of a spoon), remove it from the heat.
Transfer the pudding to a heatproof bowl, cover the surface with plastic wrap (pressed directly onto the pudding to prevent a skin from forming), and refrigerate for at least 2 hours, or until fully chilled.
3. Combine and Fill
After the pudding has chilled and thickened, gently fold in ½ cup of dairy-free whipped cream to make the texture light and fluffy.
Carefully remove the tart shells from the pans. Spoon about ¼ cup of pudding into each of the 5 tart shells (you can freeze the remaining 3 shells for another time).
Place the filled tarts back into the fridge to set slightly, ideally another 30 minutes before serving.
4. Garnish and Serve
When ready to serve, top each tart with a dollop of whipped cream and a sprinkle of chopped pistachios, if desired. The garnish adds a lovely texture and visual contrast, but the tarts are equally delicious on their own.
Notes
- No high-powered blender? Soak the spinach in warm water for 5 minutes to soften, then blend in stages.
- Pudding too runny? Keep cooking a few more minutes until thick. If still loose after chilling, stir in a bit more whipped cream to improve texture.
- Crust bubbling or cracking? Make sure you fork the bottoms before baking, and let them cool fully before removing from pans.
- Efficient prep: Make the tart shells a day ahead and store in an airtight container at room temp to cut down on same-day work.
- Tool tip: A small offset spatula or spoon helps spread pudding smoothly into tart shells.
- Prep Time: 30 minutes (plus 2 hours chill time)
- Cook Time: 18 minutes
The pistachio pudding is naturally tinted green with spinach (yes, spinach—but don’t worry, you won’t taste it), lightly sweetened with maple sugar, and made creamy with dairy-free whipped topping. The crust is a tender graham cracker shell made from scratch or using a trusted recipe from your favorite baking guide. With just a little planning and a touch of patience while things chill, you’ll have a dessert that’s not only pretty to look at but also a joy to eat.
These tarts are perfect for beginner cooks because they don’t require any complicated techniques or specialized equipment. The steps are straightforward, the ingredients are accessible, and the results are consistently satisfying. So if you’ve ever felt intimidated by pastry or nervous about making pudding from scratch, this is your invitation to give it a try. You’ve got this.
Ingredients and Preparation
Before jumping in, it’s always helpful to read through the full list of ingredients and get everything prepped. This saves time and helps things go smoothly, especially if you’re new to baking. Below is everything you need for the tart shells, pudding, and optional toppings, with notes on substitutions for flexibility.
Tart Shells
- 1 graham cracker recipe from your go-to baking book (or your preferred homemade graham cracker dough)
- Note: If you don’t have a recipe for graham crackers, you can use pre-made graham crackers, crush them, and mix with melted butter (or dairy-free butter) to form a basic tart crust. Press the mixture into tart pans and bake for 10 minutes at 350°F.
Pistachio Pudding
- 1 cup pistachio milk (can substitute almond or oat milk for a similar result)
- ¼ cup maple sugar (or coconut sugar for a deeper flavor)
- ¼ cup packed fresh spinach (adds color, not flavor)
- 1 tablespoon cassava flour (can sub arrowroot powder or cornstarch as a thickener)
- ⅛ teaspoon almond extract
- Pinch of fine sea salt
- ½ cup dairy-free whipped cream (or traditional whipped cream if dairy is not a concern)
Garnish (Optional)
- 2 tablespoons raw, unsalted pistachios, chopped
- ¼ cup additional dairy-free whipped cream for topping
This recipe makes about 5 tarts, with 8 tart shells total. The extra shells can be stored in the freezer for next time.
Step-by-Step Instructions
Breaking things down into manageable steps makes even a longer recipe feel approachable. Take your time with each phase, and don’t worry—perfection isn’t the goal. Enjoy the process.
1. Preheat and Prepare the Shells
Preheat your oven to 350°F (175°C). If you’re making graham cracker dough from scratch, prepare it according to your trusted recipe. Roll the dough out evenly and cut into 4½-inch circles. You should get about 8 circles from one batch.
Transfer each dough circle into a 4-inch mini tart pan, pressing it into the bottom and up the sides. Use a fork to poke the bottom a couple of times—this helps prevent bubbling during baking.
Place the tart pans on a baking sheet and bake for 15–18 minutes, or until the crust edges start turning a light golden brown. Remove from the oven and let them cool completely.
2. Make the Pistachio Pudding
In a high-powered blender, combine:
- Pistachio milk
- Maple sugar
- Fresh spinach
- Cassava flour
- Almond extract
- Sea salt
Blend until completely smooth and the spinach is fully pulverized—this gives the pudding a naturally beautiful green hue without artificial dyes.
Pour the mixture into a small saucepan with a heavy bottom. Place it over medium heat, and stir constantly to prevent lumps or sticking. You’ll notice the mixture start to thicken as it warms. Once it reaches a pudding-like consistency (thick enough to coat the back of a spoon), remove it from the heat.
Transfer the pudding to a heatproof bowl, cover the surface with plastic wrap (pressed directly onto the pudding to prevent a skin from forming), and refrigerate for at least 2 hours, or until fully chilled.
3. Combine and Fill
After the pudding has chilled and thickened, gently fold in ½ cup of dairy-free whipped cream to make the texture light and fluffy.
Carefully remove the tart shells from the pans. Spoon about ¼ cup of pudding into each of the 5 tart shells (you can freeze the remaining 3 shells for another time).
Place the filled tarts back into the fridge to set slightly, ideally another 30 minutes before serving.
4. Garnish and Serve
When ready to serve, top each tart with a dollop of whipped cream and a sprinkle of chopped pistachios, if desired. The garnish adds a lovely texture and visual contrast, but the tarts are equally delicious on their own.
Beginner Tips and Notes
Even simple recipes have their challenges, and a few small tweaks can make a big difference. Here are some practical pointers:
- No high-powered blender? Soak the spinach in warm water for 5 minutes to soften, then blend in stages.
- Pudding too runny? Keep cooking a few more minutes until thick. If still loose after chilling, stir in a bit more whipped cream to improve texture.
- Crust bubbling or cracking? Make sure you fork the bottoms before baking, and let them cool fully before removing from pans.
- Efficient prep: Make the tart shells a day ahead and store in an airtight container at room temp to cut down on same-day work.
- Tool tip: A small offset spatula or spoon helps spread pudding smoothly into tart shells.
Serving Suggestions
These tarts are lovely on their own but can be dressed up or down depending on the occasion.
- Pair with fresh fruit like raspberries or sliced strawberries for a pop of color and tart contrast.
- Serve alongside tea or coffee for a light afternoon treat.
- Drizzle with a little honey or dark chocolate for added indulgence.
- Freeze leftovers for up to 2 weeks. Thaw in the fridge overnight for best texture.
If making for a crowd, you can also prepare this recipe as a full 9-inch tart using a standard tart pan. Simply press the graham cracker dough into the pan and adjust the baking time slightly—around 20–22 minutes should do the trick.
Engagement Features
Trying a new recipe can be a confidence booster, especially when the end result is both delicious and beautiful. These pistachio pudding tarts offer an approachable entry point into the world of homemade desserts, and we hope you give them a go.
If you do try the recipe, let us know how it went. Did you stick to the original ingredients, or make some substitutions that worked well for you? Did you find a creative way to garnish or present them? Share your experience and any beginner tips you picked up along the way—we’d love to hear from you.
Cooking is a journey, and every success, no matter how small, deserves to be celebrated. These tarts are proof that you don’t need to be a pastry chef to create something special from scratch. So grab your ingredients, take it step by step, and enjoy the process. Happy baking.