
Baking can feel intimidating for beginners, but some recipes are so forgiving and rewarding that they’re the perfect place to start. Peanut Butter Cookie Gooey Bars are one of those recipes. They bring together the rich flavors of peanut butter and chocolate with a soft, chewy texture that makes them irresistible. Even if you’ve never baked before, this guide will walk you through each step, ensuring you end up with a delicious treat that looks and tastes like it came from a bakery.
Print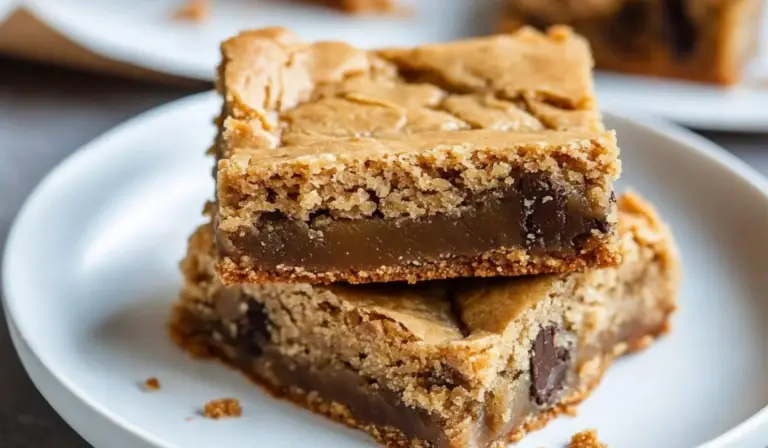
Beginner’s Guide to Making Peanut Butter Cookie Gooey Bars
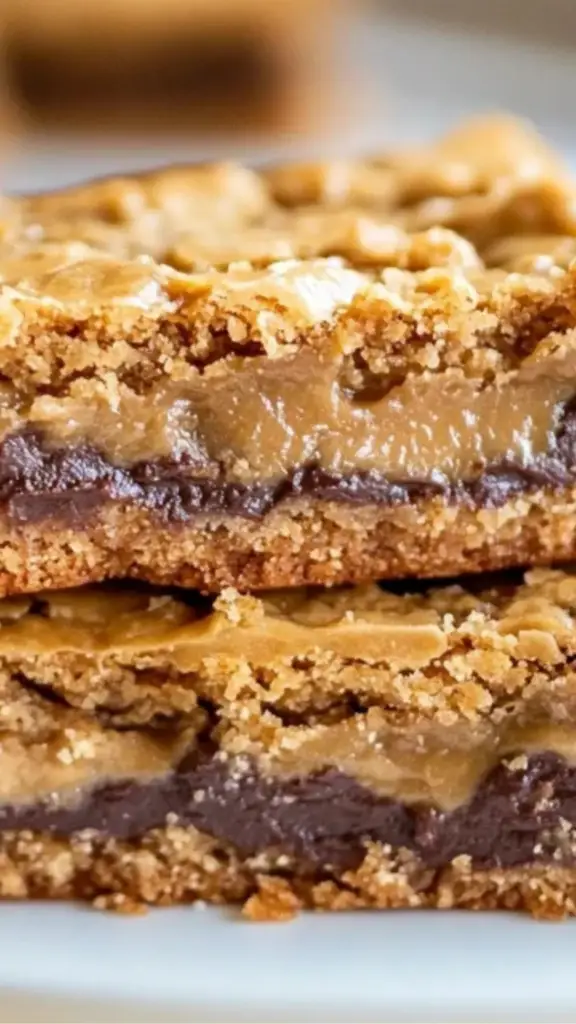
Calling all peanut butter lovers! These Peanut Butter Cookie Gooey Bars are the ultimate combination of soft, chewy, and irresistibly gooey. Made with simple ingredients and zero stress, this beginner-friendly recipe is perfect for whipping up a sweet treat in no time. Every bite is rich, nutty, and deliciously decadent—a true peanut butter dream! Serve them warm for an extra gooey center or chilled for a firmer bite. Either way, they won’t last long! Who’s grabbing a piece?
#EasyDesserts #PeanutButterPerfection #ChewyAndGooey #CookieBarMagic #SweetTreats #HomemadeGoodness #SimpleAndDelicious #BeginnerBaking #IrresistibleFlavor #BakingMadeEasy
- Total Time: 50 minutes
- Yield: 24 bars 1x
Ingredients
- 1/2 cup butter, softened – Softening butter makes it easier to mix and helps create a smooth dough.
- 3/4 cup peanut butter – Creamy peanut butter works best, but you can use natural peanut butter with a little extra mixing.
- 3/4 cup packed brown sugar – Adds moisture and a rich, caramel-like sweetness.
- 1/4 cup granulated sugar – Balances the brown sugar and helps with texture.
- 1 large egg – Binds the ingredients together and gives structure to the bars.
- 1 teaspoon vanilla extract – Enhances the flavor of the bars.
- 1 tablespoon milk – Helps keep the dough soft and pliable.
- 1/4 teaspoon salt – Brings out the flavors and balances sweetness.
- 1/2 teaspoon baking soda – Helps the bars rise slightly for a light texture.
- 1 1/2 cups flour – The base of the dough, providing structure and texture.
- 1 (14-ounce) can sweetened condensed milk – Adds richness and gooeyness to the bars.
- 2 cups milk or semi-sweet chocolate chips – Chocolate pairs perfectly with peanut butter for a classic flavor combination.
Instructions
Step 1: Preheat and Prepare the Baking Pan
Preheat your oven to 350°F (175°C). Line a 9×13-inch baking pan with parchment paper or aluminum foil, leaving some overhang to make it easier to lift the bars out later. Lightly coat the pan with cooking spray to prevent sticking.
Step 2: Make the Dough
Using an electric mixer fitted with a paddle attachment, cream together the butter, peanut butter, brown sugar, and granulated sugar. Beat on medium speed until the mixture is light and fluffy, about 2–3 minutes. This step is important because it helps incorporate air into the dough, leading to a softer texture.
Add the egg, vanilla extract, and milk, then mix until fully combined. Reduce the mixer speed to low and gradually add the salt, baking soda, and flour. Continue mixing until the dough comes together. It will be soft and slightly sticky, which is normal.
Step 3: Create the Bottom Layer
Take two-thirds of the dough and press it evenly into the bottom of your prepared pan. The dough might feel sticky, so lightly coat your hands with cooking spray to help spread it out smoothly. It will be a thin layer, but don’t worry—it will hold together once baked.
Step 4: Add the Chocolate and Sweetened Condensed Milk
Evenly sprinkle chocolate chips over the dough layer. Then, slowly pour the sweetened condensed milk on top, leaving a small 1/2-inch border around the edges. This prevents the milk from bubbling over while baking.
Step 5: Add the Top Layer
Spoon the remaining dough in small drops over the condensed milk layer. Since the dough is sticky, lightly spray your hands again and gently flatten the dough over the top. The filling won’t be completely covered, but that’s okay—it will spread slightly during baking.
Step 6: Bake the Bars
Place the pan in the preheated oven and bake for 30–36 minutes. The bars are done when the top turns golden brown and the edges look set. The center will still look slightly gooey but will firm up as it cools.
Step 7: Cool and Slice
Let the bars cool completely before cutting. For cleaner slices, refrigerate them for 30 minutes before cutting with a sharp knife. If you prefer gooey bars, serve them at room temperature.
Notes
How to Tell When Your Bars Are Done
- The edges should be lightly browned and slightly pulling away from the pan.
- The top should look set but still slightly soft in the center.
Troubleshooting Common Issues
- Bars Are Too Hard – This happens if they’re overbaked. Next time, remove them a few minutes earlier.
- Dough Is Too Sticky to Work With – Lightly grease your hands with cooking spray or chill the dough for 10 minutes before handling.
- Chocolate Chips Sinking to the Bottom – Make sure to press them lightly into the bottom layer before adding the condensed milk.
Helpful Kitchen Tips
- Use a rubber spatula to scrape every bit of sweetened condensed milk from the can.
- If you don’t have parchment paper, use foil and lightly grease it for easy removal.
- For extra crunch, sprinkle chopped peanuts on top before baking.
- Prep Time: 20 minutes
- Cook Time: 30 minutes
These bars are a great choice for beginner bakers because they require simple techniques, easy-to-find ingredients, and don’t demand advanced decorating skills. Plus, they’re incredibly satisfying to make and share. Whether you’re looking to impress guests, treat your family, or simply enjoy a homemade dessert, this is a great recipe to start with.
Ingredients and Preparation
Before you start, make sure you have all the ingredients measured and ready to go. This practice, known as mise en place, makes the baking process smoother and reduces the chances of missing a step.
Ingredients
- 1/2 cup butter, softened – Softening butter makes it easier to mix and helps create a smooth dough.
- 3/4 cup peanut butter – Creamy peanut butter works best, but you can use natural peanut butter with a little extra mixing.
- 3/4 cup packed brown sugar – Adds moisture and a rich, caramel-like sweetness.
- 1/4 cup granulated sugar – Balances the brown sugar and helps with texture.
- 1 large egg – Binds the ingredients together and gives structure to the bars.
- 1 teaspoon vanilla extract – Enhances the flavor of the bars.
- 1 tablespoon milk – Helps keep the dough soft and pliable.
- 1/4 teaspoon salt – Brings out the flavors and balances sweetness.
- 1/2 teaspoon baking soda – Helps the bars rise slightly for a light texture.
- 1 1/2 cups flour – The base of the dough, providing structure and texture.
- 1 (14-ounce) can sweetened condensed milk – Adds richness and gooeyness to the bars.
- 2 cups milk or semi-sweet chocolate chips – Chocolate pairs perfectly with peanut butter for a classic flavor combination.
Ingredient Substitutions and Tips
- Butter Alternatives – If you prefer, you can use margarine or a plant-based butter substitute.
- Peanut Butter Substitutes – Almond butter or sunflower seed butter can be used for those with peanut allergies.
- Flour Alternatives – A gluten-free flour blend can replace all-purpose flour for a gluten-free version.
- Chocolate Options – Dark chocolate chips can be used for a richer, less sweet taste.
Step-by-Step Instructions
Step 1: Preheat and Prepare the Baking Pan
Preheat your oven to 350°F (175°C). Line a 9×13-inch baking pan with parchment paper or aluminum foil, leaving some overhang to make it easier to lift the bars out later. Lightly coat the pan with cooking spray to prevent sticking.
Step 2: Make the Dough
Using an electric mixer fitted with a paddle attachment, cream together the butter, peanut butter, brown sugar, and granulated sugar. Beat on medium speed until the mixture is light and fluffy, about 2–3 minutes. This step is important because it helps incorporate air into the dough, leading to a softer texture.
Add the egg, vanilla extract, and milk, then mix until fully combined. Reduce the mixer speed to low and gradually add the salt, baking soda, and flour. Continue mixing until the dough comes together. It will be soft and slightly sticky, which is normal.
Step 3: Create the Bottom Layer
Take two-thirds of the dough and press it evenly into the bottom of your prepared pan. The dough might feel sticky, so lightly coat your hands with cooking spray to help spread it out smoothly. It will be a thin layer, but don’t worry—it will hold together once baked.
Step 4: Add the Chocolate and Sweetened Condensed Milk
Evenly sprinkle chocolate chips over the dough layer. Then, slowly pour the sweetened condensed milk on top, leaving a small 1/2-inch border around the edges. This prevents the milk from bubbling over while baking.
Step 5: Add the Top Layer
Spoon the remaining dough in small drops over the condensed milk layer. Since the dough is sticky, lightly spray your hands again and gently flatten the dough over the top. The filling won’t be completely covered, but that’s okay—it will spread slightly during baking.
Step 6: Bake the Bars
Place the pan in the preheated oven and bake for 30–36 minutes. The bars are done when the top turns golden brown and the edges look set. The center will still look slightly gooey but will firm up as it cools.
Step 7: Cool and Slice
Let the bars cool completely before cutting. For cleaner slices, refrigerate them for 30 minutes before cutting with a sharp knife. If you prefer gooey bars, serve them at room temperature.
Beginner Tips and Notes
How to Tell When Your Bars Are Done
- The edges should be lightly browned and slightly pulling away from the pan.
- The top should look set but still slightly soft in the center.
Troubleshooting Common Issues
- Bars Are Too Hard – This happens if they’re overbaked. Next time, remove them a few minutes earlier.
- Dough Is Too Sticky to Work With – Lightly grease your hands with cooking spray or chill the dough for 10 minutes before handling.
- Chocolate Chips Sinking to the Bottom – Make sure to press them lightly into the bottom layer before adding the condensed milk.
Helpful Kitchen Tips
- Use a rubber spatula to scrape every bit of sweetened condensed milk from the can.
- If you don’t have parchment paper, use foil and lightly grease it for easy removal.
- For extra crunch, sprinkle chopped peanuts on top before baking.
Serving Suggestions
These bars are delicious on their own, but you can enhance them by serving them with:
- A glass of cold milk – The classic pairing for cookies and bars.
- A scoop of vanilla ice cream – The warm, gooey bars contrast perfectly with the cold ice cream.
- Drizzle of melted chocolate or caramel – Adds extra sweetness and elegance.
Storage and Leftovers
- Store bars in an airtight container at room temperature for up to 3 days.
- Refrigerate for up to 1 week if you prefer a firmer texture.
- Freeze for up to 1 month by placing slices in a sealed container with layers of parchment paper to prevent sticking. Thaw at room temperature before serving.
Conclusion: A Perfect Recipe for Beginners
If you’re new to baking, Peanut Butter Cookie Gooey Bars are a fantastic place to start. They require basic ingredients, simple techniques, and deliver impressive results. The combination of peanut butter, chocolate, and sweetened condensed milk creates a rich, gooey treat that is sure to be a crowd-pleaser.
Give this recipe a try and let me know how it turns out. Did you add any personal twists, like using dark chocolate or adding nuts? Share your experience in the comments—I’d love to hear how your baking journey is going!