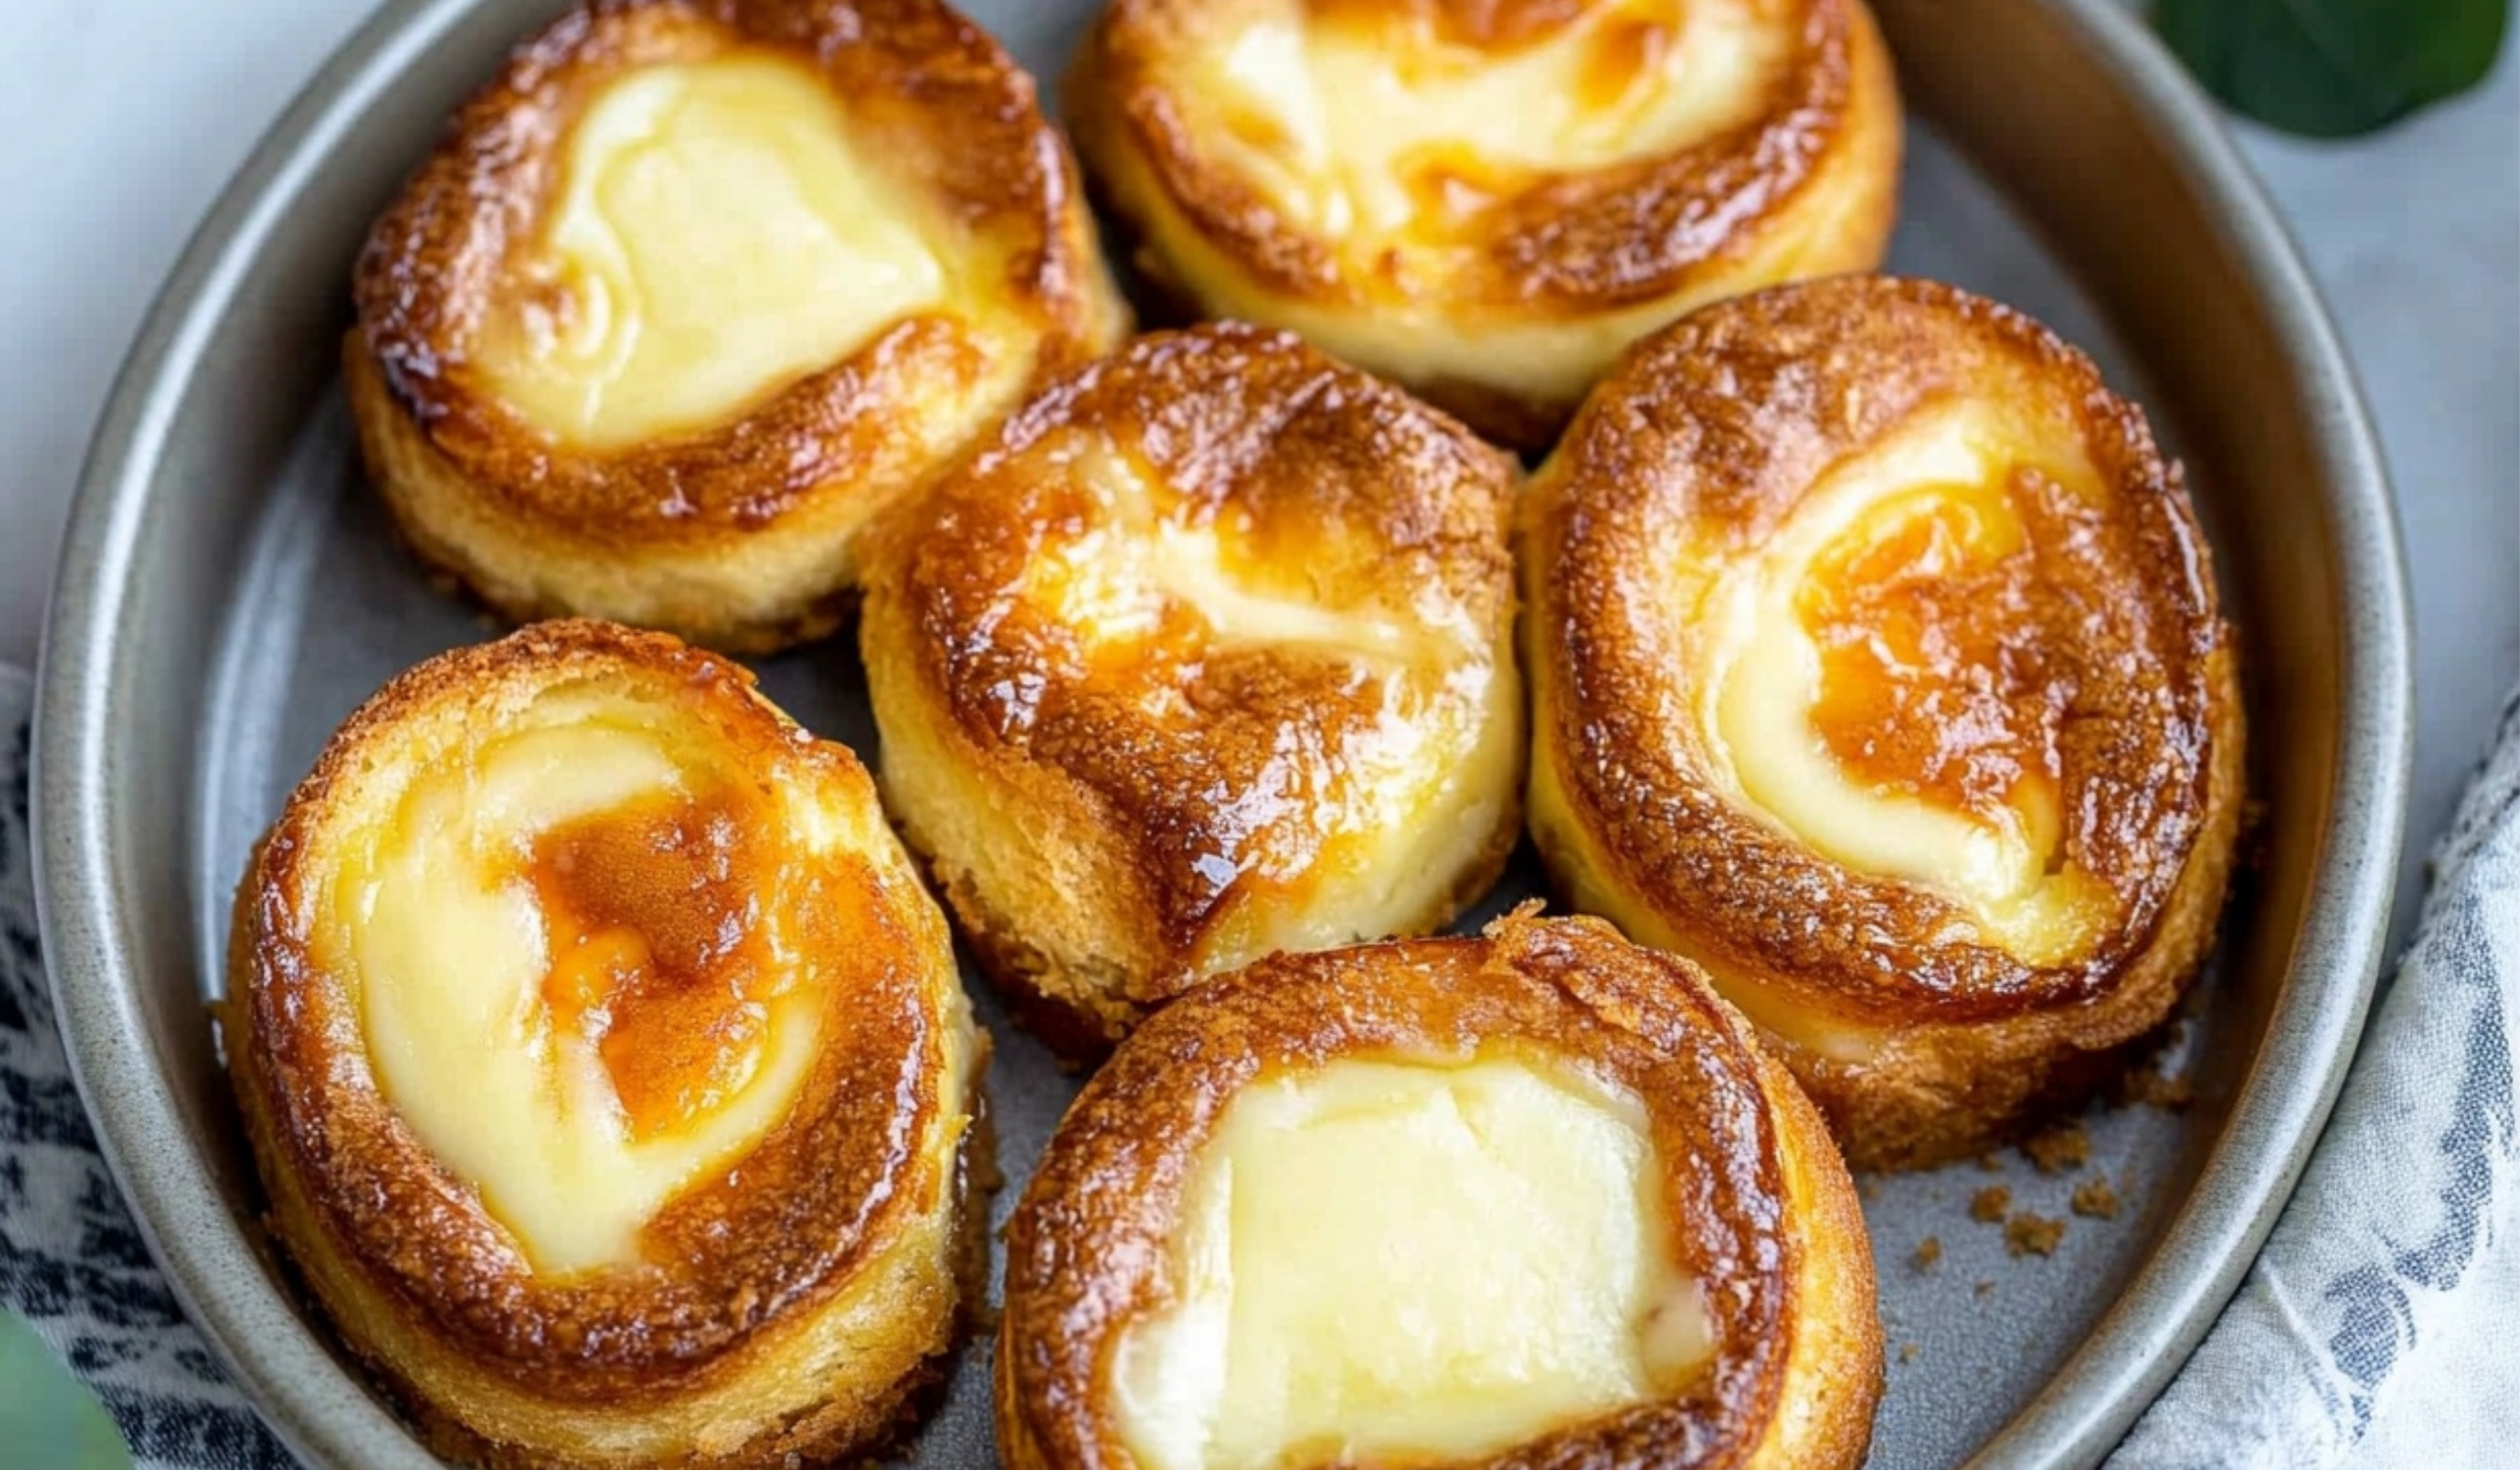
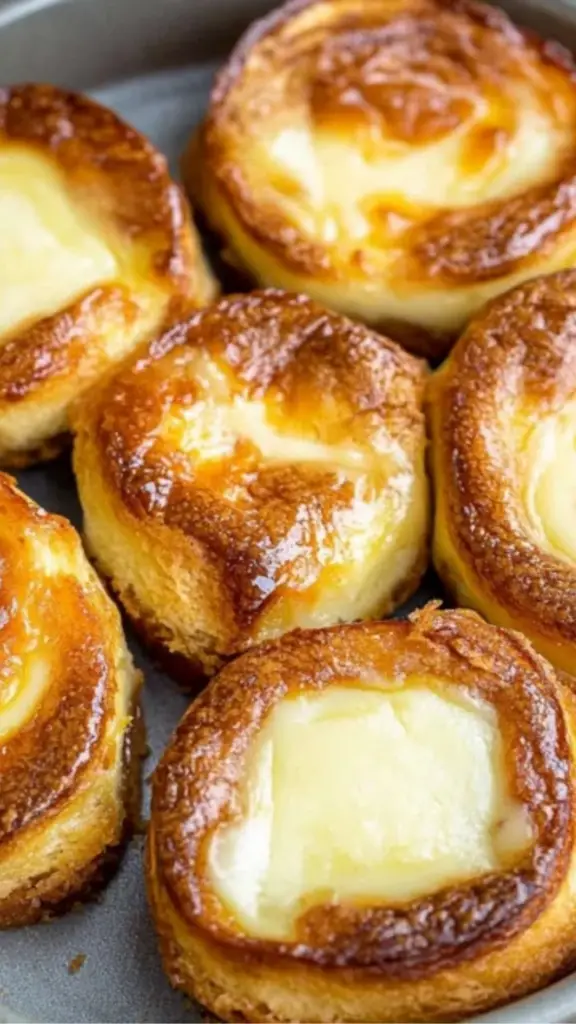
If you’re looking for an easy yet impressive treat for breakfast or brunch, this King’s Hawaiian Cheesecake Danish is the perfect recipe to try. Using pre-made Hawaiian sweet rolls, this dish transforms into a warm, creamy, cinnamon-spiced delight with minimal effort. It’s great for beginners because it requires simple ingredients, has a straightforward process, and delivers delicious results in just 22 minutes.
Print
Beginner’s Guide to Making King’s Hawaiian Cheesecake Danish
Craving a bakery-style treat with zero hassle? This King’s Hawaiian Cheesecake Danish is the answer! Soft, buttery Hawaiian rolls are filled with rich, creamy cheesecake, then baked to golden perfection. It’s sweet, tangy, and melt-in-your-mouth delicious—no complicated steps required! Perfect for beginners, this easy danish is great for brunch, a snack, or a crowd-pleasing dessert. Dust with powdered sugar or drizzle with icing for the ultimate finishing touch. Who’s adding this to their must-bake list?
#EasyDesserts #CheesecakeDanish #BakingForBeginners #SweetTreats #GoldenPerfection #HomemadeBaking #FluffyAndCreamy #SimpleAndDelicious #BreakfastGoals #HawaiianRollsMagic
- Total Time: 22 minutes
- Yield: 12 servings 1x
Ingredients
- 1 tablespoon butter, melted – Used to coat the baking dish, preventing sticking and adding flavor.
- 12-pack Hawaiian sweet rolls – The foundation of the dish, offering a soft and slightly sweet base. You can substitute brioche rolls or dinner rolls if Hawaiian rolls aren’t available.
- ⅓ cup butter, melted – Helps to create a rich, buttery cinnamon-sugar topping.
- 2 tablespoons brown sugar – Adds a warm caramel-like sweetness. Substitute with honey or maple syrup for a natural sweetener.
- ½ tablespoon ground cinnamon – Essential for that classic Danish flavor.
- ⅛ teaspoon freshly grated nutmeg – Adds depth, but you can omit or reduce if you prefer a milder flavor.
- 8 ounces cream cheese, softened – The key to a smooth and creamy filling. You can use Greek yogurt or mascarpone for a slightly different texture.
- 1 large egg, beaten – Helps bind the cream cheese mixture. Substitute with 1 tablespoon cornstarch mixed with 2 tablespoons water for an egg-free version.
- 3 tablespoons granulated sugar – Adds just the right amount of sweetness to the filling. Powdered sugar can be used for a softer texture.
Instructions
1. Prepare Your Baking Dish
Preheat your oven to 375°F (190°C). Brush 1 tablespoon of melted butter onto the bottom of a 9×13-inch baking dish to prevent sticking.
2. Prepare the Rolls
Place all 12 Hawaiian rolls into the prepared dish. Using a sharp knife, cut an X into the top of each roll, making sure not to cut all the way through. This will create a pocket for the cheesecake filling.
3. Make the Cinnamon Topping
In a small bowl, mix together:
- ⅓ cup melted butter
- 2 tablespoons brown sugar
- ½ tablespoon cinnamon
- ⅛ teaspoon grated nutmeg
Pour this mixture evenly over the rolls, ensuring they are well coated.
4. Prepare the Cheesecake Filling
In a mixing bowl, stir the softened cream cheese until smooth. Add in:
- 3 tablespoons granulated sugar
- 1 beaten egg
Mix until well combined and creamy.
5. Fill the Rolls
Using a piping bag or a zip-top bag with the corner snipped off, pipe the cheesecake mixture into the X cuts of each roll. If you don’t have a piping bag, you can carefully spoon the mixture into the rolls, pressing slightly to help it settle inside.
6. Bake to Perfection
Place the dish into the preheated oven and bake for 12–15 minutes, or until the filling is set and the rolls are slightly golden.
7. Cool and Serve
Let the rolls cool for a few minutes before serving, as the cheesecake filling will be very hot right out of the oven. Serve warm and enjoy!
Beginner Tips and Notes
Even though this recipe is simple, here are some helpful tips to ensure success:
- Softening Cream Cheese: If your cream cheese is too firm, microwave it for 10–15 seconds to soften it quickly.
- Avoid Overbaking: The rolls should be lightly golden, not dark brown. Overbaking can make the rolls dry.
- Evenly Distribute Filling: A piping bag makes this easier, but if using a spoon, work gently to press the filling inside the rolls.
- Checking for Doneness: The filling should be set but still slightly creamy. If unsure, gently press the center of one roll—it should feel firm but soft.
Notes
- Softening Cream Cheese: If your cream cheese is too firm, microwave it for 10–15 seconds to soften it quickly.
- Avoid Overbaking: The rolls should be lightly golden, not dark brown. Overbaking can make the rolls dry.
- Evenly Distribute Filling: A piping bag makes this easier, but if using a spoon, work gently to press the filling inside the rolls.
- Checking for Doneness: The filling should be set but still slightly creamy. If unsure, gently press the center of one roll—it should feel firm but soft.
- Prep Time: 10 minutes
- Cook Time: 12 minutes
This recipe is perfect for those who want to create a bakery-style dessert at home without the need for advanced baking skills. The combination of sweet rolls, creamy cheesecake filling, and warm cinnamon topping makes for a comforting dish that pairs beautifully with coffee or tea.
Ingredients and Substitutions
One of the best things about this recipe is its flexibility. Here’s what you’ll need and some possible ingredient swaps to suit different tastes or dietary needs:
Main Ingredients
- 1 tablespoon butter, melted – Used to coat the baking dish, preventing sticking and adding flavor.
- 12-pack Hawaiian sweet rolls – The foundation of the dish, offering a soft and slightly sweet base. You can substitute brioche rolls or dinner rolls if Hawaiian rolls aren’t available.
- ⅓ cup butter, melted – Helps to create a rich, buttery cinnamon-sugar topping.
- 2 tablespoons brown sugar – Adds a warm caramel-like sweetness. Substitute with honey or maple syrup for a natural sweetener.
- ½ tablespoon ground cinnamon – Essential for that classic Danish flavor.
- ⅛ teaspoon freshly grated nutmeg – Adds depth, but you can omit or reduce if you prefer a milder flavor.
- 8 ounces cream cheese, softened – The key to a smooth and creamy filling. You can use Greek yogurt or mascarpone for a slightly different texture.
- 1 large egg, beaten – Helps bind the cream cheese mixture. Substitute with 1 tablespoon cornstarch mixed with 2 tablespoons water for an egg-free version.
- 3 tablespoons granulated sugar – Adds just the right amount of sweetness to the filling. Powdered sugar can be used for a softer texture.
Step-by-Step Instructions
Even if you’re a beginner, you’ll find this recipe simple and easy to follow.
1. Prepare Your Baking Dish
Preheat your oven to 375°F (190°C). Brush 1 tablespoon of melted butter onto the bottom of a 9×13-inch baking dish to prevent sticking.
2. Prepare the Rolls
Place all 12 Hawaiian rolls into the prepared dish. Using a sharp knife, cut an X into the top of each roll, making sure not to cut all the way through. This will create a pocket for the cheesecake filling.
3. Make the Cinnamon Topping
In a small bowl, mix together:
- ⅓ cup melted butter
- 2 tablespoons brown sugar
- ½ tablespoon cinnamon
- ⅛ teaspoon grated nutmeg
Pour this mixture evenly over the rolls, ensuring they are well coated.
4. Prepare the Cheesecake Filling
In a mixing bowl, stir the softened cream cheese until smooth. Add in:
- 3 tablespoons granulated sugar
- 1 beaten egg
Mix until well combined and creamy.
5. Fill the Rolls
Using a piping bag or a zip-top bag with the corner snipped off, pipe the cheesecake mixture into the X cuts of each roll. If you don’t have a piping bag, you can carefully spoon the mixture into the rolls, pressing slightly to help it settle inside.
6. Bake to Perfection
Place the dish into the preheated oven and bake for 12–15 minutes, or until the filling is set and the rolls are slightly golden.
7. Cool and Serve
Let the rolls cool for a few minutes before serving, as the cheesecake filling will be very hot right out of the oven. Serve warm and enjoy!
Beginner Tips and Notes
Even though this recipe is simple, here are some helpful tips to ensure success:
- Softening Cream Cheese: If your cream cheese is too firm, microwave it for 10–15 seconds to soften it quickly.
- Avoid Overbaking: The rolls should be lightly golden, not dark brown. Overbaking can make the rolls dry.
- Evenly Distribute Filling: A piping bag makes this easier, but if using a spoon, work gently to press the filling inside the rolls.
- Checking for Doneness: The filling should be set but still slightly creamy. If unsure, gently press the center of one roll—it should feel firm but soft.
Serving Suggestions
These Hawaiian Cheesecake Danishes are best enjoyed warm, but they pair wonderfully with other breakfast items. Here are some ideas:
- Fresh Fruits: Serve with sliced strawberries, blueberries, or bananas for a refreshing contrast.
- Whipped Cream or Yogurt: A dollop of vanilla Greek yogurt or homemade whipped cream adds extra richness.
- Hot Beverages: These rolls go perfectly with coffee, chai tea, or a glass of milk.
- Savory Pairings: To balance the sweetness, serve alongside scrambled eggs, turkey sausage, or an avocado toast.
Storage and Reheating Tips
If you have leftovers, store them properly to maintain freshness.
- Refrigeration: Store in an airtight container in the fridge for up to 3–4 days.
- Freezing: These can be frozen for up to 1 month. Wrap them individually in plastic wrap and place them in a freezer-safe bag.
- Reheating: Warm in the oven at 300°F (150°C) for 5–7 minutes or microwave for 20–30 seconds before serving.
Why This Recipe Works for Beginners
This recipe is designed with simplicity in mind, making it ideal for beginners who want to build confidence in the kitchen. Here’s why:
- Uses Pre-Made Rolls: No dough-making required.
- Quick Prep and Bake Time: Ready in 22 minutes, perfect for busy mornings.
- Minimal Ingredients: Everything is easy to find and requires no special equipment.
- Foolproof Cheesecake Filling: Simple mixing with no complicated steps.
Final Thoughts
If you’ve never made a cheesecake-style Danish before, this is the perfect place to start. With minimal ingredients, easy steps, and a deliciously warm, creamy filling, this recipe is sure to become a favorite. Whether you’re making them for family, guests, or just for yourself, these rolls are guaranteed to impress.
Give this recipe a try and let us know how it turns out. Did you add any personal twists? Share your experience in the comments!