
There are a few classic treats that have a way of capturing the essence of family traditions and comfort. One of those treats in my household is the beloved No-Bake Cookies recipe that’s been passed down through my husband’s family for over fifty years. It’s a recipe that’s so simple and reliable, anyone can make it—even beginners in the kitchen. I vividly remember the first time I made these cookies. It was a chaotic afternoon, and I was still a novice cook. But this recipe proved to be the perfect starting point. Within minutes, I had a batch of warm, gooey cookies cooling on my countertop, and the best part was that I didn’t have to turn on the oven! The success was instant, and I was hooked. Now, every time I make these No-Bake Cookies, it feels like I’m passing on a piece of that history to my own family.
Print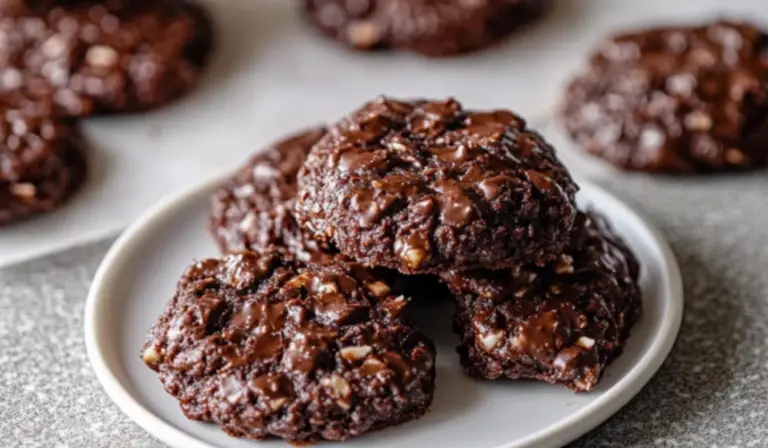
The Ultimate No-Bake Cookies Recipe for Beginners
Chocolatey, chewy, and irresistibly easy—these no-bake cookies are a beginner’s dream! No oven, no fuss, just sweet perfection in every bite! 🍫🥄✨
- Total Time: 22 minutes
- Yield: 24 cookies 1x
Ingredients
- 1/2 cup butter
- 1/2 cup milk
- 2 cups granulated sugar
- 1/2 cup cocoa powder (or dark chocolate cocoa powder)
- 1/2 cup creamy peanut butter (smooth works best)
- 1 teaspoon vanilla extract
- 3 cups rolled oats (old-fashioned oats work best)
Instructions
Step 1: Line your baking sheets
Start by preparing your cooling space. Line two baking sheets with wax paper or silicone mats. This is where your warm cookie “dough” will cool and harden into perfect little bites of chocolatey goodness. Set the prepared sheets aside for later.
Step 2: Combine butter, milk, and sugar in a pot
In a large pot, add the butter, milk, and sugar. Place the pot over medium heat and stir occasionally. Keep a close eye on it as the butter melts and the mixture begins to heat up. Once the butter is fully melted, bring the mixture to a gentle boil.
Step 3: Boil for 1 minute
Once the mixture starts to boil, set a timer for 1 minute. This step is crucial to ensure the cookies set properly later. Stir constantly to prevent burning. After one minute, remove the pot from the heat.
Step 4: Add the remaining ingredients
Now, it’s time to add the remaining ingredients to the pot. Stir in the cocoa powder, peanut butter, and vanilla extract. Mix until everything is smooth and well combined. The peanut butter will melt into the mixture, giving it a creamy, rich texture. After that, stir in the oats until they’re fully coated with the chocolatey mixture.
Step 5: Scoop out the dough onto the baking sheets
Now comes the fun part: forming your cookies. Use a spoon (or a cookie scoop if you have one) to drop dollops of the mixture onto the prepared baking sheets. The size of each cookie can vary depending on your preference, but typically, about a tablespoon of the dough per cookie is just right. Remember, these cookies don’t spread out as they bake since they’re no-bake, so feel free to space them closer together.
Step 6: Let them cool and set
Once all your cookies are scooped out, let them cool at room temperature for about 10 minutes or until they’re firm to the touch. This cooling time is essential for the cookies to set properly and achieve that signature no-bake texture. If you’re in a rush, you can pop the cookies into the fridge to speed up the process, but they should be fine at room temperature.
Notes
- Don’t overcook the sugar mixture: Be sure to only boil the mixture for exactly one minute. Boiling it longer could cause the sugar to harden too much, which would make the cookies overly firm and possibly difficult to bite into.
- If your cookies are too soft: If the cookies don’t firm up as expected, it might be because the sugar mixture didn’t cook for long enough. Simply pop them into the fridge to help them set.
- Keep stirring while boiling: Constant stirring is important to prevent the sugar from burning at the bottom of the pot.
- If your cookies spread out too much: This could mean the mixture was a little too thin when you scooped it. Ensure you stir the mixture thoroughly before scooping and try to scoop the cookies quickly before they cool too much.
- How to tell if the cookies are set: After cooling for 10 minutes, gently touch one of the cookies. If it feels firm and no longer sticky, they’re ready to eat.
- Prep Time: 10 minutes
- Cook Time: 2 minutes
The simplicity, speed, and rich flavor of these cookies make them an ideal choice for beginner cooks. You don’t need an extensive list of tools or techniques, just a few basic ingredients, and you’re good to go. This treat is great for when you’re craving something sweet but don’t have the time or energy for a lengthy baking process. And because there’s no oven involved, these cookies are perfect for hot summer days when you don’t want to heat up the kitchen. This recipe also allows room for personal twists, making it a versatile treat for various tastes.
So, whether you’re a seasoned baker looking for a quick fix or a beginner just learning the ropes, this No-Bake Cookies recipe is for you. Let’s get started!
Ingredients and Preparation
Before we dive into the step-by-step instructions, let’s first gather our ingredients. The beauty of these No-Bake Cookies is that they require minimal preparation, and the ingredients are often pantry staples, so you won’t need to make a special trip to the store.
Ingredients:
- 1/2 cup butter
- 1/2 cup milk
- 2 cups granulated sugar
- 1/2 cup cocoa powder (or dark chocolate cocoa powder)
- 1/2 cup creamy peanut butter (smooth works best)
- 1 teaspoon vanilla extract
- 3 cups rolled oats (old-fashioned oats work best)
You’ll also need a couple of baking sheets or trays lined with wax paper or silicone mats. These will serve as the cool-down station for your warm cookie dough once it’s scooped out.
Alternative Ingredient Suggestions:
For those who may have dietary restrictions or preferences, here are a few easy substitutions:
- If you don’t have cocoa powder, dark chocolate cocoa powder is an excellent alternative for an even richer flavor.
- If you prefer not to use peanut butter, you can substitute it with almond butter or sunbutter, which are both delicious and offer a slightly different twist.
- For those with a dairy-free diet, replace the butter with a plant-based butter alternative and the milk with almond or oat milk.
Once you’ve got all your ingredients ready, it’s time to start cooking!
Step-by-Step Instructions
This recipe is as simple as it gets, with just a few steps to follow. No need for precise measurements beyond what’s listed above—just a bit of patience and stirring.
Step 1: Line your baking sheets
Start by preparing your cooling space. Line two baking sheets with wax paper or silicone mats. This is where your warm cookie “dough” will cool and harden into perfect little bites of chocolatey goodness. Set the prepared sheets aside for later.
Step 2: Combine butter, milk, and sugar in a pot
In a large pot, add the butter, milk, and sugar. Place the pot over medium heat and stir occasionally. Keep a close eye on it as the butter melts and the mixture begins to heat up. Once the butter is fully melted, bring the mixture to a gentle boil.
Step 3: Boil for 1 minute
Once the mixture starts to boil, set a timer for 1 minute. This step is crucial to ensure the cookies set properly later. Stir constantly to prevent burning. After one minute, remove the pot from the heat.
Step 4: Add the remaining ingredients
Now, it’s time to add the remaining ingredients to the pot. Stir in the cocoa powder, peanut butter, and vanilla extract. Mix until everything is smooth and well combined. The peanut butter will melt into the mixture, giving it a creamy, rich texture. After that, stir in the oats until they’re fully coated with the chocolatey mixture.
Step 5: Scoop out the dough onto the baking sheets
Now comes the fun part: forming your cookies. Use a spoon (or a cookie scoop if you have one) to drop dollops of the mixture onto the prepared baking sheets. The size of each cookie can vary depending on your preference, but typically, about a tablespoon of the dough per cookie is just right. Remember, these cookies don’t spread out as they bake since they’re no-bake, so feel free to space them closer together.
Step 6: Let them cool and set
Once all your cookies are scooped out, let them cool at room temperature for about 10 minutes or until they’re firm to the touch. This cooling time is essential for the cookies to set properly and achieve that signature no-bake texture. If you’re in a rush, you can pop the cookies into the fridge to speed up the process, but they should be fine at room temperature.
Beginner Tips and Notes
If you’re new to cooking, these helpful tips can guide you through some potential hiccups and make the process even easier.
- Don’t overcook the sugar mixture: Be sure to only boil the mixture for exactly one minute. Boiling it longer could cause the sugar to harden too much, which would make the cookies overly firm and possibly difficult to bite into.
- If your cookies are too soft: If the cookies don’t firm up as expected, it might be because the sugar mixture didn’t cook for long enough. Simply pop them into the fridge to help them set.
- Keep stirring while boiling: Constant stirring is important to prevent the sugar from burning at the bottom of the pot.
- If your cookies spread out too much: This could mean the mixture was a little too thin when you scooped it. Ensure you stir the mixture thoroughly before scooping and try to scoop the cookies quickly before they cool too much.
- How to tell if the cookies are set: After cooling for 10 minutes, gently touch one of the cookies. If it feels firm and no longer sticky, they’re ready to eat.

Serving Suggestions
These No-Bake Cookies are delicious on their own, but if you’re looking to elevate the experience, here are a few suggestions to enhance the flavor and presentation:
- Serve with a glass of milk: There’s nothing like a classic combination of milk and chocolatey cookies. The cool, creamy milk complements the rich flavors of the cookies.
- Pair with fresh fruit: For a bit of balance, fresh berries or banana slices are great side dishes. Their natural sweetness pairs beautifully with the chocolatey, peanut buttery cookies.
- Make a dessert platter: If you’re entertaining or just want to indulge, make a platter of these cookies alongside other simple desserts like brownies, fruit tarts, or mini cheesecakes.
As for storing leftovers, these cookies can be kept in an airtight container for up to a week. If you want them to last longer, you can refrigerate them, which helps them stay firm and fresh for even longer.
Engagement Features
Now that you know how to make these easy and delicious No-Bake Cookies, it’s your turn to try them out! Whether you’re a first-time baker or just looking for a quick treat, this recipe is foolproof and sure to be a hit. Don’t forget to experiment with different variations—try adding chocolate chips, shredded coconut, or even a sprinkle of sea salt to give your cookies an extra flair.
Have fun, get your hands a little sticky, and enjoy the process! If you try out this recipe, I’d love to hear how it turned out for you. Leave a comment below with your thoughts, any tweaks you made, or even a photo of your cookie creations! And don’t forget to share the recipe with friends and family—there’s nothing better than spreading the joy of homemade treats.
Happy baking!