
There’s something magical about homemade chocolate ice cream. Whether it’s a warm summer day or a cozy winter evening, nothing beats the smooth, rich flavor of a bowl of freshly made ice cream. The beauty of making your own ice cream lies in the satisfaction of knowing exactly what goes into it—and the joy of creating something delicious with your own hands.
Print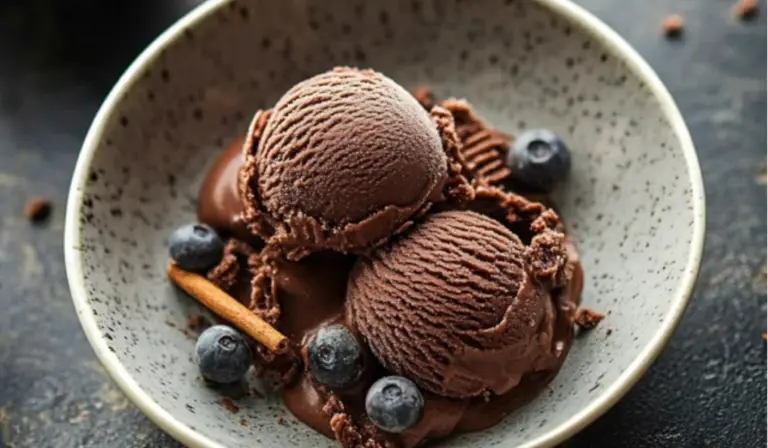
Homemade Chocolate Ice Cream: A Simple, Indulgent Treat for Beginners
Creamy, tangy feta meets roasted broccoli in this easy one-pan pasta! A rich, savory dish that’s healthy, satisfying, and perfect for beginner cooks. 🧀🥦🍝
- Total Time: 12 hours
- Yield: 10 1/2 cup servings 1x
Ingredients
- 3/4 cup cocoa powder (sifted) – This gives the ice cream its rich, chocolatey flavor. Make sure to sift the cocoa powder to avoid any lumps.
- 1/2 cup granulated sugar – This is the sweetener for the base of the ice cream.
- 1/3 cup packed brown sugar – This adds a slight molasses flavor and depth to the ice cream.
- Pinch of salt – Just a pinch of salt helps balance the sweetness and enhances the chocolate flavor.
- 2 cups heavy whipping cream – The heavy cream is what makes the ice cream rich and creamy.
- 1 cup whole milk – Whole milk provides the right consistency for a smooth and creamy ice cream.
- 2 teaspoons vanilla extract – Vanilla adds a subtle depth to the flavor and complements the chocolate.
For the no-churn version, the ingredients and their measurements differ slightly. You’ll need:
- 1 can of sweetened condensed milk – This serves as the base of the ice cream, offering sweetness and creaminess.
- 3 cups of heavy cream – Whipped until soft peaks form to give the ice cream its airy texture.
Instructions
1. Prepare the Chocolate Mixture
In a medium-sized bowl, whisk together the sifted cocoa powder, granulated sugar, brown sugar, and a pinch of salt. This combination forms the base of your chocolate flavor. Make sure to sift the cocoa powder, as this will prevent any clumps from forming in your mixture.
2. Add the Milk
Next, pour in the whole milk and whisk the mixture to combine. You can either use a hand mixer on low speed or just a whisk—whichever you prefer. The goal here is to dissolve the cocoa, sugar, and salt into the milk, creating a smooth chocolate mixture. Keep mixing until you no longer see any dry ingredients.
3. Stir in the Heavy Cream and Vanilla
Once the cocoa and sugars are fully dissolved, stir in the heavy whipping cream and vanilla extract. These two ingredients are what give the ice cream its creamy texture and rich flavor. Stir until everything is well combined.
4. Refrigerate the Mixture
Cover the bowl and place it in the refrigerator for at least 1 to 2 hours, or preferably overnight. Chilling the mixture allows the flavors to meld together, and it also ensures a smoother texture when churning.
5. Churn the Ice Cream
Now it’s time to churn the mixture! If you have an ice cream maker, turn it on and pour the chilled mixture into the machine. Follow the manufacturer’s instructions for your particular ice cream maker. If you’re using a machine with a frozen bowl, it should take about 15-20 minutes for the mixture to freeze into a soft-serve consistency. If you have a machine with a compressor, it will take a bit longer, about 25-35 minutes.
6. Scoop and Serve
Once the ice cream reaches a soft-serve consistency, it’s ready to be scooped into bowls or cones. If you prefer a firmer texture, you can transfer the ice cream to an airtight container and freeze it for an additional 2-3 hours before serving.
No-Churn Version
If you don’t have an ice cream maker or you’re looking for a simpler method, the no-churn version is just as delicious. Here’s how to make it:
1. Mix the Cocoa and Salt
In a medium bowl, whisk together the cocoa powder and salt.
2. Add Sweetened Condensed Milk and Vanilla
Pour in the can of sweetened condensed milk and add the vanilla extract. Whisk everything together until the mixture is smooth and well combined.
3. Whip the Cream
In a separate bowl, whip the heavy cream until soft to medium peaks form. This will give the ice cream its light, airy texture.
4. Fold the Mixture Together
Gently fold the chocolate mixture into the whipped cream, making sure to combine everything evenly. Be careful not to deflate the whipped cream too much during this step.
5. Freeze Until Solid
Transfer the mixture to an airtight container and freeze it until solid, about 4-6 hours, or overnight.
Notes
- Chill Your Mixture: Don’t skip the chilling step! Refrigerating the ice cream base allows the ingredients to fully incorporate and helps the ice cream churn more smoothly. If you’re in a hurry, try to chill for at least 1 hour.
- Mix Well: Make sure the cocoa powder, sugars, and salt are fully dissolved before adding the milk. If there are any clumps of cocoa, it can affect the texture of your ice cream.
- Watch Your Cream: When whipping the cream for the no-churn version, be careful not to overwhip it. Soft peaks are the key to a creamy texture. Overwhipped cream can turn into butter, which will make your ice cream too dense.
- Prevent Ice Crystals: For a smoother texture, it’s important to churn the ice cream long enough (or freeze it long enough if you’re making the no-churn version) to prevent large ice crystals from forming.
- Prep Time: 1 hour
When I first started making ice cream, I was intimidated by the idea of it. The fancy machines, the freezing, the mixing—I thought it was a process that required a professional kitchen. However, over time, I discovered that making ice cream from scratch could be surprisingly simple, even without an ice cream machine. This homemade chocolate ice cream recipe is the perfect starting point for beginner cooks. It’s easy to make, requires only a few ingredients, and the result is incredibly rewarding. Plus, it’s a treat that everyone loves!
In this guide, I’ll walk you through the process of making homemade chocolate ice cream, with helpful tips and suggestions to ensure success. Whether you have an ice cream machine or you’re opting for the no-churn method, you’ll find everything you need to create this creamy, decadent dessert.
Ingredients and Preparation
Before diving into the recipe, let’s gather our ingredients. You don’t need anything too complicated to make this chocolate ice cream; the key ingredients are simple and easy to find at your local grocery store.
Here’s what you’ll need:
- 3/4 cup cocoa powder (sifted) – This gives the ice cream its rich, chocolatey flavor. Make sure to sift the cocoa powder to avoid any lumps.
- 1/2 cup granulated sugar – This is the sweetener for the base of the ice cream.
- 1/3 cup packed brown sugar – This adds a slight molasses flavor and depth to the ice cream.
- Pinch of salt – Just a pinch of salt helps balance the sweetness and enhances the chocolate flavor.
- 2 cups heavy whipping cream – The heavy cream is what makes the ice cream rich and creamy.
- 1 cup whole milk – Whole milk provides the right consistency for a smooth and creamy ice cream.
- 2 teaspoons vanilla extract – Vanilla adds a subtle depth to the flavor and complements the chocolate.
For the no-churn version, the ingredients and their measurements differ slightly. You’ll need:
- 1 can of sweetened condensed milk – This serves as the base of the ice cream, offering sweetness and creaminess.
- 3 cups of heavy cream – Whipped until soft peaks form to give the ice cream its airy texture.
Once you’ve gathered all the ingredients, you’re ready to begin.
Step-by-Step Instructions
Whether you’re using an ice cream maker or making a no-churn version, the steps are fairly straightforward. Let’s start with the classic ice cream maker method:
1. Prepare the Chocolate Mixture
In a medium-sized bowl, whisk together the sifted cocoa powder, granulated sugar, brown sugar, and a pinch of salt. This combination forms the base of your chocolate flavor. Make sure to sift the cocoa powder, as this will prevent any clumps from forming in your mixture.
2. Add the Milk
Next, pour in the whole milk and whisk the mixture to combine. You can either use a hand mixer on low speed or just a whisk—whichever you prefer. The goal here is to dissolve the cocoa, sugar, and salt into the milk, creating a smooth chocolate mixture. Keep mixing until you no longer see any dry ingredients.
3. Stir in the Heavy Cream and Vanilla
Once the cocoa and sugars are fully dissolved, stir in the heavy whipping cream and vanilla extract. These two ingredients are what give the ice cream its creamy texture and rich flavor. Stir until everything is well combined.
4. Refrigerate the Mixture
Cover the bowl and place it in the refrigerator for at least 1 to 2 hours, or preferably overnight. Chilling the mixture allows the flavors to meld together, and it also ensures a smoother texture when churning.
5. Churn the Ice Cream
Now it’s time to churn the mixture! If you have an ice cream maker, turn it on and pour the chilled mixture into the machine. Follow the manufacturer’s instructions for your particular ice cream maker. If you’re using a machine with a frozen bowl, it should take about 15-20 minutes for the mixture to freeze into a soft-serve consistency. If you have a machine with a compressor, it will take a bit longer, about 25-35 minutes.
6. Scoop and Serve
Once the ice cream reaches a soft-serve consistency, it’s ready to be scooped into bowls or cones. If you prefer a firmer texture, you can transfer the ice cream to an airtight container and freeze it for an additional 2-3 hours before serving.
No-Churn Version
If you don’t have an ice cream maker or you’re looking for a simpler method, the no-churn version is just as delicious. Here’s how to make it:
1. Mix the Cocoa and Salt
In a medium bowl, whisk together the cocoa powder and salt.
2. Add Sweetened Condensed Milk and Vanilla
Pour in the can of sweetened condensed milk and add the vanilla extract. Whisk everything together until the mixture is smooth and well combined.
3. Whip the Cream
In a separate bowl, whip the heavy cream until soft to medium peaks form. This will give the ice cream its light, airy texture.
4. Fold the Mixture Together
Gently fold the chocolate mixture into the whipped cream, making sure to combine everything evenly. Be careful not to deflate the whipped cream too much during this step.
5. Freeze Until Solid
Transfer the mixture to an airtight container and freeze it until solid, about 4-6 hours, or overnight.
Beginner Tips and Notes
Making homemade ice cream is fun, but there are a few tips to keep in mind to ensure your success:
- Chill Your Mixture: Don’t skip the chilling step! Refrigerating the ice cream base allows the ingredients to fully incorporate and helps the ice cream churn more smoothly. If you’re in a hurry, try to chill for at least 1 hour.
- Mix Well: Make sure the cocoa powder, sugars, and salt are fully dissolved before adding the milk. If there are any clumps of cocoa, it can affect the texture of your ice cream.
- Watch Your Cream: When whipping the cream for the no-churn version, be careful not to overwhip it. Soft peaks are the key to a creamy texture. Overwhipped cream can turn into butter, which will make your ice cream too dense.
- Prevent Ice Crystals: For a smoother texture, it’s important to churn the ice cream long enough (or freeze it long enough if you’re making the no-churn version) to prevent large ice crystals from forming.
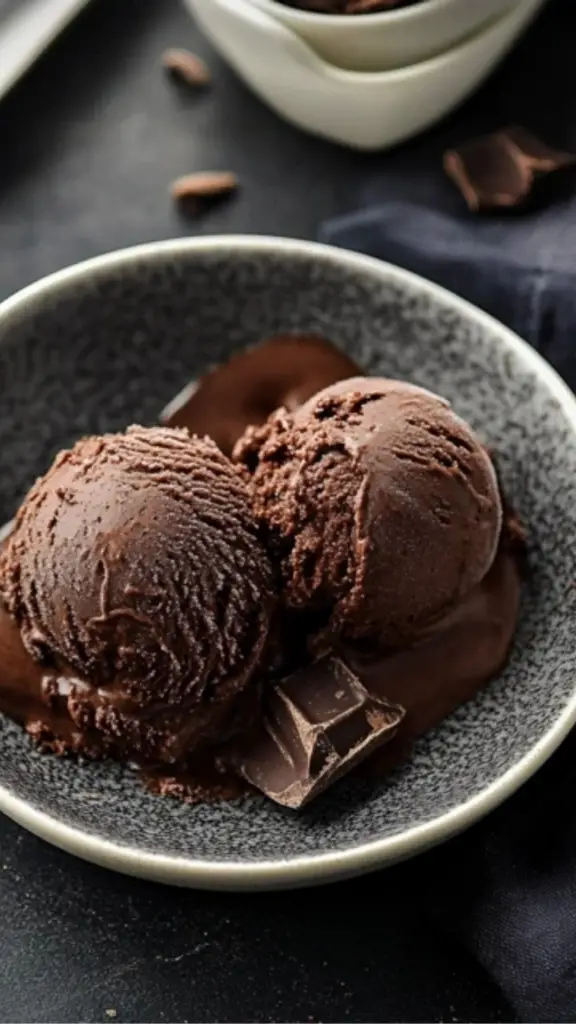
Serving Suggestions
Homemade chocolate ice cream is delicious on its own, but you can always elevate the experience with a few extra touches. Here are some serving ideas:
- Toppings: Try adding a sprinkle of chopped nuts (like almonds, pecans, or hazelnuts) or a drizzle of caramel or chocolate syrup. For a refreshing twist, top the ice cream with fresh berries.
- Sundaes: Layer your homemade chocolate ice cream in a bowl with whipped cream, a cherry, and your favorite sundae toppings for the perfect indulgent treat.
- With Cake or Brownies: Pair a scoop of chocolate ice cream with a slice of warm cake or fudgy brownies for an irresistible dessert.
If you have leftovers (which is rare with this delicious treat!), store your ice cream in an airtight container in the freezer. It should stay fresh for up to two weeks. For the best texture, let the ice cream sit at room temperature for a few minutes before scooping.
Engagement Features
There’s something special about sharing a homemade dessert with family and friends. If you’ve made this chocolate ice cream, I’d love to hear about your experience! Whether you used an ice cream maker or opted for the no-churn method, share your thoughts in the comments below. What toppings did you try? How did your ice cream turn out? If you have any questions or run into any issues, feel free to reach out—I’m here to help!
Remember, making homemade ice cream is all about having fun in the kitchen and experimenting with flavors. Once you’ve mastered this simple chocolate version, try swapping out the cocoa for other flavors, like strawberry or vanilla, to create new and exciting ice cream recipes. Happy cooking, and enjoy your homemade treat!