
There is something truly special about homemade cookies. The aroma of chocolate wafting through the kitchen, the satisfying crunch of sugar-coated edges, and the rich, melt-in-your-mouth center make chocolate sugar cookies an absolute delight. My first attempt at baking these cookies was a mixture of excitement and nervousness. I worried about getting the texture right and ensuring the cookies didn’t spread too much. But after a few simple tweaks and patience, I discovered how easy and rewarding this recipe can be.
Print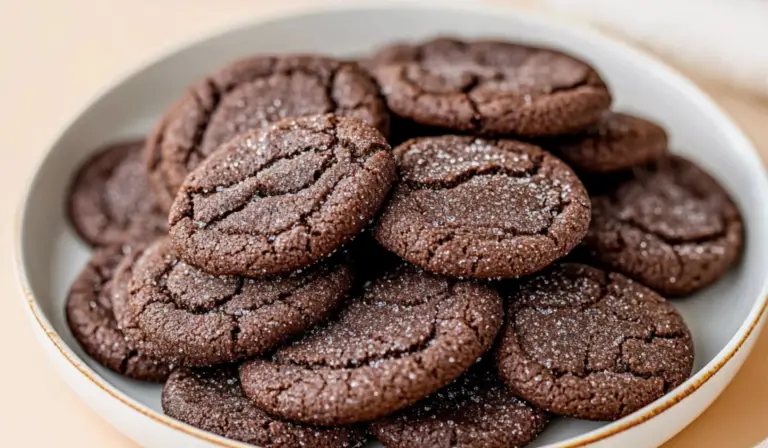
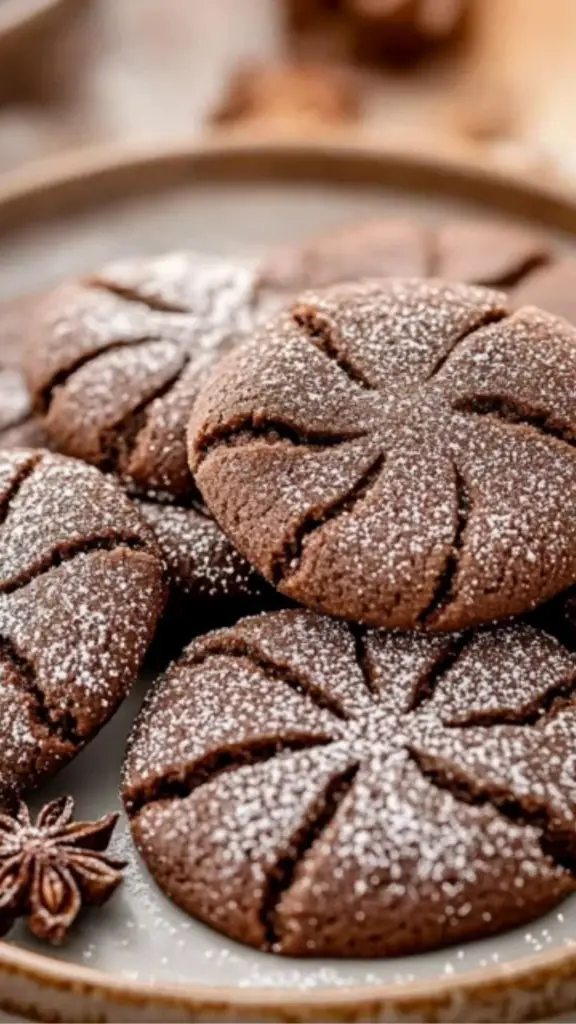
The Ultimate Guide to Making Chocolate Sugar Cookies: A Beginner-Friendly Treat
Craving something rich, chocolatey, and oh-so-delicious? These Chocolate Sugar Cookies are the perfect answer! Soft in the middle with a lightly crisp sugar-coated edge, each bite melts in your mouth with deep cocoa flavor. No fancy skills needed—just a few pantry staples and an easy, beginner-friendly recipe to create these irresistible cookies. Perfect for holiday baking, everyday snacking, or gifting to loved ones, they’re a must-try for chocolate fans. Get your oven ready and let’s bake up some happiness!
#HomemadeCookies #ChocolateCravings #BakingMadeSimple #EasyDesserts #SweetAndChocolatey #CookieAddict #BakingFun #FudgyDelights #ChocolateFix #MadeFromScratch
- Total Time: 26 minutes
- Yield: 35 cookies 1x
Ingredients
- 3 cups all-purpose flour – The base of the cookies, providing structure.
- ½ cup cocoa powder – Gives the cookies their rich chocolate flavor. Use Dutch-processed cocoa for a deeper taste.
- 1 ¼ teaspoon baking soda – Helps the cookies rise and achieve a soft, slightly chewy texture.
- ¾ teaspoon baking powder – Works with baking soda to give the cookies a light lift.
- 1/8 teaspoon salt – Enhances the chocolate flavor and balances the sweetness.
- 1 cup unsalted butter, softened – Adds richness and ensures a tender cookie texture.
- 1 ½ cups granulated sugar – Provides sweetness and helps create a crisp edge.
- 1 large egg – Acts as a binder to hold the ingredients together.
- 3 Tablespoons whole milk – Adds moisture and contributes to a soft texture.
- ½ teaspoon vanilla extract – Enhances the overall flavor of the cookies.
- 1/3 cup sparkling decorator’s sugar (for rolling) – Adds a crunchy, sugary coating.
Instructions
Step 1: Mix the Dry Ingredients
In a medium mixing bowl, whisk together the flour, cocoa powder, baking soda, baking powder, and salt. This step ensures that the leavening agents are evenly distributed, helping the cookies bake consistently.
Step 2: Cream the Butter and Sugar
Using a stand mixer with a paddle attachment or a handheld mixer, beat the softened butter and granulated sugar together for about 2 minutes until the mixture is light and fluffy. This step helps incorporate air into the dough, resulting in a better texture.
Step 3: Add the Wet Ingredients
Mix in the egg until fully combined. Then, add the milk and vanilla extract, mixing again until smooth. The dough will start coming together at this stage.
Step 4: Combine Dry and Wet Ingredients
Gradually add the dry ingredients to the wet mixture. Mix on low speed until just combined—overmixing can lead to tough cookies. The dough should be thick but slightly sticky.
Step 5: Chill the Dough
Cover the dough with plastic wrap and refrigerate for at least 2 hours or up to 2 days. Chilling is crucial as it prevents the cookies from spreading too much during baking and allows the flavors to develop.
Step 6: Preheat the Oven and Prepare Baking Sheets
Line two baking sheets with parchment paper and preheat your oven to 350°F (175°C). This ensures even baking and prevents sticking.
Step 7: Shape and Roll the Dough
Scoop out 1 ½ tablespoons of dough and roll into balls. Dip one side of each ball into decorator’s sugar for a sparkling finish. Place the cookies, sugar-side up, on the prepared baking sheet, leaving about 2 inches between each.
Step 8: Bake the Cookies
Bake for 8-11 minutes, or until the tops are puffed up and mostly set. The cookies will continue to cook slightly on the baking sheet after being removed from the oven.
Step 9: Cool the Cookies
Allow the cookies to cool on the baking sheet for 8-10 minutes before transferring them to a wire rack to cool completely. This helps them set properly without becoming too firm.
Notes
Common Baking Mistakes and How to Fix Them
- Cookies Spreading Too Much: Ensure you chill the dough for at least 2 hours. Warm dough leads to flat, thin cookies.
- Cookies Too Dry or Hard: Overbaking is the most common reason for dry cookies. Remove them from the oven when they look slightly underdone—they will firm up as they cool.
- Uneven Baking: Rotate the baking sheet halfway through baking to ensure even heat distribution.
Helpful Kitchen Tips
- Softening Butter Quickly: If you forget to take the butter out in advance, cut it into small pieces and let it sit at room temperature for 15 minutes.
- Measuring Flour Properly: Spoon flour into a measuring cup and level it off with a knife. Packing it in can lead to dense cookies.
- Making the Dough Ahead: You can prepare the dough up to two days in advance and store it in the refrigerator.
- Prep Time: 15 minutes
- Cook Time: 11 minutes
For beginner bakers, this recipe is a perfect introduction to cookie-making. It requires simple ingredients, minimal equipment, and straightforward steps. Whether you’re looking for a cozy treat for your cookie jar or a festive addition to a holiday dessert table, these chocolate sugar cookies will not disappoint. Plus, they are great for sharing, gifting, or simply indulging in a homemade sweet treat.
This guide will take you through every step of the process, from selecting the best ingredients to troubleshooting common baking mistakes. With a few expert tips and alternative ingredient suggestions, you’ll have everything you need to make perfect chocolate sugar cookies every time.
Ingredients and Preparation
Before diving into the baking process, let’s go over the essential ingredients and possible substitutions.
Ingredients
- 3 cups all-purpose flour – The base of the cookies, providing structure.
- ½ cup cocoa powder – Gives the cookies their rich chocolate flavor. Use Dutch-processed cocoa for a deeper taste.
- 1 ¼ teaspoon baking soda – Helps the cookies rise and achieve a soft, slightly chewy texture.
- ¾ teaspoon baking powder – Works with baking soda to give the cookies a light lift.
- 1/8 teaspoon salt – Enhances the chocolate flavor and balances the sweetness.
- 1 cup unsalted butter, softened – Adds richness and ensures a tender cookie texture.
- 1 ½ cups granulated sugar – Provides sweetness and helps create a crisp edge.
- 1 large egg – Acts as a binder to hold the ingredients together.
- 3 Tablespoons whole milk – Adds moisture and contributes to a soft texture.
- ½ teaspoon vanilla extract – Enhances the overall flavor of the cookies.
- 1/3 cup sparkling decorator’s sugar (for rolling) – Adds a crunchy, sugary coating.
Ingredient Substitutions and Alternatives
- Flour Alternatives: For a slightly denser texture, you can replace ½ cup of all-purpose flour with whole wheat flour. If you need a gluten-free version, use a 1:1 gluten-free baking flour.
- Dairy-Free Option: Replace butter with a plant-based alternative and use almond or oat milk instead of whole milk.
- Lower Sugar Option: Use coconut sugar instead of granulated sugar for a slightly caramel-like flavor.
- Extra Chocolate Flavor: Stir in ½ cup of mini chocolate chips for added richness.
Step-by-Step Instructions
Following these steps carefully will ensure your cookies turn out perfect every time.
Step 1: Mix the Dry Ingredients
In a medium mixing bowl, whisk together the flour, cocoa powder, baking soda, baking powder, and salt. This step ensures that the leavening agents are evenly distributed, helping the cookies bake consistently.
Step 2: Cream the Butter and Sugar
Using a stand mixer with a paddle attachment or a handheld mixer, beat the softened butter and granulated sugar together for about 2 minutes until the mixture is light and fluffy. This step helps incorporate air into the dough, resulting in a better texture.
Step 3: Add the Wet Ingredients
Mix in the egg until fully combined. Then, add the milk and vanilla extract, mixing again until smooth. The dough will start coming together at this stage.
Step 4: Combine Dry and Wet Ingredients
Gradually add the dry ingredients to the wet mixture. Mix on low speed until just combined—overmixing can lead to tough cookies. The dough should be thick but slightly sticky.
Step 5: Chill the Dough
Cover the dough with plastic wrap and refrigerate for at least 2 hours or up to 2 days. Chilling is crucial as it prevents the cookies from spreading too much during baking and allows the flavors to develop.
Step 6: Preheat the Oven and Prepare Baking Sheets
Line two baking sheets with parchment paper and preheat your oven to 350°F (175°C). This ensures even baking and prevents sticking.
Step 7: Shape and Roll the Dough
Scoop out 1 ½ tablespoons of dough and roll into balls. Dip one side of each ball into decorator’s sugar for a sparkling finish. Place the cookies, sugar-side up, on the prepared baking sheet, leaving about 2 inches between each.
Step 8: Bake the Cookies
Bake for 8-11 minutes, or until the tops are puffed up and mostly set. The cookies will continue to cook slightly on the baking sheet after being removed from the oven.
Step 9: Cool the Cookies
Allow the cookies to cool on the baking sheet for 8-10 minutes before transferring them to a wire rack to cool completely. This helps them set properly without becoming too firm.
Beginner Tips and Notes
Common Baking Mistakes and How to Fix Them
- Cookies Spreading Too Much: Ensure you chill the dough for at least 2 hours. Warm dough leads to flat, thin cookies.
- Cookies Too Dry or Hard: Overbaking is the most common reason for dry cookies. Remove them from the oven when they look slightly underdone—they will firm up as they cool.
- Uneven Baking: Rotate the baking sheet halfway through baking to ensure even heat distribution.
Helpful Kitchen Tips
- Softening Butter Quickly: If you forget to take the butter out in advance, cut it into small pieces and let it sit at room temperature for 15 minutes.
- Measuring Flour Properly: Spoon flour into a measuring cup and level it off with a knife. Packing it in can lead to dense cookies.
- Making the Dough Ahead: You can prepare the dough up to two days in advance and store it in the refrigerator.
Serving Suggestions
These cookies pair beautifully with a variety of accompaniments:
- With a Glass of Milk: A classic combination that enhances the richness of the chocolate.
- With Coffee or Tea: Perfect for an afternoon snack or a cozy treat.
- As an Ice Cream Sandwich: Place a scoop of vanilla or chocolate ice cream between two cookies for a decadent dessert.
- Drizzled with Chocolate: Melt some chocolate and drizzle it over the cooled cookies for an extra indulgent touch.
Storage Tips
- Room Temperature: Store in an airtight container for up to 5 days.
- Freezing the Dough: Roll the dough into balls and freeze on a baking sheet before transferring to a zip-top bag. Bake from frozen, adding 2-3 minutes to the baking time.
- Freezing Baked Cookies: Store baked cookies in an airtight container, separating layers with parchment paper. Thaw at room temperature before serving.
Conclusion
Baking chocolate sugar cookies is a rewarding experience, especially for beginners. This recipe is simple, adaptable, and delivers consistently delicious results. Whether you make these for a holiday gathering, a cozy night in, or just to satisfy a sweet tooth, they are sure to be a hit.
I encourage you to try this recipe and experiment with variations to make it your own. If you do, share your experience and any creative twists you tried. Happy baking!