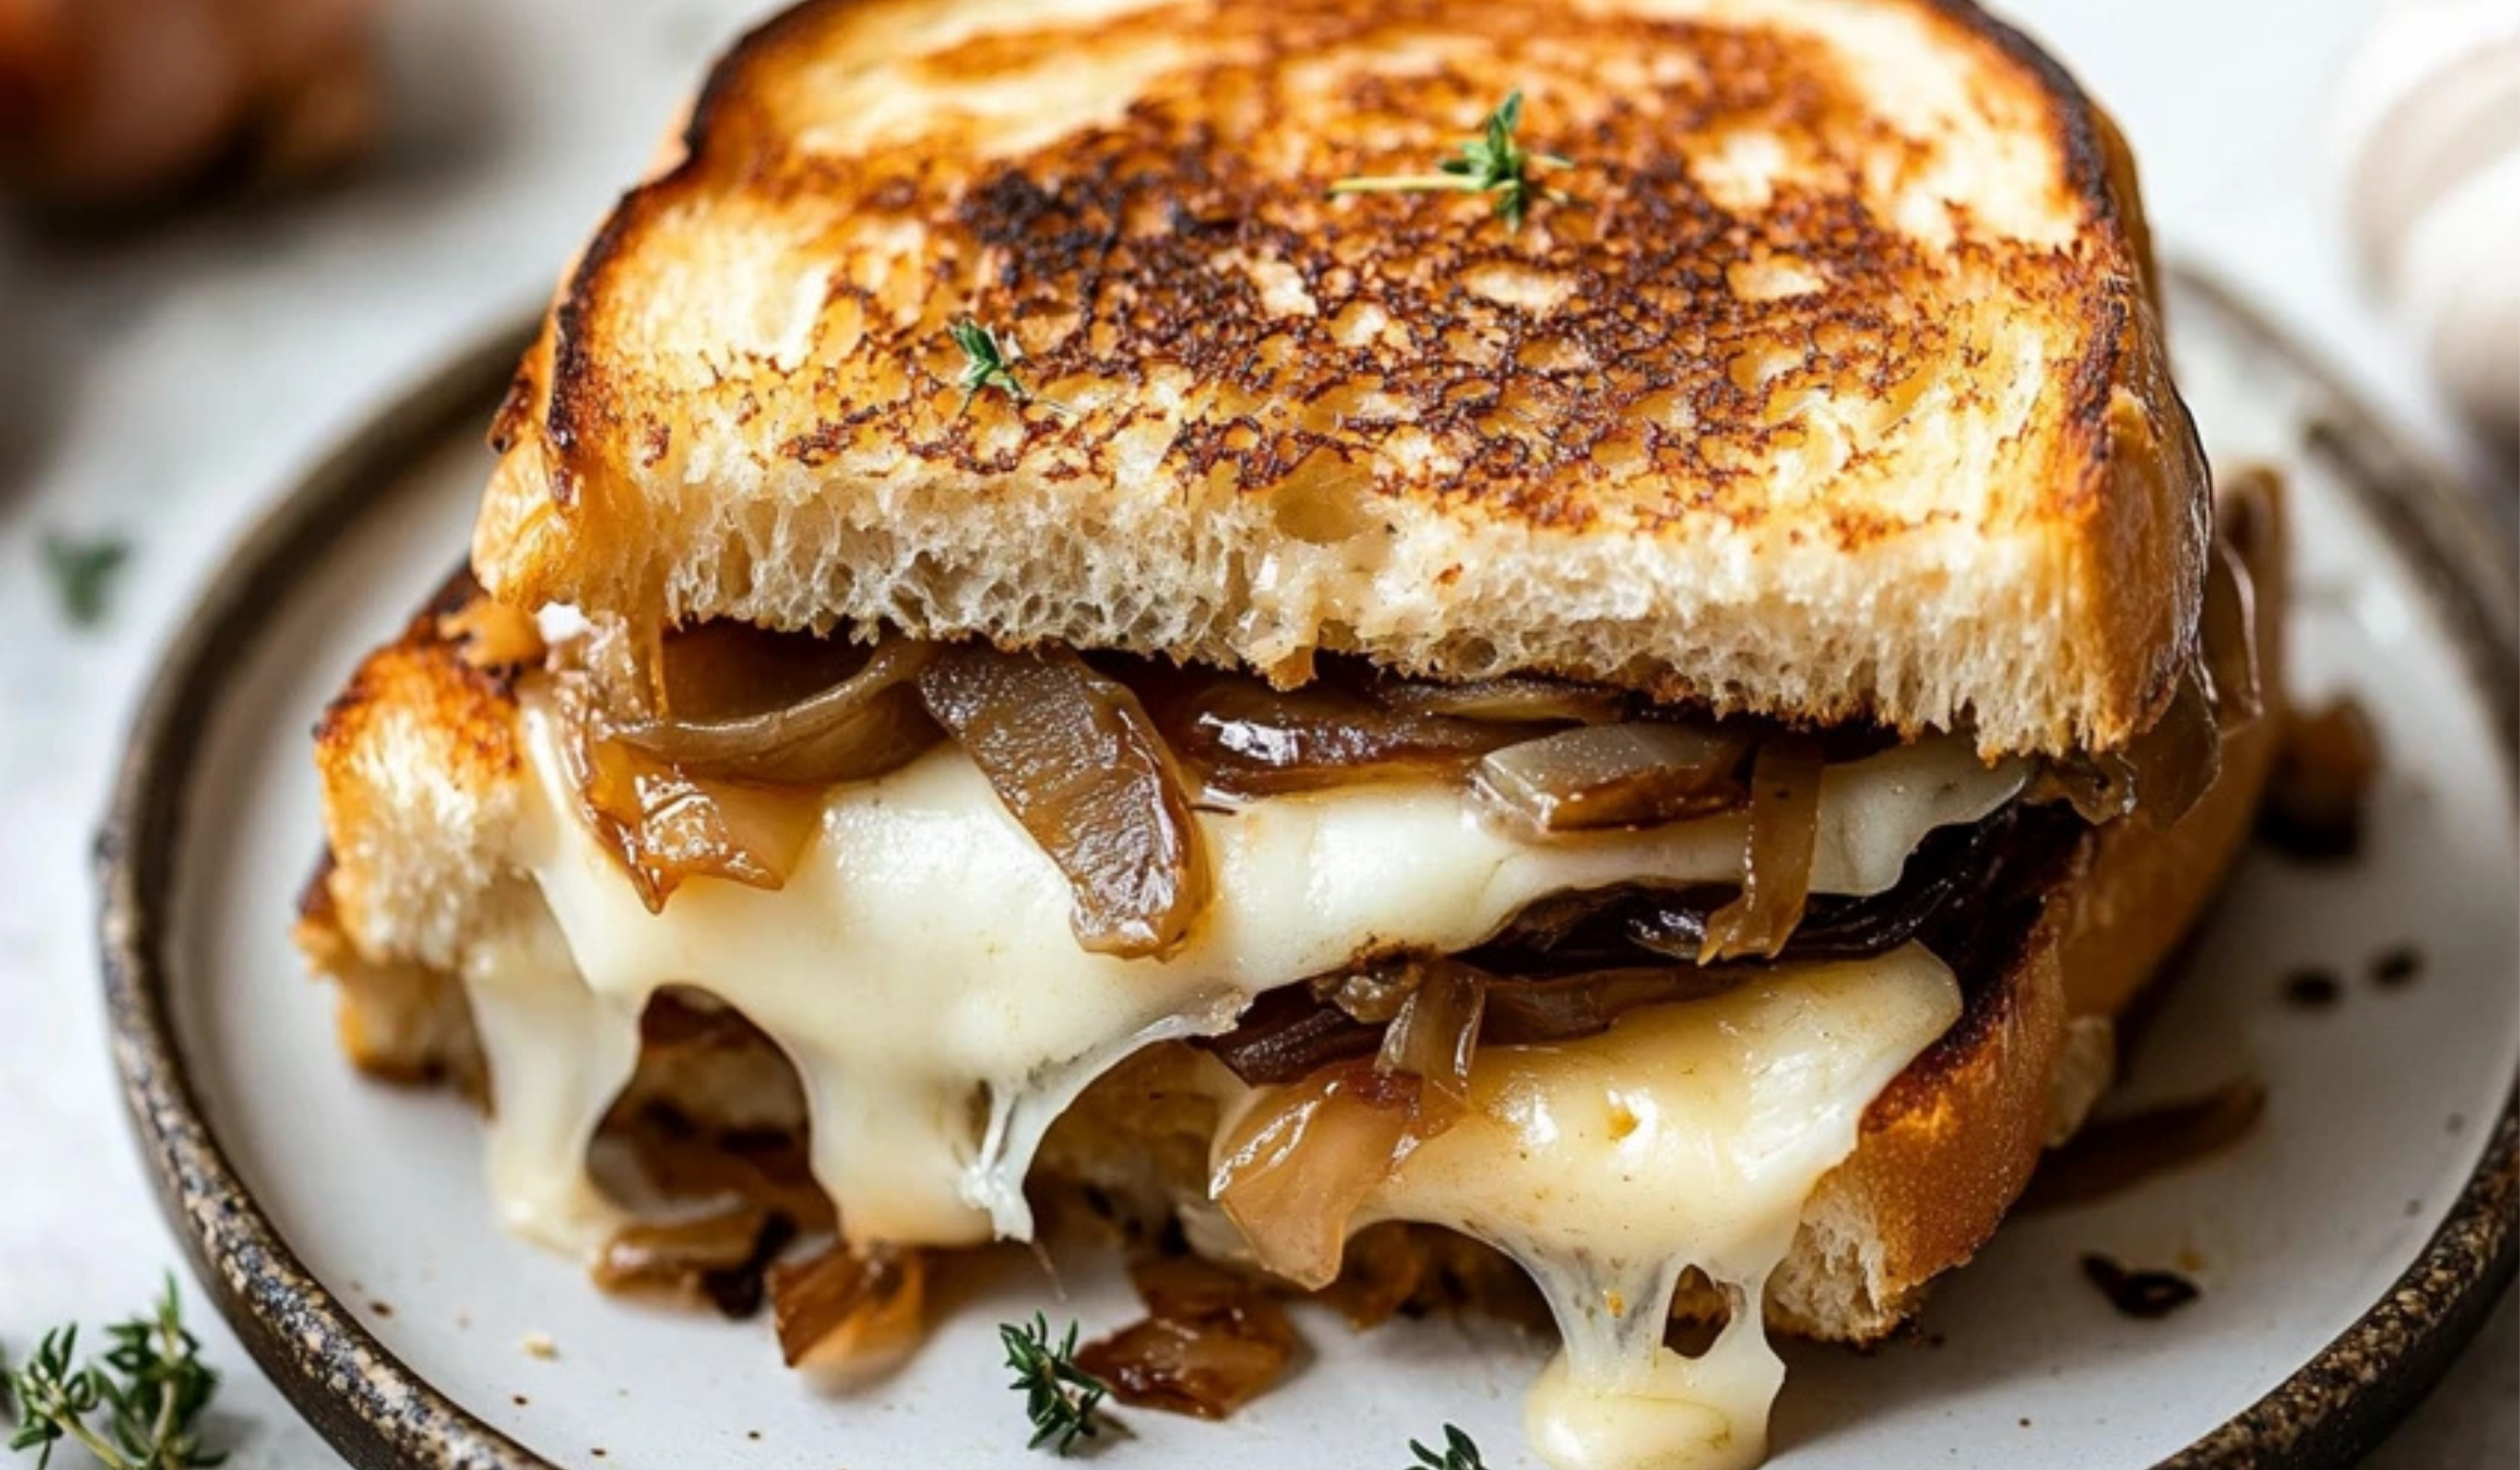
There’s something undeniably comforting about a grilled cheese sandwich. Maybe it’s the crisp golden crust, maybe it’s the melty, savory cheese—but either way, it’s the kind of food that feels like a hug on a plate. I remember the first time I made this French Onion Grilled Cheese Sandwich—it was during a quiet afternoon when I wanted something a little extra special, something indulgent but still simple. Inspired by the rich, caramelized flavors of French onion soup, I decided to blend those savory onions with the crispy, cheesy goodness of a grilled cheese. The result? A sandwich that was deeply flavorful, shockingly easy, and totally satisfying.
Print
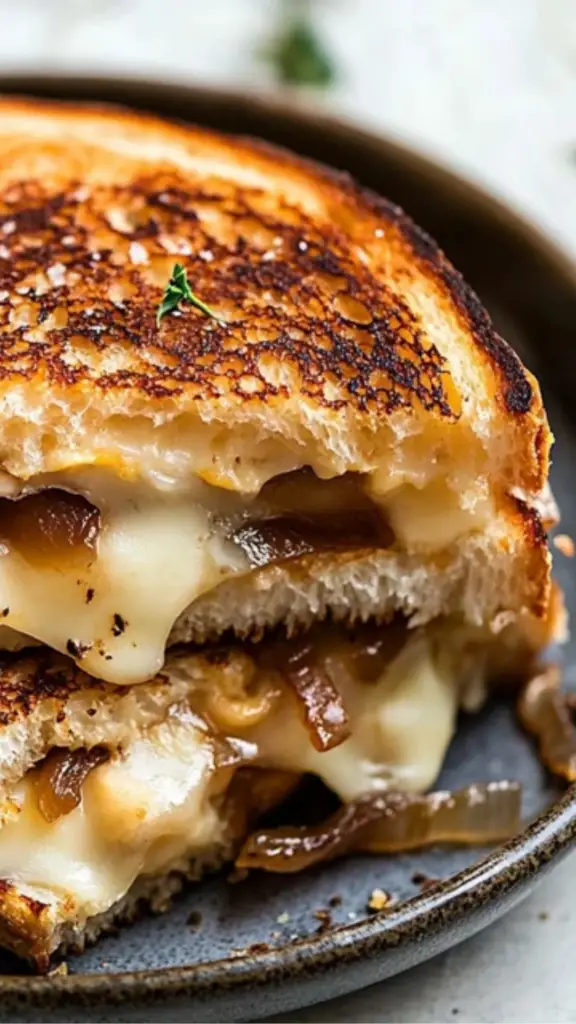
The Ultimate French Onion Grilled Cheese Sandwich: Comfort Food with a Gourmet Twist
Creamy baked feta meets roasted broccoli in this easy pasta dish bursting with flavor! A beginner-friendly recipe that’s both comforting and nourishing. 🥦🧀🍝✨
- Total Time: 45 minutes
- Yield: 2 servings 1x
Ingredients
- 4 tablespoons unsalted butter, divided
- 4 tablespoons olive oil, divided
- 3 medium yellow onions, peeled, halved, and thinly sliced
- 1 teaspoon granulated sugar
- 1⁄2 teaspoon salt
- 1⁄4 teaspoon black pepper
- 1 teaspoon fresh thyme leaves, chopped (or 1/2 teaspoon dried thyme)
- 1⁄4 cup beef broth, dry sherry, or water (for deglazing the pan)
- 4 slices hearty sourdough bread (or any crusty artisan-style bread)
- 6 oz Gruyère cheese, shredded (Swiss or Emmental can be substituted)
- 4 oz sharp white cheddar cheese, shredded
Optional Add-Ons (Protein Boost):
- Shredded or sliced grilled chicken breast
- Thinly sliced roast beef
Instructions
Step 1: Caramelize the Onions
- In a large heavy-bottom skillet (cast iron or stainless steel works best), melt 2 tablespoons of butter and 2 tablespoons of olive oil over medium heat.
- Add the sliced onions and stir to coat them in the fat. Cover the skillet and let the onions cook for 5 minutes to soften.
- Remove the lid and sprinkle the onions with sugar, salt, and pepper. Stir to combine. Reduce heat to medium-low, replace the lid, and cook the onions in 5-minute intervals for about 20 minutes. Stir frequently to prevent sticking and ensure even browning.
- Once the onions have turned a deep golden brown, pour in the beef broth (or water/sherry) to deglaze the pan. Use a wooden spoon to scrape up any flavorful browned bits stuck to the bottom. Cook for 1 more minute, then stir in the thyme.
- Remove the skillet from heat and transfer the onions to a bowl. Wipe the skillet clean with a paper towel—you’ll use it again to build the sandwich.
Step 2: Assemble and Cook the Sandwiches
- In the same skillet, melt the remaining butter and oil over medium-low heat.
- Add the 4 slices of bread and lightly toast one side of each slice—about 2 minutes per side. This adds structure so the sandwich doesn’t go soggy.
- Flip the slices so the toasted side faces up. Divide the shredded cheeses evenly across all 4 slices. Cover the skillet briefly (1–2 minutes) to help the cheese start to melt.
- Once the cheese begins to melt, remove the skillet from the heat.
- On two of the slices, spread a generous layer of caramelized onions. If using grilled chicken or roast beef, layer it on top of the onions now.
- Place the remaining cheese-covered slices on top to close the sandwich, toasted side facing out. Press gently but firmly.
- Return the skillet to medium-low heat. Cook each sandwich for 2–3 minutes per side, pressing slightly with a spatula to ensure even browning, until the outside is crisp and golden and the cheese is completely melted.
- Let the sandwiches rest for 1–2 minutes before slicing in half. Serve warm.
Notes
- Don’t rush the onions: If the heat is too high, they’ll burn instead of caramelizing. Keep it at medium-low and stir regularly.
- Use the right pan: A heavy-bottom skillet distributes heat more evenly, making it easier to control cooking.
- Prep everything before you start: Shred your cheese, slice the bread, and have your deglazing liquid ready. This keeps things smooth and stress-free.
- Watch the bread: Bread can burn quickly if the heat is too high. Keep an eye on it and adjust the heat as needed.
- If the cheese isn’t melting: Covering the skillet helps trap heat. If needed, you can transfer the sandwich to a 300°F (150°C) oven for a few minutes to finish melting.
- Prep Time: 15 minutes
- Cook Time: 30 minutes
This recipe is ideal for beginner cooks because it takes a familiar favorite—grilled cheese—and adds just enough technique to build kitchen confidence without overwhelming you. The onions are slowly caramelized to develop deep flavor, and the sandwich itself is assembled in a straightforward way. You don’t need fancy equipment or advanced skills. Just a skillet, a bit of patience, and a willingness to try something new.
Whether you’re cooking for yourself, impressing someone special, or just elevating your lunch game, this French Onion Grilled Cheese Sandwich delivers gourmet flavor in a beginner-friendly package. Let’s dive in.
Ingredients and Preparation
Here’s everything you’ll need to make two servings of this sandwich. Each element has been chosen for flavor, ease, and accessibility. Substitutions are also suggested to offer some flexibility depending on what you have on hand.
Ingredients:
- 4 tablespoons unsalted butter, divided
- 4 tablespoons olive oil, divided
- 3 medium yellow onions, peeled, halved, and thinly sliced
- 1 teaspoon granulated sugar
- 1⁄2 teaspoon salt
- 1⁄4 teaspoon black pepper
- 1 teaspoon fresh thyme leaves, chopped (or 1/2 teaspoon dried thyme)
- 1⁄4 cup beef broth, dry sherry, or water (for deglazing the pan)
- 4 slices hearty sourdough bread (or any crusty artisan-style bread)
- 6 oz Gruyère cheese, shredded (Swiss or Emmental can be substituted)
- 4 oz sharp white cheddar cheese, shredded
Optional Add-Ons (Protein Boost):
- Shredded or sliced grilled chicken breast
- Thinly sliced roast beef
Adding a bit of protein can make the sandwich more filling, and both chicken and beef pair well with the caramelized onion and cheese combination.
Preparation Tips:
- Slice onions as uniformly as possible so they caramelize evenly.
- Shred cheese fresh from a block for better melting and flavor—pre-shredded often has anti-caking agents that affect melt.
- If using protein, ensure it is pre-cooked and warm before assembling the sandwich.
Step-by-Step Instructions
This recipe involves two key parts: caramelizing the onions and building the sandwich. Each step is designed to be beginner-friendly and easy to follow.
Step 1: Caramelize the Onions
- In a large heavy-bottom skillet (cast iron or stainless steel works best), melt 2 tablespoons of butter and 2 tablespoons of olive oil over medium heat.
- Add the sliced onions and stir to coat them in the fat. Cover the skillet and let the onions cook for 5 minutes to soften.
- Remove the lid and sprinkle the onions with sugar, salt, and pepper. Stir to combine. Reduce heat to medium-low, replace the lid, and cook the onions in 5-minute intervals for about 20 minutes. Stir frequently to prevent sticking and ensure even browning.
- Once the onions have turned a deep golden brown, pour in the beef broth (or water/sherry) to deglaze the pan. Use a wooden spoon to scrape up any flavorful browned bits stuck to the bottom. Cook for 1 more minute, then stir in the thyme.
- Remove the skillet from heat and transfer the onions to a bowl. Wipe the skillet clean with a paper towel—you’ll use it again to build the sandwich.
Step 2: Assemble and Cook the Sandwiches
- In the same skillet, melt the remaining butter and oil over medium-low heat.
- Add the 4 slices of bread and lightly toast one side of each slice—about 2 minutes per side. This adds structure so the sandwich doesn’t go soggy.
- Flip the slices so the toasted side faces up. Divide the shredded cheeses evenly across all 4 slices. Cover the skillet briefly (1–2 minutes) to help the cheese start to melt.
- Once the cheese begins to melt, remove the skillet from the heat.
- On two of the slices, spread a generous layer of caramelized onions. If using grilled chicken or roast beef, layer it on top of the onions now.
- Place the remaining cheese-covered slices on top to close the sandwich, toasted side facing out. Press gently but firmly.
- Return the skillet to medium-low heat. Cook each sandwich for 2–3 minutes per side, pressing slightly with a spatula to ensure even browning, until the outside is crisp and golden and the cheese is completely melted.
- Let the sandwiches rest for 1–2 minutes before slicing in half. Serve warm.
Beginner Tips and Notes
Caramelizing onions might sound intimidating, but it’s just slow cooking. The key is patience and low heat. Here are a few tips to help you along:
- Don’t rush the onions: If the heat is too high, they’ll burn instead of caramelizing. Keep it at medium-low and stir regularly.
- Use the right pan: A heavy-bottom skillet distributes heat more evenly, making it easier to control cooking.
- Prep everything before you start: Shred your cheese, slice the bread, and have your deglazing liquid ready. This keeps things smooth and stress-free.
- Watch the bread: Bread can burn quickly if the heat is too high. Keep an eye on it and adjust the heat as needed.
- If the cheese isn’t melting: Covering the skillet helps trap heat. If needed, you can transfer the sandwich to a 300°F (150°C) oven for a few minutes to finish melting.
Serving Suggestions
While the sandwich can absolutely stand on its own, pairing it with a complementary side can take things up a notch:
Sides:
- A light arugula or mixed greens salad with vinaigrette helps balance the richness.
- Tomato soup or a simple broth-based vegetable soup makes a classic pairing.
- Oven-roasted potatoes or sweet potato fries offer a heartier option.
Sauce Options:
- A small bowl of beef broth or French onion soup as a dipping sauce brings everything full circle.
- Dijon mustard or horseradish cream on the side adds a sharp, tangy contrast.
Storage and Reheating Tips:
- If you have leftovers, wrap the sandwich in foil and refrigerate for up to 2 days.
- To reheat, place it in a skillet over low heat, pressing with a spatula to maintain crispness. Avoid microwaving—it will make the bread soggy.
- You can also freeze caramelized onions separately for up to 3 months. They’re handy for future meals like pastas, burgers, or omelets.
Engagement Features
One of the joys of cooking is sharing it—whether it’s with others at the table or by connecting online with fellow home cooks. This sandwich is a perfect gateway recipe for beginners. It teaches foundational skills: how to sauté, how to layer flavors, and how to control heat on the stove. But it doesn’t require perfection to taste amazing.
We’d love to hear how your sandwich turned out. Did you stick with the original recipe or add your own twist? Maybe you used a different cheese, added a protein, or experimented with a dipping sauce. Sharing your experience can help other new cooks feel encouraged and inspired. Leave a comment with your thoughts, and let’s build a space where cooking feels welcoming and doable for everyone.
Cooking doesn’t have to be complicated to be impressive. With just a few ingredients and some slow cooking, this French Onion Grilled Cheese Sandwich transforms everyday items into something rich, satisfying, and just a little fancy. Whether you’re new to the kitchen or just looking for a new favorite comfort food, this recipe delivers.
Now it’s your turn to try it—grab those onions, get your skillet ready, and experience the magic of a sandwich that tastes like it took hours but only took a little heart and patience