
Few desserts are as universally beloved as the classic chocolate chip cookie. Whether enjoyed with a cold glass of milk, packed in a lunchbox, or shared with friends and family, these cookies have a special way of bringing warmth and comfort.
Print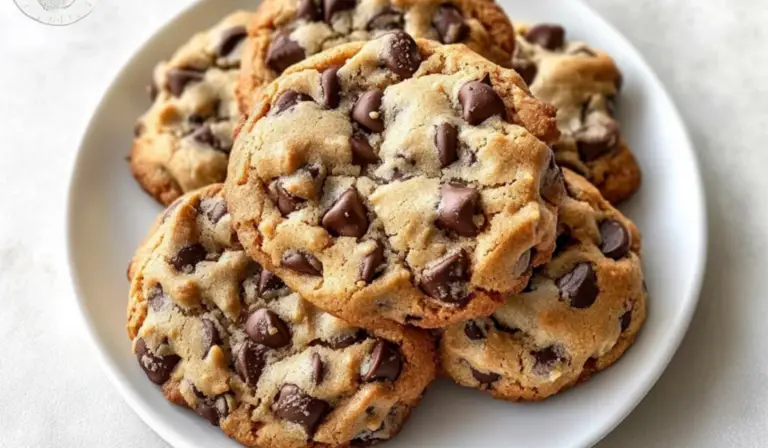
The Ultimate Chocolate Chip Cookies: A Beginner’s Guide to Baking Perfection
Nothing beats the classic Chocolate Chip Cookie—warm, gooey, and loaded with melty chocolate in every bite! This beginner-friendly recipe delivers the perfect balance of crispy edges and soft, chewy centers, making it a must-try for home bakers. Whether you love dunking them in milk or enjoying them straight from the oven, these cookies will become your new favorite sweet treat. Ready to bake the best batch ever?
#BestChocolateChipCookies #BakingForBeginners #ChewyAndCrispy #EasyHomemadeCookies #ChocolateChipHeaven #FreshlyBaked #SimpleAndIrresistible #CookieLover #BakingPerfection #SweetToothFix
- Total Time: 23-25 minutes
- Yield: 18 cookies 1x
Ingredients
- 1 ¼ cups all-purpose flour
- 3 tablespoons cornstarch (helps with softness)
- ½ teaspoon salt
- ½ teaspoon baking soda
- ½ cup cold butter (cut into small cubes for easy mixing)
- 6 tablespoons granulated sugar
- 6 tablespoons brown sugar (adds a deeper flavor)
- 1 egg
- ½ teaspoon vanilla extract
- 10–11 oz semi-sweet chocolate chips (adjust to taste)
- ¼ cup walnut pieces (optional)
Instructions
Step 1: Prepare Your Baking Station
- Preheat your oven to 375°F (not 475°F). The original recipe suggests 475°F, but for even baking and better texture, 375°F is recommended.
- Line your baking sheets with parchment paper to prevent sticking and make cleanup easier.
Step 2: Mix the Dry Ingredients
- In a small mixing bowl, whisk together flour, cornstarch, salt, and baking soda. This ensures the leavening agents and salt are evenly distributed.
Step 3: Combine the Wet Ingredients
- Cut the cold butter into small cubes. Using cold butter instead of melted butter helps create a thicker cookie.
- In a large mixing bowl, beat together the butter, granulated sugar, brown sugar, egg, and vanilla extract until well combined. You can use an electric hand mixer or a wooden spoon if mixing by hand.
Step 4: Incorporate the Dry Ingredients
- Gradually mix the dry ingredient mixture into the wet ingredients. Stir gently until fully combined. Overmixing can make the cookies tough, so mix just until the flour disappears.
Step 5: Add the Chocolate Chips and Walnuts
- Gently fold in the chocolate chips and optional walnut pieces. If you prefer fewer chocolate chips, use half a bag instead of a full one.
Step 6: Shape the Cookies
- Use a tablespoon or a small ice cream scoop to create even-sized cookie dough balls.
- Place them on the prepared baking sheet, spacing them about two inches apart to allow for spreading.
Step 7: Bake the Cookies
- Bake at 375°F for 8-10 minutes or until the tops turn light golden brown. Keep a close eye on them, as they continue cooking even after they are removed from the oven.
Step 8: Cooling and Serving
- Let the cookies cool on the baking sheet for about 5 minutes before transferring them to a wire rack. This helps them set while maintaining a soft center.
- For the best texture, enjoy the cookies warm.
Notes
How to Avoid Common Cookie Mistakes
- Overbaking: Take the cookies out when they are just turning golden. They may look slightly undercooked in the center, but they will firm up as they cool.
- Spreading Too Much: If your cookies spread too much, try chilling the dough for 20 minutes before baking. Using cold butter also helps.
- Dry Cookies: Overmixing the dough or adding too much flour can make cookies dry. Measure ingredients carefully and mix gently.
Efficient Baking Tips
- Prepare Everything First: Measuring and organizing ingredients before starting saves time and reduces mistakes.
- Use a Cookie Scoop: Ensures uniform cookies that bake evenly.
- Double the Batch: These cookies freeze well, so consider making extra dough for later.
- Prep Time: 15 minutes
- Cook Time: 8-10 minutes
My love for baking started with chocolate chip cookies. As a beginner, I wanted a recipe that was simple yet foolproof, yielding soft, chewy, and perfectly golden cookies every time. After many trials, I found the ideal combination of ingredients and techniques that make this recipe a favorite among home bakers.
This chocolate chip cookie recipe is designed with beginners in mind. The steps are straightforward, the ingredients are easy to find, and the results are consistently delicious. Whether you are baking for the first time or looking for a reliable go-to recipe, these cookies are a must-try.
Why This Recipe is Perfect for Beginners
- Simple Ingredients: Everything you need is likely already in your kitchen.
- Quick Preparation: No need for hours of chilling or complex techniques.
- Chewy and Soft Texture: Achieved with the perfect balance of ingredients.
- Customizable: Add your favorite nuts, change the type of chocolate, or adjust the sweetness.
This recipe eliminates unnecessary complications while ensuring that every batch turns out rich, chewy, and packed with chocolate flavor.
Ingredients and Preparation
Essential Ingredients
For 18 cookies, you will need:
- 1 ¼ cups all-purpose flour
- 3 tablespoons cornstarch (helps with softness)
- ½ teaspoon salt
- ½ teaspoon baking soda
- ½ cup cold butter (cut into small cubes for easy mixing)
- 6 tablespoons granulated sugar
- 6 tablespoons brown sugar (adds a deeper flavor)
- 1 egg
- ½ teaspoon vanilla extract
- 10-11 oz semi-sweet chocolate chips (adjust to taste)
- ¼ cup walnut pieces (optional)
Ingredient Substitutions for Flexibility
- Butter Substitute: If you are out of butter, use an equal amount of vegetable oil or margarine.
- Chocolate Variations: Try dark chocolate, milk chocolate, or even white chocolate chips for different flavors.
- Nut-Free Option: Skip the walnuts or replace them with sunflower seeds for crunch.
- Gluten-Free Adaptation: Use a 1:1 gluten-free flour blend.
Step-by-Step Instructions
Step 1: Prepare Your Baking Station
- Preheat your oven to 375°F (not 475°F). The original recipe suggests 475°F, but for even baking and better texture, 375°F is recommended.
- Line your baking sheets with parchment paper to prevent sticking and make cleanup easier.
Step 2: Mix the Dry Ingredients
- In a small mixing bowl, whisk together flour, cornstarch, salt, and baking soda. This ensures the leavening agents and salt are evenly distributed.
Step 3: Combine the Wet Ingredients
- Cut the cold butter into small cubes. Using cold butter instead of melted butter helps create a thicker cookie.
- In a large mixing bowl, beat together the butter, granulated sugar, brown sugar, egg, and vanilla extract until well combined. You can use an electric hand mixer or a wooden spoon if mixing by hand.
Step 4: Incorporate the Dry Ingredients
- Gradually mix the dry ingredient mixture into the wet ingredients. Stir gently until fully combined. Overmixing can make the cookies tough, so mix just until the flour disappears.
Step 5: Add the Chocolate Chips and Walnuts
- Gently fold in the chocolate chips and optional walnut pieces. If you prefer fewer chocolate chips, use half a bag instead of a full one.
Step 6: Shape the Cookies
- Use a tablespoon or a small ice cream scoop to create even-sized cookie dough balls.
- Place them on the prepared baking sheet, spacing them about two inches apart to allow for spreading.
Step 7: Bake the Cookies
- Bake at 375°F for 8-10 minutes or until the tops turn light golden brown. Keep a close eye on them, as they continue cooking even after they are removed from the oven.
Step 8: Cooling and Serving
- Let the cookies cool on the baking sheet for about 5 minutes before transferring them to a wire rack. This helps them set while maintaining a soft center.
- For the best texture, enjoy the cookies warm.
Beginner Tips and Notes
How to Avoid Common Cookie Mistakes
- Overbaking: Take the cookies out when they are just turning golden. They may look slightly undercooked in the center, but they will firm up as they cool.
- Spreading Too Much: If your cookies spread too much, try chilling the dough for 20 minutes before baking. Using cold butter also helps.
- Dry Cookies: Overmixing the dough or adding too much flour can make cookies dry. Measure ingredients carefully and mix gently.
Efficient Baking Tips
- Prepare Everything First: Measuring and organizing ingredients before starting saves time and reduces mistakes.
- Use a Cookie Scoop: Ensures uniform cookies that bake evenly.
- Double the Batch: These cookies freeze well, so consider making extra dough for later.
Serving Suggestions
These cookies are delicious on their own, but they can be even better with creative serving ideas:
- With a Glass of Milk: The classic pairing that never fails.
- Ice Cream Sandwiches: Place a scoop of vanilla or chocolate ice cream between two cookies.
- Drizzled with Chocolate: Melt some chocolate and drizzle it over the cooled cookies for an elegant touch.
- Dipped in Coffee or Hot Chocolate: The slight bitterness of coffee complements the sweetness of the cookies.

Storage and Leftovers
Short-Term Storage
- Keep cookies in an airtight container at room temperature for up to 4 days. Add a small slice of bread to the container to help keep them soft.
Freezing Options
- Dough Freezing: Roll the dough into balls and freeze them on a baking sheet. Once frozen, transfer to a freezer bag and store for up to 3 months. Bake from frozen, adding 2 extra minutes to the baking time.
- Baked Cookies Freezing: Store fully baked cookies in an airtight container in the freezer for up to 2 months. Thaw at room temperature before serving.
Conclusion: Your Turn to Bake
Baking the perfect chocolate chip cookies is easier than you think. This recipe ensures a chewy, chocolatey, and foolproof result every time, making it ideal for beginners and experienced bakers alike.
Now, it’s your turn to give it a try. Follow the steps, have fun, and enjoy the delicious reward at the end. If you make these cookies, share your experience—what worked best for you? Did you try any variations? Let’s keep the baking conversation going. Happy baking!