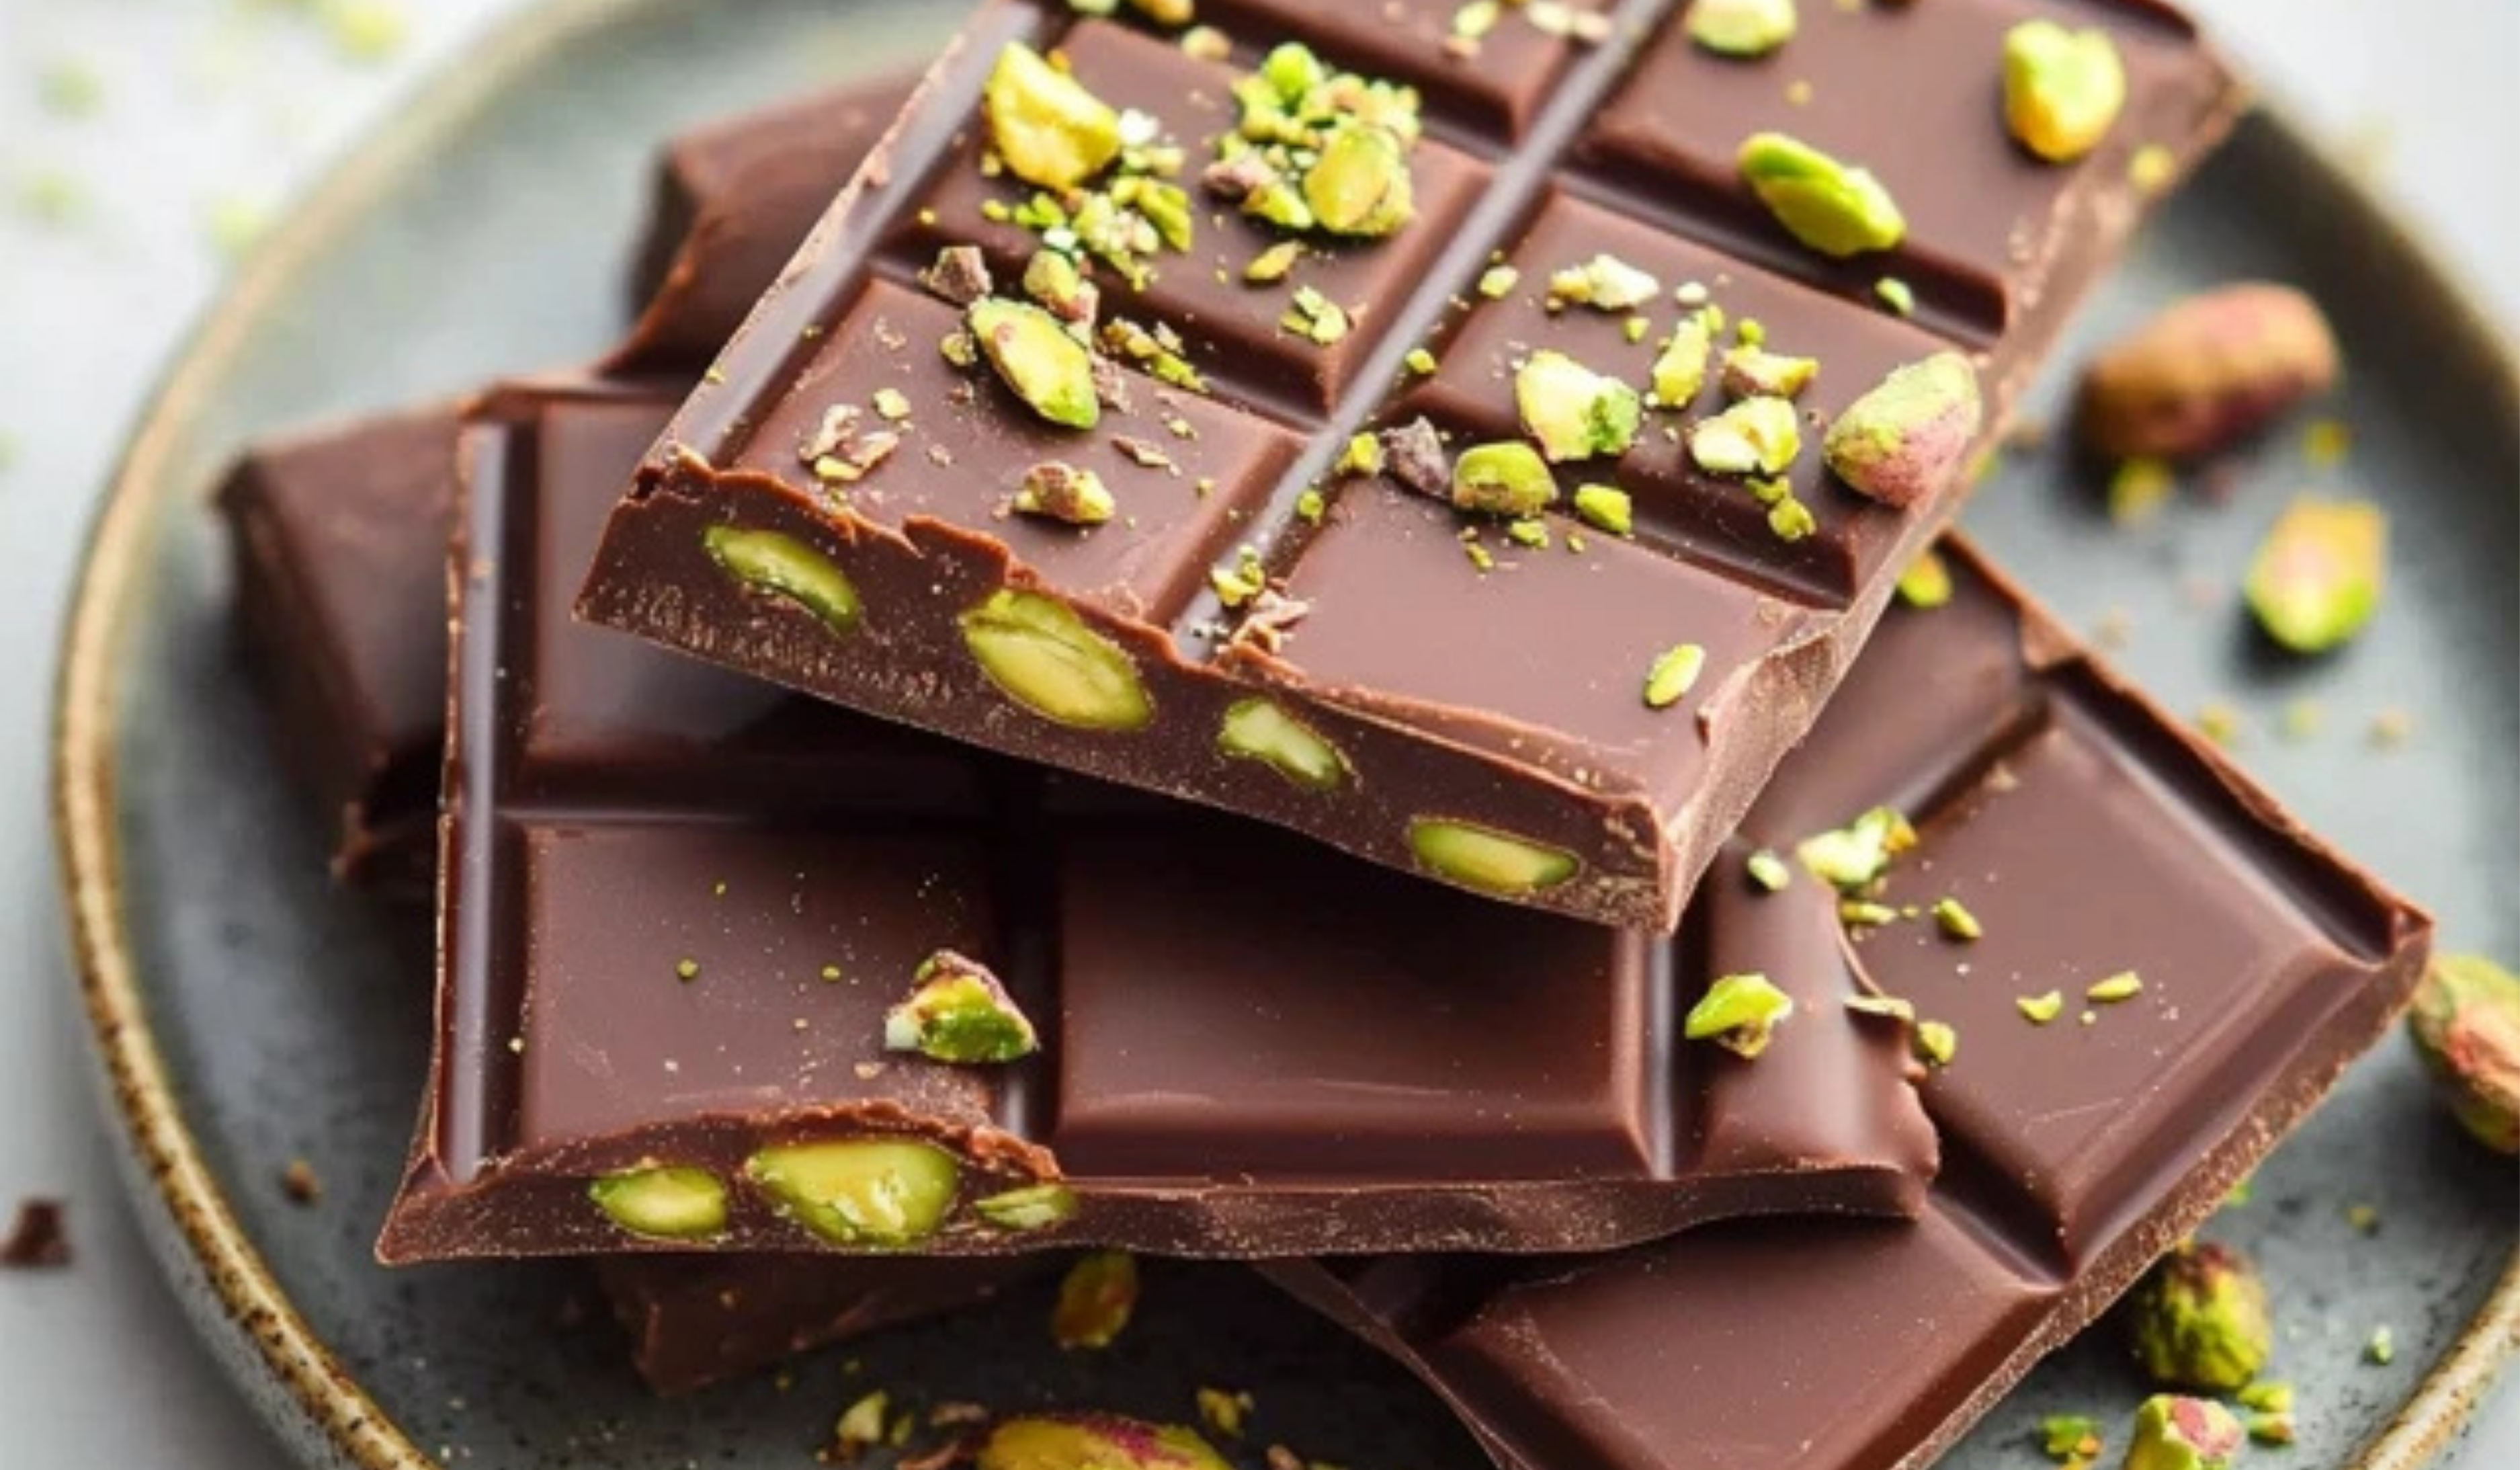
If you’ve ever craved a dessert that combines sweet chocolate with rich, nutty textures, this Pistachio Chocolate Bar—also known as the Dubai Chocolate Bar—might just be the perfect treat for you. Inspired by a viral dessert sensation, this bar takes your taste buds on an exotic journey, offering a creamy filling of tahini and pistachio cream wrapped in smooth milk chocolate. The inclusion of crispy kataifi adds an unexpected crunch, making every bite an indulgent experience. Best of all, it’s simple enough for beginner cooks to create with ease, and the recipe allows for plenty of flexibility to suit different preferences.
Print
Pistachio Chocolate Bar (Dubai Chocolate Bar) – A Beginner’s Delight
Rich chocolate, crunchy pistachios, and that melt-in-your-mouth magic—this viral Dubai Chocolate Bar is an easy indulgence that’s perfect for beginners! 🍫🌰✨
- Total Time: 2 hours 20 minutes
- Yield: 12 bars 1x
Ingredients
- 1/2 cup pistachio cream – This creamy paste offers a rich, nutty flavor that’s slightly sweet. It’s the core of the filling in this dessert.
- 1 tablespoon tahini – Made from sesame seeds, tahini adds a slightly bitter yet nutty flavor that perfectly balances the sweetness of the milk chocolate.
- 1 1/2 cups kataifi (shredded phyllo dough) – This ingredient adds a crunchy, almost pastry-like texture to the filling. If you can’t find kataifi, you can substitute it with shredded phyllo dough.
- 3 tablespoons unsalted butter – Butter provides richness and helps toast the kataifi to a golden crisp.
- 16 oz milk chocolate (about 4 milk chocolate bars) – The milk chocolate forms the outer shell of the bar, offering smooth sweetness to contrast with the nutty filling.
- A pinch of salt – A small amount of salt helps to balance the sweetness of the chocolate.
Instructions
Step 1: Prepare the chocolate
Start by melting half of the milk chocolate. You can do this using a double boiler or a microwave-safe bowl. If you’re using the microwave, heat the chocolate in 20-30 second bursts, stirring in between to prevent it from burning.
Pro Tip: To achieve that perfect, crisp snap when the chocolate sets, it’s helpful to temper it. Tempering involves slowly heating the chocolate to a specific temperature (not exceeding 90°F) to ensure it sets evenly and has a glossy finish. You can check the temperature using an instant-read thermometer.
Once the chocolate has melted, pour it into your chocolate bar molds, ensuring that the mold is well-coated. Let any excess drip off into a bowl, as this will be used for the top layer. Place the mold in the fridge to allow the chocolate to harden completely.
Step 2: Prepare the filling
While the chocolate is setting in the fridge, it’s time to make the filling. Heat a pan over medium heat and add the butter. Once it’s melted, add the kataifi (shredded phyllo dough). Stir frequently as the dough crisps up and turns golden. This should take about 5-7 minutes.
Once the kataifi is golden and crispy, remove it from the heat and place it in a large bowl. Add the tahini and pistachio cream to the kataifi and stir well to combine. You want the mixture to have a smooth, creamy consistency, with the crispy kataifi adding texture to the filling.
Step 3: Assemble the bars
Once your bottom layer of chocolate has hardened, remove it from the fridge. Spread a layer of the pistachio filling over the hardened chocolate, making sure to leave a small border around the edges. This will prevent the filling from oozing out when you add the top layer of chocolate.
Now, take the remaining half of your melted chocolate and pour it over the pistachio filling. Use an offset spatula to spread the chocolate evenly across the top, ensuring it covers the filling completely. You can give the mold a gentle shake to smooth the chocolate out further. Scrape off any excess chocolate using a bench scraper for a clean finish.
Place the mold back in the fridge for about an hour, or until the chocolate has fully set and the bars have hardened.
Step 4: Remove from molds and serve
Once your chocolate bars have set, carefully remove them from the molds. You’ll now have perfectly formed Pistachio Chocolate Bars, ready to be enjoyed.
Notes
- Tempering the chocolate: If you’re new to tempering chocolate, don’t worry! It’s optional, but it ensures that the chocolate has a smooth, glossy finish. If you don’t temper it, your bars will still taste great, just with a slightly less refined appearance.
- Chopping chocolate: If you find chopping chocolate to be time-consuming, consider using a food processor to speed up the process. It’s a real time-saver for beginners.
- Melted chocolate consistency: If the chocolate is too thick after melting, you can add a tiny bit of vegetable oil to thin it out, making it easier to pour into the molds.
- Storage: If you’re making these bars ahead of time or need to store leftovers, keep them in an airtight container in the fridge. They should last for up to a week. If you want to keep them longer, you can freeze them for up to three months. Just be sure to let them thaw in the fridge overnight before serving.
- Substitutions: If you’re unable to find pistachio cream or tahini, don’t hesitate to get creative. Nut butters like peanut butter, almond butter, or cashew butter can be used in place of pistachio cream. For the tahini, try using other nut butters or even a bit of Nutella for a different flavor.
- Prep Time: 20 minutes
- Cook Time: 2 hours
Whether you’re a chocolate enthusiast looking for something new or a home cook keen to try your hand at a more complex-looking treat, this Pistachio Chocolate Bar is a fantastic way to enhance your culinary skills while enjoying a dessert that’s as beautiful as it is delicious. It’s also an excellent choice for gifting or sharing at celebrations.
Ingredients and Preparation
Before diving into the step-by-step instructions, it’s important to gather all the necessary ingredients. Here’s what you’ll need:
Ingredients:
- 1/2 cup pistachio cream – This creamy paste offers a rich, nutty flavor that’s slightly sweet. It’s the core of the filling in this dessert.
- 1 tablespoon tahini – Made from sesame seeds, tahini adds a slightly bitter yet nutty flavor that perfectly balances the sweetness of the milk chocolate.
- 1 1/2 cups kataifi (shredded phyllo dough) – This ingredient adds a crunchy, almost pastry-like texture to the filling. If you can’t find kataifi, you can substitute it with shredded phyllo dough.
- 3 tablespoons unsalted butter – Butter provides richness and helps toast the kataifi to a golden crisp.
- 16 oz milk chocolate (about 4 milk chocolate bars) – The milk chocolate forms the outer shell of the bar, offering smooth sweetness to contrast with the nutty filling.
- A pinch of salt – A small amount of salt helps to balance the sweetness of the chocolate.
Ingredient Notes:
- Pistachio cream: This can be found in specialty stores or online, and it’s made from ground pistachios. If you can’t find it, consider using almond butter or cashew butter as alternatives for a different flavor.
- Tahini: A pantry staple in many Middle Eastern recipes, tahini provides a depth of flavor. However, if it’s not to your taste, you can swap it out with peanut butter for a different flavor profile.
- Kataifi: While kataifi is traditionally used in Middle Eastern sweets, it can sometimes be tricky to find. If this happens, shredded phyllo dough works well as a substitute, though it may not give quite the same texture.
- Milk chocolate: If you prefer a less sweet treat, you can swap out the milk chocolate for dark chocolate or semi-sweet chocolate.
Step-by-Step Instructions
Now that you’ve gathered all the ingredients, let’s break down the process into easy-to-follow steps. Don’t worry—while there are a few stages, they’re all manageable, even for beginners.
Step 1: Prepare the chocolate
Start by melting half of the milk chocolate. You can do this using a double boiler or a microwave-safe bowl. If you’re using the microwave, heat the chocolate in 20-30 second bursts, stirring in between to prevent it from burning.
Pro Tip: To achieve that perfect, crisp snap when the chocolate sets, it’s helpful to temper it. Tempering involves slowly heating the chocolate to a specific temperature (not exceeding 90°F) to ensure it sets evenly and has a glossy finish. You can check the temperature using an instant-read thermometer.
Once the chocolate has melted, pour it into your chocolate bar molds, ensuring that the mold is well-coated. Let any excess drip off into a bowl, as this will be used for the top layer. Place the mold in the fridge to allow the chocolate to harden completely.
Step 2: Prepare the filling
While the chocolate is setting in the fridge, it’s time to make the filling. Heat a pan over medium heat and add the butter. Once it’s melted, add the kataifi (shredded phyllo dough). Stir frequently as the dough crisps up and turns golden. This should take about 5-7 minutes.
Once the kataifi is golden and crispy, remove it from the heat and place it in a large bowl. Add the tahini and pistachio cream to the kataifi and stir well to combine. You want the mixture to have a smooth, creamy consistency, with the crispy kataifi adding texture to the filling.
Step 3: Assemble the bars
Once your bottom layer of chocolate has hardened, remove it from the fridge. Spread a layer of the pistachio filling over the hardened chocolate, making sure to leave a small border around the edges. This will prevent the filling from oozing out when you add the top layer of chocolate.
Now, take the remaining half of your melted chocolate and pour it over the pistachio filling. Use an offset spatula to spread the chocolate evenly across the top, ensuring it covers the filling completely. You can give the mold a gentle shake to smooth the chocolate out further. Scrape off any excess chocolate using a bench scraper for a clean finish.
Place the mold back in the fridge for about an hour, or until the chocolate has fully set and the bars have hardened.
Step 4: Remove from molds and serve
Once your chocolate bars have set, carefully remove them from the molds. You’ll now have perfectly formed Pistachio Chocolate Bars, ready to be enjoyed.
Beginner Tips and Notes
- Tempering the chocolate: If you’re new to tempering chocolate, don’t worry! It’s optional, but it ensures that the chocolate has a smooth, glossy finish. If you don’t temper it, your bars will still taste great, just with a slightly less refined appearance.
- Chopping chocolate: If you find chopping chocolate to be time-consuming, consider using a food processor to speed up the process. It’s a real time-saver for beginners.
- Melted chocolate consistency: If the chocolate is too thick after melting, you can add a tiny bit of vegetable oil to thin it out, making it easier to pour into the molds.
- Storage: If you’re making these bars ahead of time or need to store leftovers, keep them in an airtight container in the fridge. They should last for up to a week. If you want to keep them longer, you can freeze them for up to three months. Just be sure to let them thaw in the fridge overnight before serving.
- Substitutions: If you’re unable to find pistachio cream or tahini, don’t hesitate to get creative. Nut butters like peanut butter, almond butter, or cashew butter can be used in place of pistachio cream. For the tahini, try using other nut butters or even a bit of Nutella for a different flavor.
Serving Suggestions
These Pistachio Chocolate Bars are indulgent and rich, making them a perfect standalone treat or an excellent addition to a dessert table. Here are a few ideas to elevate your meal:
- Main Dishes: These bars would pair beautifully with a variety of savory dishes, such as Panko-Crusted Salmon, Lemon Chicken Piccata, or Cast Iron Ribeye Steak. The rich sweetness of the chocolate contrasts wonderfully with savory flavors.
- Cakes and Pastries: Serve these chocolate bars alongside slices of Tiramisu Cake, Coffee Chocolate Mousse, or No-Bake Mini Cheesecakes. The sweetness of the chocolate bars will complement the richness of these desserts.
- Cookies: Pair these bars with cookies like Chewy Peanut Butter Oatmeal Cookies or White Chocolate Macadamia Nut Cookies for a satisfying dessert platter.
- Beverages: These chocolate bars go wonderfully with a hot beverage. Try pairing them with a cup of tea, coffee, or even a Pumpkin Spice Latte. For something more indulgent, serve them with a rich Hot Chocolate or Caramel Frappuccino.
Engagement Features
Making Pistachio Chocolate Bars at home is an enjoyable, beginner-friendly way to expand your dessert repertoire. The simple steps, flexibility in ingredients, and delicious outcome make it a perfect choice for anyone looking to impress friends or family with a homemade treat. Whether you’re a seasoned baker or just starting out, this recipe is sure to leave you feeling proud of your creation.
So, are you ready to try your hand at making these irresistible bars? Don’t hesitate to experiment with the flavors, try different chocolate varieties, or even swap in your favorite nut butter. Once you’ve made your bars, I’d love to hear how they turned out. Leave a comment below and share your thoughts, or tag me on social media to show off your sweet creations. Happy cooking!