If you’re a fan of Oreo cookies, you know that they’re more than just a sweet snack; they’re the perfect ingredient to take your dessert game to the next level. Imagine a frosting that’s not only rich and creamy but also bursting with the nostalgic crunch of Oreos—this Oreo Frosting is the dream topping for any treat.
Print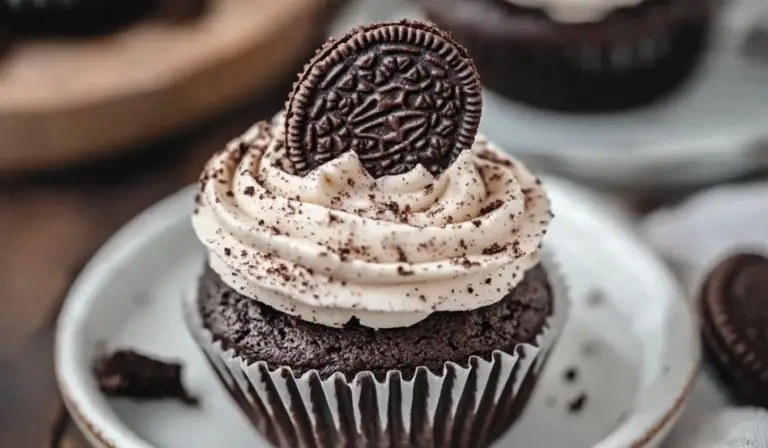
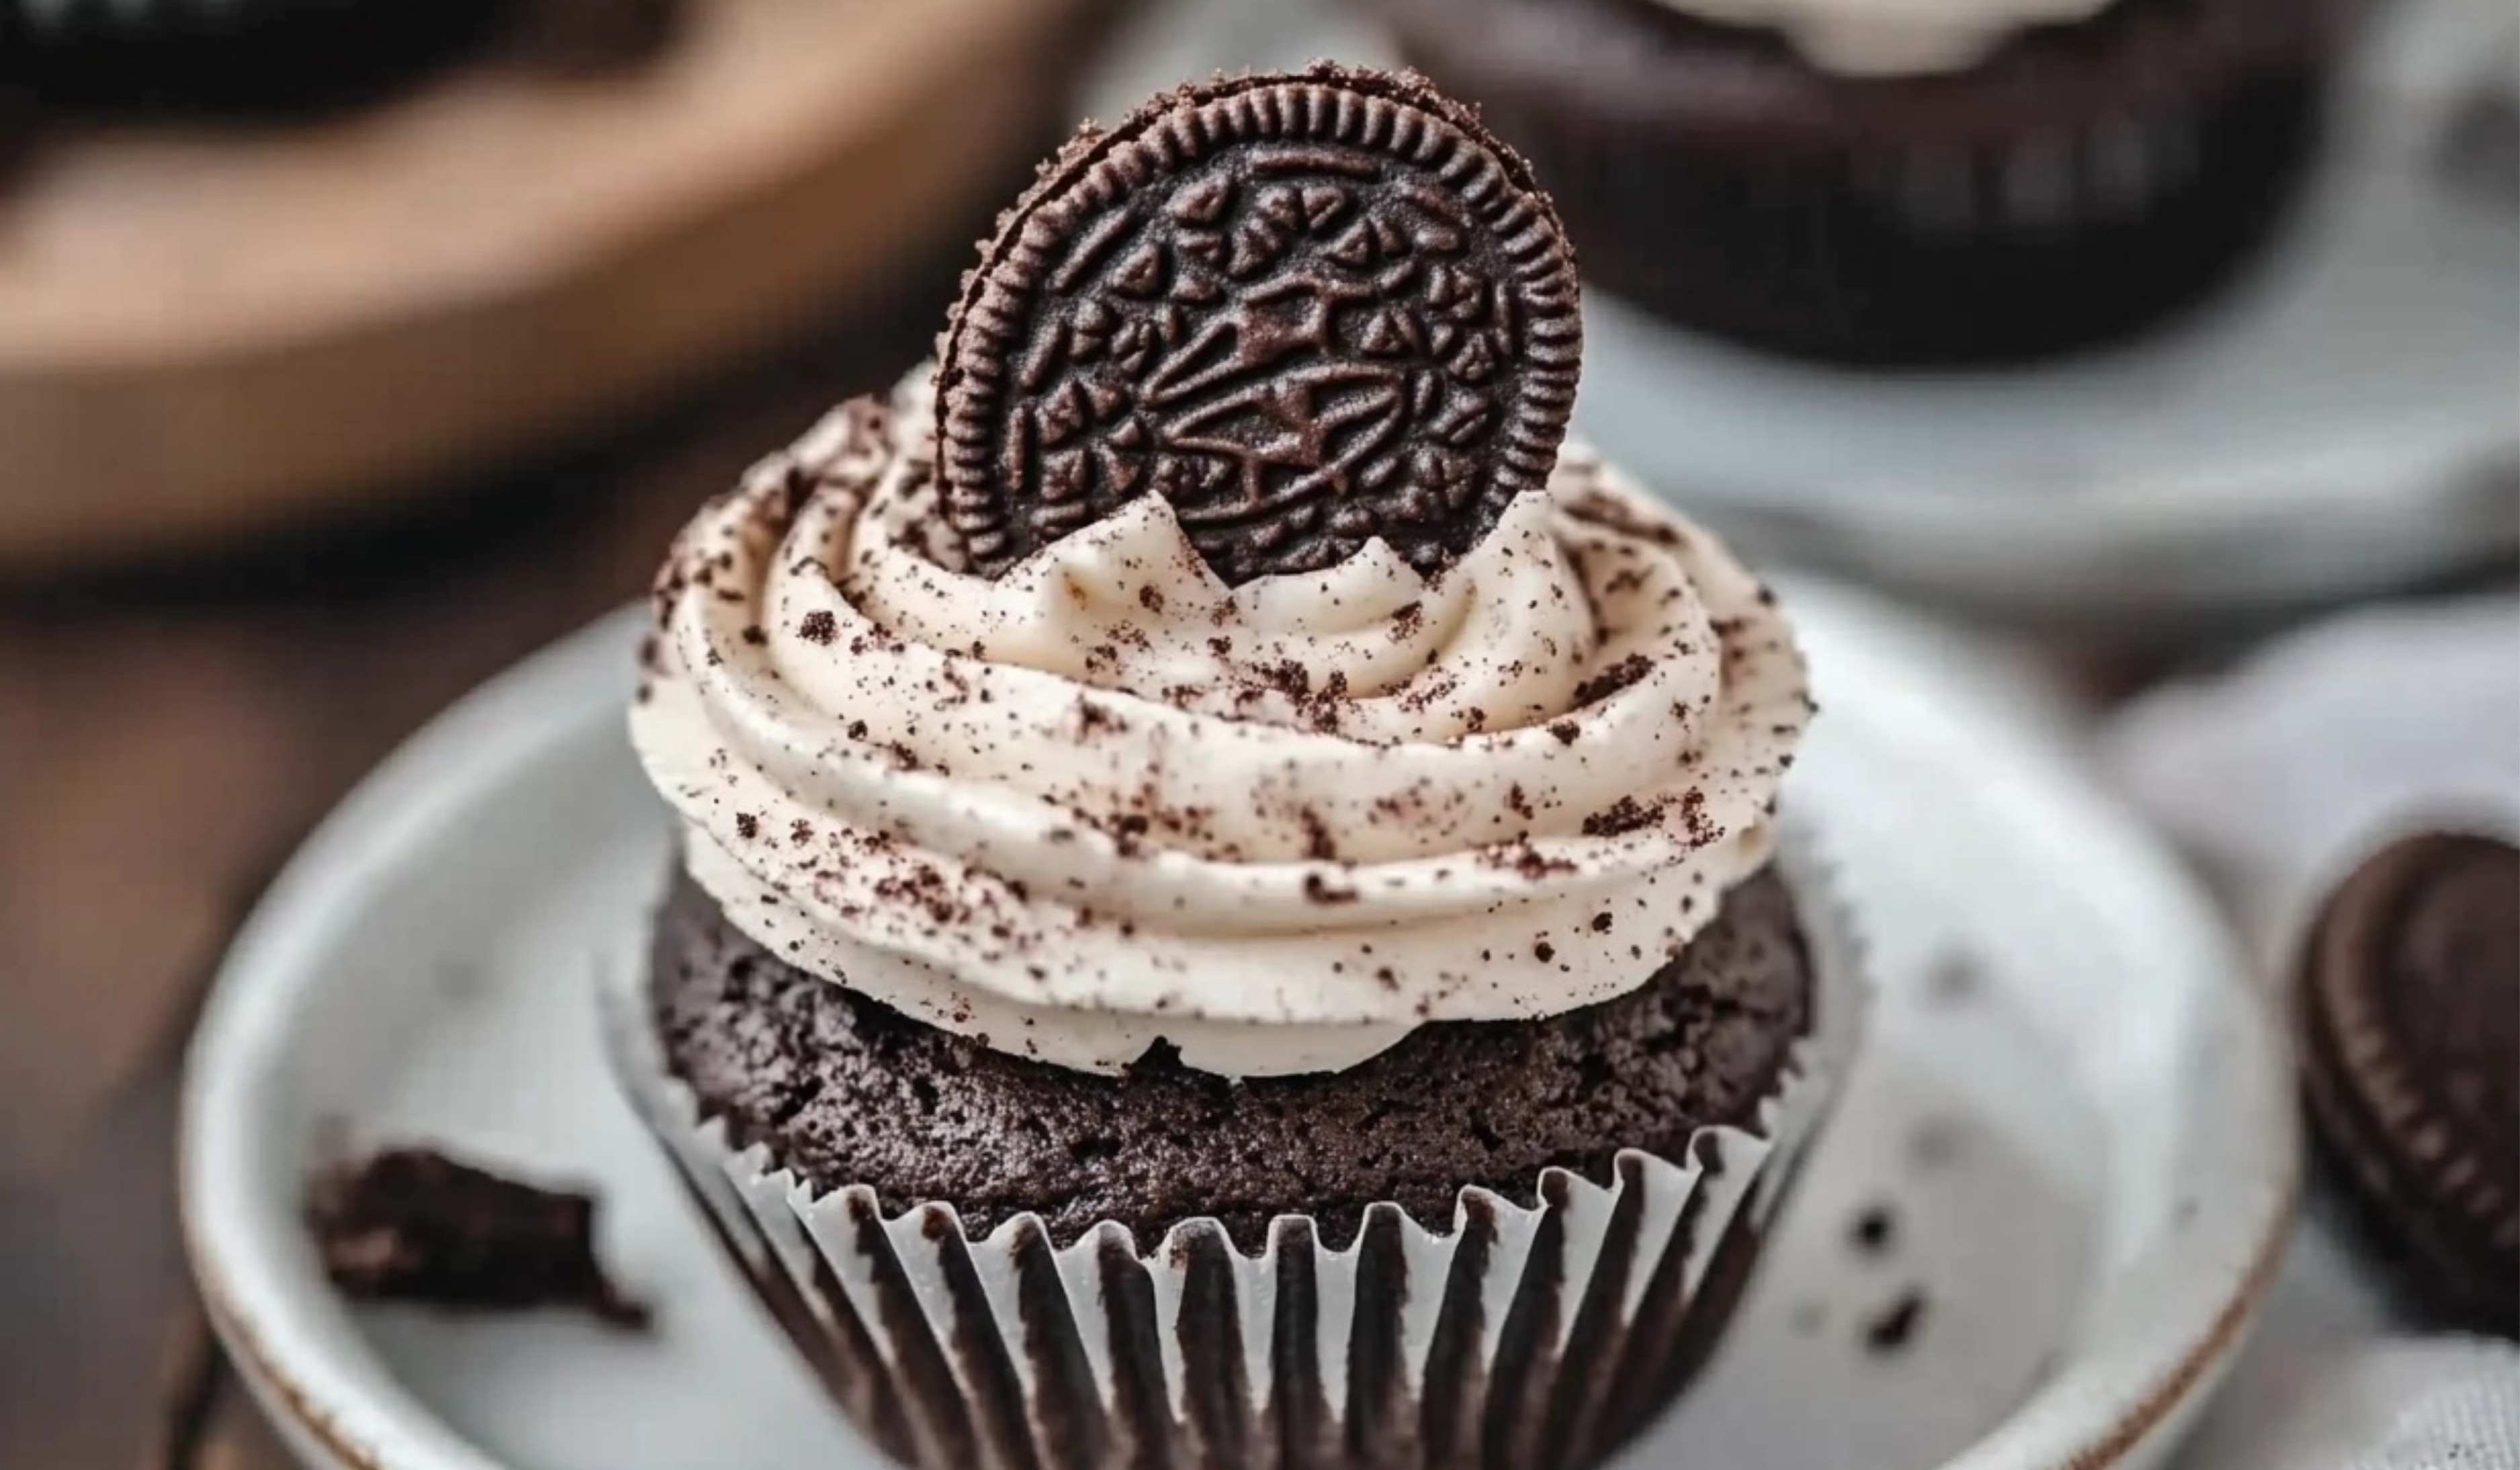
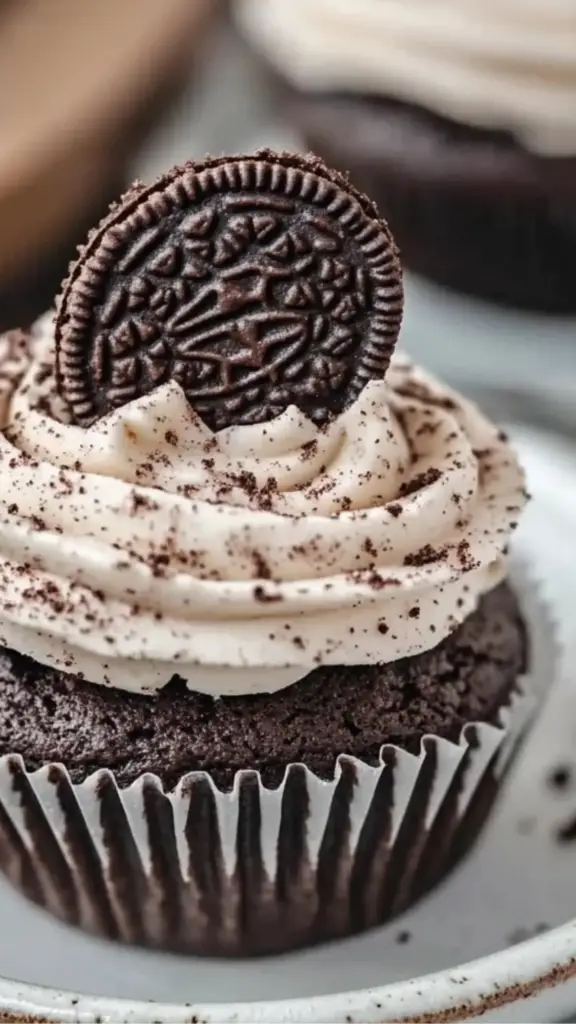
Oreo Frosting: A Creamy Dream Topping for Every Dessert
🍪💖 Oreo Frosting—because every dessert deserves a little extra sweetness! 🧁 This creamy frosting made with crushed Oreos is perfect for cakes, cupcakes, and cookies, bringing a delightful crunch and flavor that everyone will love. Sweet, simple, and oh-so-satisfying! 😋
#OreoDesserts #DreamyFrosting #CreamyDeliciousness #BakingMadeEasy #SweetTooth #OreoGoodness #FrostingLovers #QuickAndTasty #BakedWithLove #DessertPerfection 🍪💖
- Total Time: 20 minutes
- Yield: 12 servings 1x
Ingredients
- 10 Oreo cookies
You can use regular or double-stuffed Oreos. The filling adds a little extra creaminess to the frosting. No need to remove the filling—just use the whole cookie! - 1 cup unsalted butter (2 sticks), room temperature
Softened butter is key to achieving that light and fluffy texture that makes the frosting easy to spread. - 2 ½ cups powdered sugar
This ingredient is what makes the frosting sweet and gives it that smooth consistency. Be sure to sift it if there are any lumps. - 2 teaspoons vanilla extract
A splash of vanilla extract helps balance the sweetness and enhances the overall flavor of the frosting. - A pinch of salt
The salt helps cut through the sweetness and brings out the flavors of the other ingredients. - 2 tablespoons heavy whipping cream
Heavy cream adds richness and helps to achieve a silky, spreadable consistency.
Instructions
1. Prepare the Oreos
Place the 10 Oreo cookies into a food processor. Pulse until the cookies form fine crumbs. Don’t worry about removing the cream filling—just process the whole cookie. Be careful not to overprocess them, or you might end up with Oreo cookie butter, which is delicious but not quite the texture we want for frosting!
2. Cream the Butter
In a large mixing bowl, beat the room temperature butter using a hand mixer. Start on a low speed, then gradually increase to medium-high. Beat the butter for about 2-3 minutes until it’s light and fluffy. This step is crucial because it helps create a smooth base for the frosting.
3. Add the Powdered Sugar
Add the powdered sugar in increments of one cup at a time, mixing after each addition. This will help prevent a sugar cloud from forming when you start mixing. Continue to beat the butter and powdered sugar mixture until it’s smooth and well-combined. You should have a creamy, slightly thick texture.
4. Mix in the Vanilla and Oreo Crumbs
Add the vanilla extract to the bowl, followed by the Oreo cookie crumbs and a pinch of salt. Beat the mixture on high speed until everything is fully incorporated, and the frosting is light and fluffy. The cookie crumbs will add texture and flavor, so don’t be afraid if the frosting seems a little bit chunky.
5. Adjust the Texture
Next, add the heavy whipping cream, a tablespoon at a time, while beating on high speed. You’ll want to adjust the cream depending on the desired consistency. For thicker frosting, use less cream; for a smoother, more spreadable consistency, add a bit more cream. Continue to beat the frosting until it reaches a fluffy, easily spreadable texture.
6. Taste and Adjust
Before using your frosting, give it a taste test! If you find it needs more sweetness, add a little more powdered sugar. If it’s too thick, add a touch more cream. Remember, the frosting should have a balance of creamy richness and just the right amount of Oreo flavor.
Notes
- Don’t Overprocess the Oreos: While you want fine crumbs, processing the cookies too much will create a paste-like texture that’s harder to mix into the frosting. Keep an eye on it and pulse in short bursts.
- Room Temperature Butter is Key: Softened butter creates the best texture. If you forget to take it out of the fridge in time, you can cut it into small pieces to help it soften faster.
- Troubleshooting Runny Frosting: If your frosting turns out too runny, add more powdered sugar a little at a time to thicken it up. If it’s too thick, add a teaspoon of cream at a time to loosen it.
- Using a Stand Mixer: If you have a stand mixer, you can use it to make this frosting. Just be sure to scrape down the sides of the bowl a couple of times to ensure everything is well-mixed.
- Variations: To make this frosting even more decadent, you can add mini chocolate chips or a drizzle of melted chocolate into the frosting. If you love a minty twist, a few drops of peppermint extract will give it a fresh vibe!
- Prep Time: 10 minutes
- Cook Time: 10 minutes
Whether you’re topping cupcakes, cakes, or even using it as a dip, this frosting has a rich, velvety texture with just the right amount of sweetness. It’s perfect for beginner bakers because it’s incredibly easy to make, and the results are always impressive. In this article, we’ll walk you through the simple steps to create this Oreo Frosting from scratch, along with some beginner-friendly tips and serving suggestions to make the most of your frosting experience.
Why Oreo Frosting is Perfect for Beginners
When it comes to baking, frosting can often be an afterthought. However, with this Oreo Frosting, the process is straightforward and beginner-friendly. You don’t need to worry about complicated techniques or hard-to-find ingredients—just a handful of easy-to-find items that will make your desserts shine. Plus, the mix of creamy butter, sweet powdered sugar, and crunchy Oreo bits means you can’t go wrong.
Making frosting from scratch is a great way to control the texture and flavor, and this Oreo version doesn’t require fancy equipment—just a food processor and a hand mixer. The hands-on approach allows you to really see and feel the frosting come together, giving you a sense of accomplishment. Whether you’re preparing for a birthday party, a casual family dessert, or just treating yourself, this frosting will make your desserts stand out.
Ingredients and Preparation
This Oreo Frosting requires only a few simple ingredients, which you likely already have in your kitchen. Here’s what you’ll need to make enough frosting to cover 12 cupcakes or a small cake:
Ingredients:
- 10 Oreo cookiesYou can use regular or double-stuffed Oreos. The filling adds a little extra creaminess to the frosting. No need to remove the filling—just use the whole cookie!
- 1 cup unsalted butter (2 sticks), room temperatureSoftened butter is key to achieving that light and fluffy texture that makes the frosting easy to spread.
- 2 ½ cups powdered sugarThis ingredient is what makes the frosting sweet and gives it that smooth consistency. Be sure to sift it if there are any lumps.
- 2 teaspoons vanilla extractA splash of vanilla extract helps balance the sweetness and enhances the overall flavor of the frosting.
- A pinch of saltThe salt helps cut through the sweetness and brings out the flavors of the other ingredients.
- 2 tablespoons heavy whipping creamHeavy cream adds richness and helps to achieve a silky, spreadable consistency.
Alternative Ingredient Suggestions:
- If you’re looking for a dairy-free version, you can substitute the unsalted butter with a dairy-free butter alternative and the heavy cream with coconut cream.
- For a lower-sugar version, you could experiment with using powdered monk fruit sweetener or another sugar alternative, though this may slightly alter the texture.
- Want to try a different flavor? Add a teaspoon of mint extract to bring a fresh twist to the frosting.
Step-by-Step Instructions
Now that we have everything ready, let’s dive into the simple steps for making this creamy Oreo Frosting. These instructions are designed to be easy to follow, even for beginners, and will guide you through the process from start to finish.
1. Prepare the Oreos
Place the 10 Oreo cookies into a food processor. Pulse until the cookies form fine crumbs. Don’t worry about removing the cream filling—just process the whole cookie. Be careful not to overprocess them, or you might end up with Oreo cookie butter, which is delicious but not quite the texture we want for frosting!
2. Cream the Butter
In a large mixing bowl, beat the room temperature butter using a hand mixer. Start on a low speed, then gradually increase to medium-high. Beat the butter for about 2-3 minutes until it’s light and fluffy. This step is crucial because it helps create a smooth base for the frosting.
3. Add the Powdered Sugar
Add the powdered sugar in increments of one cup at a time, mixing after each addition. This will help prevent a sugar cloud from forming when you start mixing. Continue to beat the butter and powdered sugar mixture until it’s smooth and well-combined. You should have a creamy, slightly thick texture.
4. Mix in the Vanilla and Oreo Crumbs
Add the vanilla extract to the bowl, followed by the Oreo cookie crumbs and a pinch of salt. Beat the mixture on high speed until everything is fully incorporated, and the frosting is light and fluffy. The cookie crumbs will add texture and flavor, so don’t be afraid if the frosting seems a little bit chunky.
5. Adjust the Texture
Next, add the heavy whipping cream, a tablespoon at a time, while beating on high speed. You’ll want to adjust the cream depending on the desired consistency. For thicker frosting, use less cream; for a smoother, more spreadable consistency, add a bit more cream. Continue to beat the frosting until it reaches a fluffy, easily spreadable texture.
6. Taste and Adjust
Before using your frosting, give it a taste test! If you find it needs more sweetness, add a little more powdered sugar. If it’s too thick, add a touch more cream. Remember, the frosting should have a balance of creamy richness and just the right amount of Oreo flavor.
Beginner Tips and Notes
- Don’t Overprocess the Oreos: While you want fine crumbs, processing the cookies too much will create a paste-like texture that’s harder to mix into the frosting. Keep an eye on it and pulse in short bursts.
- Room Temperature Butter is Key: Softened butter creates the best texture. If you forget to take it out of the fridge in time, you can cut it into small pieces to help it soften faster.
- Troubleshooting Runny Frosting: If your frosting turns out too runny, add more powdered sugar a little at a time to thicken it up. If it’s too thick, add a teaspoon of cream at a time to loosen it.
- Using a Stand Mixer: If you have a stand mixer, you can use it to make this frosting. Just be sure to scrape down the sides of the bowl a couple of times to ensure everything is well-mixed.
- Variations: To make this frosting even more decadent, you can add mini chocolate chips or a drizzle of melted chocolate into the frosting. If you love a minty twist, a few drops of peppermint extract will give it a fresh vibe!
Serving Suggestions
This Oreo Frosting can be used on a variety of desserts, including:
- Cupcakes: Top your favorite vanilla or chocolate cupcakes with a generous swirl of this Oreo frosting. The contrast between the soft, fluffy cake and the creamy, crunchy frosting is simply divine.
- Cakes: Spread this frosting between layers of a moist chocolate or vanilla cake for a delicious Oreo-flavored treat.
- Cookies: Use it as a filling for sandwich cookies or even pair it with some classic sugar cookies.
- Brownies: For a more indulgent dessert, spread this Oreo Frosting over brownies before serving. It will take your chocolatey treats to a whole new level.
If you’re storing leftovers, place the frosting in an airtight container and refrigerate for up to 5 days. You can also freeze it for up to 2 months. Just be sure to let it come to room temperature before spreading or using it.
Conclusion: Give It a Try and Share Your Thoughts
Oreo Frosting is the perfect, easy-to-make topping that adds a delicious, creamy crunch to your baked goods. It’s a great recipe for beginners, offering a quick yet satisfying result with minimal ingredients and effort. Whether you’re making cupcakes for a party, baking a cake for a family gathering, or just treating yourself to something special, this frosting will make your dessert the star of the show.
So, give this Oreo Frosting a try, and feel free to experiment with variations! I’d love to hear how it turns out for you. Share your experiences and photos in the comments—I’m sure fellow bakers would love to see your creations. Happy baking!