
a light, airy dessert layered with fluffy angel food cake, rich cheesecake filling, and fresh, juicy berries—all without ever turning on the oven. This No-Bake Berry Trifle is a beginner-friendly recipe that delivers elegance with ease. Whether you’re preparing for a summer gathering, a festive holiday like the 4th of July, or just want to enjoy a refreshing treat, this dessert is the perfect choice.
Print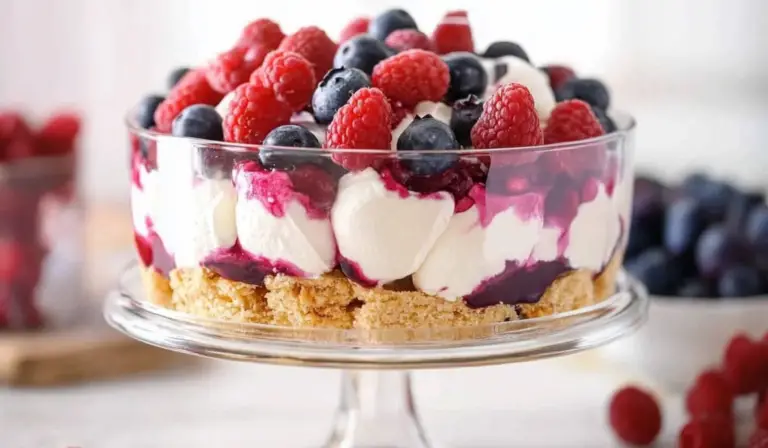
No-Bake Berry Trifle: A Simple and Elegant Dessert for Beginners
Dreaming of a light, fruity, and effortless dessert? This No-Bake Berry Trifle is a must-try! With layers of fresh berries, soft cake, and silky cream, it’s the perfect mix of refreshing and indulgent. No oven? No problem! This quick and easy dessert is beginner-approved and guaranteed to impress. Serve it in a big dish or make individual cups for a stunning presentation!
#BerryTrifleMagic #NoBakeDelight #EasyAndElegant #FreshAndFruity #LayersOfFlavor #CreamyAndDreamy #SimpleYetDelicious #HomemadeDessert #QuickAndTasty #BeginnerBaking
- Total Time: 25 minutes
- Yield: 8–10 servings 1x
Ingredients
- 16 ounces cream cheese (softened)
- 1 ¼ cups powdered sugar
- 1 teaspoon vanilla extract
- 2 cups heavy whipping cream (cold)
- 1 angel food cake (cut into 1-inch cubes, homemade or store-bought)
- 1 pint fresh blueberries
- 1 pint fresh strawberries (sliced)
Instructions
Step 1: Prepare the Cheesecake Filling
Start by placing the softened cream cheese in a large mixing bowl. Using a stand mixer fitted with a whisk attachment (or a handheld mixer), beat the cream cheese on medium speed until it becomes smooth and creamy. This step helps eliminate lumps and ensures a silky texture in the filling.
Next, add the powdered sugar and vanilla extract to the cream cheese. Continue mixing until fully combined, making sure to scrape down the sides of the bowl to incorporate all the ingredients evenly.
Step 2: Whip the Heavy Cream
Pour the cold heavy whipping cream into the cream cheese mixture. Beat on medium speed until the mixture thickens and soft peaks form. Be patient—this step may take a few minutes.
How to Tell When the Cream is Ready:
- The mixture should be thick enough to hold its shape when lifted with a spoon.
- It should have a light, fluffy texture but still be spreadable.
- If overmixed, it can become too stiff, so stop beating as soon as soft peaks form.
Once the cheesecake filling is ready, set it aside.
Step 3: Assemble the Trifle
Now comes the fun part—assembling the layers!
- First Layer: Spread half of the cubed angel food cake evenly across the bottom of a large trifle dish. Lightly press it down to create a stable base.
- Cheesecake Layer: Spoon half of the cheesecake filling over the cake, spreading it out in an even layer.
- Berry Layer: Sprinkle half of the blueberries over the filling, reserving a few for garnish if desired.
- Repeat the Layers: Add the remaining angel food cake on top of the blueberries, followed by the rest of the cheesecake filling.
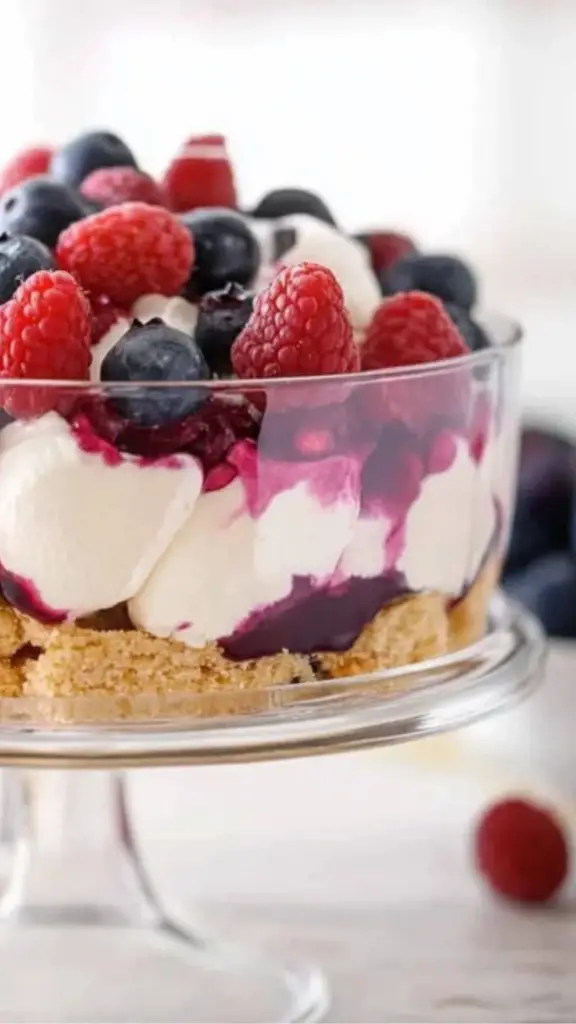
- Final Layer: Top with sliced strawberries and any reserved blueberries for a colorful and decorative finish.
Step 4: Chill and Serve
Once assembled, cover the trifle tightly and refrigerate for at least one hour before serving. Chilling helps the flavors meld together and allows the cheesecake filling to firm up slightly.
For best results, serve the trifle cold. Use a large serving spoon to scoop portions into bowls or dessert glasses, making sure each serving has all the delicious layers.
Notes
- How to Avoid a Runny Filling: If your filling is too loose, refrigerate it for 15–20 minutes before assembling the trifle. Cold ingredients help it firm up.
- What to Do if the Cake Becomes Too Soggy: If you’re making the trifle more than a day in advance, keep the cake and filling separate until a few hours before serving. This prevents excess moisture from soaking into the cake.
- How to Save Time: Buy pre-cubed angel food cake from the store to cut down on prep time.
- Serving Individual Portions: Instead of using a large trifle dish, try layering the dessert in small glass cups or mason jars for an elegant presentation.
- Prep Time: 25 minutes
For those who are new to cooking, this recipe is an excellent starting point. It requires no baking skills, comes together quickly, and delivers a beautifully layered dessert that looks far more complicated than it actually is. The balance of textures—the softness of the cake, the creaminess of the filling, and the slight tartness of the berries—creates a flavor harmony that’s hard to resist.
In this article, we’ll walk you through every step of making this No-Bake Berry Trifle, from selecting the best ingredients to assembling and serving it like a pro. We’ll also share essential tips to ensure success, troubleshooting advice for common issues, and ideas for customizing the recipe to suit your preferences. By the end, you’ll have all the knowledge you need to create a show-stopping dessert with confidence.
Ingredients and Preparation
Ingredients
To make this delicious no-bake trifle, you will need:
- 16 ounces cream cheese (softened)
- 1 ¼ cups powdered sugar
- 1 teaspoon vanilla extract
- 2 cups heavy whipping cream (cold)
- 1 angel food cake (cut into 1-inch cubes, homemade or store-bought)
- 1 pint fresh blueberries
- 1 pint fresh strawberries (sliced)
Ingredient Substitutions and Variations
- Cake Alternatives: While angel food cake is light and airy, you can also use pound cake or sponge cake for a richer texture.
- Berry Swaps: You can substitute blackberries, raspberries, or even thinly sliced mango for a different flavor profile.
- Dairy-Free Version: Use dairy-free cream cheese and a coconut-based whipped topping instead of heavy cream.
- Sweeter Filling: If you prefer a sweeter cheesecake layer, add an extra ¼ cup of powdered sugar or drizzle honey into the mixture.
By making small adjustments to the ingredients, you can tailor this recipe to match your taste preferences while keeping the process just as simple.
Step-by-Step Instructions
Step 1: Prepare the Cheesecake Filling
Start by placing the softened cream cheese in a large mixing bowl. Using a stand mixer fitted with a whisk attachment (or a handheld mixer), beat the cream cheese on medium speed until it becomes smooth and creamy. This step helps eliminate lumps and ensures a silky texture in the filling.
Next, add the powdered sugar and vanilla extract to the cream cheese. Continue mixing until fully combined, making sure to scrape down the sides of the bowl to incorporate all the ingredients evenly.
Step 2: Whip the Heavy Cream
Pour the cold heavy whipping cream into the cream cheese mixture. Beat on medium speed until the mixture thickens and soft peaks form. Be patient—this step may take a few minutes.
How to Tell When the Cream is Ready:
- The mixture should be thick enough to hold its shape when lifted with a spoon.
- It should have a light, fluffy texture but still be spreadable.
- If overmixed, it can become too stiff, so stop beating as soon as soft peaks form.
Once the cheesecake filling is ready, set it aside.
Step 3: Assemble the Trifle
Now comes the fun part—assembling the layers!
- First Layer: Spread half of the cubed angel food cake evenly across the bottom of a large trifle dish. Lightly press it down to create a stable base.
- Cheesecake Layer: Spoon half of the cheesecake filling over the cake, spreading it out in an even layer.
- Berry Layer: Sprinkle half of the blueberries over the filling, reserving a few for garnish if desired.
- Repeat the Layers: Add the remaining angel food cake on top of the blueberries, followed by the rest of the cheesecake filling.
- Final Layer: Top with sliced strawberries and any reserved blueberries for a colorful and decorative finish.
Step 4: Chill and Serve
Once assembled, cover the trifle tightly and refrigerate for at least one hour before serving. Chilling helps the flavors meld together and allows the cheesecake filling to firm up slightly.
For best results, serve the trifle cold. Use a large serving spoon to scoop portions into bowls or dessert glasses, making sure each serving has all the delicious layers.
Beginner Tips and Notes
- How to Avoid a Runny Filling: If your filling is too loose, refrigerate it for 15–20 minutes before assembling the trifle. Cold ingredients help it firm up.
- What to Do if the Cake Becomes Too Soggy: If you’re making the trifle more than a day in advance, keep the cake and filling separate until a few hours before serving. This prevents excess moisture from soaking into the cake.
- How to Save Time: Buy pre-cubed angel food cake from the store to cut down on prep time.
- Serving Individual Portions: Instead of using a large trifle dish, try layering the dessert in small glass cups or mason jars for an elegant presentation.
Serving Suggestions
This No-Bake Berry Trifle is already a complete dessert, but you can elevate it even further with these serving ideas:
- Add a Drizzle: Lightly drizzle honey, caramel, or a berry coulis over the top for extra flavor.
- Top with Crunchy Elements: Sprinkle toasted almonds, crushed graham crackers, or white chocolate shavings for added texture.
- Pair with a Beverage: Serve alongside a cold glass of iced coffee, lemonade, or a light herbal tea for a refreshing contrast.
Storage Tips
- Store leftovers in an airtight container in the refrigerator for up to two days. Over time, the cake will soften as it absorbs the moisture from the filling.
- If you need to prepare the trifle in advance, consider assembling the layers separately and combining them a few hours before serving.
Why This Recipe is Perfect for Beginners
Many desserts require precise baking techniques, but this No-Bake Berry Trifle removes all the guesswork. Here’s why it’s an ideal choice for new cooks:
- No Baking Required: You don’t have to worry about oven temperatures, baking times, or complicated steps.
- Minimal Ingredients: With just a handful of basic ingredients, it’s easy to put together without an extensive shopping list.
- Customizable: You can easily switch up the cake, berries, or flavors to suit your preferences.
- Visually Impressive: Despite its simplicity, the layered presentation makes it look like a professionally made dessert.
For beginners, this recipe is an excellent confidence booster. It teaches essential skills like whipping cream, layering textures, and balancing flavors—all in a low-pressure, fail-proof way.
Conclusion
The No-Bake Berry Trifle is a perfect example of how simple ingredients and easy techniques can come together to create something extraordinary. Whether you’re making it for a special occasion or just treating yourself, this dessert is sure to impress.
If you try this recipe, share your experience in the comments. What berries did you use? Did you make any creative variations? Cooking is all about experimentation and enjoyment, and this trifle is a fantastic starting point. Happy cooking!