
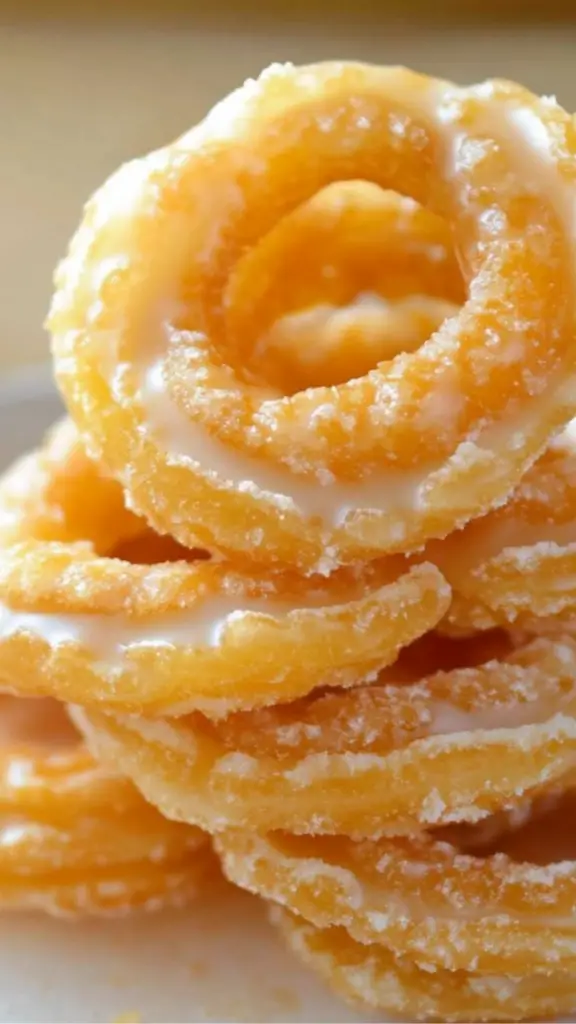
There is something truly special about homemade donuts. The crisp, golden exterior combined with a light and airy interior creates an irresistible treat. Unlike traditional yeast donuts, French crullers have a unique texture that makes them feel almost weightless when you take a bite. Their delicate nature, paired with a sweet honey glaze, makes them a favorite among pastry lovers.
Print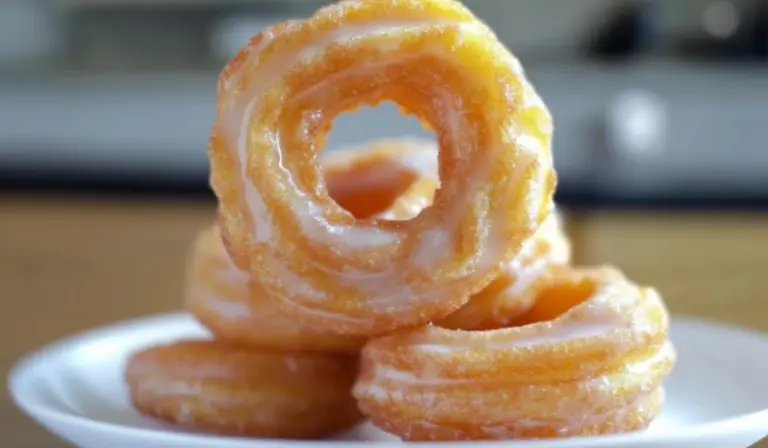
Homemade Honey Cruller Donuts: A Beginner’s Guide to Light and Fluffy Perfection
Crispy on the outside, airy on the inside—these Homemade Honey Cruller Donuts are pure perfection! 🍯🍩 Master the art of making light, golden crullers at home with this beginner-friendly guide. Soft, sweet, and absolutely irresistible!
- Total Time: 35 minutes
- Yield: 18 crullers 1x
Ingredients
For the Dough
- 1 cup water
- 6 tablespoons butter
- 2 tablespoons sugar
- 1 cup all-purpose flour
- 3 eggs
- Vegetable oil for frying
For the Honey Glaze
- 1 ½ cups powdered sugar
- 1 tablespoon honey
- 4 tablespoons milk
Instructions
Making the Choux Dough
- In a small saucepan, combine water, butter, and sugar. Bring to a boil over medium heat, ensuring the butter melts completely.
- Once the mixture reaches a rolling boil, reduce the heat to low and add the flour all at once. Stir vigorously with a whisk to incorporate the ingredients.
- Switch to a wooden spoon and continue stirring as the dough thickens. Cook for 1–2 minutes, stirring constantly, until the dough pulls away from the sides of the pan and forms a cohesive ball. A thin film should develop on the bottom of the pan, indicating that the flour has cooked properly.
- Transfer the hot dough to the bowl of a stand mixer fitted with a paddle attachment. Mix on medium speed for about a minute to allow the dough to cool slightly.
- Add the eggs one at a time, mixing well after each addition. The dough should become smooth and glossy. It should have a thick consistency but still be pipeable.
Shaping the Donuts
- Cut parchment paper into 3 x 3-inch squares. You will need one square for each donut.
- Transfer the dough to a piping bag fitted with a large star tip. Pipe circles of dough onto each parchment square, ensuring the ends meet without overlapping.
- Set the piped donuts aside while heating the oil.
Frying the Crullers
- In a deep fryer or heavy-bottomed pot, heat vegetable oil to 375°F (190°C). Use a kitchen thermometer to monitor the temperature, as oil that is too hot will burn the donuts, while oil that is too cool will result in greasy crullers.
- Carefully place one or two donuts, paper-side up, into the hot oil. The parchment paper will detach within a few seconds and can be removed with tongs.
- Fry the donuts for about 2–3 minutes on one side until they turn a deep golden brown. Flip and fry for another 2–3 minutes on the other side.
- Use a slotted spoon or tongs to transfer the cooked donuts to a wire rack or a plate lined with paper towels. Let them cool completely before glazing.
Making the Honey Glaze
- In a small bowl, whisk together powdered sugar, honey, and milk until smooth. Adjust the consistency by adding more milk if needed.
- Dip the top of each cooled donut into the glaze, allowing any excess to drip off.
- Place the glazed donuts on a wire rack and let the glaze set completely before serving.
Notes
Common Troubleshooting Advice
- Dough Too Thick or Too Thin: If the dough is too stiff, add an extra egg. If it is too runny, mix in a small amount of additional flour.
- Donuts Absorbing Too Much Oil: Ensure the oil is at the correct temperature. If the oil is too cool, the crullers will absorb excess grease.
- Uneven Browning: Rotate the donuts while frying to achieve an even color.
- Raw Centers: If the outside browns too quickly while the inside remains doughy, lower the oil temperature slightly and extend the frying time.
Efficient Kitchen Prep
- Use a piping bag for uniform donuts. If you do not have one, a resealable plastic bag with the corner cut off can work as an alternative.
- Prepare all ingredients before starting to streamline the process.
- Use a thermometer to maintain consistent frying temperature.
- Prep Time: 15 minutes
- Cook Time: 20 minutes
For many beginner cooks, making donuts at home may seem intimidating, but this recipe is surprisingly simple. The dough is made using choux pastry, the same type used for cream puffs and éclairs. This method does not require yeast or long proofing times, making it ideal for those who want quick and delicious results.
This guide will walk you through the entire process, from preparing the dough to frying and glazing the crullers. With easy-to-follow instructions, troubleshooting tips, and practical kitchen advice, you will be able to create bakery-quality donuts in your own kitchen.
Why This Recipe is Perfect for Beginners
One of the biggest challenges for new bakers is working with yeast-based doughs that require proofing and precise temperature control. This recipe eliminates those difficulties by using choux pastry, which comes together quickly on the stovetop and does not require any rising time.
Additionally, this method is forgiving. If the dough seems too thick or too thin, small adjustments can be made to achieve the right consistency. The frying process is straightforward, and with a few key techniques, you can ensure perfect results every time.
Another advantage of this recipe is its versatility. While the classic honey glaze enhances the crullers with a subtle sweetness, you can customize them with different toppings or flavors. Whether you want to add a drizzle of chocolate, a dusting of cinnamon sugar, or a touch of citrus zest, these donuts can be adapted to suit any preference.
Ingredients and Substitutions
For the Dough
- 1 cup water
- 6 tablespoons butter
- 2 tablespoons sugar
- 1 cup all-purpose flour
- 3 eggs
- Vegetable oil for frying
For the Honey Glaze
- 1 ½ cups powdered sugar
- 1 tablespoon honey
- 4 tablespoons milk
Alternative Ingredients for Flexibility
- Butter Substitute: If you prefer a dairy-free version, you can use margarine or a plant-based butter alternative.
- Flour Alternatives: While all-purpose flour works best for achieving the right texture, you can experiment with gluten-free flour blends.
- Sugar Variations: Regular white sugar is recommended, but brown sugar can add a deeper caramel-like flavor.
- Milk Options: If you are lactose intolerant, almond milk, oat milk, or coconut milk can be used in the glaze.
Step-by-Step Instructions
Making the Choux Dough
- In a small saucepan, combine water, butter, and sugar. Bring to a boil over medium heat, ensuring the butter melts completely.
- Once the mixture reaches a rolling boil, reduce the heat to low and add the flour all at once. Stir vigorously with a whisk to incorporate the ingredients.
- Switch to a wooden spoon and continue stirring as the dough thickens. Cook for 1–2 minutes, stirring constantly, until the dough pulls away from the sides of the pan and forms a cohesive ball. A thin film should develop on the bottom of the pan, indicating that the flour has cooked properly.
- Transfer the hot dough to the bowl of a stand mixer fitted with a paddle attachment. Mix on medium speed for about a minute to allow the dough to cool slightly.
- Add the eggs one at a time, mixing well after each addition. The dough should become smooth and glossy. It should have a thick consistency but still be pipeable.
Shaping the Donuts
- Cut parchment paper into 3 x 3-inch squares. You will need one square for each donut.
- Transfer the dough to a piping bag fitted with a large star tip. Pipe circles of dough onto each parchment square, ensuring the ends meet without overlapping.
- Set the piped donuts aside while heating the oil.
Frying the Crullers
- In a deep fryer or heavy-bottomed pot, heat vegetable oil to 375°F (190°C). Use a kitchen thermometer to monitor the temperature, as oil that is too hot will burn the donuts, while oil that is too cool will result in greasy crullers.
- Carefully place one or two donuts, paper-side up, into the hot oil. The parchment paper will detach within a few seconds and can be removed with tongs.
- Fry the donuts for about 2–3 minutes on one side until they turn a deep golden brown. Flip and fry for another 2–3 minutes on the other side.
- Use a slotted spoon or tongs to transfer the cooked donuts to a wire rack or a plate lined with paper towels. Let them cool completely before glazing.
Making the Honey Glaze
- In a small bowl, whisk together powdered sugar, honey, and milk until smooth. Adjust the consistency by adding more milk if needed.
- Dip the top of each cooled donut into the glaze, allowing any excess to drip off.
- Place the glazed donuts on a wire rack and let the glaze set completely before serving.
Beginner Tips and Notes
Common Troubleshooting Advice
- Dough Too Thick or Too Thin: If the dough is too stiff, add an extra egg. If it is too runny, mix in a small amount of additional flour.
- Donuts Absorbing Too Much Oil: Ensure the oil is at the correct temperature. If the oil is too cool, the crullers will absorb excess grease.
- Uneven Browning: Rotate the donuts while frying to achieve an even color.
- Raw Centers: If the outside browns too quickly while the inside remains doughy, lower the oil temperature slightly and extend the frying time.
Efficient Kitchen Prep
- Use a piping bag for uniform donuts. If you do not have one, a resealable plastic bag with the corner cut off can work as an alternative.
- Prepare all ingredients before starting to streamline the process.
- Use a thermometer to maintain consistent frying temperature.
Serving Suggestions
To elevate the flavor and presentation of your crullers, consider pairing them with the following:
- Beverage Pairings: Enjoy with a hot cup of coffee, tea, or warm spiced milk.
- Additional Toppings: Sprinkle with crushed nuts, drizzle with chocolate, or dust with cinnamon sugar.
- Side Dishes: Serve with fresh fruit or a yogurt dip for a balanced treat.
Storage Tips for Leftovers
While crullers are best enjoyed fresh, they can be stored properly to maintain their texture:
- Room Temperature: Store in an airtight container for up to one day.
- Refrigeration: Avoid refrigerating, as this can make the donuts soggy.
- Freezing: If you need to store them longer, freeze unglazed crullers in a sealed bag for up to one month. Reheat in an oven before glazing.
Conclusion
Homemade honey cruller donuts are a delightful treat that can be easily mastered by beginners. With their crisp exterior, airy interior, and sweet honey glaze, they provide a bakery-quality experience at home. By following these step-by-step instructions and tips, you can confidently create light, fluffy crullers without the need for specialized skills or equipment.
Now it’s your turn to try this recipe. Have you made crullers before? Share your experience, questions, or variations in the comments. Enjoy baking and happy cooking!