
If you’re a fan of peanut butter and chocolate, there’s a good chance you’ve indulged in peanut butter cups more times than you can count. But while store-bought versions like Reese’s may hit the sweet spot, they often come with a long list of processed ingredients—refined sugars, hydrogenated oils, preservatives, and artificial flavors.
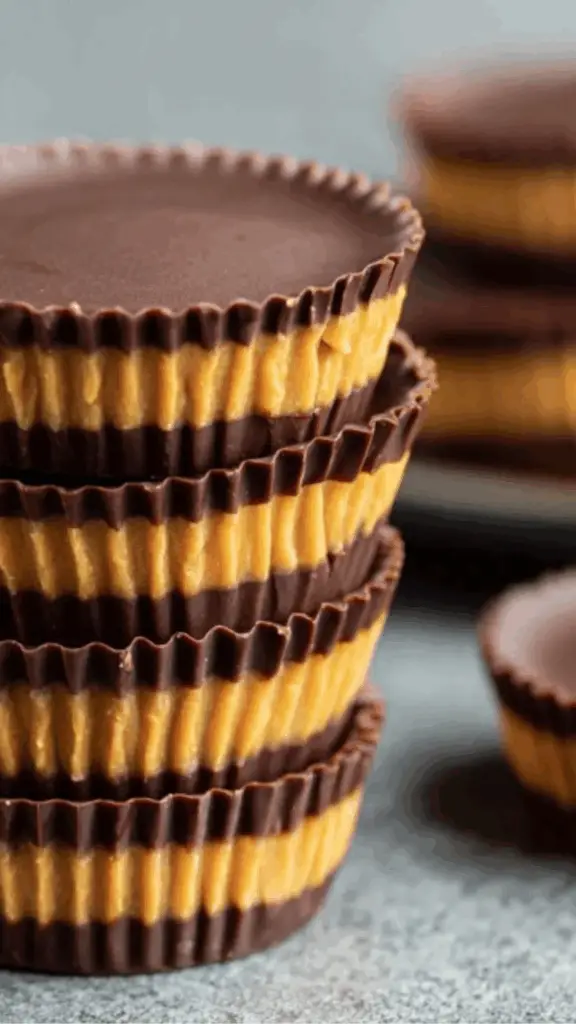
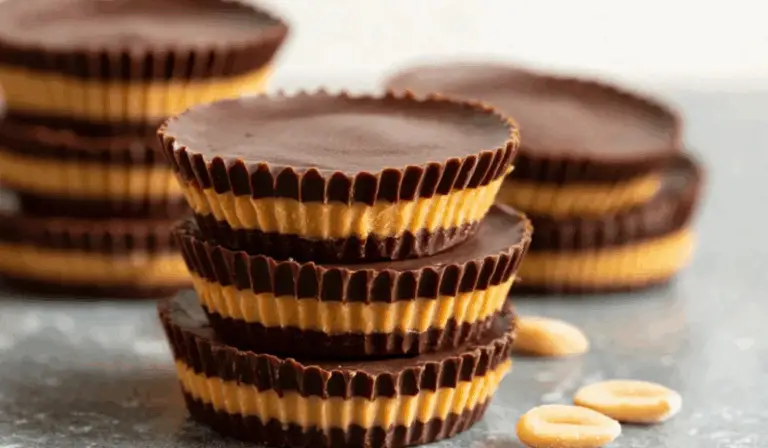
This homemade peanut butter cup recipe strips all that away, leaving you with a cleaner, healthier version that’s just as satisfying. With only five ingredients and no baking required, this dessert is beginner-friendly, quick to prepare, and easy to customize. The result? A perfectly balanced treat with a crisp chocolate shell and a creamy peanut butter center—made with real, whole ingredients.
Whether you’re looking to satisfy a sweet craving, prep snacks for the week, or impress friends with a no-fuss dessert, these peanut butter cups are an excellent option. They’re also:
- Naturally gluten-free
- Vegetarian (and easily vegan-friendly)
- Made without refined sugar
- Stored in the fridge or freezer for convenience
Let’s walk through how to create these indulgent-yet-nourishing treats step by step.
Ingredients and Preparation
Ingredients (Makes 10–12 peanut butter cups)
Chocolate Layer:
- 1 cup dark chocolate chips
- 1 tablespoon coconut oil
Peanut Butter Filling:
- ½ cup natural peanut butter (unsweetened, smooth or crunchy)
- 1 tablespoon honey or maple syrup
- ¼ teaspoon vanilla extract (optional)
- Pinch of sea salt
Note: Use maple syrup and dairy-free chocolate chips to make these fully vegan.
Equipment Needed
- Muffin tin
- Silicone or paper muffin liners
- Two mixing bowls
- Microwave-safe bowl or double boiler
- Spoon or small spatula
- Refrigerator or freezer access
Step-by-Step Instructions
1. Melt the Chocolate
- Add the chocolate chips and coconut oil to a microwave-safe bowl.
- Microwave in 30-second intervals, stirring in between, until smooth and fully melted.
- Alternatively, use a double boiler on the stovetop over low heat to gently melt the mixture.
2. Mix the Peanut Butter Filling
- In another bowl, stir together the peanut butter, honey or maple syrup, vanilla extract (if using), and a pinch of sea salt.
- Mix until smooth and thick but spoonable. The filling should hold its shape without being too stiff or too runny.
3. Create the Chocolate Base
- Line a muffin tin with paper or silicone liners.
- Spoon about 1 to 1½ teaspoons of the melted chocolate mixture into each cup, tilting or spreading it to cover the bottom evenly.
- Place the muffin tin in the freezer for 10–15 minutes to allow the base to harden.
4. Add the Peanut Butter Layer
- Once the bottom chocolate layer is firm, remove the tin from the freezer.
- Spoon around 1 teaspoon of the peanut butter mixture onto each base.
- Press lightly with the back of the spoon or spatula to spread the filling without pressing through the bottom chocolate.
5. Top with More Chocolate
- Add another teaspoon or so of the remaining melted chocolate on top of each cup to cover the peanut butter layer completely.
- Smooth the tops with the back of the spoon.
- Optionally, sprinkle with a small pinch of flaky sea salt for a gourmet touch.
6. Chill Until Set
- Return the muffin tin to the freezer for 20–30 minutes or until the peanut butter cups are fully set.
- Once firm, transfer to an airtight container and store in the refrigerator or freezer.
Beginner Tips and Notes
- Choosing the Right Chocolate:
- Use dark chocolate for a deeper flavor and lower sugar content.
- Ensure chips are dairy-free if you’re making vegan cups.
- Semi-sweet chocolate works if you prefer a milder taste.
- Natural Peanut Butter Tips:
- Stir thoroughly before using to incorporate any separated oil.
- Use a thicker variety for easier handling—overly runny peanut butter may spread too much.
- Melting Chocolate Safely:
- Do not overheat. Melt in intervals and stir often.
- If using a double boiler, make sure the bowl doesn’t touch the simmering water to avoid burning.
- Silicone Liners for Easy Release:
- Silicone muffin liners work best because they peel off cleanly.
- If using paper liners, chill thoroughly before peeling to prevent sticking.
- Layer Firming:
- Always let each layer harden before adding the next. This prevents mixing and ensures neat, professional-looking cups.
- Add Texture:
- For crunch, stir in crushed nuts or crispy rice to the filling.
- A tiny spoonful of chia seeds can add nutrition and texture without changing the taste.
Serving Suggestions
- As a Snack or Treat:
- Enjoy one as a midday energy boost or sweet bite after meals.
- Pair with black coffee or unsweetened almond milk for balance.
- Dressed-Up Dessert Board:
- Combine with fruit, dark chocolate bark, or nuts for a casual yet classy dessert spread.
- Holiday Gift Idea:
- Wrap in parchment and place in a gift box with a ribbon. Homemade peanut butter cups make a thoughtful, personal gift.
- Frozen Treat:
- Serve straight from the freezer for an ice-cream-like texture in warm weather.
- Mini Cups Option:
- Use a mini muffin tin for bite-sized treats—ideal for portion control or party platters.
Storage Instructions
- Refrigerator:
- Store in an airtight container for up to 2 weeks.
- Place parchment between layers if stacking.
- Freezer:
- Freeze for up to 3 months.
- Allow to sit at room temperature for 5–10 minutes before eating to slightly soften.
- Avoid Room Temperature:
- Coconut oil-based chocolate melts easily in warm environments. Always keep chilled.
Homemade Healthy Peanut Butter Cups – A Guilt-Free Chocolate Fix
Craving chocolate without the guilt? 🍫🥜 These Homemade Healthy Peanut Butter Cups are rich, nutty, and naturally sweetened—made with clean ingredients and zero refined sugar. 💪✨ Perfect for snack time, dessert, or whenever you need a wholesome treat that still feels indulgent!
- Total Time: 15 minutes
- Yield: 10–12 peanut butter cups 1x
Ingredients
Chocolate Layer:
-
1 cup dark chocolate chips
-
1 tablespoon coconut oil
Peanut Butter Filling:
-
½ cup natural peanut butter (unsweetened, smooth or crunchy)
-
1 tablespoon honey or maple syrup
-
¼ teaspoon vanilla extract (optional)
-
Pinch of sea salt
Note: Use maple syrup and dairy-free chocolate chips to make these fully vegan.
Instructions
1. Melt the Chocolate
-
Add the chocolate chips and coconut oil to a microwave-safe bowl.
-
Microwave in 30-second intervals, stirring in between, until smooth and fully melted.
-
Alternatively, use a double boiler on the stovetop over low heat to gently melt the mixture.
2. Mix the Peanut Butter Filling
-
In another bowl, stir together the peanut butter, honey or maple syrup, vanilla extract (if using), and a pinch of sea salt.
-
Mix until smooth and thick but spoonable. The filling should hold its shape without being too stiff or too runny.
3. Create the Chocolate Base
-
Line a muffin tin with paper or silicone liners.
-
Spoon about 1 to 1½ teaspoons of the melted chocolate mixture into each cup, tilting or spreading it to cover the bottom evenly.
-
Place the muffin tin in the freezer for 10–15 minutes to allow the base to harden.
4. Add the Peanut Butter Layer
-
Once the bottom chocolate layer is firm, remove the tin from the freezer.
-
Spoon around 1 teaspoon of the peanut butter mixture onto each base.
-
Press lightly with the back of the spoon or spatula to spread the filling without pressing through the bottom chocolate.
5. Top with More Chocolate
-
Add another teaspoon or so of the remaining melted chocolate on top of each cup to cover the peanut butter layer completely.
-
Smooth the tops with the back of the spoon.
-
Optionally, sprinkle with a small pinch of flaky sea salt for a gourmet touch.
6. Chill Until Set
-
Return the muffin tin to the freezer for 20–30 minutes or until the peanut butter cups are fully set.
-
Once firm, transfer to an airtight container and store in the refrigerator or freezer.
Notes
- Choosing the Right Chocolate:
- Use dark chocolate for a deeper flavor and lower sugar content.
- Ensure chips are dairy-free if you’re making vegan cups.
- Semi-sweet chocolate works if you prefer a milder taste.
- Natural Peanut Butter Tips:
- Stir thoroughly before using to incorporate any separated oil.
- Use a thicker variety for easier handling—overly runny peanut butter may spread too much.
- Melting Chocolate Safely:
- Do not overheat. Melt in intervals and stir often.
- If using a double boiler, make sure the bowl doesn’t touch the simmering water to avoid burning.
- Silicone Liners for Easy Release:
- Silicone muffin liners work best because they peel off cleanly.
- If using paper liners, chill thoroughly before peeling to prevent sticking.
- Layer Firming:
- Always let each layer harden before adding the next. This prevents mixing and ensures neat, professional-looking cups.
- Add Texture:
- For crunch, stir in crushed nuts or crispy rice to the filling.
- A tiny spoonful of chia seeds can add nutrition and texture without changing the taste.
- Prep Time: 15 minutes
Engagement Features
- Try Variations and Share Results:
- Did you use almond butter, cashew butter, or sunflower seed butter instead?
- Did you add toppings like chopped nuts, shredded coconut, or cacao nibs?
- Let us know your favorite twist.
- Rate the Recipe and Leave a Comment:
- Was this your first time making peanut butter cups?
- What would you adjust next time?
- Share your experience in the comments section.
- Connect on Social Media:
- Share your peanut butter cup photos using #HomemadeCupsChallenge.
- Tag your friends and invite them to try the recipe with you.