
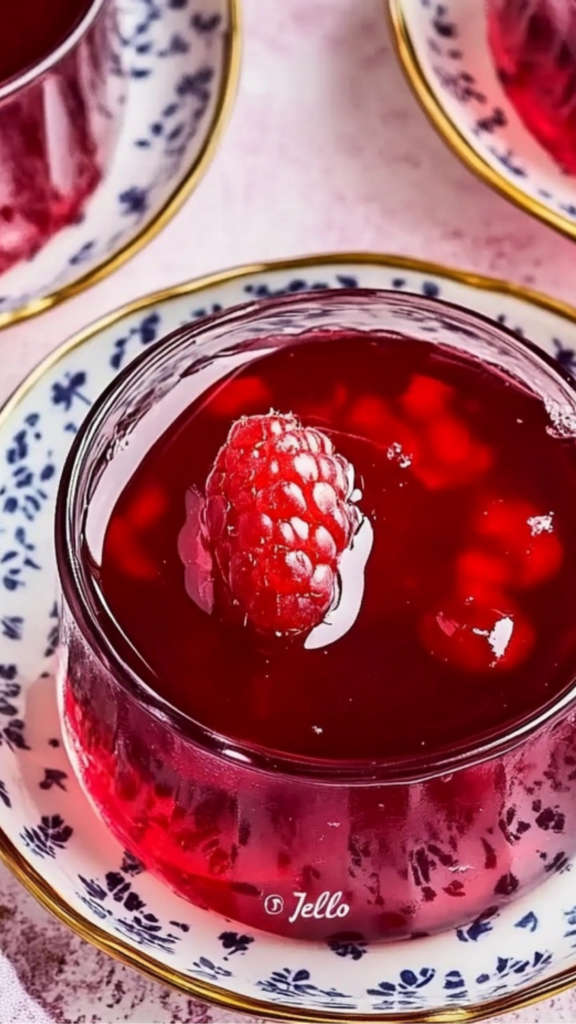
There is something nostalgic and comforting about a bowl of jello. Many of us grew up enjoying its bright colors and wobbly texture, whether at birthday parties, school lunches, or as a refreshing treat on hot days. However, store-bought jello is often loaded with artificial colors, flavors, and excessive sugar, making it a less-than-ideal choice for those looking to maintain a healthy diet.
Print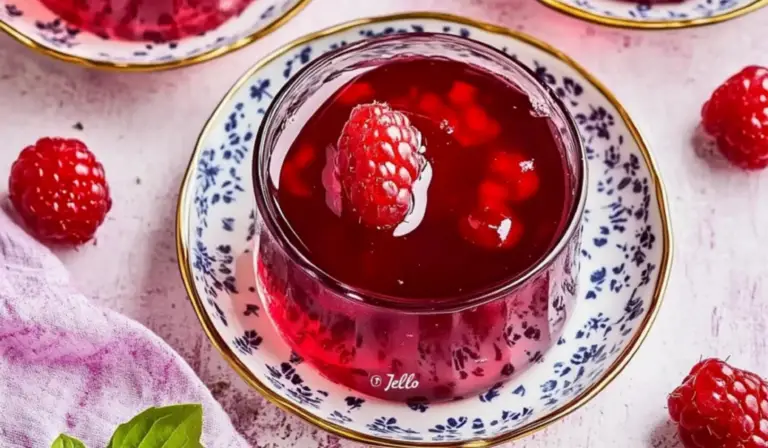
Homemade Healthy “Jello” – A Simple, Two-Ingredient Recipe for Beginners
Say goodbye to store-bought versions and hello to Homemade Healthy “Jello”! 🍓✨ Made with real fruit juice and gelatin, this easy, two-ingredient recipe is naturally sweet, refreshing, and free from artificial additives. A perfect treat for kids and adults alike!
- Total Time: 10 minutes
- Yield: 4 servings 1x
Ingredients
- 4 cups of juice of your choice (some great options include pomegranate juice, fresh-pressed apple cider, or mixed berry juice)
- 4 tablespoons of high-quality, grass-fed gelatin (such as Great Lakes Beef Gelatin or Vital Proteins Gelatin)
Instructions
- Combine the juice and gelatin: Pour the juice into a saucepan and sprinkle the gelatin evenly over the surface. Let it sit for a minute or two to allow the gelatin to “bloom.” This step helps the gelatin dissolve smoothly, preventing clumps.
- Whisk the mixture: Use a whisk to stir the gelatin into the juice until well combined. It may appear slightly lumpy at first, but as it heats up, the gelatin will fully dissolve.
- Heat the mixture: Place the saucepan over medium heat and bring the liquid to a simmer. Stir occasionally to ensure the gelatin dissolves completely. Let the mixture simmer gently for about two minutes, but avoid boiling it, as excessive heat can affect the gelatin’s setting properties.
- Pour into molds: Carefully pour the liquid into a glass dish, individual cups, or fun-shaped silicone molds. Using small cups makes portioning easy, while molds can add a playful touch, especially if making jello for children.
- Refrigerate and set: Transfer the dish or molds to the refrigerator and allow the jello to chill for at least two hours. The gelatin will solidify, creating a firm but bouncy texture.
- Serve and enjoy: Once set, slice the jello into squares or scoop it out with a spoon. Enjoy it as is or pair it with fresh fruit for added flavor and texture.
Notes
- Measure the ingredients before starting to ensure a smooth process.
- Use a glass measuring cup with a spout when pouring the liquid into molds to prevent spills.
- If using multiple flavors, prepare them separately and layer them in molds by allowing each layer to set before adding the next.
- Prep Time: 5 minutes
- Cook Time: 5 minutes
This homemade “jello” recipe is a game-changer. It requires only two simple ingredients—fruit juice and gelatin—yet delivers a naturally sweet, nutrient-rich treat that is perfect for kids and adults alike. Best of all, it is incredibly easy to make, even for beginners in the kitchen.
One of the best things about this recipe is its flexibility. You can choose your favorite juice to customize the flavor while avoiding artificial additives. The use of high-quality, grass-fed gelatin also adds health benefits, including improved digestion, joint support, and stronger hair and nails. With just a few minutes of active preparation, you can create a delicious, homemade gelatin dessert that is free from processed ingredients.
This recipe is perfect for those who are new to cooking because it requires no special equipment, advanced techniques, or complicated steps. Whether you are looking for a healthy snack, a kid-friendly dessert, or a way to satisfy your sweet tooth without guilt, this easy two-ingredient “jello” is an excellent choice.
Ingredients and Preparation
Ingredients
- 4 cups of juice of your choice (some great options include pomegranate juice, fresh-pressed apple cider, or mixed berry juice)
- 4 tablespoons of high-quality, grass-fed gelatin (such as Great Lakes Beef Gelatin or Vital Proteins Gelatin)
Alternative Ingredient Suggestions
One of the advantages of this recipe is its versatility. If you do not have access to the recommended juices, you can experiment with other options, such as:
- Grape juice for a deep, rich flavor
- Citrus juice (like orange or pineapple) for a refreshing, tangy taste (Note: If using pineapple juice, make sure to heat it properly, as fresh pineapple contains enzymes that prevent gelatin from setting)
- Mango or peach juice for a tropical twist
Additionally, if you prefer a slightly sweeter jello, you can add a small amount of natural sweetener, such as honey or maple syrup, to taste.
Step-by-Step Instructions
- Combine the juice and gelatin: Pour the juice into a saucepan and sprinkle the gelatin evenly over the surface. Let it sit for a minute or two to allow the gelatin to “bloom.” This step helps the gelatin dissolve smoothly, preventing clumps.
- Whisk the mixture: Use a whisk to stir the gelatin into the juice until well combined. It may appear slightly lumpy at first, but as it heats up, the gelatin will fully dissolve.
- Heat the mixture: Place the saucepan over medium heat and bring the liquid to a simmer. Stir occasionally to ensure the gelatin dissolves completely. Let the mixture simmer gently for about two minutes, but avoid boiling it, as excessive heat can affect the gelatin’s setting properties.
- Pour into molds: Carefully pour the liquid into a glass dish, individual cups, or fun-shaped silicone molds. Using small cups makes portioning easy, while molds can add a playful touch, especially if making jello for children.
- Refrigerate and set: Transfer the dish or molds to the refrigerator and allow the jello to chill for at least two hours. The gelatin will solidify, creating a firm but bouncy texture.
- Serve and enjoy: Once set, slice the jello into squares or scoop it out with a spoon. Enjoy it as is or pair it with fresh fruit for added flavor and texture.
Beginner Tips and Notes
How to Tell If Your Jello Is Set Properly
After two hours in the refrigerator, the jello should be firm to the touch but still jiggly. If it feels too soft, give it more time to set. If it is too stiff, it may have too much gelatin—next time, slightly reduce the amount.
What to Do If Your Jello Doesn’t Set
- If your jello is not firming up, double-check that you used the correct ratio of juice to gelatin.
- Make sure the mixture was heated enough to dissolve the gelatin completely.
- If using fresh pineapple, mango, or papaya juice, heat it to at least 160°F before adding gelatin, as these fruits contain enzymes that break down gelatin and prevent it from setting.
How to Avoid Clumps
Blooming the gelatin properly before heating is key to a smooth texture. If clumps do form, whisk vigorously while heating or strain the mixture through a fine-mesh sieve before pouring it into molds.
Efficient Preparation Tips
- Measure the ingredients before starting to ensure a smooth process.
- Use a glass measuring cup with a spout when pouring the liquid into molds to prevent spills.
- If using multiple flavors, prepare them separately and layer them in molds by allowing each layer to set before adding the next.
Serving Suggestions
This homemade jello is delicious on its own, but you can elevate it with a few simple additions:
- Topped with fresh fruit: Serve with berries, orange slices, or diced apples for a natural sweetness and a contrasting texture.
- With a dollop of yogurt or whipped coconut cream: This adds creaminess and balances the fruity flavor.
- Layered with chia pudding: For a nutrient-dense snack, alternate layers of jello with chia pudding in a glass.
- As a base for a fruit parfait: Crumble set jello into cups and layer it with granola and yogurt for a fun breakfast or dessert.
Storage Tips
- Store leftover jello in an airtight container in the refrigerator for up to five days.
- Avoid freezing, as gelatin-based desserts lose their texture and become watery when thawed.
- If making jello in advance, keep it covered to prevent it from absorbing other flavors from the fridge.
Conclusion
This easy, two-ingredient homemade jello recipe is proof that simple food can be both delicious and nutritious. By using fresh juice and high-quality gelatin, you create a treat that is free from artificial ingredients while still delivering the satisfying texture and taste of traditional jello.
For beginners, this recipe is an excellent introduction to working with gelatin and experimenting with flavors. It requires minimal effort and equipment, making it a great starting point for anyone new to homemade desserts. The flexibility of the recipe allows you to customize it to your preference, whether by choosing different juices, adjusting sweetness, or adding fresh fruit.
If you try this recipe, share your experience in the comments! What juice did you use? Did you experiment with flavors or add any creative toppings? Cooking is all about learning and sharing, and I would love to hear how this recipe worked for you.