
There is something truly magical about a well-made cheesecake. The moment a fork glides through its velvety texture, the rich creaminess melts in your mouth, balanced by a hint of sweetness and a perfect crust. Among the many variations of cheesecake, the Black Forest Cheesecake stands out as an indulgent masterpiece. Inspired by the classic Black Forest cake, this dessert combines deep chocolate flavors, a smooth cheesecake filling, and a luscious cherry topping, creating a stunning treat that is as delicious as it is visually impressive.
Print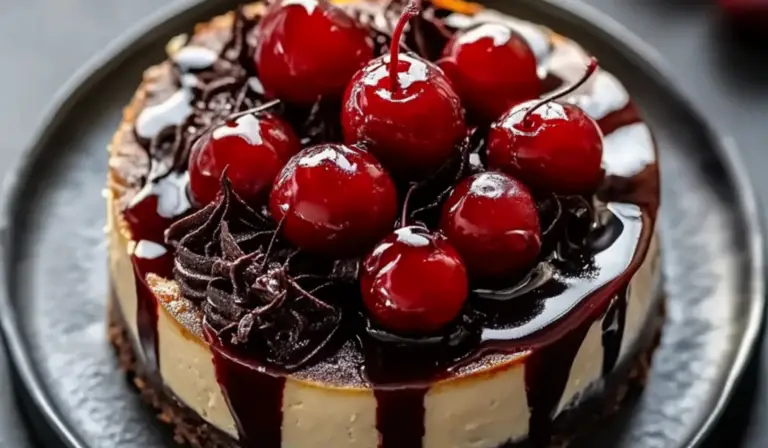
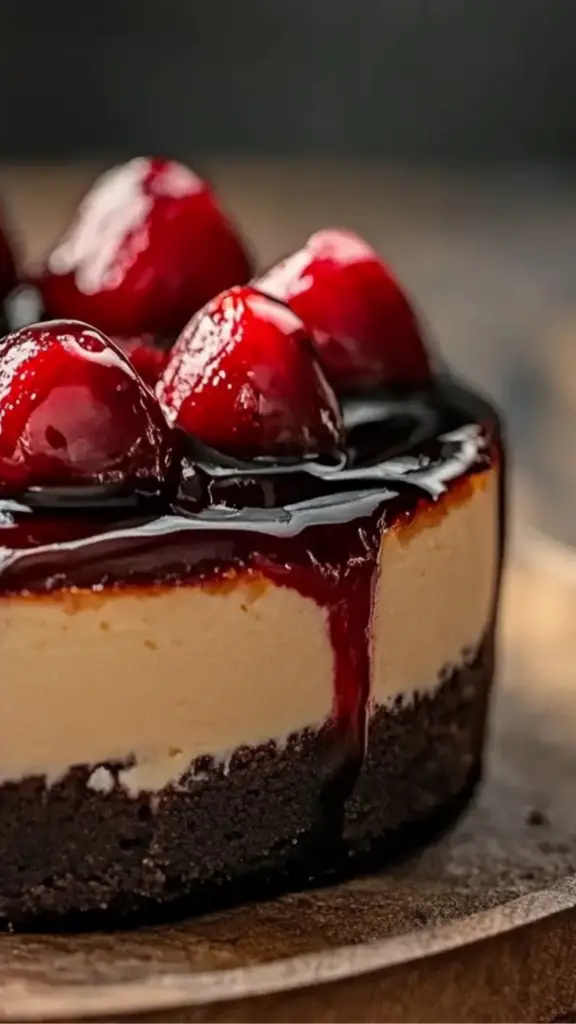
Decadent Black Forest Cheesecake: A Beginner’s Guide to a Show-Stopping Dessert
This Black Forest Cheesecake is a rich, creamy dream layered with velvety chocolate cheesecake, sweet cherry filling, and a decadent chocolate drizzle! ✨ Every bite is the perfect balance of indulgence and elegance, making it a show-stopping dessert that’s surprisingly beginner-friendly! No special skills needed—just mix, layer, and enjoy!
- Total Time: 1 hour 30 minutes
- Yield: 10–12 servings 1x
Ingredients
For the Crust:
- 2 cups chocolate sandwich cookies, crushed
- ½ cup unsalted butter, melted
- 2 tablespoons granulated sugar (optional)
For the Cheesecake Filling:
- 24 ounces cream cheese, softened
- 1 cup granulated sugar
- 1 teaspoon vanilla extract
- 3 large eggs
- 1 cup sour cream
- 1 cup heavy cream
- ½ cup unsweetened cocoa powder
- 1 cup dark chocolate chips, melted
For the Cherry Topping:
- 1 can pitted cherries in syrup (or fresh cherries)
- ¼ cup granulated sugar
- 1 tablespoon cornstarch
- 1 tablespoon lemon juice
For Garnish:
- Whipped cream
- Chocolate shavings
- Fresh cherries
Instructions
Step 1: Prepare the Crust
- Preheat your oven to 350°F (175°C). Grease a 9-inch springform pan or line the bottom with parchment paper for easy removal.
- In a mixing bowl, combine the crushed chocolate sandwich cookies with melted butter. Stir until the crumbs are evenly coated and have the texture of wet sand. If you prefer a sweeter crust, add the optional granulated sugar.
- Press the mixture firmly into the bottom of the prepared pan, using the back of a spoon or a flat-bottomed cup to create an even layer.
- Bake for 10 minutes, then remove from the oven and allow it to cool while preparing the filling.
Step 2: Make the Cheesecake Filling
- In a large bowl, beat the softened cream cheese with granulated sugar until smooth and creamy. This step is crucial for preventing lumps in your batter.
- Add vanilla extract and mix until well incorporated.
- Beat in the eggs one at a time, mixing just until combined after each addition. Overbeating can introduce too much air into the batter, which may cause cracks during baking.
- Fold in the sour cream and heavy cream, ensuring a smooth consistency.
- Sift in the unsweetened cocoa powder and mix until fully combined.
- Finally, pour in the melted dark chocolate and gently mix until the batter is rich and uniform in color.
Step 3: Bake the Cheesecake
- Pour the prepared filling into the cooled crust, spreading it evenly.
- To prevent cracks, place the springform pan inside a larger baking pan and fill the outer pan with hot water, about halfway up the sides of the cheesecake pan. This creates a water bath, which ensures even baking and a creamy texture.
- Bake for 50-60 minutes, or until the edges are set but the center still has a slight jiggle. The cheesecake will continue to set as it cools.
- Turn off the oven and leave the cheesecake inside with the door slightly open for an hour. This gradual cooling process helps prevent cracks.
- Transfer the cheesecake to the refrigerator and chill for at least 4 hours, preferably overnight.
Step 4: Prepare the Cherry Topping
- In a saucepan over medium heat, combine cherries, granulated sugar, cornstarch, and lemon juice.
- Stir continuously until the mixture thickens, about 5 minutes. If using fresh cherries, allow them to release their juices before the sauce thickens.
- Remove from heat and let it cool completely before spreading it over the cheesecake.
Step 5: Assemble the Cheesecake
- Once the cheesecake is fully chilled, carefully remove it from the springform pan.
- Spoon the cooled cherry topping over the surface, allowing some of the sauce to drip down the sides for a dramatic effect.
- Garnish with dollops of whipped cream, chocolate shavings, and fresh cherries for a stunning final touch.
Notes
- Room Temperature Ingredients: For the smoothest batter, ensure your cream cheese, eggs, and sour cream are at room temperature before mixing. Cold ingredients can create lumps.
- Avoid Overmixing: When adding eggs, mix just until combined. Overmixing can lead to air pockets that may cause cracks.
- Using a Water Bath: If you do not have a large baking pan for a water bath, place a pan of hot water on the lower oven rack while baking. This still provides moisture without direct contact.
- Checking for Doneness: The center of the cheesecake should still have a slight wobble when you gently shake the pan. It will firm up as it cools.
- Preventing a Soggy Crust: To avoid water from the bath seeping into the crust, wrap the bottom of the springform pan tightly with aluminum foil.
- Chilling is Key: Do not skip the refrigeration step. Cheesecake needs ample time to set properly, so be patient for the best results.
- Prep Time: 30 minutes
- Cook Time: 60 minutes
For beginners, this recipe offers a fantastic introduction to baking. Though cheesecakes might seem intimidating, following a few key techniques will ensure a successful result. This recipe is designed with simplicity in mind, guiding you through each step with clarity and practical tips. Whether you are making it for a special occasion or simply treating yourself, this Black Forest Cheesecake is guaranteed to impress.
Ingredients and Preparation
For the Crust:
- 2 cups chocolate sandwich cookies, crushed
- ½ cup unsalted butter, melted
- 2 tablespoons granulated sugar (optional)
For the Cheesecake Filling:
- 24 ounces cream cheese, softened
- 1 cup granulated sugar
- 1 teaspoon vanilla extract
- 3 large eggs
- 1 cup sour cream
- 1 cup heavy cream
- ½ cup unsweetened cocoa powder
- 1 cup dark chocolate chips, melted
For the Cherry Topping:
- 1 can pitted cherries in syrup (or fresh cherries)
- ¼ cup granulated sugar
- 1 tablespoon cornstarch
- 1 tablespoon lemon juice
For Garnish:
- Whipped cream
- Chocolate shavings
- Fresh cherries
Alternative Ingredients for Flexibility:
- If chocolate sandwich cookies are unavailable, use crushed chocolate graham crackers or any chocolate biscuits.
- For a lighter version, replace sour cream with Greek yogurt.
- Semi-sweet chocolate chips can be used instead of dark chocolate for a milder flavor.
- If fresh cherries are in season, they add an even better taste compared to canned cherries.
Step-by-Step Instructions
Step 1: Prepare the Crust
- Preheat your oven to 350°F (175°C). Grease a 9-inch springform pan or line the bottom with parchment paper for easy removal.
- In a mixing bowl, combine the crushed chocolate sandwich cookies with melted butter. Stir until the crumbs are evenly coated and have the texture of wet sand. If you prefer a sweeter crust, add the optional granulated sugar.
- Press the mixture firmly into the bottom of the prepared pan, using the back of a spoon or a flat-bottomed cup to create an even layer.
- Bake for 10 minutes, then remove from the oven and allow it to cool while preparing the filling.
Step 2: Make the Cheesecake Filling
- In a large bowl, beat the softened cream cheese with granulated sugar until smooth and creamy. This step is crucial for preventing lumps in your batter.
- Add vanilla extract and mix until well incorporated.
- Beat in the eggs one at a time, mixing just until combined after each addition. Overbeating can introduce too much air into the batter, which may cause cracks during baking.
- Fold in the sour cream and heavy cream, ensuring a smooth consistency.
- Sift in the unsweetened cocoa powder and mix until fully combined.
- Finally, pour in the melted dark chocolate and gently mix until the batter is rich and uniform in color.
Step 3: Bake the Cheesecake
- Pour the prepared filling into the cooled crust, spreading it evenly.
- To prevent cracks, place the springform pan inside a larger baking pan and fill the outer pan with hot water, about halfway up the sides of the cheesecake pan. This creates a water bath, which ensures even baking and a creamy texture.
- Bake for 50-60 minutes, or until the edges are set but the center still has a slight jiggle. The cheesecake will continue to set as it cools.
- Turn off the oven and leave the cheesecake inside with the door slightly open for an hour. This gradual cooling process helps prevent cracks.
- Transfer the cheesecake to the refrigerator and chill for at least 4 hours, preferably overnight.
Step 4: Prepare the Cherry Topping
- In a saucepan over medium heat, combine cherries, granulated sugar, cornstarch, and lemon juice.
- Stir continuously until the mixture thickens, about 5 minutes. If using fresh cherries, allow them to release their juices before the sauce thickens.
- Remove from heat and let it cool completely before spreading it over the cheesecake.
Step 5: Assemble the Cheesecake
- Once the cheesecake is fully chilled, carefully remove it from the springform pan.
- Spoon the cooled cherry topping over the surface, allowing some of the sauce to drip down the sides for a dramatic effect.
- Garnish with dollops of whipped cream, chocolate shavings, and fresh cherries for a stunning final touch.
Beginner Tips and Notes
- Room Temperature Ingredients: For the smoothest batter, ensure your cream cheese, eggs, and sour cream are at room temperature before mixing. Cold ingredients can create lumps.
- Avoid Overmixing: When adding eggs, mix just until combined. Overmixing can lead to air pockets that may cause cracks.
- Using a Water Bath: If you do not have a large baking pan for a water bath, place a pan of hot water on the lower oven rack while baking. This still provides moisture without direct contact.
- Checking for Doneness: The center of the cheesecake should still have a slight wobble when you gently shake the pan. It will firm up as it cools.
- Preventing a Soggy Crust: To avoid water from the bath seeping into the crust, wrap the bottom of the springform pan tightly with aluminum foil.
- Chilling is Key: Do not skip the refrigeration step. Cheesecake needs ample time to set properly, so be patient for the best results.
Serving Suggestions
- Serve slices with a drizzle of warm chocolate sauce for extra decadence.
- Pair this cheesecake with a cup of freshly brewed coffee or a glass of milk to balance its richness.
- If you enjoy a contrast of textures, sprinkle crushed chocolate cookies on top before serving.
- For an elegant touch, add a dusting of powdered sugar over the cherries.
- Leftovers can be stored in the refrigerator for up to five days, covered to prevent it from absorbing other flavors. If storing longer, freeze individual slices and thaw in the refrigerator before serving.
Engagement Features
Baking a cheesecake for the first time can feel like an achievement, and every success deserves to be celebrated. This Black Forest Cheesecake is not only a delightful dessert but also a great learning experience for beginner bakers. By mastering simple techniques like creating a smooth filling and using a water bath, you build the confidence to tackle more complex recipes in the future.
If you give this recipe a try, I would love to hear about your experience. Did you add your own twist to it? Did you encounter any challenges that you overcame? Share your thoughts in the comments below. Whether you are baking for a special occasion or just indulging in a well-deserved treat, this Black Forest Cheesecake is sure to become a favorite in your kitchen. Happy baking!