
There’s something magical about onion rings—the satisfying crunch, the golden exterior, and that delicious contrast between crispy batter and tender, slightly sweet onion. I still remember my first time attempting to make them at home. I was convinced I’d end up with a greasy mess, but after a little trial and error, I discovered a simple, foolproof method that delivered the crunch I was craving.
Print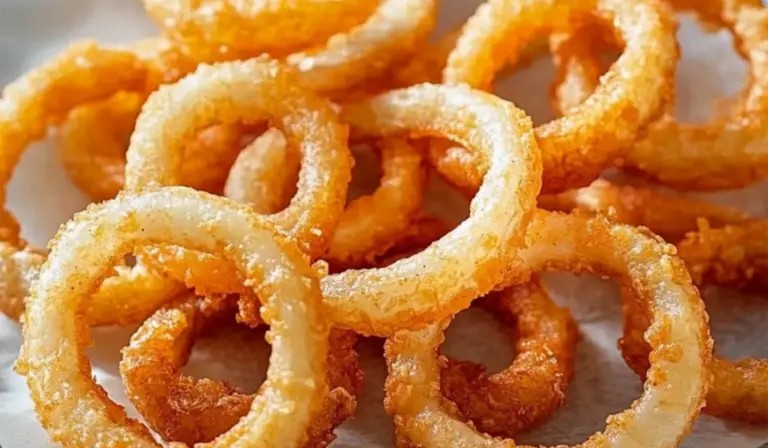
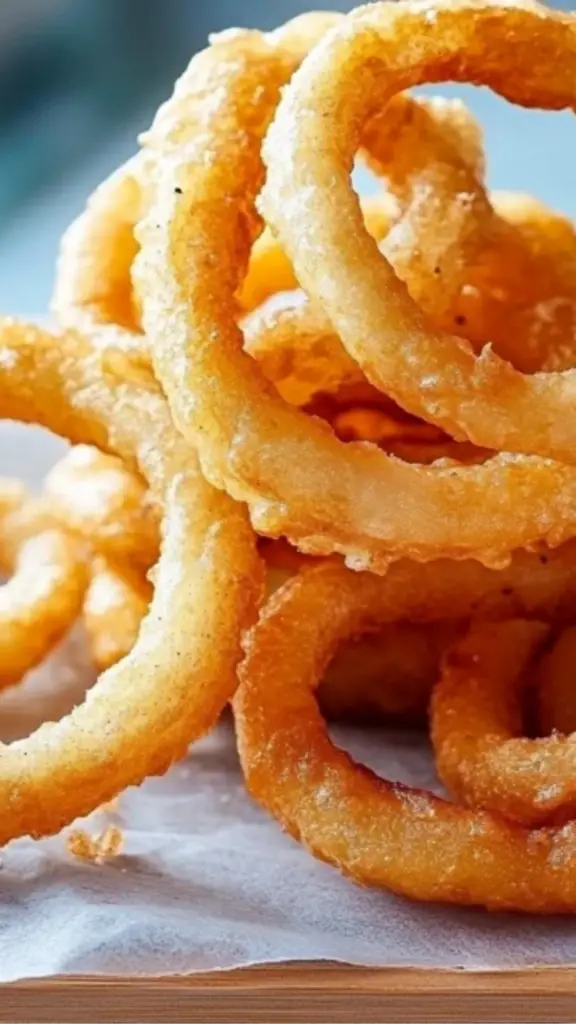
Crispy Onion Rings: A Foolproof Recipe for Beginners
These Crispy Onion Rings are perfectly seasoned, extra crunchy, and incredibly easy to make! Whether as a snack, side, or party appetizer, this beginner-friendly recipe guarantees a satisfying crunch in every bite.
- Total Time: 25 minutes
- Yield: 12 servings 1x
Ingredients
- ½ cup all-purpose flour
- ½ cup water
- 1 large egg, lightly beaten
- 1 teaspoon seasoned salt
- ½ teaspoon baking powder
- 1 large onion, very thinly sliced
- Oil for deep-fat frying (vegetable, canola, or peanut oil)
Instructions
Step 1: Prepare the Batter
In a mixing bowl, whisk together the flour, water, beaten egg, seasoned salt, and baking powder. The batter should be smooth and thick enough to coat the back of a spoon.
🔹 Beginner Tip: If your batter is too runny, add a little more flour. If too thick, thin it out with a splash of water.
Step 2: Slice and Separate the Onion Rings
Peel the onion and slice it into thin rings, about ¼-inch thick. Carefully separate them into individual rings, discarding any tiny center pieces that are too small to fry.
🔹 Beginner Tip: If an onion ring breaks, don’t worry! Fry the broken pieces as crispy onion “fries.”
Step 3: Heat the Oil
In a deep fryer or a heavy-bottomed pan, heat about 1 inch of oil to 375°F (190°C).
🔹 No Thermometer? No Problem! Drop a small spoonful of batter into the oil. If it sizzles and floats to the top immediately, your oil is ready.
Step 4: Dip and Fry
- Dip each onion ring into the batter, ensuring it’s fully coated. Let any excess batter drip off.
- Carefully place the rings into the hot oil, frying in small batches to avoid overcrowding.
- Fry for 1 to 1½ minutes per side, or until golden brown.
- Remove the rings with a slotted spoon and drain on paper towels.
🔹 Beginner Tip: Overcrowding the pan lowers the oil temperature, making your rings soggy. Fry in small batches for best results.
Step 5: Serve Immediately!
Crispy onion rings taste best when they’re fresh and hot. Serve them with your favorite dipping sauce and enjoy!
Notes
1. How to Keep Onion Rings Crispy
- Place them on a wire rack after frying instead of paper towels. This prevents steaming and keeps them crispy longer.
2. What if My Onion Rings Are Soggy?
- Your oil might be too cold. Make sure it stays around 375°F (190°C).
3. My Onion Rings Burn Too Fast!
- Your oil is too hot. Lower the heat slightly and keep an eye on them while frying.
4. Can I Make These Without Deep Frying?
Yes! Try baking them at 425°F (218°C) for 15-20 minutes, flipping halfway. You can also air-fry them at 375°F (190°C) for 8-10 minutes.
- Prep Time: 15 minutes
- Cook Time: 10 minutes
If you’re a beginner in the kitchen, this is a fantastic recipe to start with. It’s straightforward, requires only a few ingredients, and teaches you the basics of frying—an essential cooking skill. Plus, once you’ve mastered onion rings, you’ll feel more confident experimenting with other fried foods like tempura vegetables, fried pickles, or even homemade chicken tenders.
Let’s dive into everything you need to know to make the crispiest onion rings at home!
Why This Recipe is Perfect for Beginners
Cooking can feel intimidating at first, but some recipes—like this one—are simple enough to help build your confidence. Here’s why this onion ring recipe is a great place to start:
- Minimal Ingredients – You likely have most of these in your pantry already.
- Quick Cooking Time – The entire process takes about 25 minutes, making it a fast and rewarding recipe.
- No Fancy Equipment Needed – You don’t need a deep fryer; a simple pot with oil works just fine.
- Easy-to-Follow Steps – This method eliminates common frying mistakes and ensures consistently crispy results.
Even if this is your first time frying anything, follow these steps, and you’ll end up with golden, restaurant-quality onion rings!
Ingredients and Preparation
What You’ll Need
- ½ cup all-purpose flour
- ½ cup water
- 1 large egg, lightly beaten
- 1 teaspoon seasoned salt
- ½ teaspoon baking powder
- 1 large onion, very thinly sliced
- Oil for deep-fat frying (vegetable, canola, or peanut oil)
Choosing the Right Onion
Not all onions are created equal when it comes to onion rings! Here’s a quick guide:
- Sweet Onions (Vidalia, Walla Walla, Maui) – Best choice for mild, slightly sweet flavor.
- Yellow Onions – A bit stronger in taste but widely available.
- White Onions – Sharper flavor, good for those who like a bit of bite.
- Red Onions – Uncommon for onion rings, but can be used for a slightly different flavor.
Ingredient Substitutions & Additions
- For a Crispier Coating: Substitute half of the all-purpose flour with cornstarch or rice flour.
- For Extra Flavor: Add a pinch of paprika, garlic powder, or cayenne pepper to the batter.
- For a Dairy-Free Version: Replace the egg with a tablespoon of cornstarch mixed with water.
Step-by-Step Instructions for Perfect Onion Rings
Step 1: Prepare the Batter
In a mixing bowl, whisk together the flour, water, beaten egg, seasoned salt, and baking powder. The batter should be smooth and thick enough to coat the back of a spoon.
🔹 Beginner Tip: If your batter is too runny, add a little more flour. If too thick, thin it out with a splash of water.
Step 2: Slice and Separate the Onion Rings
Peel the onion and slice it into thin rings, about ¼-inch thick. Carefully separate them into individual rings, discarding any tiny center pieces that are too small to fry.
🔹 Beginner Tip: If an onion ring breaks, don’t worry! Fry the broken pieces as crispy onion “fries.”
Step 3: Heat the Oil
In a deep fryer or a heavy-bottomed pan, heat about 1 inch of oil to 375°F (190°C).
🔹 No Thermometer? No Problem! Drop a small spoonful of batter into the oil. If it sizzles and floats to the top immediately, your oil is ready.
Step 4: Dip and Fry
- Dip each onion ring into the batter, ensuring it’s fully coated. Let any excess batter drip off.
- Carefully place the rings into the hot oil, frying in small batches to avoid overcrowding.
- Fry for 1 to 1½ minutes per side, or until golden brown.
- Remove the rings with a slotted spoon and drain on paper towels.
🔹 Beginner Tip: Overcrowding the pan lowers the oil temperature, making your rings soggy. Fry in small batches for best results.
Step 5: Serve Immediately!
Crispy onion rings taste best when they’re fresh and hot. Serve them with your favorite dipping sauce and enjoy!
Beginner Tips and Troubleshooting
1. How to Keep Onion Rings Crispy
- Place them on a wire rack after frying instead of paper towels. This prevents steaming and keeps them crispy longer.
2. What if My Onion Rings Are Soggy?
- Your oil might be too cold. Make sure it stays around 375°F (190°C).
3. My Onion Rings Burn Too Fast!
- Your oil is too hot. Lower the heat slightly and keep an eye on them while frying.
4. Can I Make These Without Deep Frying?
Yes! Try baking them at 425°F (218°C) for 15-20 minutes, flipping halfway. You can also air-fry them at 375°F (190°C) for 8-10 minutes.
Serving Suggestions
Dipping Sauces
- Classic Ketchup – A timeless favorite.
- Spicy Sriracha Mayo – Mix mayo with sriracha for a kick.
- Garlic Aioli – Blended garlic, mayo, and lemon juice.
- BBQ Sauce – For a smoky-sweet contrast.
What to Serve With Onion Rings
- Burgers – The ultimate pairing!
- Grilled Cheese Sandwich – Adds a crunchy side to a melty sandwich.
- Hot Dogs or Sliders – Makes for a fun and delicious meal.
- Salads – Crumble leftover onion rings over a salad for a crispy topping.
Storage and Reheating
How to Store Leftovers
- Keep them in an airtight container in the refrigerator for up to 2 days.
Best Way to Reheat
- Oven: Bake at 375°F for 5-7 minutes until crispy.
- Air Fryer: 375°F for 3-5 minutes.
- Avoid the Microwave! It makes them soggy.
Conclusion: Ready to Try It?
Making onion rings at home is easier than you think, and once you try this recipe, you’ll never go back to store-bought! The crispy texture, simple ingredients, and endless dipping sauce possibilities make this a must-try dish.
If you make these, let me know in the comments! Did you try a different seasoning or dipping sauce? I’d love to hear about your experience. Happy cooking! 🍽️🎉