
There’s something special about the first time you make a dessert from scratch. It’s not just about satisfying your sweet tooth—it’s about that moment of pride when you realize you’ve created something with your own hands. That’s exactly what happened to me years ago when I baked my first batch of cookies. I didn’t have fancy ingredients or a background in baking. I had a jar of natural peanut butter, a few eggs, and some sweetener. What came out of my oven was not just a delicious cookie—it was a sense of accomplishment.
Print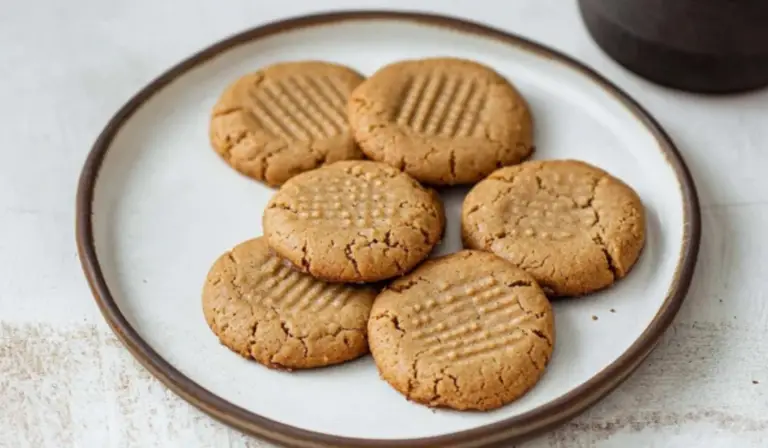
3-Ingredient Peanut Butter Cookies: A Beginner’s Sweet Victory
Soft, chewy, and loaded with peanut butter flavor—these cookies only need 3 ingredients! No fuss, all flavor, and ready in minutes! 🥜🍯🔥
- Total Time: 19 minutes
- Yield: 20 cookies 1x
Ingredients
- 1 cup natural peanut butter (unsweetened, with no added oils or sugars)
- 1/2 cup monk fruit sweetener (or other granulated sweetener of choice)
- 1 egg (or vegan substitute)
Optional Add-Ins:
- 1/4 teaspoon sea salt (only if your nut butter is unsalted)
- Mini dark chocolate chips or chopped dark chocolate (optional, for texture and richness)
Ingredient Alternatives:
- Nut butter substitutions: Almond butter or sunflower seed butter are great lower-carb alternatives to peanut butter. Choose natural versions for the best texture and results.
- Sweetener swaps: If monk fruit isn’t available, you can use erythritol, coconut sugar, or even regular granulated sugar if not following a low-carb diet.
- Egg substitute (for vegan version): Mix 1 tablespoon of chia seeds or flaxseed meal with 3 tablespoons of water. Let it sit for 5 minutes until it forms a gel-like texture, then use in place of the egg.
Instructions
Step 1: Mix Your Ingredients
In a medium-sized mixing bowl, combine the natural peanut butter, monk fruit sweetener, and egg (or egg substitute). At first, the mixture might seem too wet, but keep stirring. Within a minute or two, it will come together into a smooth, thick cookie dough.
If your peanut butter was stored in the fridge and feels too stiff, let it come to room temperature for 10 minutes before mixing, or microwave it for 10 seconds to soften it slightly.
Step 2: Shape the Cookies
Scoop out dough using about 2 tablespoons per cookie. Roll it into balls using your hands and place them on your prepared baking tray. Make sure to leave a little space between each cookie, though they won’t spread much during baking.
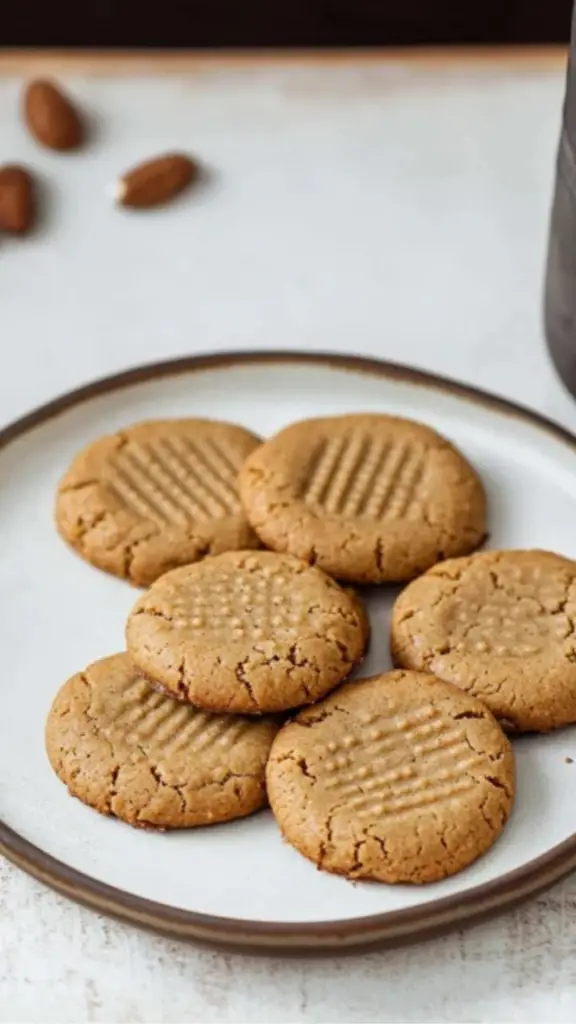
Use a fork to gently flatten each ball, creating a crosshatch pattern on top. This also helps the cookies bake more evenly.
Step 3: Bake
Place the tray in the oven and bake for 9 minutes. The cookies should be lightly golden around the edges. Don’t worry if they feel soft when they come out—this is normal. They will continue to firm up as they cool.
For Softer Cookies: Bake for just 6–7 minutes. Then, carefully transfer them to a wire rack after 1 minute to stop the baking process.
Step 4: Cool and Serve
Let the cookies rest on the baking tray for about 5 minutes before transferring them to a wire rack. This helps them hold their shape and develop the perfect texture—crisp edges with a chewy center.
Notes
Tip 1: Choose the Right Nut Butter
Make sure your nut butter contains only nuts (and maybe salt). Added sugars or oils can cause the cookies to spread too much or result in a greasy texture. Stir the nut butter well before using, especially if it has natural oil separation.
Tip 2: Watch the Baking Time Closely
Since these cookies bake quickly, keep an eye on your oven. Even a minute or two too long can make them overly crisp or dry. Set a timer and check them at the 7-minute mark if you prefer softer cookies.
Tip 3: Don’t Skip the Cooling Time
It’s tempting to bite into a warm cookie straight out of the oven, but these cookies need a few minutes to set. Letting them cool helps develop their final texture and makes them easier to handle.
Tip 4: Mix-In Ideas
If you want to customize your cookies, feel free to stir in a handful of mini dark chocolate chips, crushed nuts, or even a few raisins. Just don’t overdo it—too many add-ins can cause the dough to break apart.
Tip 5: Make a Double Batch
These cookies are so easy, they’re ideal for meal prep or sharing. Make a double batch and freeze half of the dough for later. Roll into balls and freeze on a tray before transferring to a zip-top bag. Bake directly from frozen, adding an extra minute or two to the bake time.
- Prep Time: 10 minutes
- Cook Time: 9 minutes
This recipe for 3-Ingredient Peanut Butter Cookies is perfect for beginner bakers. It’s simple, quick, and uses pantry staples. There are no complicated techniques or special equipment required. You’ll learn just how easy baking can be while creating something that tastes incredible. Whether you’re starting out in the kitchen or just want a quick treat without the fuss, this is the perfect dessert to try.
These cookies are also a healthier option than most store-bought varieties. They’re naturally gluten-free, low in carbs, and don’t require any flour or butter. You can even make them vegan or reduce the sugar even more depending on your preferences. And best of all, they’re incredibly satisfying—slightly crisp on the outside, soft in the center, and full of rich peanut butter flavor.
Let’s get into it.
Ingredients and Preparation
One of the best parts about this recipe is its simplicity. You only need three core ingredients, and you probably have all of them in your kitchen already.
Ingredients (for about 20 cookies):
- 1 cup natural peanut butter (unsweetened, with no added oils or sugars)
- 1/2 cup monk fruit sweetener (or other granulated sweetener of choice)
- 1 egg (or vegan substitute)
Optional Add-Ins:
- 1/4 teaspoon sea salt (only if your nut butter is unsalted)
- Mini dark chocolate chips or chopped dark chocolate (optional, for texture and richness)
Ingredient Alternatives:
- Nut butter substitutions: Almond butter or sunflower seed butter are great lower-carb alternatives to peanut butter. Choose natural versions for the best texture and results.
- Sweetener swaps: If monk fruit isn’t available, you can use erythritol, coconut sugar, or even regular granulated sugar if not following a low-carb diet.
- Egg substitute (for vegan version): Mix 1 tablespoon of chia seeds or flaxseed meal with 3 tablespoons of water. Let it sit for 5 minutes until it forms a gel-like texture, then use in place of the egg.
Before you begin, set your oven to preheat at 350°F (175°C) and line a baking sheet with parchment paper or a silicone baking mat to prevent sticking.
Step-by-Step Instructions
These cookies come together in under 20 minutes from start to finish. Here’s a breakdown of each step to ensure success, even if you’ve never baked before.
Step 1: Mix Your Ingredients
In a medium-sized mixing bowl, combine the natural peanut butter, monk fruit sweetener, and egg (or egg substitute). At first, the mixture might seem too wet, but keep stirring. Within a minute or two, it will come together into a smooth, thick cookie dough.
If your peanut butter was stored in the fridge and feels too stiff, let it come to room temperature for 10 minutes before mixing, or microwave it for 10 seconds to soften it slightly.
Step 2: Shape the Cookies
Scoop out dough using about 2 tablespoons per cookie. Roll it into balls using your hands and place them on your prepared baking tray. Make sure to leave a little space between each cookie, though they won’t spread much during baking.
Use a fork to gently flatten each ball, creating a crosshatch pattern on top. This also helps the cookies bake more evenly.
Step 3: Bake
Place the tray in the oven and bake for 9 minutes. The cookies should be lightly golden around the edges. Don’t worry if they feel soft when they come out—this is normal. They will continue to firm up as they cool.
For Softer Cookies: Bake for just 6–7 minutes. Then, carefully transfer them to a wire rack after 1 minute to stop the baking process.
Step 4: Cool and Serve
Let the cookies rest on the baking tray for about 5 minutes before transferring them to a wire rack. This helps them hold their shape and develop the perfect texture—crisp edges with a chewy center.
Beginner Tips and Notes
Here are some essential tips to help you avoid common mistakes and make your cookie-baking experience smooth and fun.
Tip 1: Choose the Right Nut Butter
Make sure your nut butter contains only nuts (and maybe salt). Added sugars or oils can cause the cookies to spread too much or result in a greasy texture. Stir the nut butter well before using, especially if it has natural oil separation.
Tip 2: Watch the Baking Time Closely
Since these cookies bake quickly, keep an eye on your oven. Even a minute or two too long can make them overly crisp or dry. Set a timer and check them at the 7-minute mark if you prefer softer cookies.
Tip 3: Don’t Skip the Cooling Time
It’s tempting to bite into a warm cookie straight out of the oven, but these cookies need a few minutes to set. Letting them cool helps develop their final texture and makes them easier to handle.
Tip 4: Mix-In Ideas
If you want to customize your cookies, feel free to stir in a handful of mini dark chocolate chips, crushed nuts, or even a few raisins. Just don’t overdo it—too many add-ins can cause the dough to break apart.
Tip 5: Make a Double Batch
These cookies are so easy, they’re ideal for meal prep or sharing. Make a double batch and freeze half of the dough for later. Roll into balls and freeze on a tray before transferring to a zip-top bag. Bake directly from frozen, adding an extra minute or two to the bake time.
Serving Suggestions
These cookies are a treat all on their own, but here are a few ways to make them even more special.
Pair with a Warm Drink: A cup of tea, coffee, or warm almond milk pairs perfectly with the rich peanut butter flavor.
Serve with Fresh Fruit: Balance the richness of the cookies with a side of sliced apples, strawberries, or banana for a wholesome snack.
Turn into a Dessert Platter: Create a simple dessert board by adding these cookies alongside some dark chocolate squares, dried fruit, and nuts. It’s an easy way to impress guests without extra work.
Make Cookie Sandwiches: Spread a thin layer of almond butter or a low-sugar chocolate spread between two cookies for a fun twist.
Storage Tips:
- Store leftover cookies in an airtight container at room temperature for up to 5 days.
- For longer storage, freeze the baked cookies in a sealed container for up to 2 months. Let them thaw at room temperature or warm in the oven for a few minutes before serving.
Engagement Features
Trying new recipes can be intimidating at first, but that’s what makes small victories so meaningful. These 3-Ingredient Peanut Butter Cookies are not only easy, they’re forgiving, adaptable, and surprisingly satisfying. Whether you’re baking for yourself, your family, or just testing your skills, you’ll be amazed by what you can create with just a handful of ingredients.
Have you made these cookies? Did you try a different nut butter or sweetener? Maybe you discovered your own twist with a fun add-in. I’d love to hear how your version turned out. Share your thoughts, your tweaks, or even your baking missteps in the comments. Every experience helps someone else feel more confident in the kitchen.
Baking doesn’t have to be complicated or overwhelming. Sometimes, all you need is one bowl, a few ingredients, and a bit of curiosity. So go ahead—try this recipe today. You might surprise yourself with just how delicious simple can be.