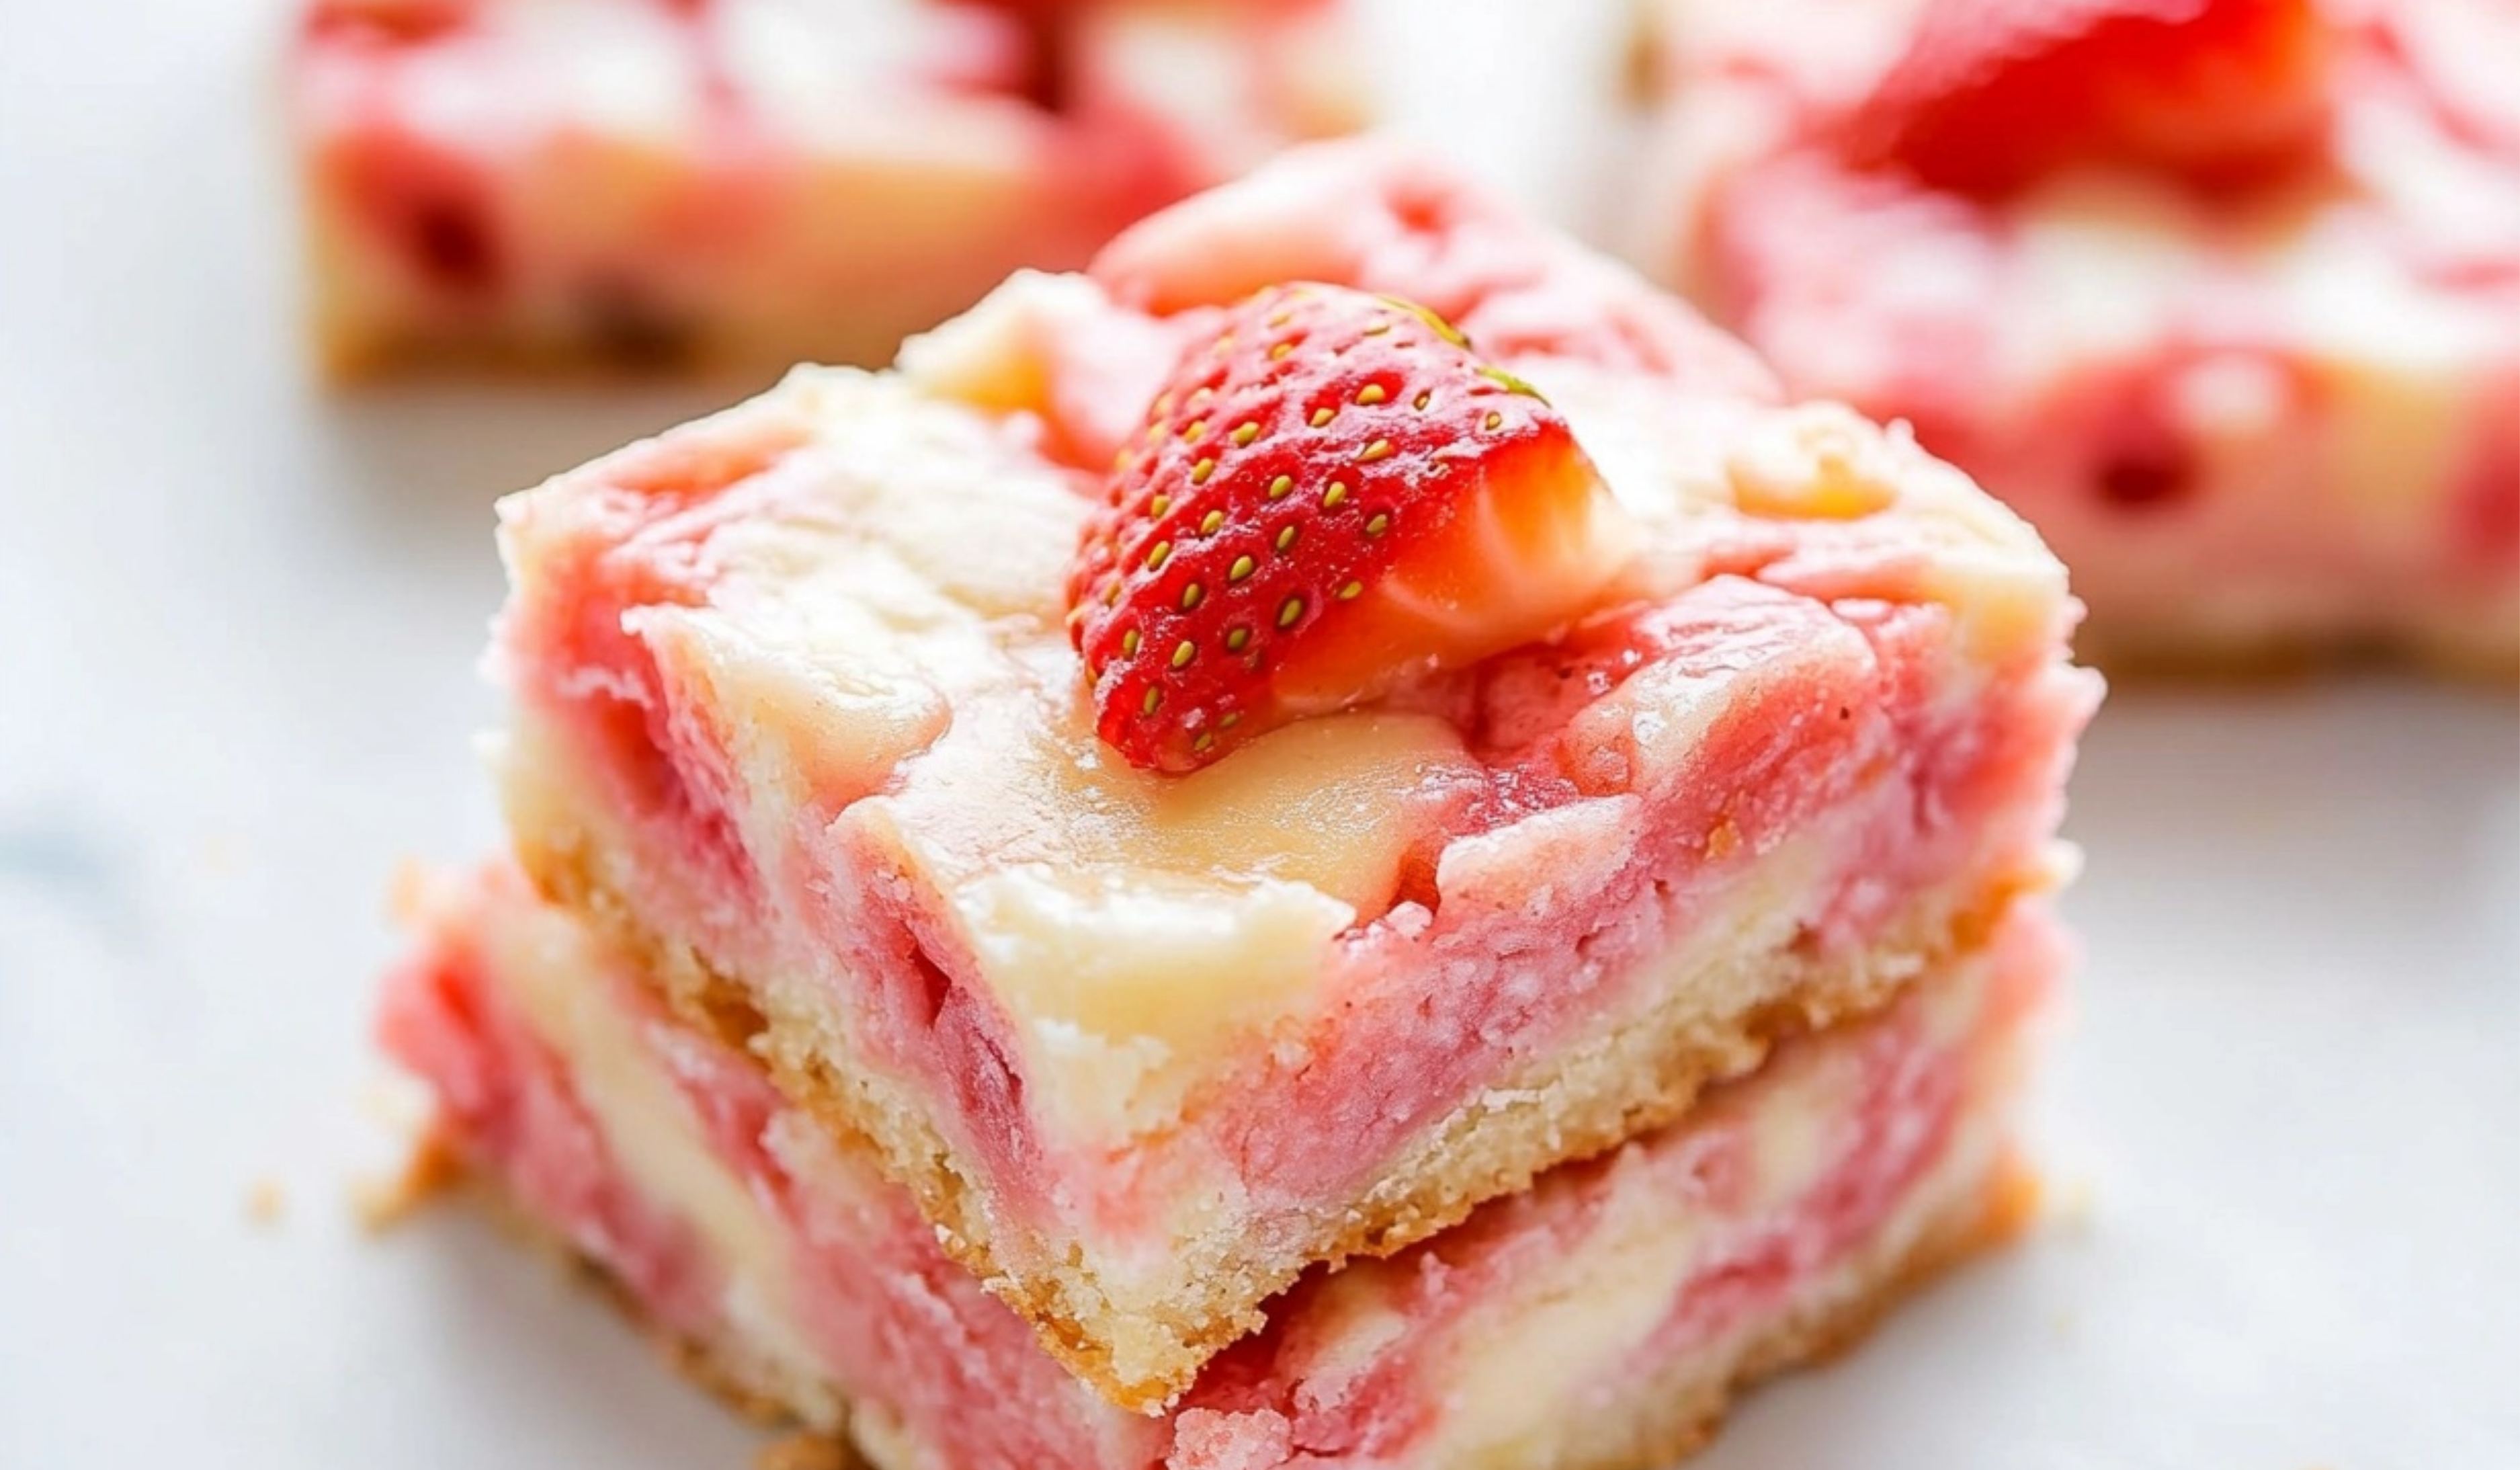
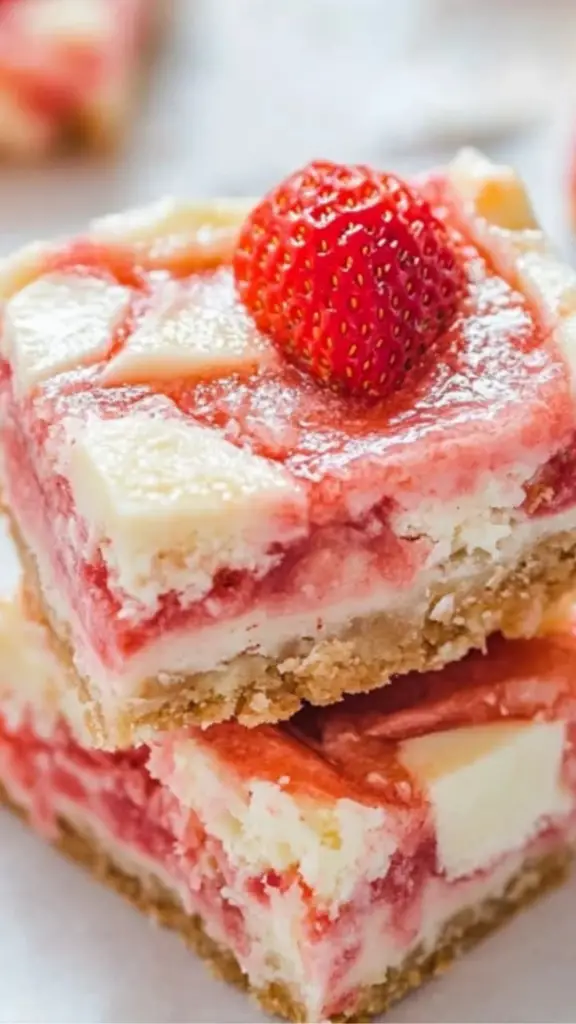
There’s something special about a dessert that’s both incredibly easy to make and irresistibly delicious. Strawberry White Chocolate Gooey Bars fall into that category—a perfect treat for beginners who want to impress with minimal effort. With only five ingredients and simple preparation steps, this recipe is ideal for those new to baking.
Print
The Ultimate Guide to Making Strawberry White Chocolate Gooey Bars: A Beginner-Friendly Delight
Craving a dessert that’s soft, gooey, and bursting with strawberry goodness? Strawberry White Chocolate Gooey Bars are here to satisfy your sweet tooth! These beginner-friendly bars combine fruity flavors with rich white chocolate for an irresistibly soft and chewy texture. No fancy techniques—just mix, bake, and enjoy bakery-style treats at home. Perfect for parties, afternoon snacks, or whenever you need a delicious pick-me-up!
#StrawberryWhiteChocolate #GooeyDesserts #SimpleBaking #BerryDelights #ChewyAndSweet #EasyHomemadeTreats #BakingMadeSimple #DessertLover #SoftAndDelicious #BeginnerBaking
- Total Time: 35 minutes
- Yield: 16 bars 1x
Ingredients
- ½ cup unsalted butter, very soft
- One 15.25-ounce box strawberry cake mix
- 1 large egg
- 1 cup white chocolate chips
- About 60% of one 14-ounce can sweetened condensed milk (about 8 ounces, fat-free recommended)
Instructions
1. Preheat and Prepare the Pan
Preheat your oven to 350°F (175°C). Line a 9×9-inch pan with aluminum foil for easy cleanup and spray with nonstick cooking spray. This prevents sticking and makes it easier to remove the bars later.
2. Cream the Butter
In a large mixing bowl, add ½ cup of very soft butter. Using a handheld electric mixer, beat it on medium-high speed until smooth and creamy. This step ensures the butter evenly distributes throughout the dough, creating a tender texture.
3. Mix in Cake Mix and Egg
Add the strawberry cake mix and one egg to the butter. Beat on low speed to combine. The batter will look very thick and crumbly at first—keep mixing until it turns into a tacky, thick dough.
Tip: If the dough feels too dry, add one tablespoon of milk to help bring it together.
4. Form the Base Layer
Take about half to two-thirds of the dough and press it evenly into the bottom of your prepared pan. You can use a spatula or your hands (spray them with cooking spray to prevent sticking). This creates a solid base for the gooey layer.
5. Add White Chocolate Chips and Condensed Milk
Evenly sprinkle one cup of white chocolate chips over the dough. Then, drizzle about 8 ounces (60% of the can) of sweetened condensed milk over the chocolate chips. This is what gives the bars their rich, gooey texture.
6. Add the Remaining Dough
Take the remaining dough and break it into small 1-inch pieces. Scatter them over the condensed milk layer, lightly pressing them down. It won’t completely cover the top, and that’s okay—some gooey filling should peek through.
7. Bake Until Golden
Place the pan in the preheated oven and bake for 27 to 30 minutes. The edges should be set and lightly golden brown, while the center may still be slightly jiggly.
How to Tell When It’s Done:
- Edges turn golden brown—this is a good indicator the bars are ready.
- Center is slightly set but not fully firm—it will continue firming as it cools.
8. Cool Completely Before Slicing
Let the pan cool on a wire rack for at least 2 to 3 hours before cutting. For best results, let them cool overnight. This allows the gooey layer to firm up for cleaner slices.
Notes
Troubleshooting Common Issues
- Dough is too dry: Add a tablespoon of milk to help moisten it.
- Bars are too gooey when slicing: Let them cool longer before cutting. Chilling them in the refrigerator for 30 minutes can also help.
- Edges burn too quickly: If your oven runs hot, reduce the temperature to 325°F and bake for a few extra minutes.
Helpful Kitchen Tips
- Use a serrated knife to cut clean slices without squishing the bars.
- Line the pan with foil to make cleanup effortless and prevent sticking.
- Let butter soften at room temperature instead of microwaving it to avoid melting.
- Prep Time: 5 minutes
- Cook Time: 30 minutes
Whether you’re making a sweet snack for yourself, a family gathering, or a last-minute party dessert, these gooey bars deliver. They require no advanced techniques, no complicated tools, and no stress. The result? A soft, chewy, and indulgent treat with the perfect balance of strawberry flavor and creamy white chocolate.
In this guide, we’ll walk through every step of the process, offering beginner-friendly tips, troubleshooting advice, and serving suggestions. By the end, you’ll feel confident in your ability to create these delicious bars from scratch.
Ingredients and Preparation
This recipe requires just five simple ingredients, making it easy to follow even if you don’t have much baking experience.
Ingredients
- ½ cup unsalted butter, very soft
- One 15.25-ounce box strawberry cake mix
- 1 large egg
- 1 cup white chocolate chips
- About 60% of one 14-ounce can sweetened condensed milk (about 8 ounces, fat-free recommended)
Ingredient Substitutions and Variations
- Butter Alternative: If you’re out of unsalted butter, use salted butter and reduce any added salt in other recipes. You can also try melted coconut oil, but it may slightly alter the flavor.
- Cake Mix Options: While strawberry cake mix gives these bars their signature color and taste, vanilla or lemon cake mix can also work for a fun twist.
- Chocolate Variations: White chocolate chips add a creamy sweetness, but you can swap them for milk or dark chocolate chips if preferred.
- Dairy-Free Alternative: Use dairy-free butter and coconut condensed milk for a non-dairy version.
Step-by-Step Instructions
1. Preheat and Prepare the Pan
Preheat your oven to 350°F (175°C). Line a 9×9-inch pan with aluminum foil for easy cleanup and spray with nonstick cooking spray. This prevents sticking and makes it easier to remove the bars later.
2. Cream the Butter
In a large mixing bowl, add ½ cup of very soft butter. Using a handheld electric mixer, beat it on medium-high speed until smooth and creamy. This step ensures the butter evenly distributes throughout the dough, creating a tender texture.
3. Mix in Cake Mix and Egg
Add the strawberry cake mix and one egg to the butter. Beat on low speed to combine. The batter will look very thick and crumbly at first—keep mixing until it turns into a tacky, thick dough.
Tip: If the dough feels too dry, add one tablespoon of milk to help bring it together.
4. Form the Base Layer
Take about half to two-thirds of the dough and press it evenly into the bottom of your prepared pan. You can use a spatula or your hands (spray them with cooking spray to prevent sticking). This creates a solid base for the gooey layer.
5. Add White Chocolate Chips and Condensed Milk
Evenly sprinkle one cup of white chocolate chips over the dough. Then, drizzle about 8 ounces (60% of the can) of sweetened condensed milk over the chocolate chips. This is what gives the bars their rich, gooey texture.
6. Add the Remaining Dough
Take the remaining dough and break it into small 1-inch pieces. Scatter them over the condensed milk layer, lightly pressing them down. It won’t completely cover the top, and that’s okay—some gooey filling should peek through.
7. Bake Until Golden
Place the pan in the preheated oven and bake for 27 to 30 minutes. The edges should be set and lightly golden brown, while the center may still be slightly jiggly.
How to Tell When It’s Done:
- Edges turn golden brown—this is a good indicator the bars are ready.
- Center is slightly set but not fully firm—it will continue firming as it cools.
8. Cool Completely Before Slicing
Let the pan cool on a wire rack for at least 2 to 3 hours before cutting. For best results, let them cool overnight. This allows the gooey layer to firm up for cleaner slices.
Beginner Tips and Notes
Troubleshooting Common Issues
- Dough is too dry: Add a tablespoon of milk to help moisten it.
- Bars are too gooey when slicing: Let them cool longer before cutting. Chilling them in the refrigerator for 30 minutes can also help.
- Edges burn too quickly: If your oven runs hot, reduce the temperature to 325°F and bake for a few extra minutes.
Helpful Kitchen Tips
- Use a serrated knife to cut clean slices without squishing the bars.
- Line the pan with foil to make cleanup effortless and prevent sticking.
- Let butter soften at room temperature instead of microwaving it to avoid melting.
Serving Suggestions
Strawberry White Chocolate Gooey Bars are rich and indulgent, making them perfect on their own. However, you can elevate them with these serving ideas:
- With Fresh Fruit: Serve with strawberries, raspberries, or blueberries for a fresh contrast.
- Paired with Ice Cream: A scoop of vanilla or strawberry ice cream complements the gooey texture.
- Drizzled with White Chocolate: Melt extra white chocolate chips and drizzle over the bars for a decorative touch.
Storage and Leftovers
- Room Temperature: Store in an airtight container for up to 5 days.
- Refrigerator: Keeps fresh for up to one week.
- Freezer: Freeze individually wrapped bars for up to 3 months. Let thaw at room temperature before serving.
Conclusion
These Strawberry White Chocolate Gooey Bars are a perfect treat for beginner bakers. With only five ingredients, simple instructions, and no special equipment required, they are an easy and rewarding dessert to make. Their chewy texture, sweet strawberry flavor, and creamy white chocolate make them a guaranteed crowd-pleaser.
If you try this recipe, share your experience and any creative twists you added. Baking should be fun and stress-free, so enjoy the process and treat yourself to these gooey delights. Happy baking!