
There’s something truly special about biting into a piece of crispy, golden-brown fried chicken. The crunch of the perfectly seasoned crust followed by tender, juicy meat makes it a classic comfort food enjoyed across cultures. If you’ve ever wanted to make restaurant-quality fried chicken at home but felt intimidated by the process, this guide is for you.
Print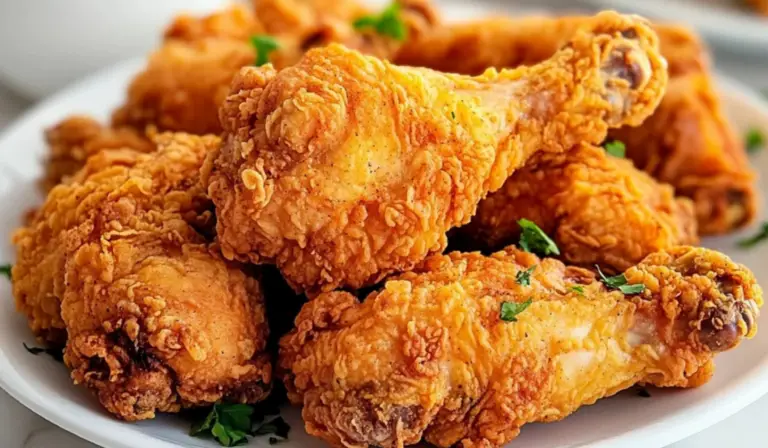
The Ultimate Guide to Buttermilk Fried Chicken for Beginners
This Buttermilk Fried Chicken is marinated to perfection, coated in a crispy golden crust, and packed with bold, savory flavors. A beginner-friendly guide to making the ultimate comfort food at home!
- Total Time: 1 hour
- Yield: 8 servings 1x
Ingredients
- 8 pieces of bone-in, skin-on chicken (thighs and legs preferred)
- 2 cups buttermilk
- 2 cups all-purpose flour
- 1½ teaspoons garlic powder
- 1½ teaspoons paprika
- 1½ teaspoons onion powder
- 1½ teaspoons salt
- 1½ teaspoons dried thyme
- 1½ teaspoons dried basil
- 1 teaspoon salt
- 1 teaspoon ground black pepper
- 1 teaspoon garlic powder
- 1 teaspoon dried mustard
- 1 teaspoon cayenne pepper (adjust for spice preference)
- 1 tablespoon baking powder
- ½ teaspoon paprika
- Vegetable oil (enough for frying)
Instructions
1. Marinate the Chicken
Place the chicken pieces in a large bowl and season with salt, pepper, garlic powder, dried mustard, and paprika. Toss well to evenly coat the chicken in seasoning.
Pour the buttermilk over the seasoned chicken and stir to ensure each piece is fully submerged. The buttermilk helps tenderize the chicken and enhances the flavor.
Cover the bowl and refrigerate for at least 1 hour. For the best results, marinate overnight to allow the flavors to fully develop.
2. Prepare the Coating
In a shallow dish, whisk together the flour, baking powder, salt, garlic powder, paprika, dried basil, dried thyme, onion powder, and cayenne pepper. This seasoned flour mixture will create the signature crispy crust.
3. Heat the Oil
Pour enough vegetable oil into a deep fryer or large pot to submerge the chicken pieces. Heat the oil to around 340°F (170°C). Maintaining the right temperature is crucial—oil that’s too hot will burn the crust before the inside is fully cooked, while oil that’s too cool will make the chicken greasy.
Use a candy or deep-fry thermometer to monitor the oil temperature. If you don’t have one, test the oil by dropping a small amount of flour into it—if it sizzles immediately, it’s ready.
4. Dredge the Chicken
Remove the chicken from the buttermilk marinade, letting any excess drip off. Dredge each piece in the seasoned flour mixture, pressing firmly to ensure a thick, even coating. Shake off any excess flour before frying.
5. Fry the Chicken
Carefully place the coated chicken pieces into the hot oil. Avoid overcrowding the pan, as this lowers the oil temperature and results in uneven cooking. Fry 4-5 pieces at a time.
Fry each piece for about 15 minutes, turning occasionally for even browning. The chicken is done when the crust is golden brown and the internal temperature reaches 170°F (77°C) for dark meat and 165°F (74°C) for white meat.
If you’re unsure whether the chicken is cooked through, insert a meat thermometer into the thickest part without touching the bone.
6. Drain and Rest
Once fried, transfer the chicken to a wire rack set over a baking sheet. This helps keep the crust crisp by allowing excess oil to drain. Avoid using paper towels, as they can trap steam and make the crust soggy.
Notes
Troubleshooting Common Issues:
- Chicken browns too quickly: The oil is too hot. Reduce the heat slightly and monitor the temperature.
- Chicken is undercooked inside: Ensure the oil stays at the right temperature. Frying at too low a temperature can result in raw centers.
- Coating falls off: Make sure the chicken is well-dried after the buttermilk marinade before dredging in flour. Press the flour firmly onto the chicken for better adherence.
- Too oily: Fry in small batches and maintain the oil temperature to prevent excessive oil absorption.
Kitchen Efficiency Tips:
- Prep ahead: Measure and mix your flour coating in advance for quicker dredging.
- Use tongs: This helps handle the chicken without disturbing the coating too much.
- Oil safety: Always fry with caution. Keep a lid nearby in case of oil splatters and never leave hot oil unattended.
- Prep Time: 15 minutes
- Cook Time: 45 minutes
I still remember my first time attempting homemade fried chicken. I was nervous about the oil temperature, unsure if my seasoning was right, and constantly checking if the chicken was fully cooked. But with a little practice and the right technique, I realized that making great fried chicken isn’t as complicated as it seems. This recipe simplifies the process, ensuring even beginner cooks can achieve crispy, flavorful results.
What makes this buttermilk fried chicken perfect for beginners? It uses simple ingredients, requires minimal prep work, and delivers outstanding results every time. Marinating the chicken in buttermilk not only tenderizes the meat but also helps the coating stick better, creating an irresistibly crunchy crust.
By following this step-by-step guide, you’ll learn everything from ingredient selection to frying techniques, as well as common mistakes to avoid. Whether you’re cooking for a family meal or impressing guests, this foolproof recipe will set you up for success.
Ingredients and Preparation
Before you begin, gather all your ingredients to make the cooking process smooth and efficient.
Ingredients:
- 8 pieces of bone-in, skin-on chicken (thighs and legs preferred)
- 2 cups buttermilk
- 2 cups all-purpose flour
- 1½ teaspoons garlic powder
- 1½ teaspoons paprika
- 1½ teaspoons onion powder
- 1½ teaspoons salt
- 1½ teaspoons dried thyme
- 1½ teaspoons dried basil
- 1 teaspoon salt
- 1 teaspoon ground black pepper
- 1 teaspoon garlic powder
- 1 teaspoon dried mustard
- 1 teaspoon cayenne pepper (adjust for spice preference)
- 1 tablespoon baking powder
- ½ teaspoon paprika
- Vegetable oil (enough for frying)
Alternative Ingredient Suggestions:
- Chicken Cuts: While thighs and legs are preferred due to their juiciness, you can also use bone-in chicken breasts or drumsticks. If using boneless cuts, reduce frying time accordingly.
- Flour Substitute: If you prefer a gluten-free option, try using a 1:1 gluten-free flour blend.
- Buttermilk Alternative: If you don’t have buttermilk, mix 2 cups of milk with 2 tablespoons of lemon juice or vinegar and let it sit for 10 minutes.
- Spices: Adjust the seasoning based on your preference. For a milder taste, reduce the cayenne pepper. For extra flavor, add smoked paprika or a dash of hot sauce to the buttermilk marinade.
Step-by-Step Instructions
1. Marinate the Chicken
Place the chicken pieces in a large bowl and season with salt, pepper, garlic powder, dried mustard, and paprika. Toss well to evenly coat the chicken in seasoning.
Pour the buttermilk over the seasoned chicken and stir to ensure each piece is fully submerged. The buttermilk helps tenderize the chicken and enhances the flavor.
Cover the bowl and refrigerate for at least 1 hour. For the best results, marinate overnight to allow the flavors to fully develop.
2. Prepare the Coating
In a shallow dish, whisk together the flour, baking powder, salt, garlic powder, paprika, dried basil, dried thyme, onion powder, and cayenne pepper. This seasoned flour mixture will create the signature crispy crust.
3. Heat the Oil
Pour enough vegetable oil into a deep fryer or large pot to submerge the chicken pieces. Heat the oil to around 340°F (170°C). Maintaining the right temperature is crucial—oil that’s too hot will burn the crust before the inside is fully cooked, while oil that’s too cool will make the chicken greasy.
Use a candy or deep-fry thermometer to monitor the oil temperature. If you don’t have one, test the oil by dropping a small amount of flour into it—if it sizzles immediately, it’s ready.
4. Dredge the Chicken
Remove the chicken from the buttermilk marinade, letting any excess drip off. Dredge each piece in the seasoned flour mixture, pressing firmly to ensure a thick, even coating. Shake off any excess flour before frying.
5. Fry the Chicken
Carefully place the coated chicken pieces into the hot oil. Avoid overcrowding the pan, as this lowers the oil temperature and results in uneven cooking. Fry 4-5 pieces at a time.
Fry each piece for about 15 minutes, turning occasionally for even browning. The chicken is done when the crust is golden brown and the internal temperature reaches 170°F (77°C) for dark meat and 165°F (74°C) for white meat.
If you’re unsure whether the chicken is cooked through, insert a meat thermometer into the thickest part without touching the bone.
6. Drain and Rest
Once fried, transfer the chicken to a wire rack set over a baking sheet. This helps keep the crust crisp by allowing excess oil to drain. Avoid using paper towels, as they can trap steam and make the crust soggy.
Beginner Tips and Notes
Troubleshooting Common Issues:
- Chicken browns too quickly: The oil is too hot. Reduce the heat slightly and monitor the temperature.
- Chicken is undercooked inside: Ensure the oil stays at the right temperature. Frying at too low a temperature can result in raw centers.
- Coating falls off: Make sure the chicken is well-dried after the buttermilk marinade before dredging in flour. Press the flour firmly onto the chicken for better adherence.
- Too oily: Fry in small batches and maintain the oil temperature to prevent excessive oil absorption.
Kitchen Efficiency Tips:
- Prep ahead: Measure and mix your flour coating in advance for quicker dredging.
- Use tongs: This helps handle the chicken without disturbing the coating too much.
- Oil safety: Always fry with caution. Keep a lid nearby in case of oil splatters and never leave hot oil unattended.

Serving Suggestions
Side Dishes to Pair With Fried Chicken:
- Classic Mashed Potatoes: Creamy, buttery mashed potatoes complement the crispy texture of fried chicken.
- Coleslaw: A tangy slaw with a vinegar or mayo base adds a refreshing contrast.
- Biscuits: Fluffy, buttery biscuits make an excellent side, especially when paired with honey.
- Mac and Cheese: A creamy, cheesy side dish that’s always a crowd favorite.
Dipping Sauce Ideas:
- Honey Mustard: A mix of honey, Dijon mustard, and mayonnaise.
- Spicy Mayo: Blend mayo with a dash of hot sauce and lemon juice.
- Garlic Aioli: A simple sauce of mayo, minced garlic, and lemon juice.
Storage and Reheating Tips:
- Refrigerate Leftovers: Store fried chicken in an airtight container in the refrigerator for up to 3 days.
- Reheat for Crispiness: Avoid microwaving, as it softens the crust. Instead, reheat in an oven at 350°F for 10-15 minutes.
Conclusion
Making buttermilk fried chicken at home may seem daunting at first, but with the right approach, it’s completely achievable—even for beginners. The combination of a flavorful marinade, a perfectly seasoned crust, and proper frying techniques ensures crispy, juicy results every time.
If you try this recipe, let me know how it turns out. Did you experiment with different seasonings or sides? Share your experiences, tips, or any questions in the comments. Happy cooking!