
Tiramisu is one of those desserts that seems fancy but is surprisingly simple to make. It’s rich, creamy, and full of deep coffee flavor, yet requires no baking and minimal effort. The best part? This version is entirely eggless, making it even more beginner-friendly.
Print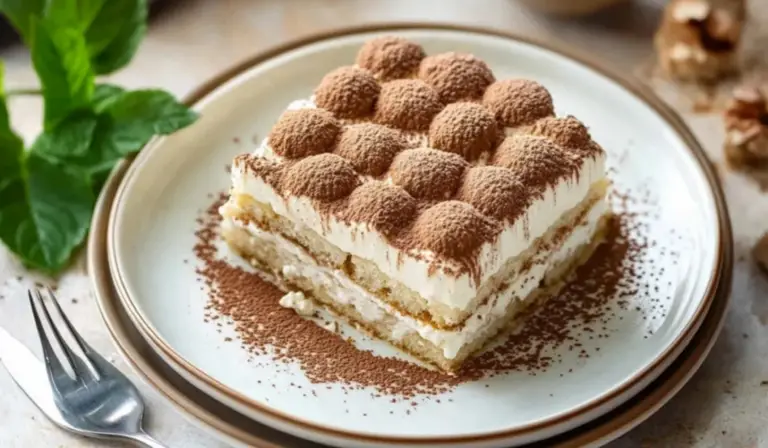
The Ultimate 10-Minute Easy Tiramisu: A Beginner’s Guide to a Classic Italian Dessert
This Ultimate 10-Minute Easy Tiramisu brings you layers of creamy mascarpone, espresso-soaked biscuits, and a dusting of cocoa—all without the wait! ☕🍫 A foolproof, no-bake dessert that’s rich, indulgent, and unbelievably easy!
- Total Time: 10 minutes
- Yield: 9 servings 1x
Ingredients
- Heavy Whipping Cream (1 ½ cups / 360ml, cold): This helps create the fluffy, stable cream layer. If unavailable, use an equal amount of chilled coconut cream for a dairy-free option.
- Powdered Sugar (⅔ cup / 65g) or Granulated Sugar (⅓ cup): Powdered sugar dissolves more easily, but granulated sugar works fine as well. If substituting, blend granulated sugar with cornstarch to mimic the smooth texture of powdered sugar.
- Vanilla Extract (1 tsp / 5ml, or to taste): Enhances the flavor of the cream. If vanilla extract is unavailable, try almond extract for a slightly nutty twist.
- Mascarpone Cheese (8oz, room temperature): The key to the creamy texture of tiramisu. If you cannot find mascarpone, substitute with a blend of cream cheese and heavy cream for a similar consistency.
- Strongly Brewed Coffee or Espresso (1 cup / 237ml): Gives the ladyfingers their signature flavor. If you prefer a caffeine-free version, use decaf coffee or hot chocolate for a sweeter variation.
- Instant Coffee (1-2 tbsp mixed in with 1 cup of water, optional): Adds a stronger coffee flavor. If using freshly brewed espresso, you can skip this.
- Ladyfingers (½ package or more, Savoiardi): The traditional choice for layering. If unavailable, substitute with plain sponge cake cut into strips or graham crackers for a different texture.
- Unsweetened Cocoa Powder (2 tbsp / 15g, for dusting): A final dusting of cocoa balances the sweetness. Use dark cocoa powder for a more intense flavor.
Instructions
Step 1: Prepare the Mascarpone Cream
In a large mixing bowl, add the cold whipping cream and beat on medium speed for about a minute until it starts to thicken. Sift in the powdered sugar and add the vanilla extract. Continue whipping until soft peaks form, meaning the cream holds its shape but is still slightly droopy.
Next, add the mascarpone cheese and mix again until stiff peaks form. Stiff peaks mean that when you lift the whisk, the cream holds its shape firmly without collapsing. Be careful not to overmix, as the mascarpone can turn grainy.
Step 2: Dip and Layer the Ladyfingers
Pour the brewed coffee into a shallow bowl. Quickly dip each ladyfinger into the coffee, making sure not to soak them too long. The biscuits should be lightly coated but not soggy. Arrange a single layer of dipped ladyfingers at the bottom of an 8×8-inch dish.
Step 3: Add the First Cream Layer
Spread half of the mascarpone mixture evenly over the ladyfingers. Use a spatula or spoon to smooth it out.
Step 4: Repeat the Layers
Repeat the dipping process with another layer of coffee-soaked ladyfingers, then spread the remaining mascarpone cream on top. Smooth it out for an even finish.
Step 5: Refrigerate and Set
Cover the dish and refrigerate for at least 3-4 hours, but overnight is ideal. Chilling allows the flavors to meld and the texture to firm up for easier slicing.
Step 6: Add the Final Touch
Before serving, use a fine-mesh strainer to dust an even layer of cocoa powder over the top. This final step enhances the presentation and balances the sweetness with a hint of bitterness.
Notes
- Whipping the Cream Properly: Cold cream whips best, so ensure it is well-chilled before starting. Using a cold bowl and beaters can also help achieve the best texture.
- Preventing Soggy Ladyfingers: Dip the biscuits quickly—just enough to absorb some coffee. Over-soaking can make the tiramisu too soft and difficult to slice.
- Achieving the Perfect Layers: Use an offset spatula or back of a spoon to spread the cream layers evenly. Keeping the dish at eye level can help you see if the layers are even.
- Making it in Advance: Tiramisu tastes even better the next day, so preparing it 24 hours ahead enhances the flavor. Store it in the refrigerator and dust with cocoa just before serving.
- Storage Tips: Tiramisu can be refrigerated for up to five days. If freezing, wrap the dish tightly in plastic wrap and foil, then store for up to three months. Thaw overnight in the refrigerator before serving.
- Prep Time: 10 minutes
For anyone new to cooking, this recipe is a fantastic way to build confidence in the kitchen. It requires only a few basic techniques, such as whipping cream and layering ingredients, and delivers a result that looks and tastes like it came from a high-end bakery. The simplicity of this dish makes it perfect for a last-minute dessert when hosting guests or satisfying a sudden sweet craving.
Tiramisu is traditionally made with mascarpone cheese, espresso-soaked ladyfingers, and a dusting of cocoa powder. While classic recipes often include raw eggs in the cream, this version skips them entirely without compromising on texture or flavor. Instead, a combination of whipped cream and mascarpone creates a light yet luscious filling.
This no-bake dessert is especially great for warm weather when turning on the oven is the last thing you want to do. With just ten minutes of preparation, a bit of patience while it chills, and a final dusting of cocoa powder, you will have a dessert that is bound to impress.
Ingredients and Substitutions
One of the best aspects of this tiramisu recipe is its flexibility. Here’s what you’ll need, along with alternative ingredient suggestions for dietary preferences or availability:
- Heavy Whipping Cream (1 ½ cups / 360ml, cold): This helps create the fluffy, stable cream layer. If unavailable, use an equal amount of chilled coconut cream for a dairy-free option.
- Powdered Sugar (⅔ cup / 65g) or Granulated Sugar (⅓ cup): Powdered sugar dissolves more easily, but granulated sugar works fine as well. If substituting, blend granulated sugar with cornstarch to mimic the smooth texture of powdered sugar.
- Vanilla Extract (1 tsp / 5ml, or to taste): Enhances the flavor of the cream. If vanilla extract is unavailable, try almond extract for a slightly nutty twist.
- Mascarpone Cheese (8oz, room temperature): The key to the creamy texture of tiramisu. If you cannot find mascarpone, substitute with a blend of cream cheese and heavy cream for a similar consistency.
- Strongly Brewed Coffee or Espresso (1 cup / 237ml): Gives the ladyfingers their signature flavor. If you prefer a caffeine-free version, use decaf coffee or hot chocolate for a sweeter variation.
- Instant Coffee (1-2 tbsp mixed in with 1 cup of water, optional): Adds a stronger coffee flavor. If using freshly brewed espresso, you can skip this.
- Ladyfingers (½ package or more, Savoiardi): The traditional choice for layering. If unavailable, substitute with plain sponge cake cut into strips or graham crackers for a different texture.
- Unsweetened Cocoa Powder (2 tbsp / 15g, for dusting): A final dusting of cocoa balances the sweetness. Use dark cocoa powder for a more intense flavor.
Step-by-Step Instructions
Step 1: Prepare the Mascarpone Cream
In a large mixing bowl, add the cold whipping cream and beat on medium speed for about a minute until it starts to thicken. Sift in the powdered sugar and add the vanilla extract. Continue whipping until soft peaks form, meaning the cream holds its shape but is still slightly droopy.
Next, add the mascarpone cheese and mix again until stiff peaks form. Stiff peaks mean that when you lift the whisk, the cream holds its shape firmly without collapsing. Be careful not to overmix, as the mascarpone can turn grainy.
Step 2: Dip and Layer the Ladyfingers
Pour the brewed coffee into a shallow bowl. Quickly dip each ladyfinger into the coffee, making sure not to soak them too long. The biscuits should be lightly coated but not soggy. Arrange a single layer of dipped ladyfingers at the bottom of an 8×8-inch dish.
Step 3: Add the First Cream Layer
Spread half of the mascarpone mixture evenly over the ladyfingers. Use a spatula or spoon to smooth it out.
Step 4: Repeat the Layers
Repeat the dipping process with another layer of coffee-soaked ladyfingers, then spread the remaining mascarpone cream on top. Smooth it out for an even finish.
Step 5: Refrigerate and Set
Cover the dish and refrigerate for at least 3-4 hours, but overnight is ideal. Chilling allows the flavors to meld and the texture to firm up for easier slicing.
Step 6: Add the Final Touch
Before serving, use a fine-mesh strainer to dust an even layer of cocoa powder over the top. This final step enhances the presentation and balances the sweetness with a hint of bitterness.
Beginner Tips and Notes
- Whipping the Cream Properly: Cold cream whips best, so ensure it is well-chilled before starting. Using a cold bowl and beaters can also help achieve the best texture.
- Preventing Soggy Ladyfingers: Dip the biscuits quickly—just enough to absorb some coffee. Over-soaking can make the tiramisu too soft and difficult to slice.
- Achieving the Perfect Layers: Use an offset spatula or back of a spoon to spread the cream layers evenly. Keeping the dish at eye level can help you see if the layers are even.
- Making it in Advance: Tiramisu tastes even better the next day, so preparing it 24 hours ahead enhances the flavor. Store it in the refrigerator and dust with cocoa just before serving.
- Storage Tips: Tiramisu can be refrigerated for up to five days. If freezing, wrap the dish tightly in plastic wrap and foil, then store for up to three months. Thaw overnight in the refrigerator before serving.
Serving Suggestions
Tiramisu is delicious on its own, but pairing it with complementary flavors can enhance the experience. Here are some ideas:
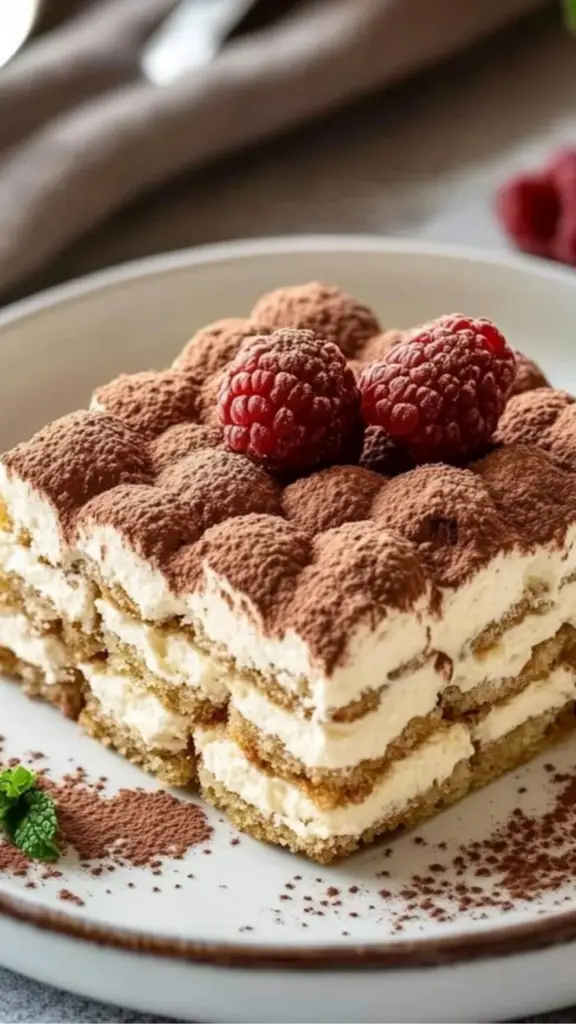
- Fresh Berries: A side of raspberries, strawberries, or blueberries adds a refreshing contrast to the creamy texture.
- Chocolate Shavings: Instead of just cocoa powder, garnish with dark chocolate curls for added richness.
- Whipped Cream: A small dollop of extra whipped cream on each slice makes the presentation even more elegant.
- Coffee or Hot Chocolate: A warm beverage complements the chilled tiramisu and enhances the coffee notes.
For a unique twist, consider adding a flavored drizzle such as caramel, chocolate syrup, or even a fruit reduction.
Conclusion
This 10-minute tiramisu proves that a show-stopping dessert doesn’t have to be complicated. With minimal ingredients and simple steps, even absolute beginners can create a dish that looks impressive and tastes even better. The creamy mascarpone, the coffee-soaked ladyfingers, and the hint of cocoa come together in perfect harmony, creating a dessert that is both indulgent and refreshing.
If you’ve never made tiramisu before, this is the perfect place to start. The recipe is forgiving, allowing for variations and substitutions without compromising the final result. Once you try it, you may find yourself making it for every special occasion or simply as a well-deserved treat.
Give this recipe a try, and let us know how it turns out. Did you add any personal twists? Did you face any challenges along the way? Share your experience and any questions in the comments. Happy cooking.