
Grilled chicken is one of the most versatile and satisfying meals you can make, especially for beginners looking to master simple, flavorful cooking. It is lean, packed with protein, and can be paired with various sides to create a well-balanced meal. One of the biggest concerns when cooking chicken breasts is keeping them juicy and flavorful rather than ending up with dry, overcooked meat. This recipe eliminates that problem by using a well-balanced marinade and an easy grilling technique that ensures the perfect texture and taste.
Print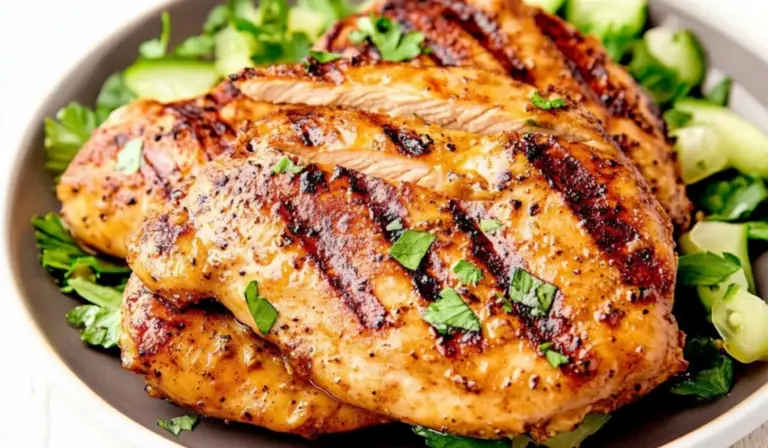
The Best Grilled Chicken Breasts: A Beginner’s Guide to Juicy, Flavorful Chicken
Master the art of grilled chicken with this beginner-friendly recipe! 🍗🔥 These Grilled Chicken Breasts are marinated in savory herbs and spices, delivering tender, juicy bites every time. Perfect for weeknight dinners, BBQs, or meal prep!
- Total Time: 25 minutes
- Yield: 4 servings 1x
Ingredients
- 1 pound thinly sliced chicken breasts (about four 4-ounce pieces)
- 2 tablespoons extra virgin olive oil
- 2 tablespoons red wine vinegar
- 2 tablespoons soy sauce
- 2 tablespoons Worcestershire sauce
- 2 tablespoons brown sugar
- 1 tablespoon lemon juice
- 1 tablespoon Dijon mustard
- 1 teaspoon garlic powder
- 1 teaspoon ground ginger
- 1 teaspoon onion powder
- 1 teaspoon crushed dried rosemary
- ½ teaspoon paprika
- ½ teaspoon salt (plus more to taste if needed)
- ½ teaspoon ground black pepper
Instructions
1. Prepare the Chicken
Place the thinly sliced chicken breasts into a gallon-sized ziplock bag or a shallow dish. This will allow the marinade to coat the chicken evenly. If the chicken pieces are uneven in thickness, consider pounding them slightly to ensure they cook uniformly.
2. Make the Marinade
In a medium-sized mixing bowl, whisk together the olive oil, red wine vinegar, soy sauce, Worcestershire sauce, brown sugar, lemon juice, Dijon mustard, garlic powder, ground ginger, onion powder, crushed rosemary, paprika, salt, and black pepper. Whisking ensures that the ingredients are well combined, distributing the flavors evenly.
3. Marinate the Chicken
Reserve about ⅓ cup of the marinade for basting while grilling. Pour the remaining marinade over the chicken, ensuring that each piece is well-coated. Cover the dish or seal the bag and refrigerate for at least 4 hours, preferably overnight for maximum flavor. Avoid marinating for more than 24 hours, as the acidity in the marinade can break down the chicken too much, affecting its texture.
4. Preheat the Grill
Lightly grease the grates of your grill with oil (avocado oil works well for this) and preheat to medium-high heat (about 400°F). This prevents the chicken from sticking and helps achieve those beautiful grill marks.
5. Grill the Chicken
Remove the chicken from the marinade, allowing the excess to drip off. Place the chicken on the grill and cook for 2 to 3 minutes per side. Use tongs to flip the chicken, and avoid pressing down on it to retain juices. While grilling, baste the chicken occasionally with the reserved marinade to add an extra layer of flavor.
6. Check for Doneness
The chicken is done when it reaches an internal temperature of 165°F. Using a meat thermometer is the most accurate way to check doneness. If you do not have a thermometer, cut into the thickest part of the chicken; the juices should run clear, and the center should be opaque.
7. Rest the Chicken
Once cooked, remove the chicken from the grill and let it rest for 5 minutes. This allows the juices to redistribute, keeping the meat moist and flavorful.
Notes
Common Troubleshooting Advice
- Overcooked Chicken: If the chicken turns out dry, it was likely cooked too long or at too high a temperature. Stick to the recommended cooking time and check for doneness with a thermometer.
- Undercooked Chicken: If the chicken is still pink inside, return it to the grill for an extra minute per side. Always ensure it reaches 165°F.
- Chicken Sticking to the Grill: Ensure the grill grates are clean and well-oiled before cooking. Let the chicken sear before attempting to flip it.
Helpful Kitchen Tips
- Prepping Efficiently: Measure out your marinade ingredients in advance to make the process smoother.
- Substituting Tools: If you don’t have a whisk, use a fork to mix the marinade. If you lack a grill, cook the chicken on a stovetop grill pan or a cast-iron skillet over medium-high heat.
- Prep Time: 15 minutes
- Cook Time: 10 minutes
I remember my first attempt at grilling chicken breasts. I was excited, but my main concern was overcooking them, leading to tough, rubbery meat. I had read countless tips about marinating, resting, and proper grilling techniques, but I didn’t fully understand their importance until I followed a recipe similar to this one. The moment I bit into my first perfectly grilled chicken breast—tender, juicy, and infused with bold flavors—I knew I had found a go-to recipe. This method works every time, making it perfect for beginners who want reliable results without complicated steps.
This recipe is ideal for those new to cooking because it requires minimal effort but delivers restaurant-quality flavor. The marinade does most of the work, allowing the chicken to absorb a perfect balance of savory, tangy, and slightly sweet notes. The cooking process is straightforward, requiring only a grill, a few basic ingredients, and a bit of patience. Whether you are cooking for yourself, your family, or guests, this grilled chicken will quickly become a favorite in your meal rotation.
Ingredients and Preparation
To make the best grilled chicken breasts, you need simple, everyday ingredients that come together to create a well-balanced marinade.
Ingredients
- 1 pound thinly sliced chicken breasts (about four 4-ounce pieces)
- 2 tablespoons extra virgin olive oil
- 2 tablespoons red wine vinegar
- 2 tablespoons soy sauce
- 2 tablespoons Worcestershire sauce
- 2 tablespoons brown sugar
- 1 tablespoon lemon juice
- 1 tablespoon Dijon mustard
- 1 teaspoon garlic powder
- 1 teaspoon ground ginger
- 1 teaspoon onion powder
- 1 teaspoon crushed dried rosemary
- ½ teaspoon paprika
- ½ teaspoon salt (plus more to taste if needed)
- ½ teaspoon ground black pepper
Alternative Ingredient Suggestions
- Chicken Alternatives: If you prefer dark meat, boneless skinless chicken thighs work well and stay even juicier on the grill.
- Oil Options: Avocado oil or grapeseed oil can be used instead of olive oil for a higher smoke point.
- Vinegar Substitutes: Apple cider vinegar or balsamic vinegar can be swapped for red wine vinegar, adding a slightly different depth of flavor.
- Sweeteners: Honey or maple syrup can replace brown sugar for a natural sweetener.
- Spice Adjustments: If you prefer a bit of heat, add ¼ teaspoon of cayenne pepper or red pepper flakes.
Step-by-Step Instructions
This recipe is designed for beginner cooks, breaking down the process into simple, easy-to-follow steps.
1. Prepare the Chicken
Place the thinly sliced chicken breasts into a gallon-sized ziplock bag or a shallow dish. This will allow the marinade to coat the chicken evenly. If the chicken pieces are uneven in thickness, consider pounding them slightly to ensure they cook uniformly.
2. Make the Marinade
In a medium-sized mixing bowl, whisk together the olive oil, red wine vinegar, soy sauce, Worcestershire sauce, brown sugar, lemon juice, Dijon mustard, garlic powder, ground ginger, onion powder, crushed rosemary, paprika, salt, and black pepper. Whisking ensures that the ingredients are well combined, distributing the flavors evenly.
3. Marinate the Chicken
Reserve about ⅓ cup of the marinade for basting while grilling. Pour the remaining marinade over the chicken, ensuring that each piece is well-coated. Cover the dish or seal the bag and refrigerate for at least 4 hours, preferably overnight for maximum flavor. Avoid marinating for more than 24 hours, as the acidity in the marinade can break down the chicken too much, affecting its texture.
4. Preheat the Grill
Lightly grease the grates of your grill with oil (avocado oil works well for this) and preheat to medium-high heat (about 400°F). This prevents the chicken from sticking and helps achieve those beautiful grill marks.
5. Grill the Chicken
Remove the chicken from the marinade, allowing the excess to drip off. Place the chicken on the grill and cook for 2 to 3 minutes per side. Use tongs to flip the chicken, and avoid pressing down on it to retain juices. While grilling, baste the chicken occasionally with the reserved marinade to add an extra layer of flavor.
6. Check for Doneness
The chicken is done when it reaches an internal temperature of 165°F. Using a meat thermometer is the most accurate way to check doneness. If you do not have a thermometer, cut into the thickest part of the chicken; the juices should run clear, and the center should be opaque.
7. Rest the Chicken
Once cooked, remove the chicken from the grill and let it rest for 5 minutes. This allows the juices to redistribute, keeping the meat moist and flavorful.
Beginner Tips and Notes
Common Troubleshooting Advice
- Overcooked Chicken: If the chicken turns out dry, it was likely cooked too long or at too high a temperature. Stick to the recommended cooking time and check for doneness with a thermometer.
- Undercooked Chicken: If the chicken is still pink inside, return it to the grill for an extra minute per side. Always ensure it reaches 165°F.
- Chicken Sticking to the Grill: Ensure the grill grates are clean and well-oiled before cooking. Let the chicken sear before attempting to flip it.
Helpful Kitchen Tips
- Prepping Efficiently: Measure out your marinade ingredients in advance to make the process smoother.
- Substituting Tools: If you don’t have a whisk, use a fork to mix the marinade. If you lack a grill, cook the chicken on a stovetop grill pan or a cast-iron skillet over medium-high heat.
Serving Suggestions
Grilled chicken pairs well with a variety of sides and sauces. Here are some ideas to enhance your meal.
Side Dish Pairings
- Grilled Vegetables: Bell peppers, zucchini, asparagus, and mushrooms add a smoky, nutritious complement.
- Rice or Quinoa: A light and fluffy grain balances the bold flavors of the chicken.
- Fresh Salad: A crisp green salad with a simple vinaigrette provides a refreshing contrast.
Sauce Pairings
- Garlic Herb Butter: Melted butter mixed with fresh garlic and herbs enhances the dish.
- Yogurt-Based Sauce: A simple mixture of Greek yogurt, lemon juice, and herbs creates a creamy, tangy dip.
- Spicy Sriracha Mayo: Combine mayonnaise, sriracha, and a squeeze of lime for a spicy kick.
Storage Tips for Leftovers
If you have leftovers, store them properly to maintain their flavor and texture.
- Refrigeration: Store cooked chicken in an airtight container in the refrigerator for up to 4 days.
- Freezing: Wrap individual pieces in plastic wrap and place them in a freezer-safe bag for up to 3 months. Thaw overnight in the refrigerator before reheating.
- Reheating: Warm the chicken in a covered skillet over low heat or in the oven at 300°F to retain moisture. Avoid microwaving for too long to prevent drying out.
Conclusion
This grilled chicken breast recipe is perfect for beginner cooks looking for an easy, foolproof way to achieve juicy, flavorful chicken every time. The marinade does the heavy lifting, creating a well-balanced blend of savory, tangy, and slightly sweet flavors, while the grilling method ensures tender meat with a delicious char.
If you try this recipe, share your experience and any personal twists in the comments. Cooking is all about learning and experimenting, and this grilled chicken is a great place to start. Whether you serve it as a main dish, in a salad, or as part of a meal prep plan, this recipe is sure to become a staple in your kitchen.