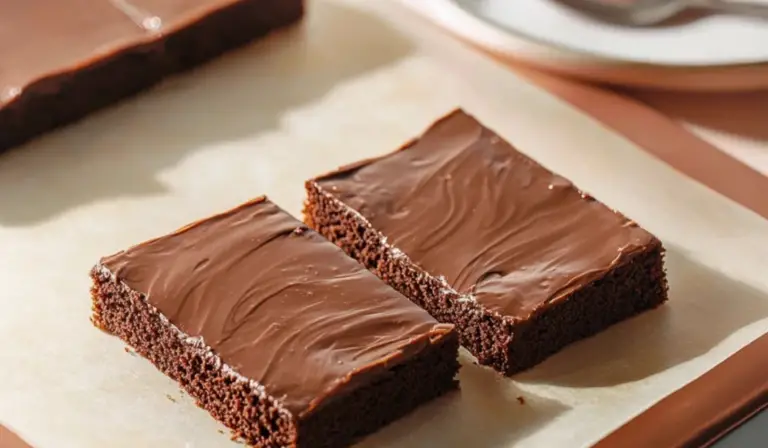
Ingredients
Scale
For the Cake:
- 2 cups of all-purpose flour
- 2 cups of granulated sugar
- ¼ teaspoon salt
- 4 tablespoons unsweetened cocoa powder
- 1 cup (16 tablespoons) unsalted butter
- 1 cup boiling water
- ½ cup buttermilk
- 2 large eggs (whisked together)
- 1 teaspoon baking soda
- 1 teaspoon vanilla extract
For the Icing:
- 14 tablespoons unsalted butter
- 4 tablespoons unsweetened cocoa powder
- 6 tablespoons milk
- 1 teaspoon vanilla extract
- 3½ cups powdered sugar (sifted)
Instructions
- Preheat the Oven and Prep the Pan: Begin by preheating your oven to 350°F (175°C). While the oven is heating up, lightly spray an 18×13-inch baking sheet with cooking spray or grease it with butter. Set it aside to get ready for the cake batter.
- Mix the Dry Ingredients: In a large mixing bowl, whisk together the flour, sugar, and salt. This will ensure that the dry ingredients are evenly distributed before you add the wet ones. It’s a quick step that will make the rest of the process even smoother.
- Melt the Butter and Cocoa: In a medium saucepan over medium-low heat, melt 1 cup (16 tablespoons) of unsalted butter. Once the butter is fully melted, add in the cocoa powder. Whisk it together until smooth. This is the base of your rich chocolate flavor, and trust me, it smells heavenly.
- Add Boiling Water: Carefully add 1 cup of boiling water to the saucepan and whisk it in with the cocoa and butter mixture. The water helps create a smooth batter and gives the cake its moist texture. The mixture will bubble a little—this is totally normal and ensures the cake will be rich and flavorful.
- Combine Wet Ingredients: In a separate bowl, whisk together the buttermilk, eggs, baking soda, and vanilla extract. This will ensure the eggs are fully incorporated and the baking soda is evenly distributed. Once everything is well mixed, add it to the chocolate mixture in the saucepan.
- Combine Wet and Dry Ingredients: Pour the wet mixture into the bowl with the dry ingredients and gently stir until just combined. Be careful not to overmix, as this could lead to a dense cake. You want to keep things light and fluffy.
- Bake the Cake: Pour the cake batter into your prepared baking sheet. Use a spatula to spread the batter evenly. Pop the pan into the preheated oven and bake for 20 minutes, or until a toothpick inserted into the center of the cake comes out clean. The cake should rise nicely and develop a soft, moist texture.
- Poke the Cake: Once the cake is out of the oven, grab a fork or a wooden skewer and poke small holes all over the surface of the cake. This step is important because it allows the frosting to soak into the cake, making it extra moist and flavorful. You’ll want to poke it generously but carefully—just enough to make small holes without breaking the cake.
- Make the Frosting: While the cake is baking, prepare the frosting. Melt the remaining 14 tablespoons of butter in a saucepan over medium-low heat. Once melted, whisk in the cocoa powder. After the cocoa is smooth, turn off the heat. Add in the milk, vanilla extract, and sift in the powdered sugar while whisking constantly to avoid lumps.
- Frost the Cake: Once the frosting is smooth and velvety, pour it over the warm cake, making sure to cover it evenly. Let the frosting settle into the holes you made earlier for a moist and rich finish. Let the cake cool for 10-15 minutes before slicing and serving.
Notes
- Don’t Overmix the Batter: When combining your wet and dry ingredients, mix gently until they’re just incorporated. Overmixing can lead to a dense cake, and that’s the last thing you want!
- Poking the Cake: Make sure you poke the cake with a fork or skewer while it’s still hot out of the oven. This is one of the secrets to creating a moist cake with an irresistible frosting soak.
- Check for Doneness: Baking times can vary depending on your oven and the pan you use. After 20 minutes, insert a toothpick into the center of the cake. If it comes out clean or with just a few moist crumbs, the cake is done. If not, pop it back into the oven for a few more minutes.
- Storage Tips: This cake is actually better the longer it sits, so you can store leftovers (if there are any!) at room temperature for up to 5 days. Just cover it with plastic wrap or foil. The frosting will help keep it moist, so there’s no need to refrigerate it unless you’re storing it for an extended period of time.
- Freezing the Cake: You can also freeze this cake! Let it cool completely, then wrap it tightly in plastic wrap and foil. Store in the freezer for up to 2 months. When you’re ready to eat it, just let the cake thaw to room temperature, and it’ll taste just as delicious as the day you made it.
- Prep Time: 15 minutes
- Cook Time: 20 minutes