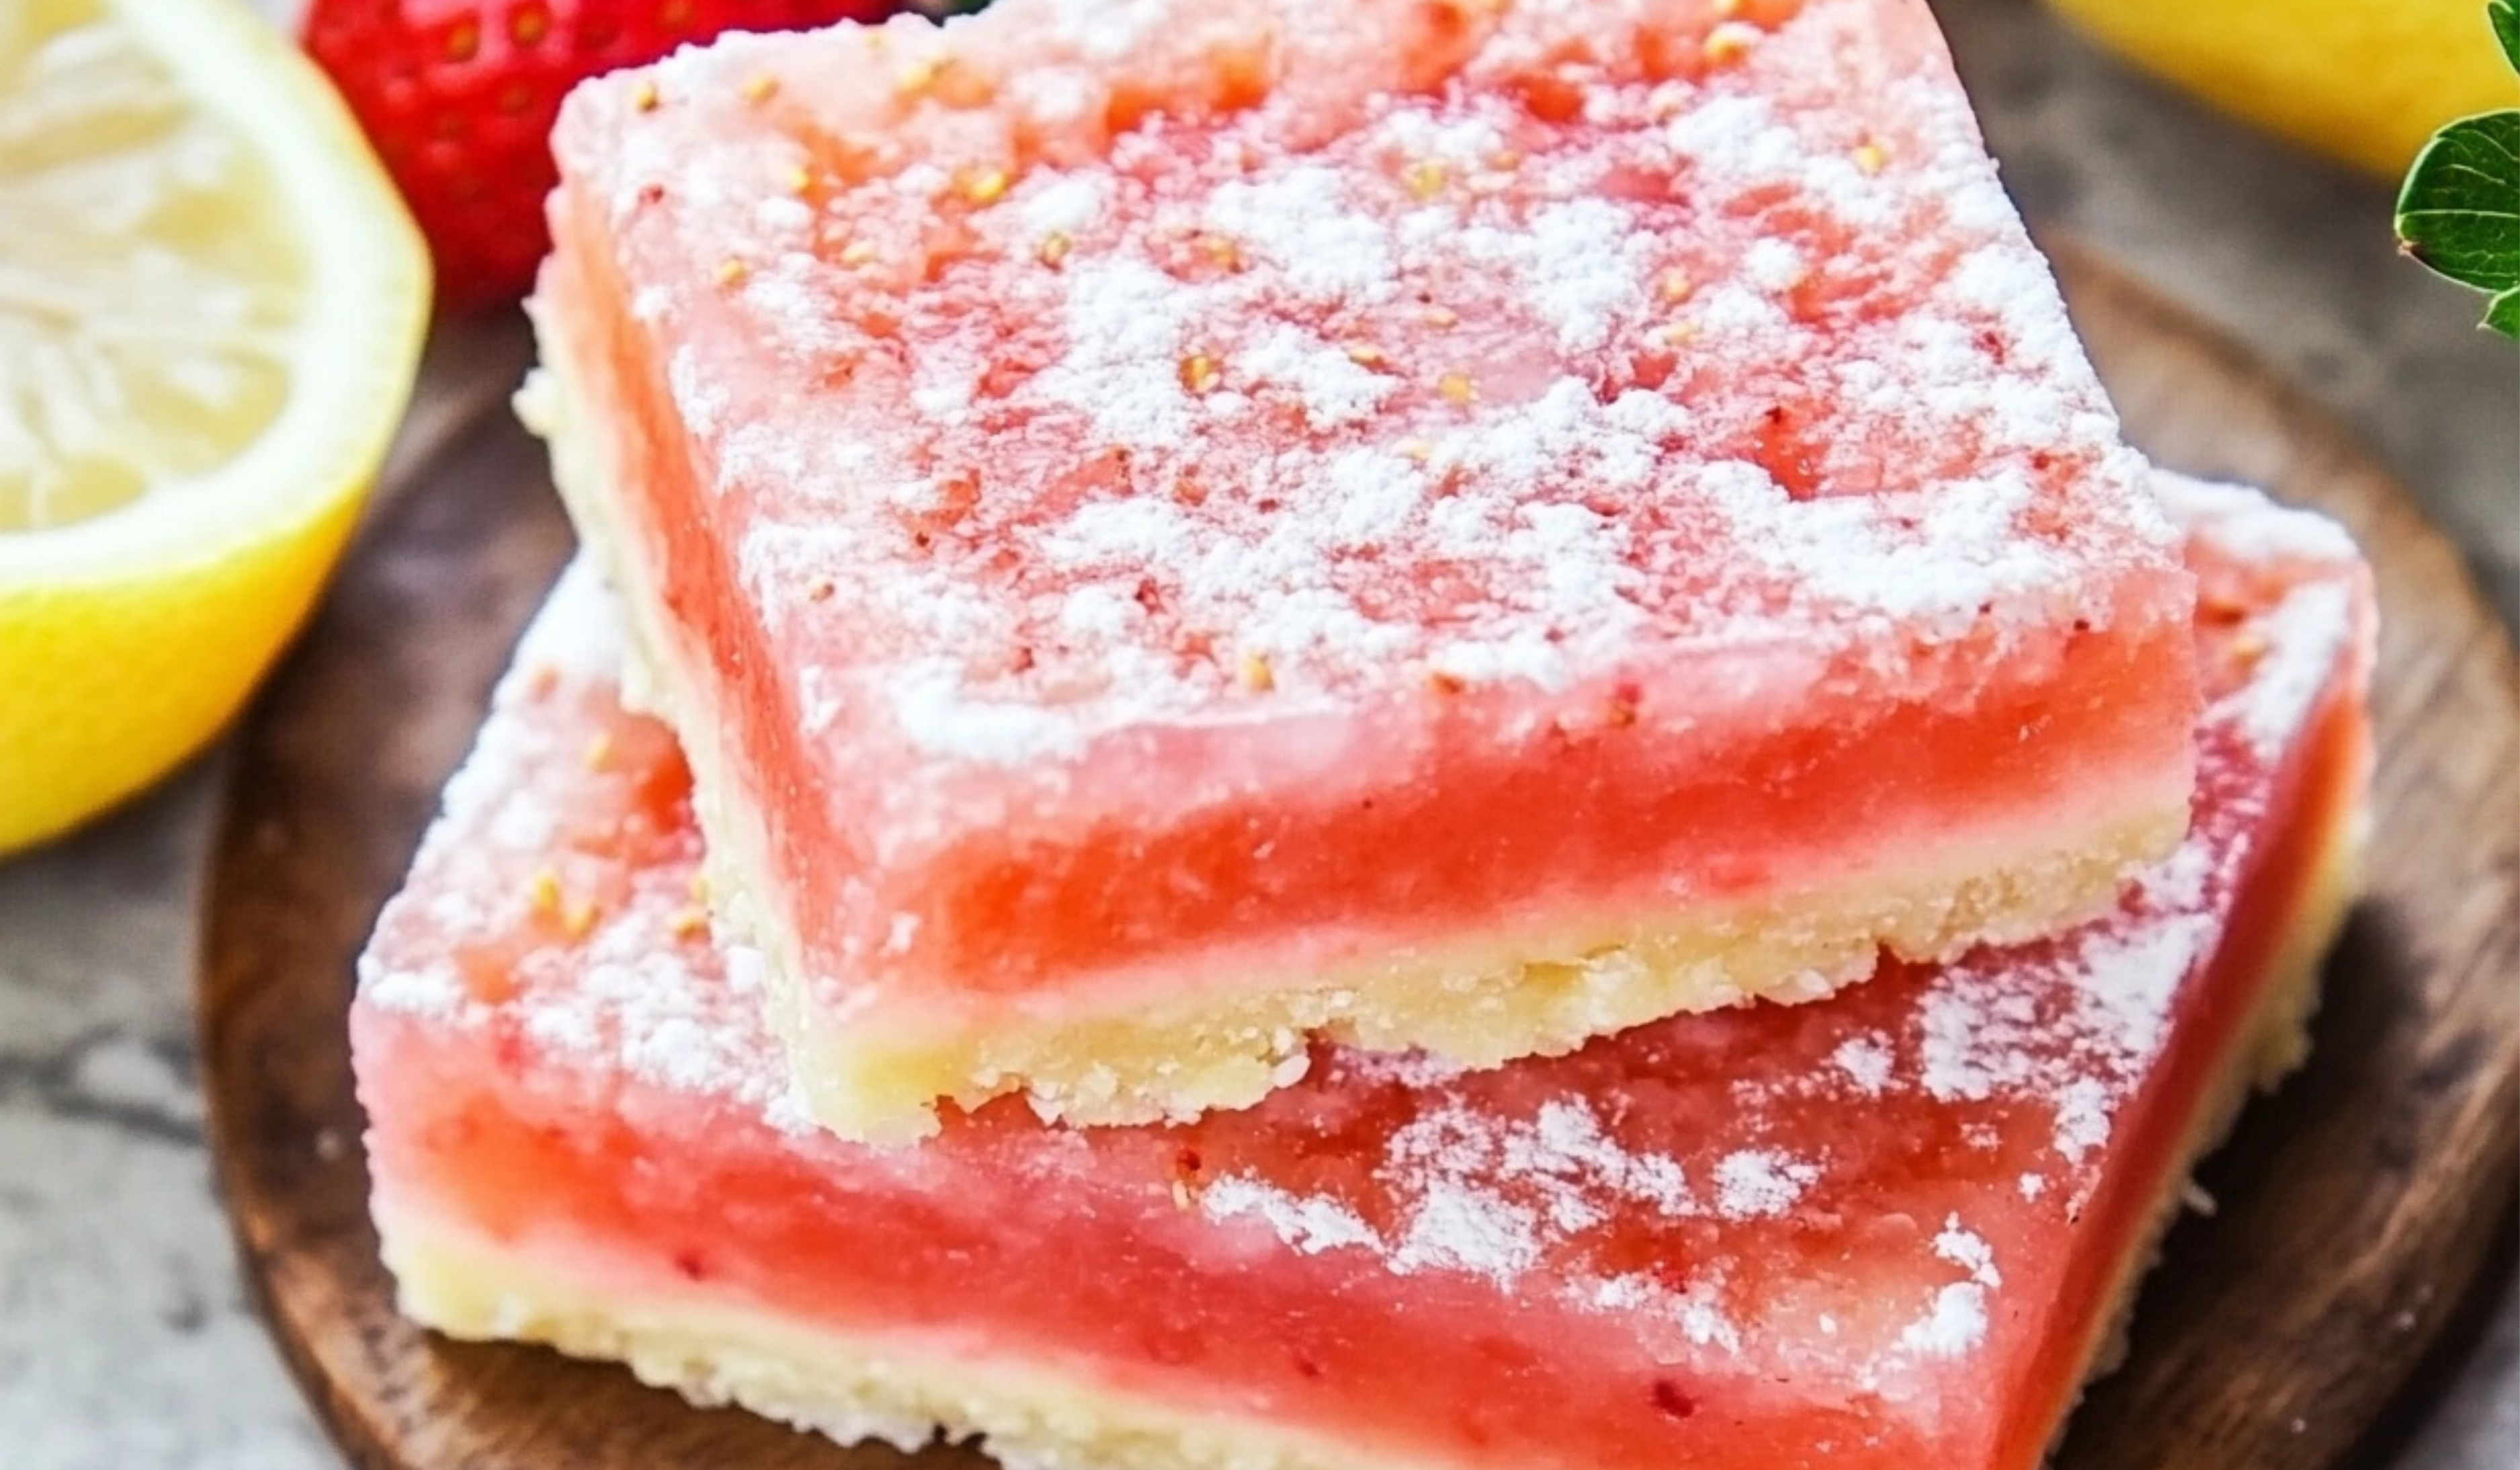
There’s something truly nostalgic about the combination of strawberries and lemonade—it brings to mind warm summer afternoons, refreshing drinks, and the joy of simple homemade treats. These Strawberry Lemonade Bars capture that same bright, tangy-sweet flavor in a soft and chewy dessert that is easy enough for beginners to make. Whether you’re new to baking or looking for a simple yet impressive dessert, this recipe is a perfect choice.
Print
Strawberry Lemonade Bars: A Refreshing and Easy Treat for Beginners
Love the sweet-tart taste of strawberry lemonade? These Strawberry Lemonade Bars turn that refreshing flavor into a buttery, citrusy dessert! With a zesty lemon base and fresh strawberry twist, they’re the ultimate summer-inspired treat. No fancy skills required—just mix, bake, and enjoy! Perfect for potlucks, picnics, or a bright afternoon snack, these bars bring a pop of color and flavor to any table. Serve chilled for an extra-refreshing bite. Who’s ready to bake up a batch of sunshine?
#ZestyTreats #BerryDelight #LemonLover #EasyBakes #SweetAndTart #HomemadeDesserts #SimpleIndulgence #BakingForBeginners #RefreshingBites #StrawberryMagic
- Total Time: 40 minutes
- Yield: 12–16 bars 1x
Ingredients
For the crust:
- ½ cup butter, room temperature
- ¼ cup sugar
- 1½ cups flour
- ¼ teaspoon salt
For the filling:
- 1 cup fresh lemon juice
- 2–3 teaspoons lemon zest
- ¾ cup chopped strawberries
- 1¼ cups sugar
- 4 large eggs
- ¼ cup flour
- ½ teaspoon baking powder
- ¼ teaspoon salt
- Powdered sugar (for garnish)
Instructions
Step 1: Prepare the Crust
- Preheat the oven to 350°F (175°C). Line a 9×13-inch baking pan with parchment paper or foil, and lightly spray it with cooking spray to prevent sticking.
- In a medium-sized bowl, cream the butter and sugar together using a hand mixer or spoon until the mixture becomes light and fluffy. This step ensures a tender and flavorful crust.
- Add the flour and salt, mixing until a crumbly dough forms. If the mixture feels too dry, gently press it together with your hands.
- Transfer the dough to the prepared baking pan and press it down evenly to form a firm, compact layer.
- Bake for 15 minutes, or until the edges turn lightly golden. While the crust bakes, prepare the filling.
Step 2: Make the Filling
- In a blender or food processor, combine the lemon juice, lemon zest, strawberries, and sugar. Blend until smooth, ensuring that no large chunks remain.
- Add the eggs and blend again until the mixture becomes creamy and well incorporated.
- Sprinkle in the flour, baking powder, and salt, blending once more until the filling is smooth and uniform in texture.
Step 3: Bake the Bars
- Carefully pour the filling over the hot, pre-baked crust. It is important that the crust is still warm when adding the filling to help it set properly.
- Return the pan to the oven and bake for 22-25 minutes, or until the top appears set, dry, and slightly golden. A gentle shake of the pan should show no excessive movement in the center.
- Remove from the oven and let the bars cool completely in the pan before slicing.
Step 4: Finishing Touches
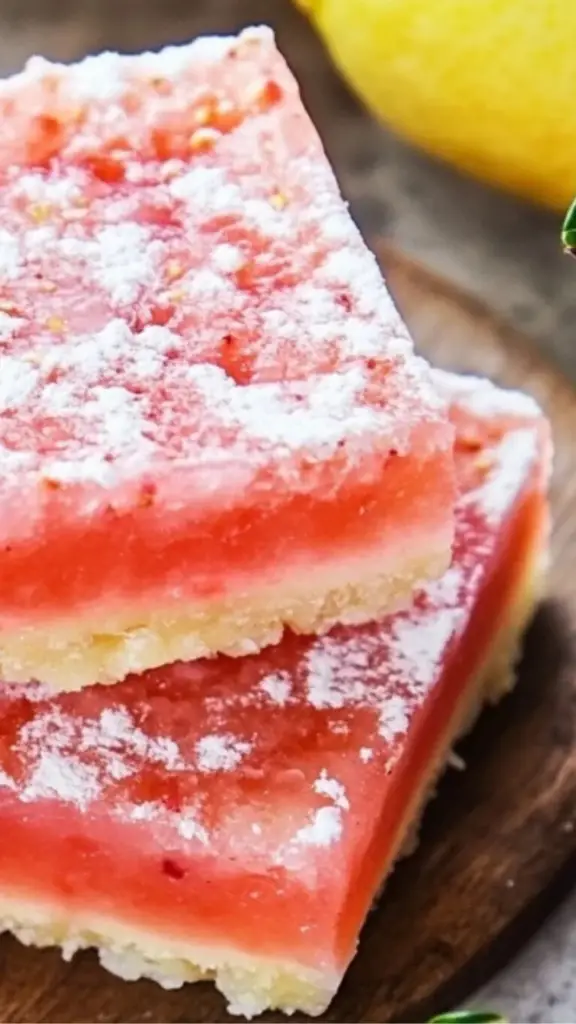
- Once cooled, dust the top with powdered sugar for a classic, elegant finish. This not only adds a touch of sweetness but also enhances the presentation.
- Slice into squares or rectangles and serve!
Notes
- How to Tell If the Bars Are Done:
- The edges should be a light golden brown, and the center should be firm to the touch.
- If the filling still jiggles significantly when you move the pan, bake for another 2-3 minutes.
- Avoiding a Soggy Crust:
- Be sure to bake the crust before adding the filling. This step is crucial to prevent a soggy bottom.
- Use room temperature butter to help the crust mix evenly.
- What If the Bars Crack or Overbake?
- Overbaking can lead to a dry texture. If the bars crack, you can lightly brush them with a sugar syrup (equal parts sugar and water, heated until dissolved) to restore moisture.
- Cutting Perfect Bars:
- Let the bars cool completely before slicing to prevent a messy cut.
- Use a sharp knife, wiping it clean between slices for a neat finish.
- Storing and Freezing:
- Store leftover bars in an airtight container in the refrigerator for up to 4 days.
- For longer storage, freeze the bars (without the powdered sugar) by wrapping them tightly in plastic wrap and placing them in a freezer-safe container. Thaw in the fridge before serving.
- Prep Time: 15 minutes
- Cook Time: 25 minutes
What makes these bars great for beginners? The steps are straightforward, requiring just a few basic baking techniques. There’s no need for fancy equipment—just a blender or food processor to mix the filling and a bowl to prepare the crust. The ingredients are easy to find, and the result is a beautifully layered treat with a buttery crust and a luscious strawberry-lemon filling.
Let’s dive into the details of how to make these delightful bars, along with tips to ensure they turn out perfectly every time.
Ingredients and Preparation
For the crust:
- ½ cup butter, room temperature
- ¼ cup sugar
- 1½ cups flour
- ¼ teaspoon salt
For the filling:
- 1 cup fresh lemon juice
- 2-3 teaspoons lemon zest
- ¾ cup chopped strawberries
- 1¼ cups sugar
- 4 large eggs
- ¼ cup flour
- ½ teaspoon baking powder
- ¼ teaspoon salt
- Powdered sugar (for garnish)
Alternative Ingredient Options:
- Butter substitute: If you need a dairy-free option, use plant-based butter or coconut oil.
- Sugar alternatives: You can replace white sugar with honey, maple syrup, or a sugar substitute like stevia, but this may slightly alter the texture.
- Flour options: For a gluten-free version, use a gluten-free flour blend that contains xanthan gum.
- Strawberries: While fresh strawberries work best, frozen strawberries (thawed and drained) can also be used.
Step-by-Step Instructions
Step 1: Prepare the Crust
- Preheat the oven to 350°F (175°C). Line a 9×13-inch baking pan with parchment paper or foil, and lightly spray it with cooking spray to prevent sticking.
- In a medium-sized bowl, cream the butter and sugar together using a hand mixer or spoon until the mixture becomes light and fluffy. This step ensures a tender and flavorful crust.
- Add the flour and salt, mixing until a crumbly dough forms. If the mixture feels too dry, gently press it together with your hands.
- Transfer the dough to the prepared baking pan and press it down evenly to form a firm, compact layer.
- Bake for 15 minutes, or until the edges turn lightly golden. While the crust bakes, prepare the filling.
Step 2: Make the Filling
- In a blender or food processor, combine the lemon juice, lemon zest, strawberries, and sugar. Blend until smooth, ensuring that no large chunks remain.
- Add the eggs and blend again until the mixture becomes creamy and well incorporated.
- Sprinkle in the flour, baking powder, and salt, blending once more until the filling is smooth and uniform in texture.
Step 3: Bake the Bars
- Carefully pour the filling over the hot, pre-baked crust. It is important that the crust is still warm when adding the filling to help it set properly.
- Return the pan to the oven and bake for 22-25 minutes, or until the top appears set, dry, and slightly golden. A gentle shake of the pan should show no excessive movement in the center.
- Remove from the oven and let the bars cool completely in the pan before slicing.
Step 4: Finishing Touches
- Once cooled, dust the top with powdered sugar for a classic, elegant finish. This not only adds a touch of sweetness but also enhances the presentation.
- Slice into squares or rectangles and serve!
Beginner Tips and Notes
- How to Tell If the Bars Are Done:
- The edges should be a light golden brown, and the center should be firm to the touch.
- If the filling still jiggles significantly when you move the pan, bake for another 2-3 minutes.
- Avoiding a Soggy Crust:
- Be sure to bake the crust before adding the filling. This step is crucial to prevent a soggy bottom.
- Use room temperature butter to help the crust mix evenly.
- What If the Bars Crack or Overbake?
- Overbaking can lead to a dry texture. If the bars crack, you can lightly brush them with a sugar syrup (equal parts sugar and water, heated until dissolved) to restore moisture.
- Cutting Perfect Bars:
- Let the bars cool completely before slicing to prevent a messy cut.
- Use a sharp knife, wiping it clean between slices for a neat finish.
- Storing and Freezing:
- Store leftover bars in an airtight container in the refrigerator for up to 4 days.
- For longer storage, freeze the bars (without the powdered sugar) by wrapping them tightly in plastic wrap and placing them in a freezer-safe container. Thaw in the fridge before serving.
Serving Suggestions
- These bars pair wonderfully with vanilla ice cream or whipped cream for an extra indulgent treat.
- Serve alongside a hot cup of tea or a refreshing iced lemonade to complement the bright citrus flavors.
- If you’re making these for a party or gathering, arrange them on a dessert platter with fresh strawberries and lemon slices for a beautiful presentation.
Conclusion: Why You’ll Love This Recipe
Strawberry Lemonade Bars are the perfect dessert for beginner bakers looking for a simple yet impressive treat. With a buttery crust, tangy citrus flavor, and sweet strawberry balance, these bars deliver a refreshing twist on traditional lemon bars. The recipe is flexible, allowing for ingredient swaps and easy adjustments, making it ideal for anyone experimenting in the kitchen.
If you try this recipe, share your experience in the comments! Did you make any modifications? How did they turn out? Baking is all about learning and having fun, so don’t be afraid to get creative. Enjoy your homemade Strawberry Lemonade Bars!