There’s something undeniably comforting about homemade pie. The delicate balance of a buttery, flaky crust, the soft, juicy filling, and a topping that adds a perfect crunch. When I first attempted to make a strawberry crumble pie, I was both excited and intimidated. As a beginner cook, I wasn’t sure if I could pull it off. But to my delight, this recipe proved to be simple, quick, and immensely satisfying. It’s the kind of dessert that will impress your family and friends while requiring minimal effort. Whether you’re a seasoned baker or someone who is just starting to explore the kitchen, this strawberry crumble pie is a great recipe to have in your arsenal. It’s full of vibrant strawberries, perfectly complemented by a golden crumble topping, and it’s surprisingly easy to make. Let’s dive in!
Print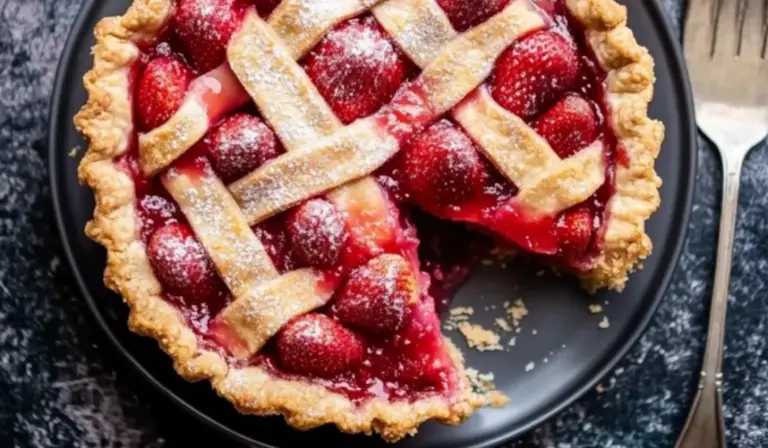
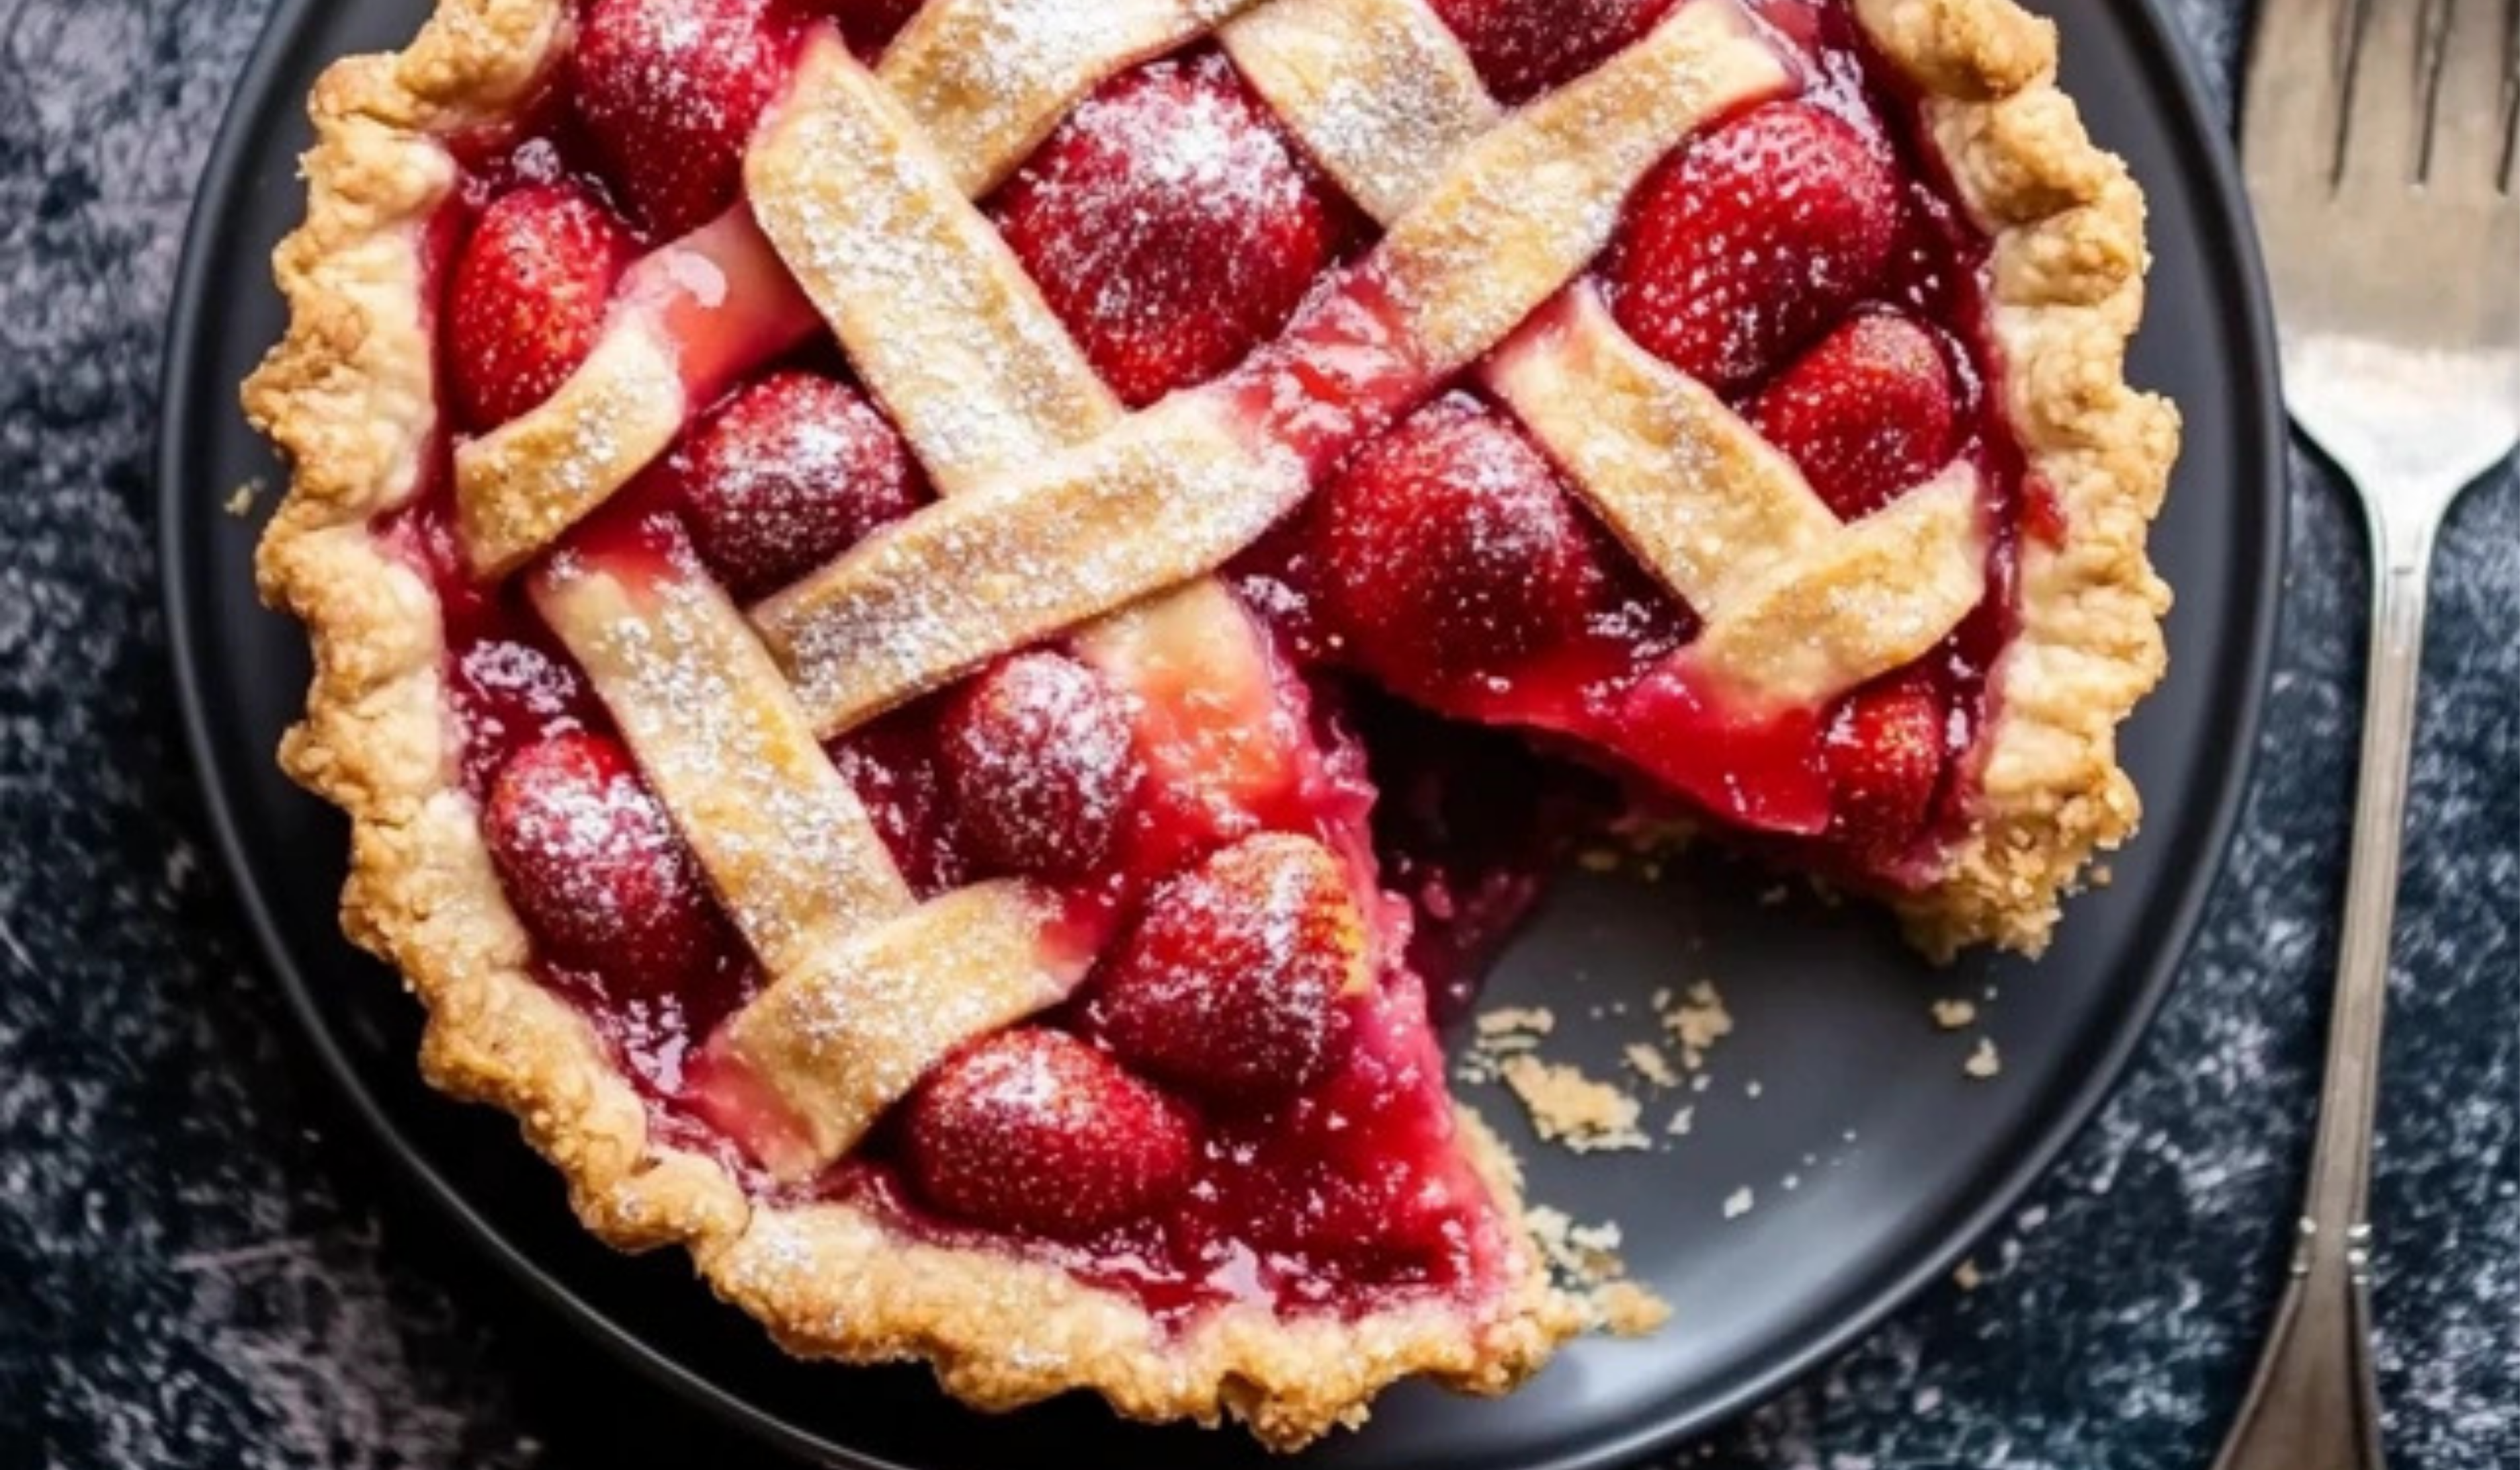
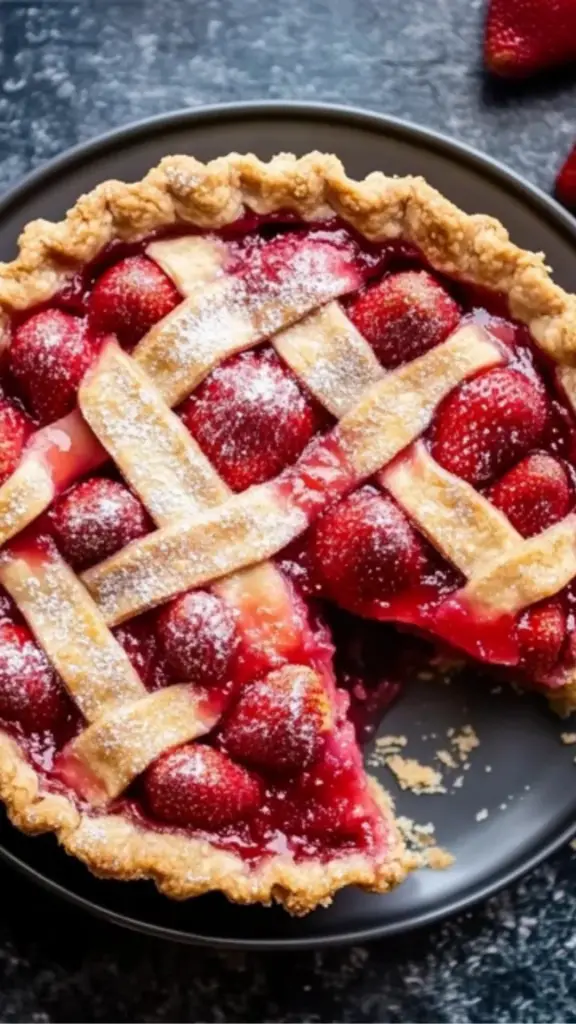
Strawberry Crumble Pie: A Beginner’s Guide to Making a Sweet, Jammy Delight
Juicy strawberries, buttery crumble topping, and a flaky crust make this pie a jammy, golden masterpiece! Sweet, easy, and perfect for beginner bakers! 🍓🧁✨
- Total Time: 1 hour 15 minutes
- Yield: 8 servings 1x
Ingredients
- 1 deep dish frozen pie crust (Do not thaw before use)
- Filling:
- 1 1/2 pounds of strawberries (fresh, washed, and sliced)
- 1/2 cup sugar
- 1 tablespoon lemon juice
- 2 tablespoons Instant Clearjel (You can substitute with 4 tablespoons of cornstarch or 5 tablespoons of tapioca flour)
- Crumble Topping:
- 3/4 cup all-purpose flour
- 1/2 cup white sugar
- 1/4 cup brown sugar
- 6 tablespoons cold butter (cut into small cubes)
Instructions
Step 1: Preheat the Oven
Start by preheating your oven to 400°F (200°C). This will ensure that the pie crust gets a good initial bake and helps to seal in the filling.
Step 2: Prepare the Strawberry Filling
In a large bowl, toss the sliced strawberries with sugar, lemon juice, and Instant Clearjel (or the cornstarch/tapioca flour substitute). The sugar helps to sweeten the strawberries, while the lemon juice adds a touch of acidity that balances the sweetness. The Instant Clearjel (or your chosen thickener) ensures that the filling becomes thick and syrupy during baking, giving the pie a rich texture.
Once everything is well-coated, set the bowl aside to allow the strawberries to macerate. This means the sugar will help draw out the juices from the strawberries, creating a naturally sweet syrup.
Step 3: Make the Crumble Topping
In a separate bowl, combine the all-purpose flour, white sugar, and brown sugar. Stir these dry ingredients together. Add the cold, cubed butter to the mixture, and use your fingers or two forks to cut the butter into the dry ingredients. Keep working until the mixture becomes coarse crumbles. The butter should be cold and firm, which helps create that crumbly texture you’re looking for.
Step 4: Assemble the Pie
Take your frozen pie crust (don’t thaw it) and place it on a baking sheet to catch any juices that might spill over during baking. Transfer the strawberry filling into the pie crust. Be sure to leave any excess liquid behind in the bowl. Mound the strawberries in the center to create a nice, full pie.
Once the filling is in place, sprinkle the crumble topping evenly over the strawberries. The buttery, sugary crumbs will bake up into a crisp, golden topping that perfectly complements the soft, jammy filling.
Step 5: Bake the Pie
Place the pie in the preheated oven and bake at 400°F for the first 15 minutes. This initial high temperature will help the crust set and start browning. After 15 minutes, lower the oven temperature to 375°F and bake for another 40 minutes. You’ll know the pie is done when the crumble topping is golden brown and the juices from the strawberries are bubbling around the edges of the pie.
Step 6: Let the Pie Cool
Once the pie is done, remove it from the oven and let it cool completely before slicing. This step is essential, as it allows the filling to set properly, making for cleaner slices. The pie is delicious warm, but letting it cool ensures the best texture.
Notes
- Pie Crust Tip: If you find that the edges of your pie crust are browning too quickly while the rest of the pie is still baking, you can cover the edges with aluminum foil or a pie crust shield. This prevents the crust from over-baking and ensures the filling gets enough time to cook through.
- Thickening the Filling: If your pie’s filling seems too runny, make sure you’ve used enough of the thickening agent (Instant Clearjel, cornstarch, or tapioca flour). You can adjust the amount based on your preference for filling consistency. Just remember, a thickened filling means a pie that holds its shape better when sliced.
- Butter for the Crumble: Cold butter is key to a perfect crumble topping. It’s important not to soften it before use, as this will affect the texture of the topping. The cold butter creates a crisp, crumbly texture that contrasts beautifully with the soft berries.
- Strawberry Juiciness: If your strawberries release too much juice while baking, it may be because they weren’t fully drained after tossing with sugar. To avoid this, let them sit for a few minutes before transferring them to the pie crust, allowing excess juice to be discarded.
- Prep Time: 20 minutes
- Cook Time: 55 minutes
Ingredients and Preparation
Before we get started, let’s go over the ingredients. This recipe is designed to be simple, with ingredients that are easy to find at any grocery store. The pie uses a deep dish frozen pie crust, fresh strawberries, and a few other pantry staples to create a dessert that’s full of flavor. Below are the ingredients you’ll need:
Ingredients:
- 1 deep dish frozen pie crust (Do not thaw before use)
- Filling:
- 1 1/2 pounds of strawberries (fresh, washed, and sliced)
- 1/2 cup sugar
- 1 tablespoon lemon juice
- 2 tablespoons Instant Clearjel (You can substitute with 4 tablespoons of cornstarch or 5 tablespoons of tapioca flour)
- Crumble Topping:
- 3/4 cup all-purpose flour
- 1/2 cup white sugar
- 1/4 cup brown sugar
- 6 tablespoons cold butter (cut into small cubes)
Preparation Notes:
- If you can’t find Instant Clearjel, don’t worry! You can use cornstarch or tapioca flour as mentioned above. Both work perfectly as thickening agents, helping to create a jammy filling that holds together well.
- The frozen pie crust is a convenient shortcut, but if you’re feeling adventurous, you can always make your own pie crust from scratch using flour, butter, and water. However, this recipe works wonderfully with the pre-made crust.
- For the best flavor, make sure your strawberries are fresh and ripe. The sweetness of the strawberries is the star of this dish, so using the juiciest, ripest berries will make a noticeable difference.
Step-by-Step Instructions
Now that we’ve covered the ingredients, let’s move on to the fun part—assembling and baking your strawberry crumble pie. Don’t be intimidated by the steps; this is a straightforward recipe that’s easy to follow.
Step 1: Preheat the Oven
Start by preheating your oven to 400°F (200°C). This will ensure that the pie crust gets a good initial bake and helps to seal in the filling.
Step 2: Prepare the Strawberry Filling
In a large bowl, toss the sliced strawberries with sugar, lemon juice, and Instant Clearjel (or the cornstarch/tapioca flour substitute). The sugar helps to sweeten the strawberries, while the lemon juice adds a touch of acidity that balances the sweetness. The Instant Clearjel (or your chosen thickener) ensures that the filling becomes thick and syrupy during baking, giving the pie a rich texture.
Once everything is well-coated, set the bowl aside to allow the strawberries to macerate. This means the sugar will help draw out the juices from the strawberries, creating a naturally sweet syrup.
Step 3: Make the Crumble Topping
In a separate bowl, combine the all-purpose flour, white sugar, and brown sugar. Stir these dry ingredients together. Add the cold, cubed butter to the mixture, and use your fingers or two forks to cut the butter into the dry ingredients. Keep working until the mixture becomes coarse crumbles. The butter should be cold and firm, which helps create that crumbly texture you’re looking for.
Step 4: Assemble the Pie
Take your frozen pie crust (don’t thaw it) and place it on a baking sheet to catch any juices that might spill over during baking. Transfer the strawberry filling into the pie crust. Be sure to leave any excess liquid behind in the bowl. Mound the strawberries in the center to create a nice, full pie.
Once the filling is in place, sprinkle the crumble topping evenly over the strawberries. The buttery, sugary crumbs will bake up into a crisp, golden topping that perfectly complements the soft, jammy filling.
Step 5: Bake the Pie
Place the pie in the preheated oven and bake at 400°F for the first 15 minutes. This initial high temperature will help the crust set and start browning. After 15 minutes, lower the oven temperature to 375°F and bake for another 40 minutes. You’ll know the pie is done when the crumble topping is golden brown and the juices from the strawberries are bubbling around the edges of the pie.
Step 6: Let the Pie Cool
Once the pie is done, remove it from the oven and let it cool completely before slicing. This step is essential, as it allows the filling to set properly, making for cleaner slices. The pie is delicious warm, but letting it cool ensures the best texture.
Beginner Tips and Notes
For those new to baking, there are a few helpful tips and common troubleshooting suggestions to ensure your strawberry crumble pie turns out perfectly every time.
- Pie Crust Tip: If you find that the edges of your pie crust are browning too quickly while the rest of the pie is still baking, you can cover the edges with aluminum foil or a pie crust shield. This prevents the crust from over-baking and ensures the filling gets enough time to cook through.
- Thickening the Filling: If your pie’s filling seems too runny, make sure you’ve used enough of the thickening agent (Instant Clearjel, cornstarch, or tapioca flour). You can adjust the amount based on your preference for filling consistency. Just remember, a thickened filling means a pie that holds its shape better when sliced.
- Butter for the Crumble: Cold butter is key to a perfect crumble topping. It’s important not to soften it before use, as this will affect the texture of the topping. The cold butter creates a crisp, crumbly texture that contrasts beautifully with the soft berries.
- Strawberry Juiciness: If your strawberries release too much juice while baking, it may be because they weren’t fully drained after tossing with sugar. To avoid this, let them sit for a few minutes before transferring them to the pie crust, allowing excess juice to be discarded.
Serving Suggestions
Now that your strawberry crumble pie is baked to perfection, you might be wondering how to serve it. While it’s delicious on its own, here are a few ideas to take this dessert to the next level:
- Serve with Whipped Cream or Ice Cream: A dollop of freshly whipped cream or a scoop of vanilla ice cream is the perfect complement to this warm, fruity pie. The coolness balances the warmth of the pie, and the creamy texture pairs perfectly with the crisp topping.
- Pair with a Fresh Salad: If you’re serving this pie as part of a larger meal, consider serving a light, fresh salad alongside it. A simple green salad with a tangy vinaigrette can help balance the sweetness of the pie.
- Garnish with Fresh Berries: For an extra pop of color and flavor, top the pie with a handful of fresh strawberries or other berries before serving. This adds an extra layer of freshness and makes for a beautiful presentation.
As for leftovers, this pie can be stored in the refrigerator for 3–4 days. Be sure to cover it tightly to maintain its freshness. You can enjoy it cold, or reheat it in the oven at 350°F for about 10 minutes to warm it up and crisp the topping.
Engagement Features
Making a strawberry crumble pie from scratch is a rewarding experience, especially for beginner cooks. The beauty of this recipe is in its simplicity, and I hope you feel confident enough to try it out. Whether you’re baking for a special occasion, a family gathering, or just to satisfy a craving for something sweet, this pie is sure to please.
If you’ve made the recipe, I’d love to hear about your experience! Did you make any modifications to suit your tastes? Do you have any tips of your own that helped make the pie even better? Feel free to share your thoughts and pictures in the comments below—I’d love to know how your pie turned out.
Happy baking!