Nothing sparks joy quite like an easy-to-make dessert that looks stunning and tastes heavenly. These no-bake Strawberry and Mango Cheesecake Jars check all the boxes: they’re creamy, sweet, and filled with the tropical flair of strawberries and mangoes. Designed with simplicity in mind, this recipe is a game-changer for anyone just starting their culinary journey.
Print
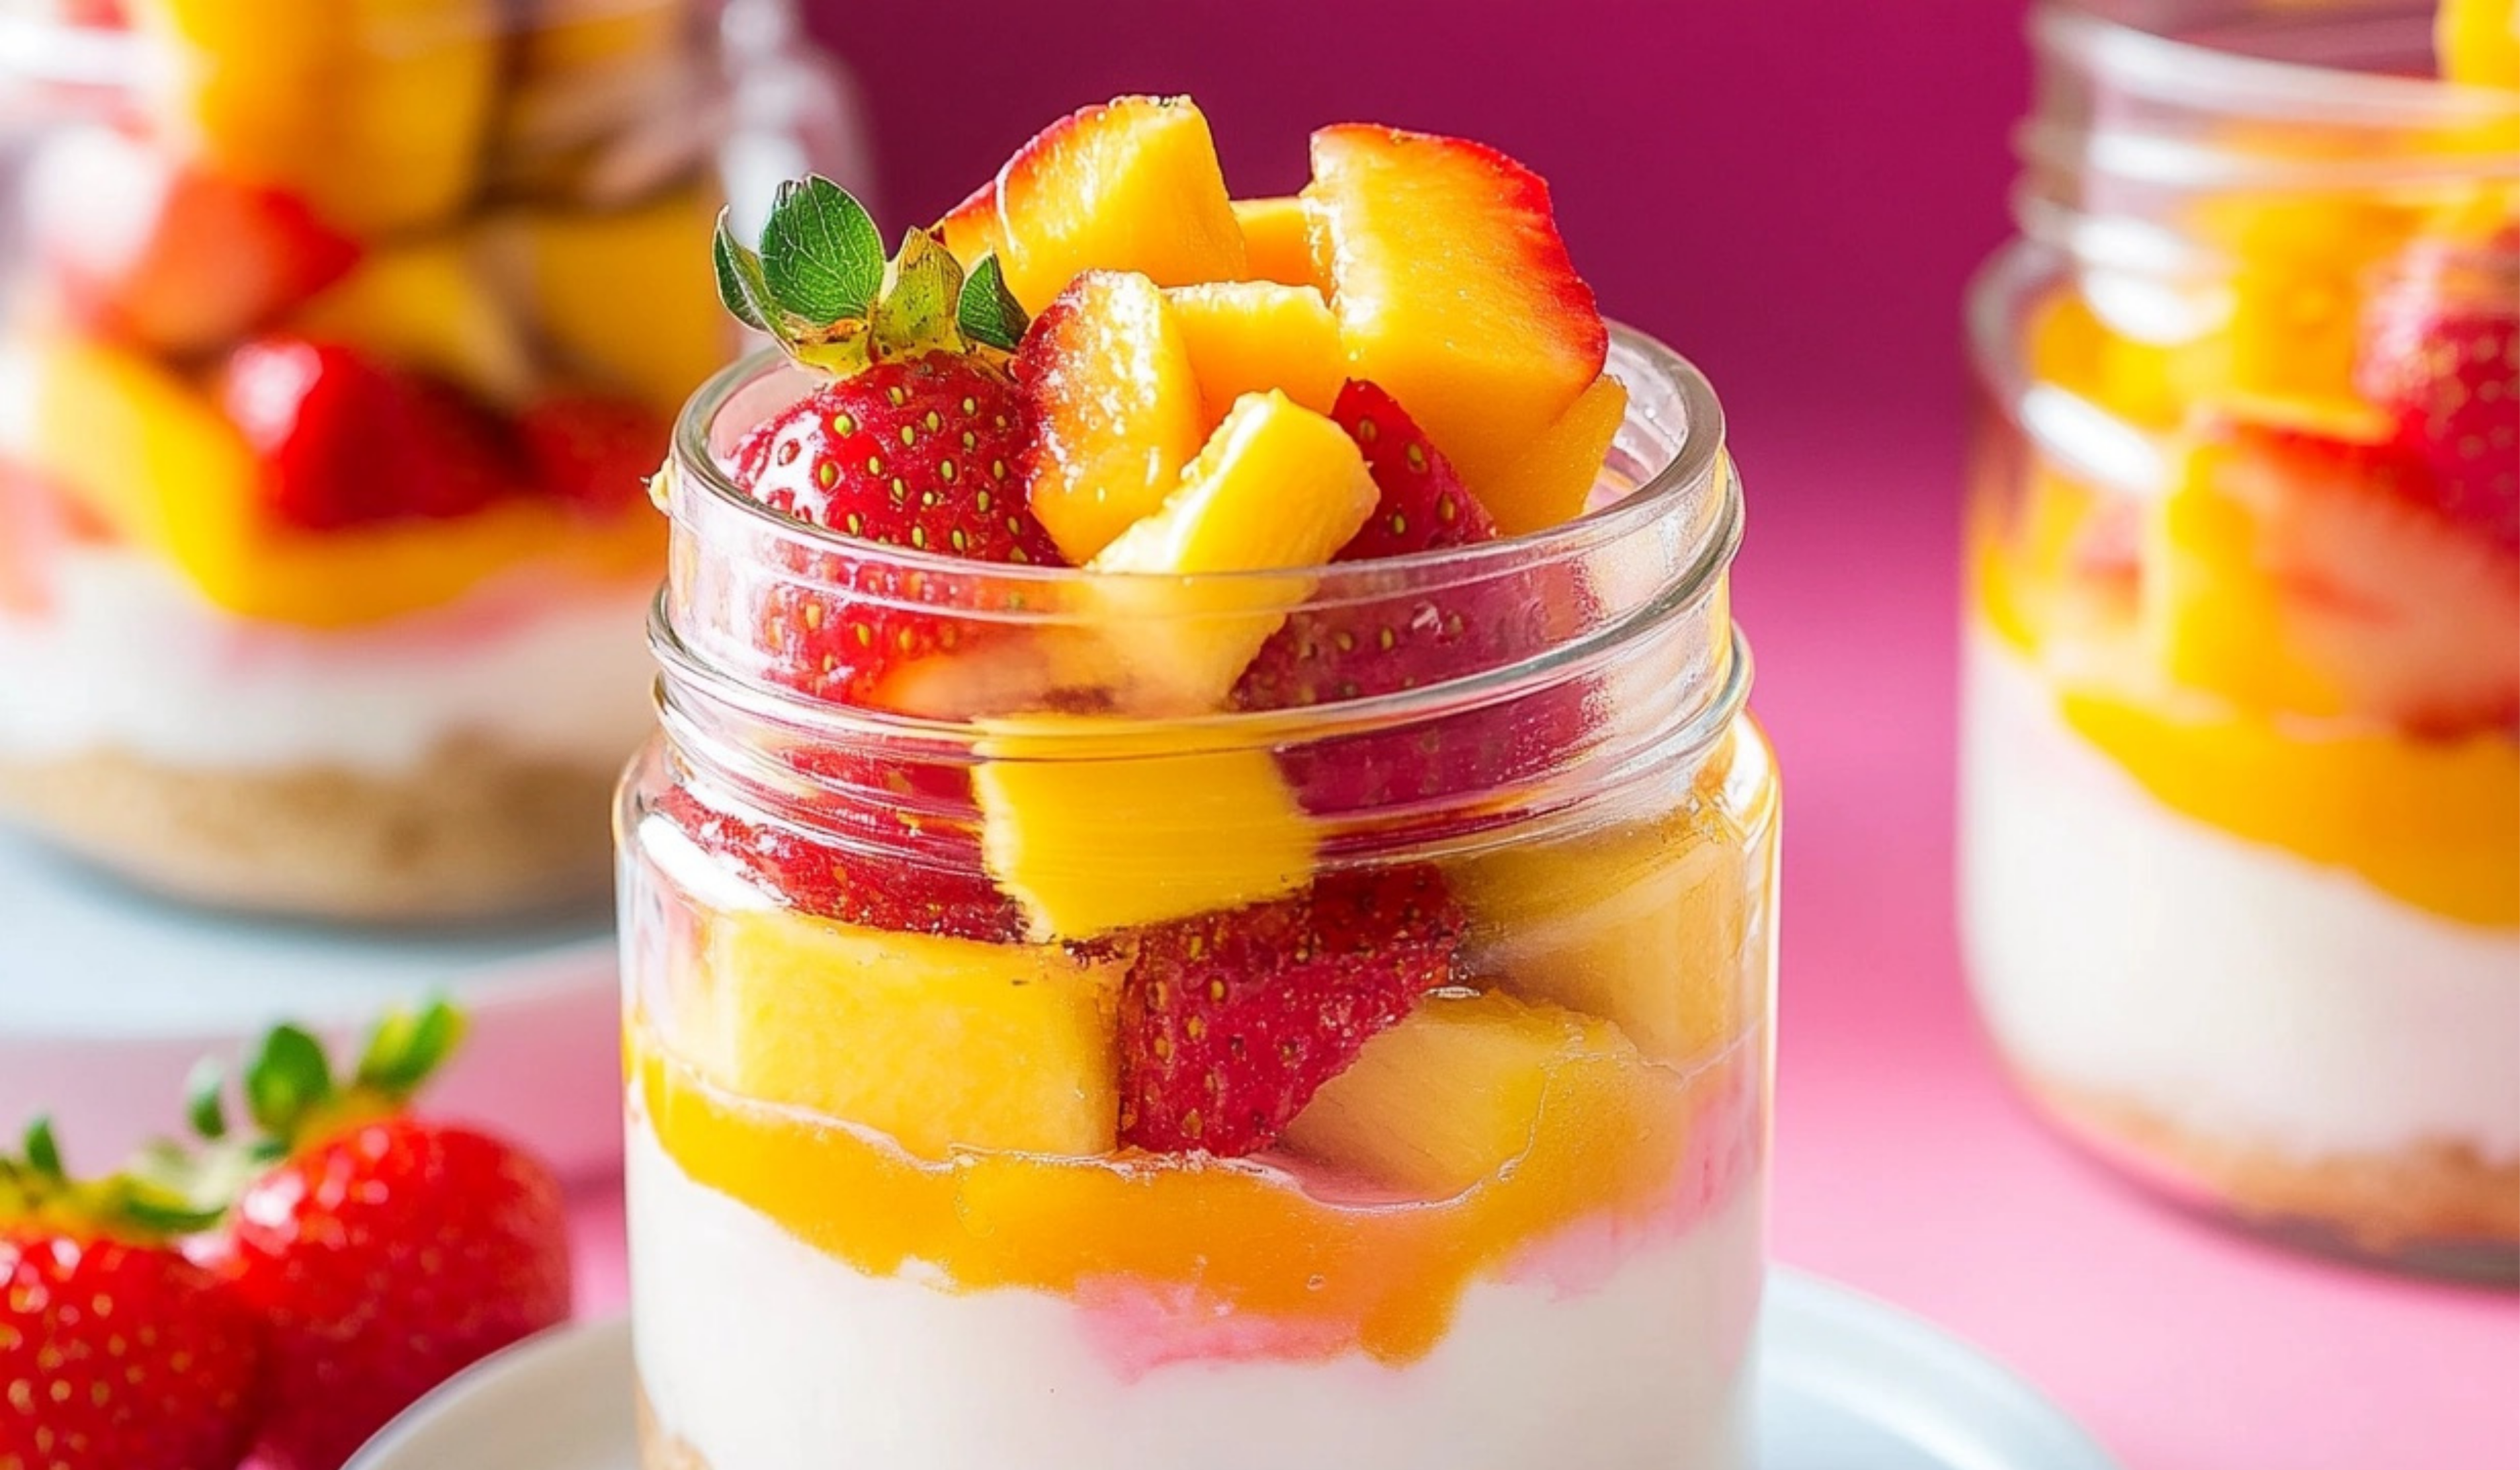
Strawberry and Mango Cheesecake Jars: A Beginner-Friendly Delight
🌟🥄 Brighten your day with Strawberry and Mango Cheesecake Jars! 🥭🍓 This no-bake dessert is creamy, fruity, and oh-so-easy to make. Perfect for beginners, these layered jars are both stunning and scrumptious! 😋✨ Treat yourself or wow your guests!
#CheesecakeInAJar 🍓🥭 #TropicalTreats 🌴 #NoBakeMagic ✨ #SweetAndFruity 🍰 #MangoAndStrawberryLove ❤️ #DessertSimplified 🥄 #EasyAndDelicious 😍 #PerfectLayers 💕 #BeginnerFriendlyDessert 🌟 #JarOfHappiness 🥭🍓
- Total Time: 30 minutes
- Yield: 4 servings 1x
Ingredients
For the Base:
- 1 1/2 cups (180g) crushed digestives or graham crackers
- 3 tbsp unsalted butter, melted and slightly cooled
For the Cheesecake:
- 9 oz (255g) cream cheese, at room temperature (reduced fat or full fat)
- 1/2 cup (165g) condensed milk
- Pinch of salt
- 1 tsp vanilla extract
- 1/2 cup (60g) icing/powdered sugar, sifted
- 1 tbsp lemon juice
For the Topping:
- 1 1/2 cups (225g) diced fresh strawberries
- 1 1/2 cups (225g) diced fresh mango
- 2 tbsp caster/white sugar
Instructions
1. Prepare the Biscuit Base
- Crush the digestives or graham crackers into fine crumbs. You can use a food processor or place the biscuits in a zip-top bag and crush them with a rolling pin.
- In a small bowl, mix the crushed biscuits with melted butter until the crumbs are evenly coated. The mixture should resemble wet sand.
- Spoon 2 tablespoons of the biscuit mixture into the bottom of each jar. Use the back of a spoon to press it down lightly.
2. Make the Cheesecake Layer
- In a medium-sized mixing bowl, combine cream cheese, condensed milk, salt, vanilla extract, and sifted icing sugar. Whisk until smooth and creamy.
- Add lemon juice and continue whisking. The mixture will thicken slightly as the lemon juice reacts with the cream cheese.
- Spoon 2–3 tablespoons of the cheesecake mixture over the biscuit base in each jar. Use a small spatula or the back of a spoon to spread it evenly.
3. Prepare the Fruit Topping
- In a separate bowl, mix the diced strawberries, mango, and sugar. Stir gently until the fruit is evenly coated and begins to release its natural juices, forming a glossy syrup.
4. Assemble the Jars
- Add 2 tablespoons of the fruit mixture on top of the cheesecake layer in each jar.
- Repeat the layers: add another 2 tablespoons of biscuit mixture, followed by 2–3 tablespoons of cheesecake, and finish with the remaining fruit mixture.
5. Chill and Serve
- Refrigerate the jars for at least 15 minutes before serving to allow the layers to set.
- For make-ahead convenience, cover the jars with lids or plastic wrap and store in the fridge for up to one day.
Notes
1. Troubleshooting Tips:
- Too Runny Cheesecake Mixture? Chill the cream cheese mixture for 10 minutes before layering.
- Crumbs Not Sticking? Add an extra teaspoon of melted butter to the base mixture.
- Overly Sweet? Reduce the sugar in the fruit topping or use unsweetened fruits.
2. Ingredient Substitutions:
- Replace strawberries and mangoes with blueberries, raspberries, or peaches based on availability and taste.
- For a gluten-free version, use gluten-free graham crackers or cookies.
3. Efficiency Tips:
- Prep all your ingredients beforehand to streamline the assembly process.
- Use piping bags to neatly layer the cheesecake mixture if you want a professional finish.
- Prep Time: 30 minutes
I remember the first time I made these jars for a family picnic. It was a sweltering summer day, and I wanted something light yet indulgent. These cheesecake jars stole the show! They were gone in minutes, and even the kids came back for seconds. Since then, they’ve become my go-to dessert for gatherings, and I’m excited to share this recipe with you.
Whether you’re a novice or an experienced cook, this recipe will inspire confidence. The no-bake method eliminates the stress of baking, and the individual portions make serving a breeze. Let’s dive into the magic of creating these delightful treats!
Why This Recipe is Perfect for Beginners
1. No Baking Required:
You won’t need an oven or any complicated techniques. If you can stir, layer, and refrigerate, you’ve got this covered.
2. Simple Ingredients:
This recipe uses everyday ingredients like cream cheese, condensed milk, and fruit. You might already have most of them in your kitchen!
3. Quick Preparation:
With just 30 minutes of prep time, this dessert fits perfectly into a busy schedule.
4. Flexible and Customizable:
You can easily swap out ingredients to suit your preferences or dietary needs, making it a versatile recipe for all occasions.
5. Beginner-Friendly Instructions:
Every step is designed with clarity in mind, offering tips to help you succeed even on your first try.
Ingredients
For the Base:
- 1 1/2 cups (180g) crushed digestives or graham crackers
- 3 tbsp unsalted butter, melted and slightly cooled
For the Cheesecake:
- 9 oz (255g) cream cheese, at room temperature (reduced fat or full fat)
- 1/2 cup (165g) condensed milk
- Pinch of salt
- 1 tsp vanilla extract
- 1/2 cup (60g) icing/powdered sugar, sifted
- 1 tbsp lemon juice
For the Topping:
- 1 1/2 cups (225g) diced fresh strawberries
- 1 1/2 cups (225g) diced fresh mango
- 2 tbsp caster/white sugar
Preparation
Before starting, gather all your ingredients and tools. You’ll need four jars, ideally 13oz in size, to assemble the cheesecakes. If you don’t have jars, small glasses or bowls will work just fine.
Step-by-Step Instructions
1. Prepare the Biscuit Base
- Crush the digestives or graham crackers into fine crumbs. You can use a food processor or place the biscuits in a zip-top bag and crush them with a rolling pin.
- In a small bowl, mix the crushed biscuits with melted butter until the crumbs are evenly coated. The mixture should resemble wet sand.
- Spoon 2 tablespoons of the biscuit mixture into the bottom of each jar. Use the back of a spoon to press it down lightly.
2. Make the Cheesecake Layer
- In a medium-sized mixing bowl, combine cream cheese, condensed milk, salt, vanilla extract, and sifted icing sugar. Whisk until smooth and creamy.
- Add lemon juice and continue whisking. The mixture will thicken slightly as the lemon juice reacts with the cream cheese.
- Spoon 2–3 tablespoons of the cheesecake mixture over the biscuit base in each jar. Use a small spatula or the back of a spoon to spread it evenly.
3. Prepare the Fruit Topping
- In a separate bowl, mix the diced strawberries, mango, and sugar. Stir gently until the fruit is evenly coated and begins to release its natural juices, forming a glossy syrup.
4. Assemble the Jars
- Add 2 tablespoons of the fruit mixture on top of the cheesecake layer in each jar.
- Repeat the layers: add another 2 tablespoons of biscuit mixture, followed by 2–3 tablespoons of cheesecake, and finish with the remaining fruit mixture.
5. Chill and Serve
- Refrigerate the jars for at least 15 minutes before serving to allow the layers to set.
- For make-ahead convenience, cover the jars with lids or plastic wrap and store in the fridge for up to one day.
Beginner Tips and Notes
1. Troubleshooting Tips:
- Too Runny Cheesecake Mixture? Chill the cream cheese mixture for 10 minutes before layering.
- Crumbs Not Sticking? Add an extra teaspoon of melted butter to the base mixture.
- Overly Sweet? Reduce the sugar in the fruit topping or use unsweetened fruits.
2. Ingredient Substitutions:
- Replace strawberries and mangoes with blueberries, raspberries, or peaches based on availability and taste.
- For a gluten-free version, use gluten-free graham crackers or cookies.
3. Efficiency Tips:
- Prep all your ingredients beforehand to streamline the assembly process.
- Use piping bags to neatly layer the cheesecake mixture if you want a professional finish.
Serving Suggestions
- Pair with Drinks:
Serve these jars with iced tea, lemonade, or a tropical smoothie to enhance the summery vibes. - Add Extra Toppings:
- A dollop of whipped cream and a mint leaf for elegance.
- A drizzle of honey or caramel sauce for extra indulgence.
- Complementary Sides:
- Serve alongside a light fruit salad or a platter of fresh fruits for a refreshing touch.
- Pair with shortbread cookies or biscotti for added texture.
Storage Tips
- Fridge: Store covered jars in the fridge for up to 24 hours. The fresher, the better, as the fruit can soften over time.
- Avoid Freezing: Freezing isn’t recommended, as it may affect the texture of the cream cheese and fruit.
Why You’ll Love These Cheesecake Jars
These Strawberry and Mango Cheesecake Jars are more than just a dessert—they’re a celebration of flavors and textures. The crumbly biscuit base adds a buttery crunch, the cheesecake layer is smooth and tangy, and the fruit topping bursts with natural sweetness.
For beginners, this recipe is a confidence booster. The no-bake method ensures success without the fear of burnt edges or sunken centers. Plus, the individual portions make them perfect for entertaining or portion-controlled indulgence.

Conclusion
Ready to impress your friends and family with minimal effort? These Strawberry and Mango Cheesecake Jars are your ticket to dessert stardom. Assemble, chill, and serve—it’s that simple! Whether you’re whipping these up for a party, picnic, or quiet night at home, you’ll love how easy and rewarding they are to make.
Give this recipe a try and share your experience in the comments. What fruits did you use? Did you add any creative twists? Let’s inspire each other in the kitchen! Happy cooking!