
Baking can feel intimidating for beginners, but the right recipe can turn the process into an enjoyable and rewarding experience. These salted caramel chocolate cookies are the perfect introduction to baking, offering a rich, decadent treat that balances sweet and salty flavors. The combination of deep chocolate, gooey caramel, and a sprinkle of sea salt creates a bakery-quality cookie that anyone can make at home.
Print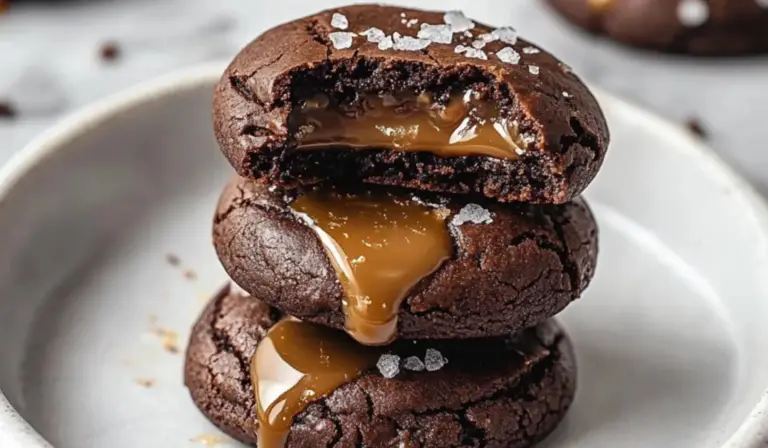
Salted Caramel Chocolate Cookies: A Beginner-Friendly Indulgence
These Salted Caramel Chocolate Cookies are the ultimate indulgence! 🍪🍫 Rich, fudgy chocolate cookies stuffed with melty caramel and topped with a sprinkle of sea salt for the perfect sweet-salty balance. Easy to make and absolutely irresistible—one bite and you’re hooked! ✨🔥
- Total Time: 1 hour 10 minutes
- Yield: 12–16 cookies 1x
Ingredients
- 1 cup unsalted butter, softened
- 1 cup brown sugar, packed
- 1/2 cup granulated sugar
- 2 large eggs
- 1 teaspoon vanilla extract
- 2 cups all-purpose flour
- 1/2 cup unsweetened cocoa powder
- 1 teaspoon baking soda
- 1/2 teaspoon salt
- 1 cup chocolate chips (milk, dark, or a mix)
- 1/2 cup salted caramel sauce, plus extra for drizzling
For the Caramel Center (Optional):
- Chilled salted caramel sauce or caramel-filled candies
For Topping:
- Sea salt flakes for sprinkling
Instructions
Step 1: Preheat the Oven and Prepare the Baking Sheet
Preheat the oven to 350°F (175°C). Line a baking sheet with parchment paper or a silicone baking mat. This prevents the cookies from sticking and ensures even baking.
Step 2: Cream the Butter and Sugars
In a large mixing bowl, use an electric mixer or a sturdy whisk to beat the softened butter, brown sugar, and granulated sugar together. Mix for about 2-3 minutes until the mixture becomes light and fluffy. This process incorporates air into the dough, resulting in softer cookies.
Step 3: Add Eggs and Vanilla Extract
Crack the eggs into the bowl, adding them one at a time while mixing. Stir in the vanilla extract and blend until the mixture is smooth. The eggs help bind the ingredients together and add moisture to the dough.
Step 4: Mix the Dry Ingredients
In a separate bowl, whisk together the all-purpose flour, cocoa powder, baking soda, and salt. Whisking ensures that all dry ingredients are evenly distributed and prevents clumps in the dough.
Step 5: Combine Wet and Dry Ingredients
Gradually add the dry ingredient mixture to the wet ingredients, mixing on low speed or by hand. Stir until just combined. Overmixing at this stage can lead to dense cookies.
Step 6: Fold in the Chocolate Chips and Caramel
Gently fold in the chocolate chips and 1/2 cup of salted caramel sauce using a spatula. This adds rich flavors and texture to the cookies. Be careful not to overmix, as you want the caramel to remain in pockets throughout the dough.
Step 7: Form the Cookie Dough Balls
Using a cookie scoop or tablespoon, portion out the dough and roll it into balls. If adding a caramel center, flatten each ball slightly, place a small spoonful of chilled caramel sauce or a caramel-filled candy in the center, and wrap the dough around it to seal completely.
Step 8: Arrange and Bake
Place the cookie dough balls on the prepared baking sheet, spacing them about 2 inches apart. Bake for 10-12 minutes, or until the edges are set but the centers remain soft. The cookies will continue to cook slightly after being removed from the oven.
Step 9: Cool and Add Toppings
Let the cookies cool on the baking sheet for about 5 minutes before transferring them to a wire rack. Drizzle with extra salted caramel sauce while they are still warm, and sprinkle a light dusting of sea salt flakes on top for added flavor.
Step 10: Serve and Enjoy
Break open a cookie while it’s still slightly warm to reveal the gooey caramel center. Serve immediately, or store in an airtight container for later enjoyment.
Notes
How to Tell When Cookies Are Done
- The cookies should look set around the edges but slightly soft in the center when removed from the oven. They will firm up as they cool.
- If unsure, lightly press the edge of a cookie with a spatula. If it holds its shape but feels soft, they are ready.
Common Baking Mistakes and Fixes
- Overmixing the Dough: This can make the cookies tough. Mix only until the ingredients are combined.
- Cookies Spreading Too Much: This can happen if the butter is too warm. If the dough feels too soft, chill it in the refrigerator for 15-20 minutes before baking.
- Cookies Not Spreading Enough: If the dough is too cold, let it sit at room temperature for a few minutes before baking.
- Burnt Bottoms: Use light-colored baking sheets and parchment paper to prevent overheating.
Efficient Kitchen Tips
- Pre-measure all ingredients before starting to make the process smoother.
- Use a cookie scoop to ensure even-sized cookies that bake consistently.
- Chill caramel sauce or caramel-filled candies before adding them to the dough. This helps keep the caramel in the center without leaking out during baking.
- Prep Time: 30 minutes
- Cook Time: 40 minutes
One of the best parts about this recipe is its forgiving nature. The dough is easy to handle, the ingredients are simple, and the results are impressive even if you’re new to baking. This recipe eliminates the need for complicated techniques and instead focuses on creating soft, chewy cookies with pockets of melted chocolate and caramel in every bite.
The key to success is understanding how ingredients work together. Butter and sugar provide structure and moisture, eggs add richness, and the combination of flour, cocoa, and baking soda ensures the right texture. This guide will break everything down step by step, making it easy to follow along, troubleshoot common issues, and customize the recipe to suit your taste.
These cookies are perfect for any occasion. They pair wonderfully with a glass of milk, make great gifts, and are sure to impress family and friends. Whether you are baking for the first time or looking to perfect your cookie skills, this recipe will become a favorite.
Ingredients and Preparation
For the Cookie Dough:
- 1 cup unsalted butter, softened
- 1 cup brown sugar, packed
- 1/2 cup granulated sugar
- 2 large eggs
- 1 teaspoon vanilla extract
- 2 cups all-purpose flour
- 1/2 cup unsweetened cocoa powder
- 1 teaspoon baking soda
- 1/2 teaspoon salt
- 1 cup chocolate chips (milk, dark, or a mix)
- 1/2 cup salted caramel sauce, plus extra for drizzling
For the Caramel Center (Optional):
- Chilled salted caramel sauce or caramel-filled candies
For Topping:
- Sea salt flakes for sprinkling
Ingredient Substitutions:
- For a gluten-free version, replace the all-purpose flour with a 1:1 gluten-free flour blend.
- If you prefer a lighter cookie, substitute half of the butter with an equal amount of vegetable oil.
- Dark chocolate chips can be swapped for white or semi-sweet chocolate for a different flavor profile.
- Instead of store-bought caramel sauce, you can make homemade caramel with sugar, butter, and cream.
Step-by-Step Instructions
Step 1: Preheat the Oven and Prepare the Baking Sheet
Preheat the oven to 350°F (175°C). Line a baking sheet with parchment paper or a silicone baking mat. This prevents the cookies from sticking and ensures even baking.
Step 2: Cream the Butter and Sugars
In a large mixing bowl, use an electric mixer or a sturdy whisk to beat the softened butter, brown sugar, and granulated sugar together. Mix for about 2-3 minutes until the mixture becomes light and fluffy. This process incorporates air into the dough, resulting in softer cookies.
Step 3: Add Eggs and Vanilla Extract
Crack the eggs into the bowl, adding them one at a time while mixing. Stir in the vanilla extract and blend until the mixture is smooth. The eggs help bind the ingredients together and add moisture to the dough.
Step 4: Mix the Dry Ingredients
In a separate bowl, whisk together the all-purpose flour, cocoa powder, baking soda, and salt. Whisking ensures that all dry ingredients are evenly distributed and prevents clumps in the dough.
Step 5: Combine Wet and Dry Ingredients
Gradually add the dry ingredient mixture to the wet ingredients, mixing on low speed or by hand. Stir until just combined. Overmixing at this stage can lead to dense cookies.
Step 6: Fold in the Chocolate Chips and Caramel
Gently fold in the chocolate chips and 1/2 cup of salted caramel sauce using a spatula. This adds rich flavors and texture to the cookies. Be careful not to overmix, as you want the caramel to remain in pockets throughout the dough.
Step 7: Form the Cookie Dough Balls
Using a cookie scoop or tablespoon, portion out the dough and roll it into balls. If adding a caramel center, flatten each ball slightly, place a small spoonful of chilled caramel sauce or a caramel-filled candy in the center, and wrap the dough around it to seal completely.
Step 8: Arrange and Bake
Place the cookie dough balls on the prepared baking sheet, spacing them about 2 inches apart. Bake for 10-12 minutes, or until the edges are set but the centers remain soft. The cookies will continue to cook slightly after being removed from the oven.
Step 9: Cool and Add Toppings
Let the cookies cool on the baking sheet for about 5 minutes before transferring them to a wire rack. Drizzle with extra salted caramel sauce while they are still warm, and sprinkle a light dusting of sea salt flakes on top for added flavor.
Step 10: Serve and Enjoy
Break open a cookie while it’s still slightly warm to reveal the gooey caramel center. Serve immediately, or store in an airtight container for later enjoyment.
Beginner Tips and Notes
How to Tell When Cookies Are Done
- The cookies should look set around the edges but slightly soft in the center when removed from the oven. They will firm up as they cool.
- If unsure, lightly press the edge of a cookie with a spatula. If it holds its shape but feels soft, they are ready.
Common Baking Mistakes and Fixes
- Overmixing the Dough: This can make the cookies tough. Mix only until the ingredients are combined.
- Cookies Spreading Too Much: This can happen if the butter is too warm. If the dough feels too soft, chill it in the refrigerator for 15-20 minutes before baking.
- Cookies Not Spreading Enough: If the dough is too cold, let it sit at room temperature for a few minutes before baking.
- Burnt Bottoms: Use light-colored baking sheets and parchment paper to prevent overheating.
Efficient Kitchen Tips
- Pre-measure all ingredients before starting to make the process smoother.
- Use a cookie scoop to ensure even-sized cookies that bake consistently.
- Chill caramel sauce or caramel-filled candies before adding them to the dough. This helps keep the caramel in the center without leaking out during baking.

Serving Suggestions
- With a Glass of Milk: Classic and comforting, this pairing enhances the rich flavors of the cookies.
- With Coffee or Hot Chocolate: The bittersweet notes of coffee or cocoa complement the sweetness of the caramel and chocolate.
- As a Dessert Base: Crumble the cookies over ice cream or yogurt for a decadent treat.
- With a Scoop of Whipped Cream: A simple, airy topping that balances the cookie’s dense texture.
Storage and Reheating Tips
- Store at Room Temperature: Keep cookies in an airtight container for up to five days.
- Freeze for Later: Place baked cookies in a sealed container and freeze for up to three months. Reheat in the microwave for 10-15 seconds before serving.
- Reheat for a Fresh-Baked Feel: Warm cookies in the oven at 300°F for 5 minutes to restore their texture.
Engagement Features
Baking is an enjoyable experience, and part of the fun is sharing the results. Try making these cookies and experimenting with different variations, such as adding chopped nuts or white chocolate chips.
If you make this recipe, share your experience. What worked well? Did you try any variations? Leave a comment and let others know your tips and tricks.
Baking is all about learning and enjoying the process. This recipe is a great way to start, and with practice, you’ll gain the confidence to explore even more delicious creations. Happy baking!