
When the heat of summer rolls in, the last thing anyone wants is to crank up the oven. That’s when chilled, no-bake desserts like these individual frozen key lime pies truly shine. Tangy, smooth, and lightly sweetened, these creamy little pies are a satisfying treat that’s simple to make and perfect for beginner bakers. Their refreshing citrus flavor pairs beautifully with a buttery graham cracker crust, creating a contrast of textures and tastes in each bite. Because they’re served in individual portions, they’re ideal for entertaining, portion control, or a fun twist on traditional dessert. Whether you’re preparing for a backyard barbecue, a family dinner, or just need something cold and sweet to finish your day, this easy key lime pie recipe delivers all the flavor of a classic dessert with none of the fuss.
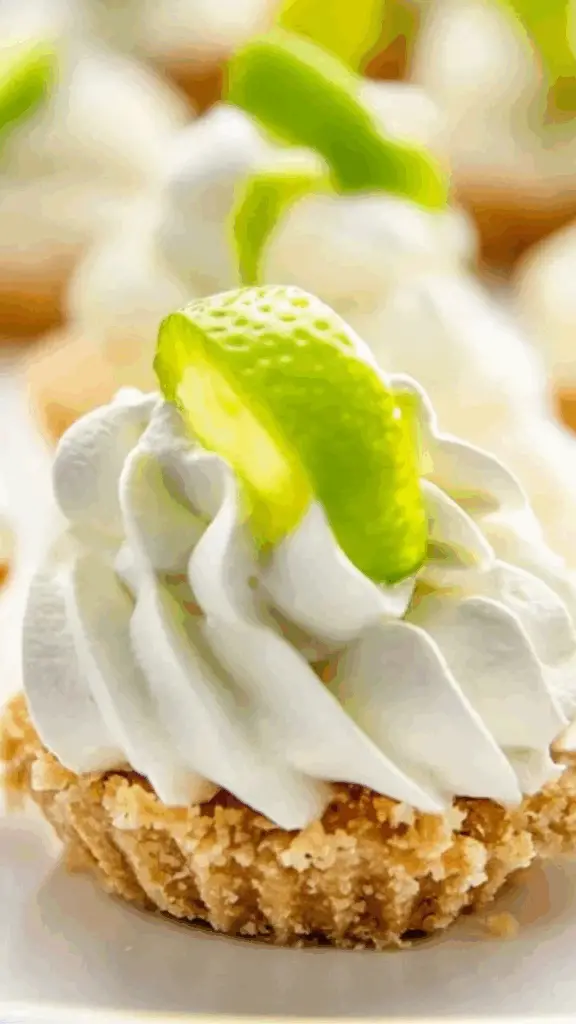
Ingredients and Preparation
Creating these frozen pies requires just a few basic ingredients, most of which are pantry staples. Here’s everything you’ll need to gather before you begin:
Graham Cracker Crust:
- 1½ cups graham cracker crumbs (about one sleeve of crackers)
- 4 ounces unsalted butter, melted
Creamy Key Lime Filling:
- 8 ounces cream cheese, softened
- 14 ounces sweetened condensed milk (one can)
- ¾ cup key lime juice (freshly squeezed or bottled)
- 8 ounces whipped topping (store-bought or homemade), plus extra for topping
Optional Garnishes:
- Lime zest for a touch of color and extra citrus flavor
- Graham cracker crumbs for topping
Preparation Overview:
Before diving into assembly, make sure your cream cheese is softened at room temperature to ensure a smooth, lump-free filling. If using fresh limes, juice them in advance and strain out seeds. You’ll also want a muffin tin lined with cupcake wrappers to make individual pies easy to portion and serve.
Step-by-Step Instructions
1. Make the Crust:
- In a medium mixing bowl, combine graham cracker crumbs and melted butter.
- Stir with a fork or spoon until the mixture resembles wet sand and holds together slightly when pressed.
- Line a standard muffin tin with 12 cupcake liners.
- Spoon about 1½ tablespoons of crust mixture into each liner.
- Use the back of a spoon or a small flat-bottomed cup to press the mixture firmly into the base of each cup, creating a compact crust layer.
- Set aside while you prepare the filling.
2. Prepare the Key Lime Filling:
- In a large bowl, beat the softened cream cheese with an electric mixer on medium speed until smooth and fluffy, about 2–3 minutes.
- Slowly add the sweetened condensed milk while continuing to beat until fully combined and creamy.
- Pour in the key lime juice and beat until well incorporated. The mixture will start to thicken slightly.
- Gently fold in the whipped topping using a rubber spatula until the filling is smooth and evenly combined. Avoid overmixing to keep the filling light and airy.
3. Assemble the Pies:
- Spoon or pipe the key lime filling evenly over each prepared crust. Fill each liner nearly to the top, smoothing the tops with a spoon or spatula.
- Tap the muffin tin gently on the counter to remove any air bubbles and level the surface.
4. Freeze the Pies:
- Place the muffin tin in the freezer and freeze the pies for at least 4 hours or overnight for best results. The filling should be completely set and firm to the touch.
5. Serve:
- Before serving, let the pies sit at room temperature for 10–15 minutes to soften slightly.
- Remove the pies from the muffin tin and peel away the cupcake liners.
- Top each pie with a dollop of whipped topping, a sprinkle of graham cracker crumbs, and a pinch of lime zest if desired.
Beginner Tips and Notes
- Room Temperature Cream Cheese: Always allow cream cheese to soften before beating. This ensures a smooth, lump-free filling and avoids overworking the mixture.
- Whipped Topping Tips: If you prefer homemade whipped cream, beat 1 cup of heavy cream with 2 tablespoons of powdered sugar until stiff peaks form. Use this as a direct substitute.
- Lime Juice: Fresh key lime juice gives the best flavor, but bottled varieties work well too. Just be sure it’s labeled as 100% key lime juice with no added sugars.
- Crust Pressing Tip: Use a small measuring cup to press the crust mixture into each liner evenly and tightly for the best base texture.
- No Muffin Tin? You can also use small ramekins or silicone molds for a different presentation. Just make sure they are freezer-safe and easy to unmold.
- Storage: These mini pies can be stored in an airtight container in the freezer for up to one month. Keep them covered to prevent freezer burn.
- Texture Preference: If you prefer a softer texture, you can chill the pies in the refrigerator for 3–4 hours instead of freezing, although they will be more mousse-like and less firm.
Serving Suggestions
These frozen mini key lime pies are perfect on their own, but you can dress them up with a few creative additions:
- Tropical Twist: Top each pie with shredded toasted coconut for added texture and a summery vibe.
- Fruit Garnish: Serve with fresh berries such as raspberries or blueberries for color contrast and added sweetness.
- Citrus Medley: Pair with thin slices of lemon or orange for a layered citrus experience.
- Cookie Crust Variation: Replace graham crackers with crushed vanilla wafers or digestive biscuits for a unique crust flavor.
- Mini Dessert Bar: Present them as part of a dessert table, with other no-bake treats like chocolate mousse cups or mini cheesecakes for a beautiful and varied display.
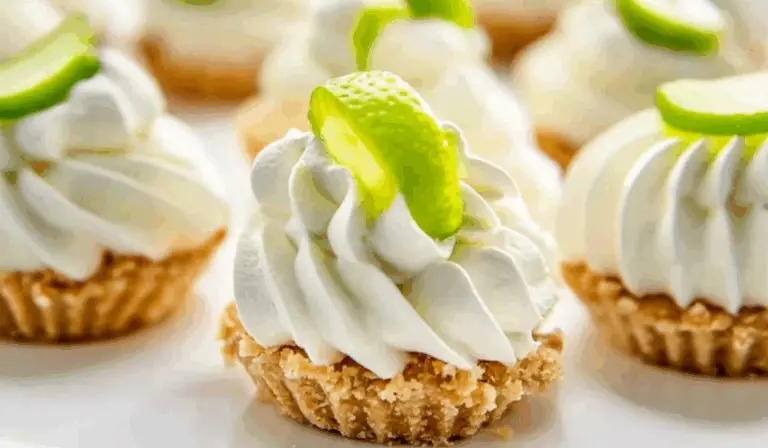
Refreshing No-Bake Mini Key Lime Pies: A Cool and Creamy Treat for Every Occasion
Cool, creamy, and bursting with citrusy flavor—these No-Bake Mini Key Lime Pies are the ultimate refreshment! 🥧🍈 Perfect for any celebration or a quick sweet fix, they’re light, tangy, and totally irresistible. No oven, no problem—just chill and enjoy the zesty goodness! ❄️💚 Serve them up at parties, picnics, or just because. One bite and you’ll be hooked! 😋✨
- Total Time: 20 minutes
- Yield: 12 mini pies 1x
Ingredients
Graham Cracker Crust:
- 1½ cups graham cracker crumbs (about one sleeve of crackers)
- 4 ounces unsalted butter, melted
Creamy Key Lime Filling:
- 8 ounces cream cheese, softened
- 14 ounces sweetened condensed milk (one can)
- ¾ cup key lime juice (freshly squeezed or bottled)
- 8 ounces whipped topping (store-bought or homemade), plus extra for topping
Optional Garnishes:
- Lime zest for a touch of color and extra citrus flavor
- Graham cracker crumbs for topping
Instructions
1. Make the Crust:
- In a medium mixing bowl, combine graham cracker crumbs and melted butter.
- Stir with a fork or spoon until the mixture resembles wet sand and holds together slightly when pressed.
- Line a standard muffin tin with 12 cupcake liners.
- Spoon about 1½ tablespoons of crust mixture into each liner.
- Use the back of a spoon or a small flat-bottomed cup to press the mixture firmly into the base of each cup, creating a compact crust layer.
- Set aside while you prepare the filling.
2. Prepare the Key Lime Filling:
- In a large bowl, beat the softened cream cheese with an electric mixer on medium speed until smooth and fluffy, about 2–3 minutes.
- Slowly add the sweetened condensed milk while continuing to beat until fully combined and creamy.
- Pour in the key lime juice and beat until well incorporated. The mixture will start to thicken slightly.
- Gently fold in the whipped topping using a rubber spatula until the filling is smooth and evenly combined. Avoid overmixing to keep the filling light and airy.
3. Assemble the Pies:
- Spoon or pipe the key lime filling evenly over each prepared crust. Fill each liner nearly to the top, smoothing the tops with a spoon or spatula.
- Tap the muffin tin gently on the counter to remove any air bubbles and level the surface.
4. Freeze the Pies:
- Place the muffin tin in the freezer and freeze the pies for at least 4 hours or overnight for best results. The filling should be completely set and firm to the touch.
5. Serve:
- Before serving, let the pies sit at room temperature for 10–15 minutes to soften slightly.
- Remove the pies from the muffin tin and peel away the cupcake liners.
- Top each pie with a dollop of whipped topping, a sprinkle of graham cracker crumbs, and a pinch of lime zest if desired.
Notes
- Room Temperature Cream Cheese: Always allow cream cheese to soften before beating. This ensures a smooth, lump-free filling and avoids overworking the mixture.
- Whipped Topping Tips: If you prefer homemade whipped cream, beat 1 cup of heavy cream with 2 tablespoons of powdered sugar until stiff peaks form. Use this as a direct substitute.
- Lime Juice: Fresh key lime juice gives the best flavor, but bottled varieties work well too. Just be sure it’s labeled as 100% key lime juice with no added sugars.
- Crust Pressing Tip: Use a small measuring cup to press the crust mixture into each liner evenly and tightly for the best base texture.
- No Muffin Tin? You can also use small ramekins or silicone molds for a different presentation. Just make sure they are freezer-safe and easy to unmold.
- Storage: These mini pies can be stored in an airtight container in the freezer for up to one month. Keep them covered to prevent freezer burn.
- Texture Preference: If you prefer a softer texture, you can chill the pies in the refrigerator for 3–4 hours instead of freezing, although they will be more mousse-like and less firm.
- Prep Time: 20 minutes
Engagement Features
To make this recipe even more enjoyable, consider these interactive and personalized ideas:
- Make It with Kids: This is a great recipe to prepare with children. Let them press the crust into the liners and mix the filling with supervision.
- Flavor Variations: Try swapping the key lime juice for lemon or orange juice to create your own twist on the classic recipe. Which citrus flavor do you like best?
- Presentation Challenge: Challenge your friends or family to decorate their pies with the most creative toppings—berries, citrus twists, mint leaves, or even a drizzle of honey.
- Ice Cream Pie Style: Pour the filling into a store-bought graham cracker pie crust and freeze it whole for a key lime ice cream pie effect.
- Party Activity: Set up a mini pie station at your next gathering where guests can assemble and customize their own frozen treats.
If you try this no-bake mini key lime pie recipe, share your experience with family or friends and compare toppings, textures, or techniques. These kinds of recipes are ideal for bonding over simple kitchen fun.
Conclusion
There’s something undeniably joyful about a dessert that’s easy to make, fun to serve, and consistently delicious. These no-bake frozen key lime pies hit all the right notes—creamy, tart, cool, and perfectly portioned. They’re the ultimate answer to hot weather cravings and busy schedules, offering a make-ahead option that saves time without sacrificing flavor. Beginners will love the simplicity of the ingredients and steps, while experienced home cooks can customize and elevate the pies to suit any occasion. Whether you stick to the classic version or put your own spin on it, one thing is certain: these individual pies will quickly become a favorite in your dessert rotation. Try them out, share them with others, and enjoy the refreshing zing of key lime with every bite.