
There’s something undeniably comforting about the aroma of freshly baked cookies wafting through the kitchen. And when those cookies are raspberry-infused, soft, and allergy-friendly, they become even more irresistible. Raspberry cookies offer a delicious twist to the classic sugar cookie, bringing together the sweet-tart flavor of raspberries with the soft chewiness of a perfectly baked treat. This recipe is specially crafted to be gluten-free, nut-free, and eggless, with an option to make it dairy-free. It’s ideal for those with dietary restrictions or anyone simply looking to try a new and fruity variation of a classic cookie. Whether you’re baking for a weekend treat, a school snack, or a special celebration, these cookies are sure to become a favorite.
Ingredients and Preparation
Before diving into the baking process, gather all your ingredients to ensure a smooth workflow. Here’s what you’ll need:
For the Raspberry Syrup:
- 1 cup frozen raspberries
- ¼ cup granulated sugar
For the Cookie Dough:
- 1 cup unsalted butter (use a dairy-free substitute if preferred), softened
- 1 cup granulated sugar
- ¼ cup light brown sugar
- ¼ cup dairy-free milk of choice (e.g., oat, almond, soy)
- 1 tablespoon pure vanilla extract
- 2½ cups gluten-free 1:1 baking flour (ensure it contains xanthan gum)
- ½ teaspoon baking powder
- ½ teaspoon kosher salt
- ¾ cup frozen raspberries, finely chopped
Preparation Steps Before Baking:
- Thaw your butter slightly so it’s soft but not melted.
- Make sure the frozen raspberries are measured and separated into two portions—one for the syrup and the other to chop for the dough.
- Line two baking sheets with parchment paper for easy cleanup.
- Preheat the oven to 325°F (163°C).
Step-by-Step Instructions
1. Make the Raspberry Syrup
- In a small saucepan, add 1 cup frozen raspberries and ¼ cup granulated sugar.
- Heat over medium-low heat, stirring frequently until the mixture breaks down and thickens, forming a syrup-like consistency.
- Use a fine mesh strainer to remove seeds and separate the smooth syrup.
- Set aside to cool completely before using in the dough.
2. Cream the Butter and Sugars
- In a large mixing bowl or stand mixer, combine the softened butter, granulated sugar, and light brown sugar.
- Beat on medium-high speed for about 2–3 minutes until the mixture is light and fluffy.
- This step is crucial for incorporating air and creating a soft, chewy texture.
3. Add Milk and Vanilla
- Slowly add ¼ cup dairy-free milk and 1 tablespoon vanilla extract to the creamed mixture.
- Beat until fully combined.
- Scrape down the sides of the bowl to ensure everything is evenly mixed.
4. Mix the Dry Ingredients
- In a separate bowl, whisk together the 2½ cups gluten-free flour, ½ teaspoon baking powder, and ½ teaspoon salt.
- Gradually add the dry ingredients to the wet mixture, mixing on low speed until a dough forms.
- Be careful not to overmix, especially when working with gluten-free flour, to avoid dense cookies.
5. Fold in Chopped Raspberries
- Finely chop ¾ cup of frozen raspberries.
- Gently fold them into the dough using a spatula or wooden spoon.
- Stir just enough to distribute the fruit without overmixing or breaking down the berries.
6. Swirl in Raspberry Syrup
- Add the cooled raspberry syrup to the dough and gently fold it in a few times to create a marbled effect.
- Avoid fully mixing it in, as you want streaks of raspberry visible throughout the dough.
7. Scoop and Shape the Cookies
- Use a cookie scoop or tablespoon to portion out the dough onto the prepared baking sheets.
- Leave about 2 inches between each cookie to allow for spreading.
- If desired, slightly flatten the tops for a more uniform shape.
8. Bake the Cookies
- Place the cookies in the preheated oven and bake for 15–17 minutes.
- The edges should be set, and the centers may look slightly soft, which is perfect.
- Do not overbake, as these cookies will continue to set as they cool.
9. Cool and Enjoy
- Let the cookies rest on the baking sheet for 5 minutes before transferring them to a wire rack.
- Once completely cooled, store in an airtight container for up to 5 days.
Beginner Tips and Notes
- Use frozen raspberries only: Fresh raspberries are too juicy and can make the dough overly wet. Frozen raspberries hold their shape better during mixing.
- Don’t skip the syrup straining: Straining out the seeds ensures a smoother texture in your finished cookie.
- Marbling, not mixing: For that signature raspberry swirl look, fold the syrup gently. Mixing it in too much will tint the whole dough instead of creating contrast.
- Chop frozen, not thawed raspberries: Thawed raspberries are too soft and messy to chop. Use them frozen straight from the bag for cleaner pieces.
- Avoid overbaking: The cookies might seem underdone when the timer goes off, but they’ll firm up as they cool. Overbaking makes them dry and crumbly.
- Dairy-free options: Use vegan butter and plant-based milk like oat or soy for a fully dairy-free version.
- Flour substitution warning: This recipe was tested with a gluten-free 1:1 blend. Using almond flour or coconut flour will not yield the same results.
Serving Suggestions
- Afternoon Tea or Coffee Pairing: These cookies are perfect with a warm cup of tea or coffee. The tart raspberry flavor complements bitter or creamy beverages.
- Dessert Platter Star: Serve alongside vanilla or lemon-flavored treats for a bright and varied dessert spread.
- Gift Giving: Wrap a few of these cookies in parchment and twine for a thoughtful homemade gift during holidays or celebrations.
- School Snacks: Since they’re nut-free and egg-free, they’re safe for most school settings—pack them in lunchboxes for a fruity treat.
- Ice Cream Sandwiches: Try sandwiching a scoop of vanilla or lemon sorbet between two cookies for a unique dessert.

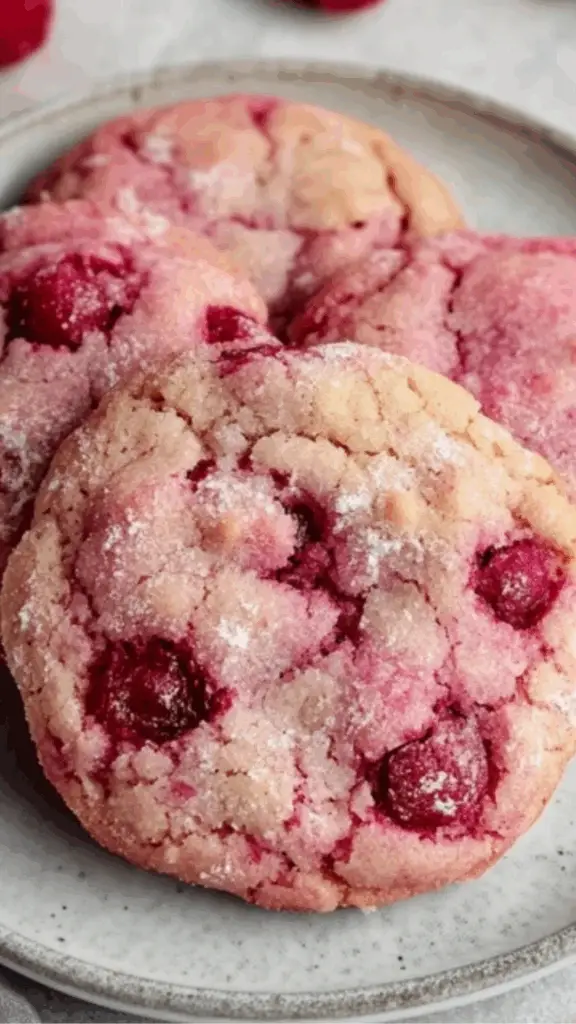
Raspberry Cookies: Soft, Fruity, and Perfect for Every Occasion
Sweet, soft, and bursting with berry bliss! 🍪🍓 These Raspberry Cookies are the ultimate fruity treat—tender on the inside, slightly crisp on the outside, and packed with juicy raspberry flavor. Perfect for picnics, parties, or cozy nights in, they’re a delightful bite of sunshine in cookie form. ☀️💕 One taste and you’ll be hooked on their sweet charm! ✨
- Total Time: 37 minutes
- Yield: 20 cookies 1x
Ingredients
For the Raspberry Syrup:
- 1 cup frozen raspberries
- ¼ cup granulated sugar
For the Cookie Dough:
- 1 cup unsalted butter (use a dairy-free substitute if preferred), softened
- 1 cup granulated sugar
- ¼ cup light brown sugar
- ¼ cup dairy-free milk of choice (e.g., oat, almond, soy)
- 1 tablespoon pure vanilla extract
- 2½ cups gluten-free 1:1 baking flour (ensure it contains xanthan gum)
- ½ teaspoon baking powder
- ½ teaspoon kosher salt
- ¾ cup frozen raspberries, finely chopped
Preparation Steps Before Baking:
- Thaw your butter slightly so it’s soft but not melted.
- Make sure the frozen raspberries are measured and separated into two portions—one for the syrup and the other to chop for the dough.
- Line two baking sheets with parchment paper for easy cleanup.
- Preheat the oven to 325°F (163°C).
Instructions
1. Make the Raspberry Syrup
- In a small saucepan, add 1 cup frozen raspberries and ¼ cup granulated sugar.
- Heat over medium-low heat, stirring frequently until the mixture breaks down and thickens, forming a syrup-like consistency.
- Use a fine mesh strainer to remove seeds and separate the smooth syrup.
- Set aside to cool completely before using in the dough.
2. Cream the Butter and Sugars
- In a large mixing bowl or stand mixer, combine the softened butter, granulated sugar, and light brown sugar.
- Beat on medium-high speed for about 2–3 minutes until the mixture is light and fluffy.
- This step is crucial for incorporating air and creating a soft, chewy texture.
3. Add Milk and Vanilla
- Slowly add ¼ cup dairy-free milk and 1 tablespoon vanilla extract to the creamed mixture.
- Beat until fully combined.
- Scrape down the sides of the bowl to ensure everything is evenly mixed.
4. Mix the Dry Ingredients
- In a separate bowl, whisk together the 2½ cups gluten-free flour, ½ teaspoon baking powder, and ½ teaspoon salt.
- Gradually add the dry ingredients to the wet mixture, mixing on low speed until a dough forms.
- Be careful not to overmix, especially when working with gluten-free flour, to avoid dense cookies.
5. Fold in Chopped Raspberries
- Finely chop ¾ cup of frozen raspberries.
- Gently fold them into the dough using a spatula or wooden spoon.
- Stir just enough to distribute the fruit without overmixing or breaking down the berries.
6. Swirl in Raspberry Syrup
- Add the cooled raspberry syrup to the dough and gently fold it in a few times to create a marbled effect.
- Avoid fully mixing it in, as you want streaks of raspberry visible throughout the dough.
7. Scoop and Shape the Cookies
- Use a cookie scoop or tablespoon to portion out the dough onto the prepared baking sheets.
- Leave about 2 inches between each cookie to allow for spreading.
- If desired, slightly flatten the tops for a more uniform shape.
8. Bake the Cookies
- Place the cookies in the preheated oven and bake for 15–17 minutes.
- The edges should be set, and the centers may look slightly soft, which is perfect.
- Do not overbake, as these cookies will continue to set as they cool.
9. Cool and Enjoy
- Let the cookies rest on the baking sheet for 5 minutes before transferring them to a wire rack.
- Once completely cooled, store in an airtight container for up to 5 days.
Notes
- Use frozen raspberries only: Fresh raspberries are too juicy and can make the dough overly wet. Frozen raspberries hold their shape better during mixing.
- Don’t skip the syrup straining: Straining out the seeds ensures a smoother texture in your finished cookie.
- Marbling, not mixing: For that signature raspberry swirl look, fold the syrup gently. Mixing it in too much will tint the whole dough instead of creating contrast.
- Chop frozen, not thawed raspberries: Thawed raspberries are too soft and messy to chop. Use them frozen straight from the bag for cleaner pieces.
- Avoid overbaking: The cookies might seem underdone when the timer goes off, but they’ll firm up as they cool. Overbaking makes them dry and crumbly.
- Dairy-free options: Use vegan butter and plant-based milk like oat or soy for a fully dairy-free version.
- Flour substitution warning: This recipe was tested with a gluten-free 1:1 blend. Using almond flour or coconut flour will not yield the same results.
- Prep Time: 20 minutes
- Cook Time: 17 minutes
Engagement Features
- Have you tried baking with raspberries before? Share your tips or variations in the comments.
- If you made these cookies, let us know how they turned out! Did you go for the dairy-free version or stick with the classic?
- Feel free to ask questions if you’re unsure about an ingredient swap or need clarification on a step.
- Tag us in your cookie creations and show off your marbled raspberry swirls.
- What other fruit-infused cookie flavors would you like to try? Your suggestions might be the inspiration for our next recipe.