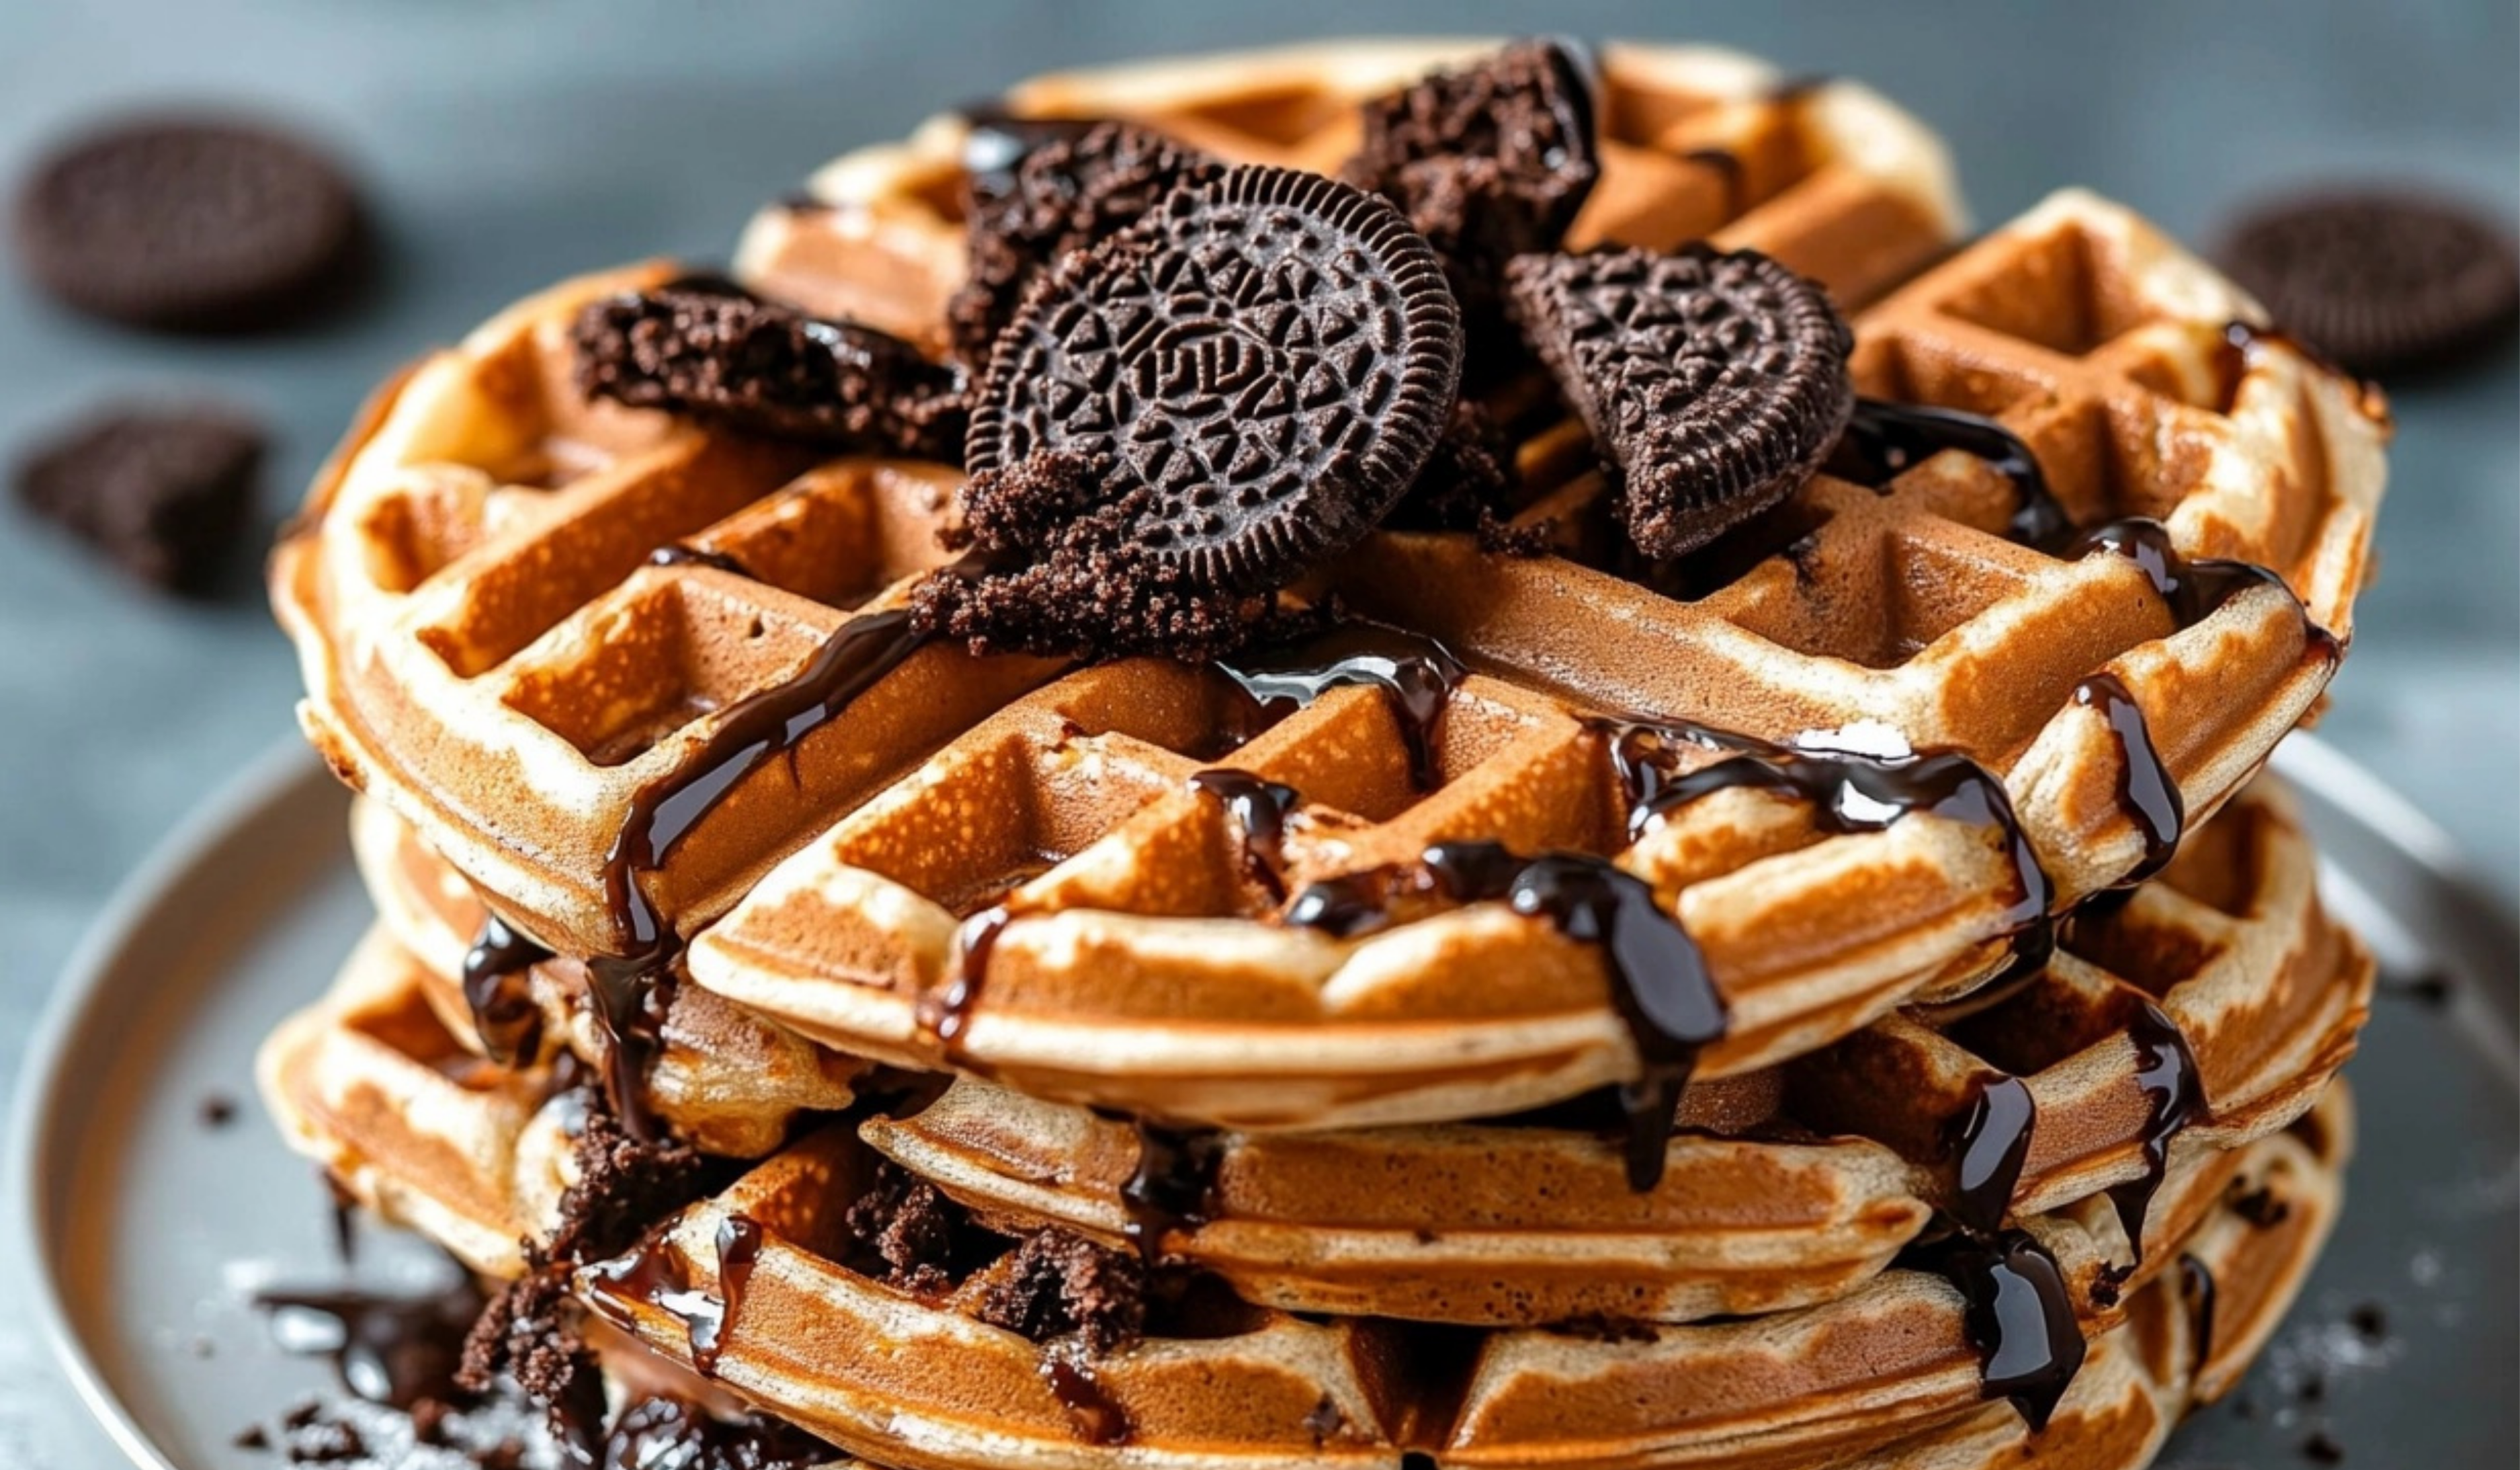
When it comes to breakfast, there are few things more delightful than a stack of warm, fluffy waffles. But what if you could elevate your morning routine with a twist on this classic dish? Introducing Oreo waffles—the ultimate combination of crispy, golden waffles and the indulgent, chocolatey goodness of Oreos! These waffles are crispy on the outside, soft and fluffy on the inside, with the irresistible crunch of crushed Oreos folded right into the batter. Topped with even more Oreos and drizzled with rich melted chocolate, these waffles are a sweet way to start your day. Perfect for Oreo lovers, or anyone with a sweet tooth, this recipe will leave you craving more with every bite.
Print
Oreo Waffles: The Ultimate Breakfast Treat
🍪🧇 Oreo Waffles are the ultimate way to satisfy your sweet cravings at breakfast! 💖 These waffles are packed with the irresistible flavor of crushed Oreos, creating the perfect balance of crispy and creamy in every bite. 🌟 Top with whipped cream, extra Oreos, or syrup for the ultimate indulgence. Ready to treat yourself to this deliciously unique breakfast? 😋
#WaffleMagic 🧇✨ #OreoBreakfast 🍪💖 #ChocolateLoversDelight 😍 #SweetIndulgence 🍫 #MorningTreats 🌞 #OreoCravings 🖤 #WaffleGoals 😋 #CrunchyAndCreamy 💖 #IndulgeInSweets 🍯 #OreoLoversUnite 🖤
- Total Time: 30 minutes
- Yield: 8–10 waffles 1x
Ingredients
- 2 cups All Purpose Flour (250g)
- ⅓ cup White Granulated Sugar (66g)
- 1 teaspoon Salt
- 1 Tablespoon Baking Powder
- 1½ cups Milk (360ml)
- 2 Large Eggs
- 1 teaspoon Vanilla Extract
- ⅓ cup Butter, melted (75g)
- 10 Oreo Cookies, broken up
- 20 Oreo Cookies, to place on top of the waffles before closing the machine
For Serving (Optional):
- ½ cup Chocolate, melted (85g)
- 4 Oreo Cookies, broken up
Instructions
1. Preheat Your Waffle Iron
Before you start mixing your ingredients, set your waffle iron to preheat. This ensures that it’s ready when your batter is all set to go. Follow the manufacturer’s instructions for the proper temperature settings.
2. Prepare the Dry Ingredients
In a mixing bowl, sift the all-purpose flour to ensure it’s free from lumps. Add the sugar, salt, and baking powder. Stir everything together until it’s well combined.
3. Add Wet Ingredients
To the dry mixture, add the milk, eggs, vanilla extract, and melted butter. Use a whisk or spoon to gently mix the ingredients into a smooth batter. Be careful not to overmix, as this can lead to tough waffles. A few lumps are perfectly fine!
4. Add the Oreos
Take 10 Oreo cookies and break them into smaller pieces. Add them into the batter and fold them in with a spatula, distributing the Oreo chunks evenly throughout the mixture.
5. Grease the Waffle Iron
Once your waffle iron is heated, grease it with oil or spray it with non-stick spray. Make sure to follow the manufacturer’s recommendations for greasing the iron to avoid any waffle mishaps.
6. Pour the Batter & Add Extra Oreos
Pour an even amount of batter onto the preheated waffle iron, depending on the size of your waffle maker. Before closing the lid, place two whole Oreo cookies on top of the batter. This will give the waffles that extra Oreo touch that everyone will love.
7. Cook the Waffles
Close the waffle iron and cook the waffles for about 3-5 minutes, or until they are golden brown and crisp. Be sure not to open the waffle iron too early. The key is to wait for the steam to subside before checking, as this means the waffles are fully cooked and crispy.
8. Serve & Enjoy
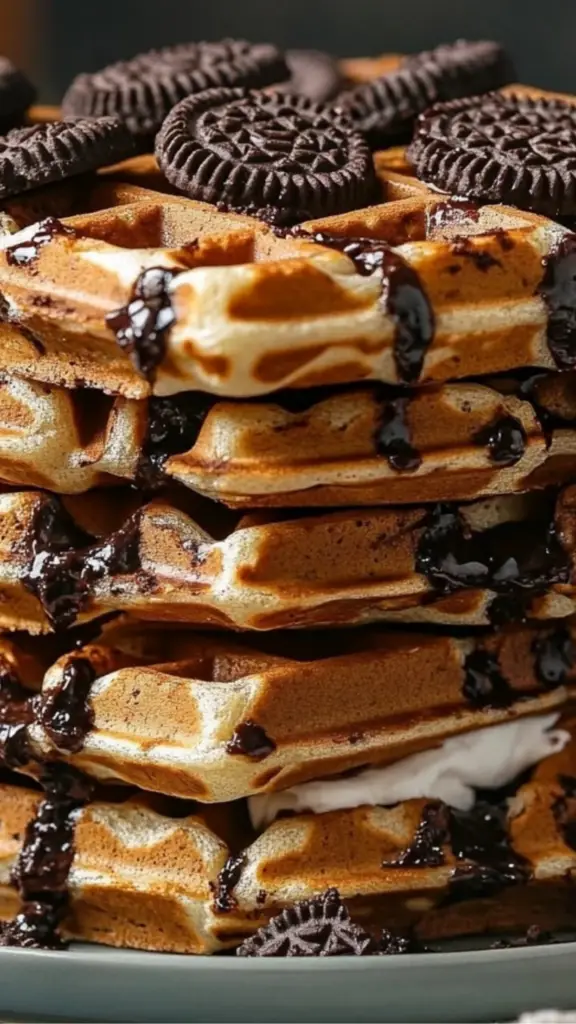
Once your waffles are ready, carefully remove them from the waffle iron. Drizzle them with melted chocolate and sprinkle broken-up Oreo cookies on top for an extra indulgent touch.
Notes
- Measure the Flour Properly: Be sure to measure your flour correctly to avoid a dense batter. Use the spoon and level method or weigh the flour on a food scale for the best accuracy. This ensures your waffles come out light and fluffy.
- Grease Your Waffle Iron: Don’t skip greasing your waffle iron! Whether you use non-stick spray or oil, this step is crucial for preventing the waffles from sticking and making them easy to remove once they’re done.
- Don’t Overmix the Batter: Overmixing the batter can result in dense waffles. Mix just until the ingredients are incorporated, and remember that a few lumps are perfectly okay.
- Resist Peeking: It’s tempting to open your waffle maker early, but be patient! Opening it too soon can disrupt the cooking process. Wait until the steam has died down before checking the waffles to get that perfect golden-brown crispiness.
- Substitute Ingredients: You can easily tweak the recipe to fit your preferences. Try using almond milk or oat milk for a dairy-free option, or swap the eggs for a flax egg if you want to make it egg-free. You can even substitute the vanilla extract with a different flavor, such as almond or hazelnut.
- Prep Time: 10 minutes
- Cook Time: 20 minutes
Whether you’re making these for a special weekend breakfast, brunch with friends, or a sweet treat after dinner, these Oreo waffles are sure to impress. The added chocolate drizzle and broken Oreo cookie pieces bring a satisfying crunch and a touch of decadence that makes each bite feel like a celebration. The best part? They are incredibly easy to make and will fill your home with a mouth-watering aroma that’s bound to bring everyone to the breakfast table.
Let’s break down how to make these delicious Oreo waffles that are sure to be the star of your morning!
Ingredients
- 2 cups All Purpose Flour (250g)
- ⅓ cup White Granulated Sugar (66g)
- 1 teaspoon Salt
- 1 Tablespoon Baking Powder
- 1½ cups Milk (360ml)
- 2 Large Eggs
- 1 teaspoon Vanilla Extract
- ⅓ cup Butter, melted (75g)
- 10 Oreo Cookies, broken up
- 20 Oreo Cookies, to place on top of the waffles before closing the machine
For Serving (Optional):
- ½ cup Chocolate, melted (85g)
- 4 Oreo Cookies, broken up
Instructions
1. Preheat Your Waffle Iron
Before you start mixing your ingredients, set your waffle iron to preheat. This ensures that it’s ready when your batter is all set to go. Follow the manufacturer’s instructions for the proper temperature settings.
2. Prepare the Dry Ingredients
In a mixing bowl, sift the all-purpose flour to ensure it’s free from lumps. Add the sugar, salt, and baking powder. Stir everything together until it’s well combined.
3. Add Wet Ingredients
To the dry mixture, add the milk, eggs, vanilla extract, and melted butter. Use a whisk or spoon to gently mix the ingredients into a smooth batter. Be careful not to overmix, as this can lead to tough waffles. A few lumps are perfectly fine!
4. Add the Oreos
Take 10 Oreo cookies and break them into smaller pieces. Add them into the batter and fold them in with a spatula, distributing the Oreo chunks evenly throughout the mixture.
5. Grease the Waffle Iron
Once your waffle iron is heated, grease it with oil or spray it with non-stick spray. Make sure to follow the manufacturer’s recommendations for greasing the iron to avoid any waffle mishaps.
6. Pour the Batter & Add Extra Oreos
Pour an even amount of batter onto the preheated waffle iron, depending on the size of your waffle maker. Before closing the lid, place two whole Oreo cookies on top of the batter. This will give the waffles that extra Oreo touch that everyone will love.
7. Cook the Waffles
Close the waffle iron and cook the waffles for about 3-5 minutes, or until they are golden brown and crisp. Be sure not to open the waffle iron too early. The key is to wait for the steam to subside before checking, as this means the waffles are fully cooked and crispy.
8. Serve & Enjoy
Once your waffles are ready, carefully remove them from the waffle iron. Drizzle them with melted chocolate and sprinkle broken-up Oreo cookies on top for an extra indulgent touch.
Flavor, Texture, and Aroma
These Oreo waffles are a delightful combination of textures and flavors. The waffles themselves are light and fluffy on the inside, with a slightly crispy outer layer that provides a satisfying crunch with each bite. The Oreo pieces in the batter give a pleasant crunch and chocolate flavor, while the added whole Oreos on top create an extra layer of texture as they melt into the batter during cooking.
As the waffles cook, the sweet aroma of vanilla and chocolate wafts through the air, tempting you to take that first bite. The melted chocolate drizzle adds an indulgent richness that complements the slightly sweet batter. The Oreo cookies provide a touch of crunch that balances the soft waffle and creamy chocolate. Every bite is a perfect harmony of warm, gooey chocolate, cookie crumbs, and fluffy waffle goodness.
Tips for Perfect Oreo Waffles
- Measure the Flour Properly: Be sure to measure your flour correctly to avoid a dense batter. Use the spoon and level method or weigh the flour on a food scale for the best accuracy. This ensures your waffles come out light and fluffy.
- Grease Your Waffle Iron: Don’t skip greasing your waffle iron! Whether you use non-stick spray or oil, this step is crucial for preventing the waffles from sticking and making them easy to remove once they’re done.
- Don’t Overmix the Batter: Overmixing the batter can result in dense waffles. Mix just until the ingredients are incorporated, and remember that a few lumps are perfectly okay.
- Resist Peeking: It’s tempting to open your waffle maker early, but be patient! Opening it too soon can disrupt the cooking process. Wait until the steam has died down before checking the waffles to get that perfect golden-brown crispiness.
- Substitute Ingredients: You can easily tweak the recipe to fit your preferences. Try using almond milk or oat milk for a dairy-free option, or swap the eggs for a flax egg if you want to make it egg-free. You can even substitute the vanilla extract with a different flavor, such as almond or hazelnut.
Variations & Serving Suggestions
While the classic Oreo waffle recipe is already amazing, feel free to experiment with different variations:
- Oreo & Nut Butter Waffles: Add a spoonful of peanut butter or almond butter to the batter for a rich, nutty twist that pairs perfectly with Oreos.
- Oreo Waffle Sundae: Turn your waffles into a decadent sundae by adding a scoop of vanilla ice cream, a drizzle of hot fudge or caramel sauce, and extra crushed Oreos for a dessert-worthy treat.
- Fruit Topping: Add fresh berries like strawberries, raspberries, or bananas for a burst of sweetness that balances the richness of the waffles. You could even mix the fruit into the batter for an extra pop of flavor.
- Whipped Cream: A dollop of freshly whipped cream on top makes for a heavenly finish, complementing the waffles with a light and airy contrast to the chocolatey crunch.
- Oreo Waffle Sandwich: For an extra indulgent option, you can sandwich the waffles with ice cream or your favorite sweet spread to create a fun and delicious dessert.
Storage and Freezing Tips
These Oreo waffles are so delicious that you may not have any leftovers, but just in case:
- Refrigeration: Leftover waffles can be stored in an airtight container in the fridge for up to two days. Reheat them in a toaster for the best crispy texture.
- Freezing: For longer storage, you can freeze the waffles. Simply place them in a Ziploc bag or freezer-safe container, and freeze them for up to 3 months. When you’re ready to enjoy them again, reheat them directly from frozen in the toaster.
Conclusion
Oreo waffles are more than just a breakfast; they are an experience that turns an ordinary morning into something extraordinary. The combination of crispy, golden waffles with the rich flavor of Oreos baked right into the batter creates a delightful contrast of textures. The crunch of Oreo pieces, the melt-in-your-mouth softness of the waffles, and the extra indulgence of chocolate drizzle make each bite irresistible. It’s not just the taste that makes these waffles stand out, but also the smell of the waffles cooking—the sweet aroma of chocolate and vanilla filling the air as you wait for that perfect golden-brown finish.
This recipe is a fantastic way to bring a little fun to your morning routine. It’s ideal for sharing with loved ones, whether you’re hosting a brunch, making breakfast for a family gathering, or treating yourself to a well-deserved sweet morning indulgence. The versatility of the dish also allows you to customize it to suit your tastes, from adding extra toppings like fresh fruits, whipped cream, or even a scoop of ice cream, to experimenting with different flavors by incorporating nut butter or using non-dairy alternatives.
Not only are these Oreo waffles a crowd-pleaser, but they’re also incredibly easy to make, especially when you follow the tips and instructions provided. Whether you’re a seasoned waffle maker or new to the kitchen, the recipe ensures a foolproof way to create a delicious, visually appealing dish that looks as good as it tastes.