
Some of the best recipes begin with a craving. Mine started on a warm summer afternoon, with the memory of my grandmother’s pineapple upside-down cake still lingering in my mind. I loved the way the caramelized pineapple would slightly melt into the buttery cake, but as a beginner cook at the time, the idea of baking a whole cake from scratch was intimidating. I wanted something easier, something portioned, and something I could pull off with minimal tools and stress. That’s how I stumbled into the world of mini cheesecakes.
Print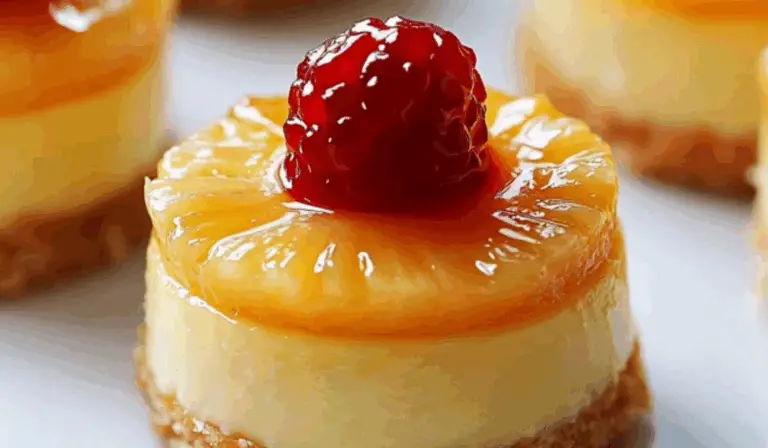
Mini Pineapple Upside-Down Cheesecakes: A Tropical Treat for Every Beginner Baker
These Mini Pineapple Upside-Down Cheesecakes are a tropical twist on a classic! 🍍🍰 Sweet caramelized pineapple tops creamy cheesecake for a bite-sized dessert that’s beginner-friendly and oh-so-fun to make. No stress, just sunshine on a plate! Perfect for parties, snacks, or treating yourself anytime. ☀️💛
- Total Time: 45 minutes
- Yield: 12 mini cheesecakes 1x
Ingredients
Crust:
-
1½ cups graham cracker crumbs
These provide a crunchy base that pairs perfectly with the smooth cheesecake filling. Crush whole graham crackers in a food processor or place them in a zip-top bag and roll with a rolling pin for a fresher texture. -
¼ cup melted butter
Acts as the binding agent to hold the crust together. You can substitute with margarine or a plant-based butter alternative if desired.
Cheesecake Filling:
-
2 (8 oz) packages of full-fat cream cheese, softened
Full-fat cream cheese gives the best flavor and texture. Avoid low-fat versions, which may result in a runnier or less stable filling. -
½ cup granulated sugar
Sweetens the cheesecake just enough to complement the pineapple topping without overwhelming it. -
2 large eggs
Eggs help set the cheesecake. Make sure they’re at room temperature for easier mixing. -
1 teaspoon vanilla extract
Adds depth and warmth to the filling.
Topping:
-
1 can (20 oz) pineapple chunks, thoroughly drained
Remove as much moisture as possible using paper towels. Wet pineapple can lead to soggy or sunken cheesecakes. -
¼ cup caramel sauce
This adds a smooth, buttery richness to balance the tart pineapple. You can use store-bought or make your own.
Instructions
1. Preheat the Oven
Start by preheating your oven to 350°F (175°C). Line a standard 12-cup muffin tin with paper liners. These liners will make removing and serving the cheesecakes far easier, especially for beginners.
2. Prepare the Crust
In a medium-sized bowl, mix the graham cracker crumbs with the melted butter. Stir until the mixture resembles wet sand. Evenly divide the crust mixture between the lined muffin cups, pressing it firmly into the bottom of each one using the back of a spoon or a small glass. The firmer the crust is packed, the more stable your final cheesecake will be.
3. Mix the Cheesecake Filling
In a large mixing bowl, combine the softened cream cheese and sugar. Beat until smooth and fluffy—this may take 2-3 minutes using an electric hand mixer. Be sure to scrape down the sides of the bowl to incorporate everything evenly.
Add the eggs one at a time, mixing just until combined. Avoid over-beating, which can introduce air into the batter and lead to cracking. Stir in the vanilla extract until evenly mixed.
4. Assemble the Cheesecakes
Fill each muffin cup about three-quarters full with the cheesecake batter. Gently place a few pieces of drained pineapple on top of each one, pressing them lightly into the filling. This will ensure they partially sink and become slightly embedded, helping them caramelize slightly as they bake.
5. Bake
Bake the mini cheesecakes for 20-25 minutes. Keep an eye on them—when the edges are set and the centers still have a slight jiggle, they’re ready. If you insert a toothpick, it should come out mostly clean but not dry. They will continue to set as they cool.
6. Cool and Chill
Once removed from the oven, let the cheesecakes cool in the muffin tin for at least 30 minutes. Then transfer them to the refrigerator and chill for at least 4 hours, preferably overnight. This step allows the flavors to develop and ensures the texture becomes smooth and creamy.
7. Add Toppings and Serve
Just before serving, drizzle each cheesecake with a spoonful of caramel sauce. For a more festive presentation, consider adding a maraschino cherry or a small sprig of mint. Optional garnishes should be kept minimal to avoid overpowering the balanced flavors of the dessert.
Notes
Drain the Pineapple Well
Moisture is the enemy of cheesecake. Thoroughly pat the pineapple chunks dry with a paper towel after draining to prevent sogginess and help them caramelize properly during baking.
Pack the Crust Tightly
Use a flat-bottomed object to press the crust down firmly into each muffin liner. This will create a solid foundation and prevent crumbling when you take a bite.
Avoid Overmixing
Mix the ingredients just until combined. Overmixing can cause the batter to trap too much air, leading to cracking or sinking during baking.
Water Bath Alternative
Instead of the traditional water bath, which can be tricky for new bakers, place a shallow pan of hot water on the bottom rack of the oven during baking. The steam helps maintain moisture in the oven, reducing the risk of cracked tops.
Don’t Rush the Chill Time
Cheesecake needs time to set properly. If you rush this step, the texture may be too soft and difficult to handle.
- Prep Time: 20 minutes
- Cook Time: 25 minutes
Mini pineapple upside-down cheesecakes combine two crowd favorites: the classic tropical flavor of pineapple upside-down cake and the rich, creamy decadence of cheesecake. Even better, they’re bite-sized, perfect for sharing, and wonderfully forgiving for beginner bakers. No springform pans. No water bath nightmares. No fuss.
These cheesecakes are ideal for anyone new to the kitchen. They’re simple, time-efficient, and deliver a great balance of sweetness and tang without overcomplicating your ingredient list. Whether you’re baking for a party or just for fun, this recipe is the perfect way to start your home baking journey.
Ingredients and Preparation
Crust:
- 1½ cups graham cracker crumbs
These provide a crunchy base that pairs perfectly with the smooth cheesecake filling. Crush whole graham crackers in a food processor or place them in a zip-top bag and roll with a rolling pin for a fresher texture. - ¼ cup melted butter
Acts as the binding agent to hold the crust together. You can substitute with margarine or a plant-based butter alternative if desired.
Cheesecake Filling:
- 2 (8 oz) packages of full-fat cream cheese, softened
Full-fat cream cheese gives the best flavor and texture. Avoid low-fat versions, which may result in a runnier or less stable filling. - ½ cup granulated sugar
Sweetens the cheesecake just enough to complement the pineapple topping without overwhelming it. - 2 large eggs
Eggs help set the cheesecake. Make sure they’re at room temperature for easier mixing. - 1 teaspoon vanilla extract
Adds depth and warmth to the filling.
Topping:
- 1 can (20 oz) pineapple chunks, thoroughly drained
Remove as much moisture as possible using paper towels. Wet pineapple can lead to soggy or sunken cheesecakes. - ¼ cup caramel sauce
This adds a smooth, buttery richness to balance the tart pineapple. You can use store-bought or make your own.
Step-by-Step Instructions
1. Preheat the Oven
Start by preheating your oven to 350°F (175°C). Line a standard 12-cup muffin tin with paper liners. These liners will make removing and serving the cheesecakes far easier, especially for beginners.
2. Prepare the Crust
In a medium-sized bowl, mix the graham cracker crumbs with the melted butter. Stir until the mixture resembles wet sand. Evenly divide the crust mixture between the lined muffin cups, pressing it firmly into the bottom of each one using the back of a spoon or a small glass. The firmer the crust is packed, the more stable your final cheesecake will be.
3. Mix the Cheesecake Filling
In a large mixing bowl, combine the softened cream cheese and sugar. Beat until smooth and fluffy—this may take 2-3 minutes using an electric hand mixer. Be sure to scrape down the sides of the bowl to incorporate everything evenly.
Add the eggs one at a time, mixing just until combined. Avoid over-beating, which can introduce air into the batter and lead to cracking. Stir in the vanilla extract until evenly mixed.
4. Assemble the Cheesecakes
Fill each muffin cup about three-quarters full with the cheesecake batter. Gently place a few pieces of drained pineapple on top of each one, pressing them lightly into the filling. This will ensure they partially sink and become slightly embedded, helping them caramelize slightly as they bake.
5. Bake
Bake the mini cheesecakes for 20-25 minutes. Keep an eye on them—when the edges are set and the centers still have a slight jiggle, they’re ready. If you insert a toothpick, it should come out mostly clean but not dry. They will continue to set as they cool.
6. Cool and Chill
Once removed from the oven, let the cheesecakes cool in the muffin tin for at least 30 minutes. Then transfer them to the refrigerator and chill for at least 4 hours, preferably overnight. This step allows the flavors to develop and ensures the texture becomes smooth and creamy.
7. Add Toppings and Serve
Just before serving, drizzle each cheesecake with a spoonful of caramel sauce. For a more festive presentation, consider adding a maraschino cherry or a small sprig of mint. Optional garnishes should be kept minimal to avoid overpowering the balanced flavors of the dessert.
Beginner Tips and Notes
Use Room Temperature Ingredients
Softened cream cheese and room-temperature eggs blend much more smoothly, preventing lumps and ensuring an even texture.
Drain the Pineapple Well
Moisture is the enemy of cheesecake. Thoroughly pat the pineapple chunks dry with a paper towel after draining to prevent sogginess and help them caramelize properly during baking.
Pack the Crust Tightly
Use a flat-bottomed object to press the crust down firmly into each muffin liner. This will create a solid foundation and prevent crumbling when you take a bite.
Avoid Overmixing
Mix the ingredients just until combined. Overmixing can cause the batter to trap too much air, leading to cracking or sinking during baking.
Water Bath Alternative
Instead of the traditional water bath, which can be tricky for new bakers, place a shallow pan of hot water on the bottom rack of the oven during baking. The steam helps maintain moisture in the oven, reducing the risk of cracked tops.
Don’t Rush the Chill Time
Cheesecake needs time to set properly. If you rush this step, the texture may be too soft and difficult to handle.

Serving Suggestions
Pair With Fresh Fruit
Serve your mini cheesecakes with a side of fresh berries or a tropical fruit salad. The acidity in the fruit helps balance the richness of the cheesecake.
Serve With Light Protein Options
If serving as part of a full meal, consider light savory options like grilled chicken skewers, marinated tofu, or citrus-herb beef. This complements the sweet-sour flavor of the pineapple without making the meal feel too heavy.
Add a Crisp Side
Offer something with crunch, such as coconut crisps or a lightly sweetened nut mix, for textural contrast.
Storage Tips
Store leftover cheesecakes in an airtight container in the refrigerator for up to 5 days. If you want to make them in advance, they also freeze well. Freeze them without the caramel topping, wrapped tightly in plastic wrap and foil. When ready to serve, thaw in the refrigerator overnight and top with caramel just before serving.
Engagement Features
Trying a new recipe can be both exciting and nerve-wracking, especially when you’re just getting comfortable in the kitchen. The beauty of these mini pineapple upside-down cheesecakes is how forgiving they are. If your crust crumbles a bit or your caramel drizzle doesn’t look like a bakery ad, it’s okay. These little treats are all about the flavor and the joy of making something with your own hands.
If you give this recipe a try, let us know how it turned out. Did you swap the pineapple for mango or use a different crust altogether? Share your tweaks and tips in the comments. The kitchen is a place for creativity as much as it is for following directions. You might just inspire someone else to start baking.