
There are few dishes as simple yet impressive as melting potatoes. The first time I made them, I was skeptical. Could something as basic as a potato be transformed into a restaurant-quality side dish with just a handful of ingredients? The answer was a resounding yes. When I pulled them from the oven—golden brown, glistening with butter, and infused with the aroma of garlic and herbs—I knew I had discovered something special.
Print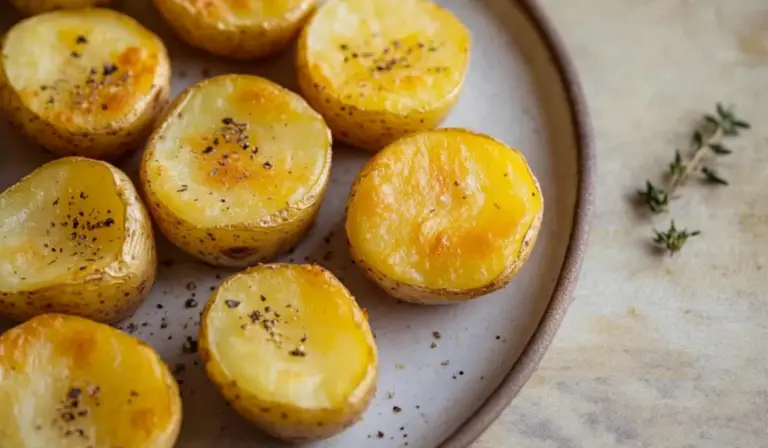
Melting Potatoes: The Ultimate Beginner-Friendly Side Dish
Golden-brown melting potatoes are roasted to perfection, soaking up a rich, buttery broth for an ultra-tender, melt-in-your-mouth experience. The easiest way to turn simple potatoes into a restaurant-worthy side dish!
- Total Time: 1 hour
- Yield: 6 servings 1x
Ingredients
- 2 pounds Yukon gold potatoes (about 8 medium potatoes)
- 4 tablespoons butter, melted
- 2 tablespoons oil (avocado or olive oil)
- 1 teaspoon fresh rosemary, finely chopped
- 1 teaspoon fresh thyme, finely chopped
- 3 cloves garlic, finely minced
- 1 teaspoon salt
- ¼ teaspoon black pepper
- 1 cup chicken broth (or beef broth for a deeper flavor)
Instructions
1. Prepare the Potatoes
Preheat your oven to 400°F. This high heat is essential for creating the perfect crispy crust while keeping the inside tender.
Trim about ½ inch from the rounded ends of all the potatoes, then cut each one in half to create two even rounds, approximately 1 inch thick. Cutting them this way ensures they cook evenly and get the perfect balance of crispiness and softness.
2. Coat with Seasoning
In a large mixing bowl, whisk together the melted butter, oil, finely chopped rosemary, thyme, minced garlic, salt, and black pepper. This mixture will infuse the potatoes with a rich, herbaceous flavor.
Add the potato rounds to the bowl and toss them until they are evenly coated with the seasoning. This step ensures every bite is packed with flavor.
3. Arrange and Bake
Lightly grease a 13×9-inch baking dish with non-stick cooking spray or a thin layer of oil. Arrange the potatoes in a single layer, cut-side down, so they make direct contact with the baking dish. Pour any remaining butter and herb mixture over them.
Place the baking dish in the preheated oven and bake for 30 minutes. About halfway through, use tongs or a spatula to flip the potatoes so they brown evenly on both sides.
4. Add the Broth and Finish Roasting
After 30 minutes, remove the dish from the oven and carefully pour in the chicken or beef broth. This step is what makes these potatoes so incredibly tender. The liquid seeps into the potatoes, giving them a melt-in-your-mouth texture and a rich, savory depth.
Return the dish to the oven and roast for another 20-25 minutes. By the end of the cooking time, the broth will have reduced, and the potatoes will be infused with incredible flavor.
5. Serve and Enjoy
Remove the baking dish from the oven and spoon some of the remaining sauce over the potatoes for extra moisture and flavor. Garnish with additional fresh herbs for a beautiful, aromatic finish.
Serve immediately while they are hot and crisp.
Notes
How to Tell If the Potatoes Are Done
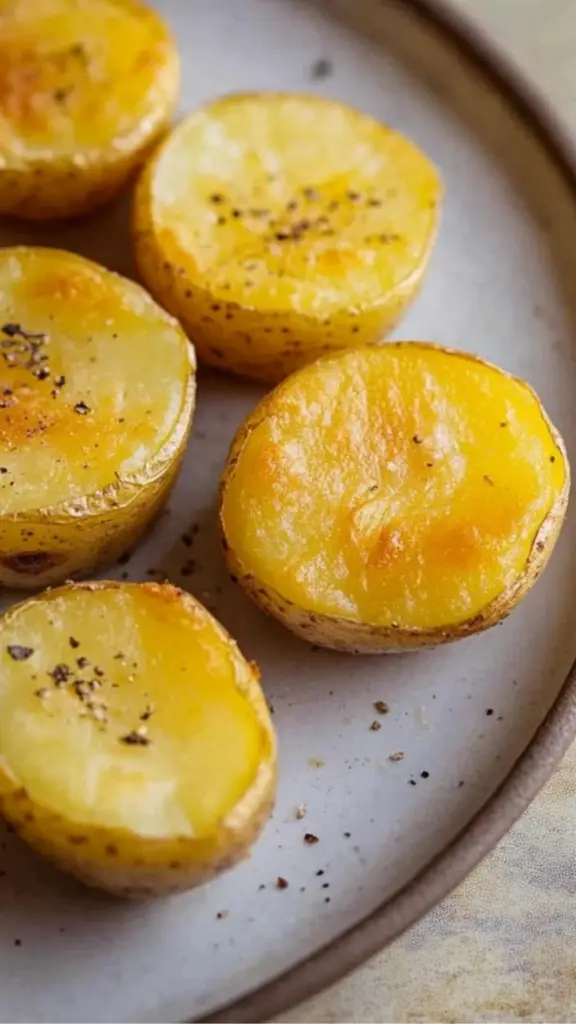
- The potatoes should have a golden-brown crust on the outside.
- A fork should easily slide into the center without resistance.
- The broth should be mostly absorbed, leaving a small amount of flavorful sauce at the bottom.
Troubleshooting Common Issues
- Potatoes Are Not Crispy Enough: If they seem too soft, it may be because they were too close together in the pan. Make sure they are arranged in a single layer with space between them. Also, avoid overcrowding the oven with other dishes.
- Garlic Burns Too Quickly: Minced garlic can burn if left on the surface of the potatoes. To prevent this, make sure it is well mixed with the butter and oil before coating the potatoes.
- Potatoes Are Too Dry: If they seem dry, try adding an extra splash of broth towards the end of the cooking time or drizzling with a bit more melted butter before serving.
Efficient Prep Tips
- Use a Sharp Knife: Cutting even rounds ensures they cook uniformly.
- Prep in Advance: You can chop the herbs and mince the garlic ahead of time to make the process smoother.
- Choose the Right Pan: A metal or glass baking dish works best for even heat distribution. Avoid ceramic dishes, as they retain too much moisture, which may prevent crisping.
- Prep Time: 10 minutes
- Cook Time: 50 minutes
Melting potatoes are the perfect recipe for beginners. They require minimal ingredients, basic kitchen tools, and no complicated techniques. The secret lies in roasting the potatoes at a high temperature, allowing them to develop a crispy exterior while the inside turns unbelievably soft. A final touch of broth ensures they become rich, flavorful, and, as the name suggests, melt-in-your-mouth delicious.
This dish is also incredibly versatile. Whether you serve it alongside a roasted chicken, a grilled steak, or a fresh salad, melting potatoes elevate any meal. Plus, they are naturally gluten-free and can be adapted for different dietary needs.
If you’re looking for an easy yet impressive side dish that requires little effort but delivers maximum flavor, this recipe is for you.
Ingredients and Preparation
Ingredients (Serves 6)
- 2 pounds Yukon gold potatoes (about 8 medium potatoes)
- 4 tablespoons butter, melted
- 2 tablespoons oil (avocado or olive oil)
- 1 teaspoon fresh rosemary, finely chopped
- 1 teaspoon fresh thyme, finely chopped
- 3 cloves garlic, finely minced
- 1 teaspoon salt
- ¼ teaspoon black pepper
- 1 cup chicken broth (or beef broth for a deeper flavor)
Ingredient Notes and Substitutions
- Potatoes: Yukon gold potatoes are ideal because of their naturally creamy texture, but russet or red potatoes can work if needed. Russet potatoes will be fluffier inside, while red potatoes will have a firmer texture.
- Butter: Unsalted butter is best, as it allows you to control the salt level. If using salted butter, reduce the added salt slightly.
- Oil: Avocado oil has a high smoke point, making it great for roasting, but olive oil adds a rich flavor. Either works well.
- Herbs: Fresh rosemary and thyme provide incredible fragrance, but dried herbs can be substituted if fresh ones aren’t available. Use half the amount if using dried herbs.
- Broth: Chicken broth adds a savory depth, but beef broth gives the dish a heartier taste. For a vegetarian option, vegetable broth works as well.
Step-by-Step Instructions
1. Prepare the Potatoes
Preheat your oven to 400°F. This high heat is essential for creating the perfect crispy crust while keeping the inside tender.
Trim about ½ inch from the rounded ends of all the potatoes, then cut each one in half to create two even rounds, approximately 1 inch thick. Cutting them this way ensures they cook evenly and get the perfect balance of crispiness and softness.
2. Coat with Seasoning
In a large mixing bowl, whisk together the melted butter, oil, finely chopped rosemary, thyme, minced garlic, salt, and black pepper. This mixture will infuse the potatoes with a rich, herbaceous flavor.
Add the potato rounds to the bowl and toss them until they are evenly coated with the seasoning. This step ensures every bite is packed with flavor.
3. Arrange and Bake
Lightly grease a 13×9-inch baking dish with non-stick cooking spray or a thin layer of oil. Arrange the potatoes in a single layer, cut-side down, so they make direct contact with the baking dish. Pour any remaining butter and herb mixture over them.
Place the baking dish in the preheated oven and bake for 30 minutes. About halfway through, use tongs or a spatula to flip the potatoes so they brown evenly on both sides.
4. Add the Broth and Finish Roasting
After 30 minutes, remove the dish from the oven and carefully pour in the chicken or beef broth. This step is what makes these potatoes so incredibly tender. The liquid seeps into the potatoes, giving them a melt-in-your-mouth texture and a rich, savory depth.
Return the dish to the oven and roast for another 20-25 minutes. By the end of the cooking time, the broth will have reduced, and the potatoes will be infused with incredible flavor.
5. Serve and Enjoy
Remove the baking dish from the oven and spoon some of the remaining sauce over the potatoes for extra moisture and flavor. Garnish with additional fresh herbs for a beautiful, aromatic finish.
Serve immediately while they are hot and crisp.
Beginner Tips and Notes
How to Tell If the Potatoes Are Done
- The potatoes should have a golden-brown crust on the outside.
- A fork should easily slide into the center without resistance.
- The broth should be mostly absorbed, leaving a small amount of flavorful sauce at the bottom.
Troubleshooting Common Issues
- Potatoes Are Not Crispy Enough: If they seem too soft, it may be because they were too close together in the pan. Make sure they are arranged in a single layer with space between them. Also, avoid overcrowding the oven with other dishes.
- Garlic Burns Too Quickly: Minced garlic can burn if left on the surface of the potatoes. To prevent this, make sure it is well mixed with the butter and oil before coating the potatoes.
- Potatoes Are Too Dry: If they seem dry, try adding an extra splash of broth towards the end of the cooking time or drizzling with a bit more melted butter before serving.
Efficient Prep Tips
- Use a Sharp Knife: Cutting even rounds ensures they cook uniformly.
- Prep in Advance: You can chop the herbs and mince the garlic ahead of time to make the process smoother.
- Choose the Right Pan: A metal or glass baking dish works best for even heat distribution. Avoid ceramic dishes, as they retain too much moisture, which may prevent crisping.
Serving Suggestions
Melting potatoes pair well with a variety of dishes. Here are some ideas to complete your meal:
Main Dishes
- Garlic Herb Chicken: The juicy, flavorful chicken complements the buttery potatoes perfectly.
- Grilled Steak: The richness of the beef pairs beautifully with the creamy, melt-in-your-mouth texture of the potatoes.
- Oven-Roasted Salmon: The crisp potatoes add a great contrast to tender, flaky fish.
Side Additions
- Steamed Green Beans: A fresh and vibrant side that adds color and balance to your plate.
- Roasted Asparagus: A simple but elegant vegetable side that complements the herb flavors in the potatoes.
- Crisp Garden Salad: A light salad with a tangy vinaigrette helps balance the richness of the dish.
Storage and Reheating Tips
- Refrigeration: Store leftover potatoes in an airtight container in the refrigerator for up to 3 days.
- Reheating: Reheat in a 375°F oven for 10-15 minutes to restore crispiness. Microwaving works but will make them softer.
- Freezing: While possible, freezing can alter the texture. If needed, freeze in a single layer and reheat in the oven.
Conclusion: Why You Should Try This Recipe Today
Melting potatoes are the ultimate beginner-friendly side dish. They require minimal effort but deliver restaurant-quality results. With a perfectly crispy exterior, a creamy interior, and an infusion of garlic and herb flavors, they are guaranteed to impress.
This dish is also highly adaptable, allowing you to experiment with different broths, herbs, and seasonings. Whether you’re cooking for yourself, your family, or guests, melting potatoes are a foolproof way to elevate any meal.
Give this recipe a try, and let me know how it turns out. Share your experience and any creative variations you come up with. Cooking is all about experimenting and finding what works best for you. Enjoy your delicious, melt-in-your-mouth potatoes.