When I first ventured into the world of homemade donuts, I was immediately drawn to the French cruller. These delicate, airy rings of dough, fried to golden perfection and coated in a sweet maple glaze, felt like a culinary challenge worth tackling. I wasn’t sure if I could master the piping technique that gave crullers their signature lines or if I’d be able to get the texture just right. But with a bit of patience, practice, and the right recipe, I was able to create a batch of light, fluffy French crullers that rivaled any donut shop’s version.
Print
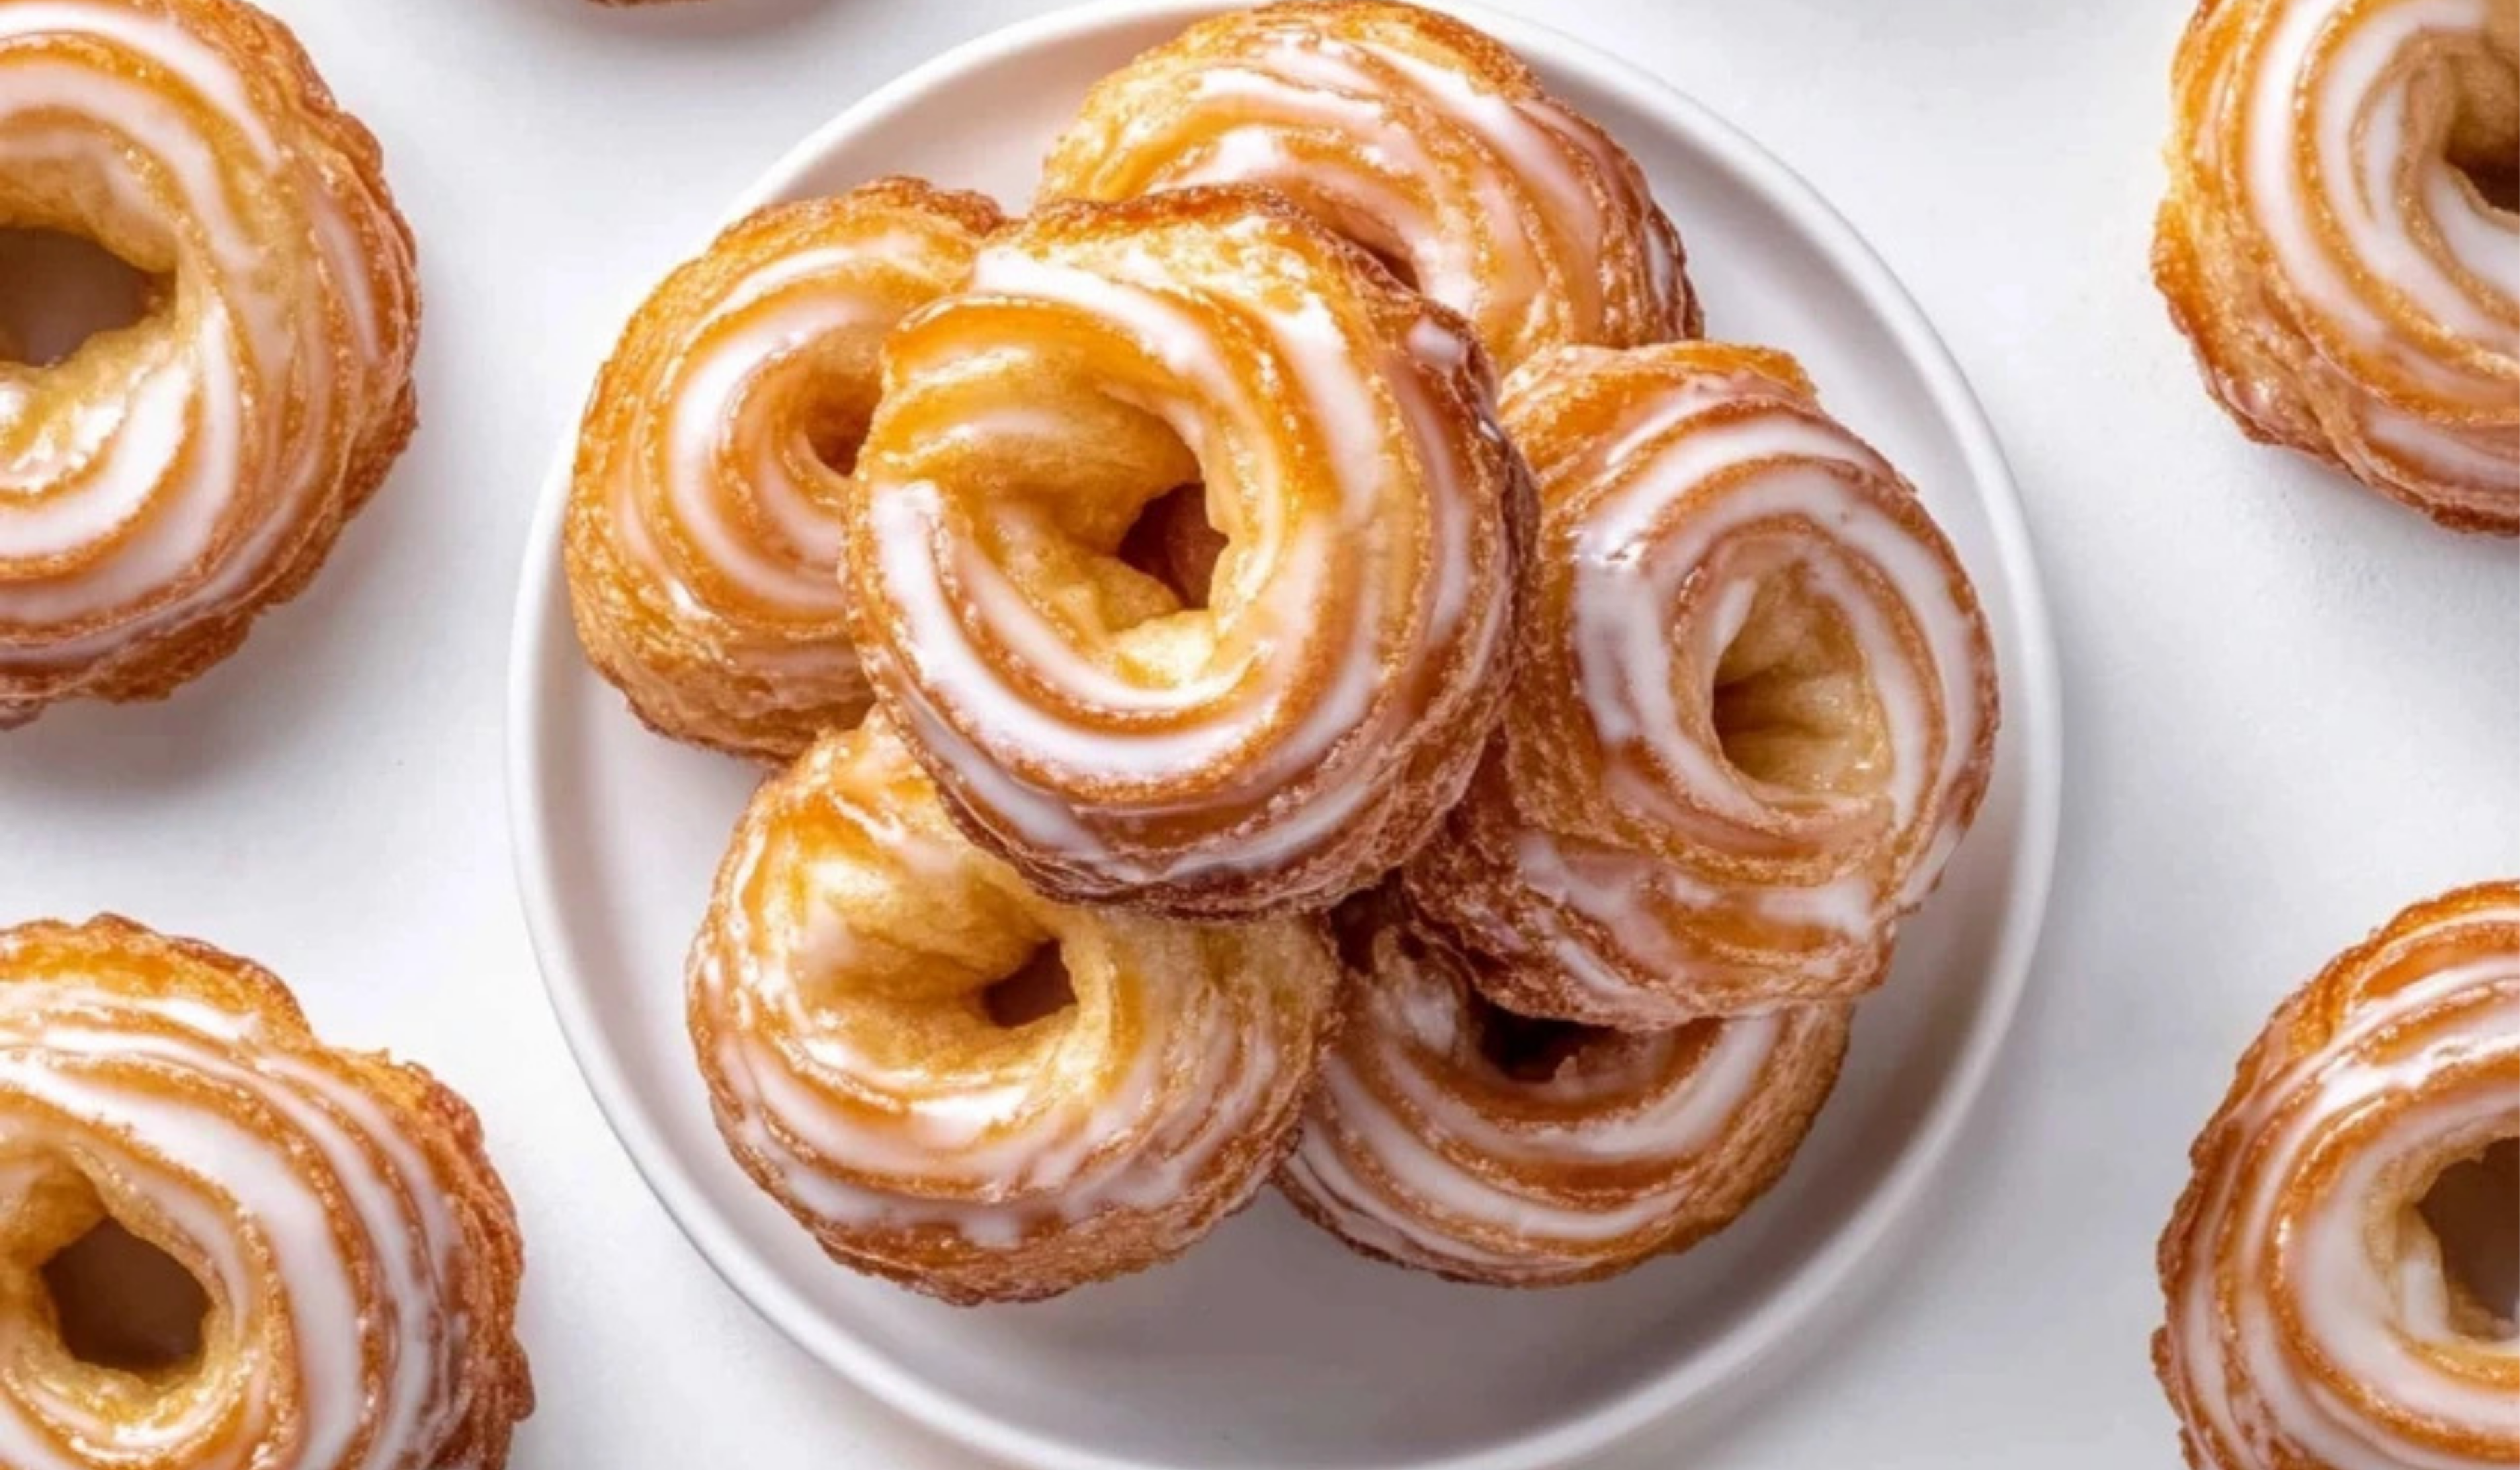
How to Make French Crullers with Maple Glaze
Imagine biting into a light, airy cruller coated in a silky maple glaze—pure heaven! 🍩✨ These French Crullers are a beginner-friendly twist on a classic pastry, with a crisp shell, soft center, and just the right amount of sweetness. The homemade maple glaze gives them that perfectly cozy, caramelized flavor that pairs beautifully with coffee. Plus, they’re baked, not fried—so you can indulge guilt-free! Who’s excited to try this delicious treat? 😋
#MapleCrullers #FrenchPastry #GoldenCrisp #BakingMadeEasy #LightAndFluffy #HomemadeSweets #SweetTreats #PerfectGlaze #EasyDesserts #MorningIndulgence
- Total Time: 1 hour 20 minutes
- Yield: 12 crullers 1x
Ingredients
For the Crullers:
- 1 ⅓ cups whole milk
- ¾ cup unsalted butter, cubed
- 1 tablespoon granulated sugar
- 1 tablespoon light brown sugar (packed)
- ¾ teaspoon kosher salt
- 1 ⅔ cups all-purpose flour
- 3 large eggs
- 1 ½ egg whites
For the Maple Glaze:
- ½ cup powdered sugar
- 1 tablespoon maple syrup (or more to taste)
- ⅛ teaspoon kosher salt
- 1 tablespoon whole milk (or more to desired consistency)
Instructions
Step 1: Prepare the Dry Ingredients
In a large bowl, whisk together the granulated sugar, light brown sugar, salt, and flour. Set this mixture aside. This will ensure that all your dry ingredients are evenly distributed before you add them to the wet mixture.
Step 2: Heat the Milk and Butter
In a large, high-sided saucepot, combine the whole milk and cubed unsalted butter. Bring this mixture to a boil over medium-high heat, stirring occasionally to make sure the butter melts completely.
Be sure to let the butter melt fully before the milk comes to a boil. If you allow the milk to boil before the butter melts, the water in the milk will evaporate too quickly, which could affect the texture of your dough.
Step 3: Add the Dry Ingredients to the Pot
Once the milk and butter are boiling, immediately add the dry ingredients you prepared earlier. Stir constantly over medium heat, making sure the dry ingredients incorporate into the milk-butter mixture. Continue stirring until the mixture thickens and a residue begins to form on the bottom of the pot. This is a crucial step! You need to cook the mixture long enough to evaporate some of the liquid, which will help the dough hold its shape when piped and fried.
Step 4: Cool the Mixture and Add the Eggs
Next, pour the dough mixture into the bowl of a stand mixer. Attach the paddle attachment, and beat the dough on high speed for about 1 minute. This helps cool the dough down and allows some of the steam (moisture) to evaporate, which will create a firmer texture.
Once the mixture has cooled slightly, slowly add the eggs, one at a time. Make sure to beat the dough for at least a minute between each addition. Add the egg whites with the last egg. The mixture should eventually become smooth, emulsified, and glossy.
Step 5: Pipe the Crullers
Now it’s time to pipe the crullers! Scoop the dough into a pastry bag fitted with a large Ateco French star tip (869). Pipe rings of dough onto parchment paper, each ring about 2 ½ to 3 inches in diameter. You want to make sure the crullers are uniform in size for even frying.
Once piped, transfer the parchment paper with the crullers onto a baking sheet and place them in the freezer for at least 30 minutes. Freezing the crullers is essential to maintain their shape when fried. Don’t skip this step!
Step 6: Prepare the Glaze
While the crullers are chilling, it’s time to prepare the maple glaze. In a large bowl, combine the powdered sugar, maple syrup, kosher salt, and whole milk. Whisk the ingredients together until smooth. If the glaze is too thick, add more milk to reach the desired consistency. It should be thick enough to coat the crullers but still flow from the whisk like cold molasses.
Cover the bowl with plastic wrap to prevent a skin from forming on the surface of the glaze while you finish preparing the crullers.
Step 7: Fry the Crullers
Once the crullers are fully frozen, it’s time to fry them. Preheat a tabletop fryer to 335°F (or heat canola oil in a large skillet or Dutch oven). You want to make sure the oil temperature is consistent for even frying.
Now, get your frying setup ready. You’ll need a rimmed baking sheet with a wire rack inside to drain the crullers after frying, a slotted spoon or spider for transferring the crullers, and the glaze you’ve prepared.
To fry the crullers, gently place them, still on the parchment, into the hot oil. Be sure to delicately transfer them into the oil to avoid splashing. Fry the crullers until golden brown on one side, then flip them over and fry until golden brown on all sides.
Step 8: Glaze the Crullers
Once fried, carefully remove the crullers from the oil and place them on the wire rack to drain the excess oil. While they’re still hot, dip the crullers into the prepared maple glaze, then place them back on the wire rack to cool. Let the crullers cool to room temperature before serving, as they have the best texture once cooled. The glaze will help keep them fresh for up to three days.
Notes
- Troubleshooting Overcooked Veggies or Chicken: If your chicken or vegetables overcook, it’s easy to adjust. For chicken, simply slice the meat into smaller pieces to ensure even cooking. For vegetables, you can lightly sauté them in a pan to bring back their color and crispness.
- Piping Tips: Don’t worry if your piping isn’t perfect. Just take your time and make sure the rings are as even as possible. A little practice makes perfect!
- Frying: Frying from frozen is essential to maintaining the cruller’s shape. If they thaw before frying, the texture may become too loose, and the crullers won’t hold up well in the oil.
- Storage: If you have leftover crullers, store them in an airtight container for up to 3 days. The glaze will help keep the crullers fresh and delicious!
- Prep Time: 30 minutes
- Cook Time: 20 minutes
The best part? Making French crullers at home is easier than you might think, especially if you follow a clear, step-by-step recipe. This French Cruller with Maple Glaze recipe is perfect for beginner cooks, focusing on simplicity, time efficiency, and the joy of creating a delicious treat from scratch. Whether you’re new to baking or just want to impress friends and family with a homemade dessert, this guide will walk you through every step of the process.
Why This Recipe is Perfect for Beginners
At first glance, French crullers might seem like a daunting pastry to tackle, but don’t be intimidated! This recipe focuses on creating a light, fluffy cruller with the characteristic piped lines that stay intact even when fried. It’s perfect for beginners because:
- Simple Ingredients: You don’t need any complicated tools or ingredients. With just a few pantry staples like butter, flour, and eggs, you’re well on your way to making crullers. Even the maple glaze is simple, adding an extra layer of flavor that elevates the dish without requiring a lot of extra steps.
- Time-Efficient: While the process of making crullers might take some time, much of the work involves waiting for dough to cool and freeze. You can prepare the dough and glaze ahead of time, then fry the crullers when you’re ready to serve them.
- Health Benefits: Unlike traditional deep-fried donuts that are heavy and greasy, French crullers are light and airy. They’re made from a dough that’s cooked on the stovetop before being piped into shape and fried, resulting in a more delicate texture. You can even experiment with different glazes or topping options, such as using a citrus glaze instead of maple, to change up the flavor profile.
Ingredients and Preparation
Before diving into the step-by-step instructions, let’s take a look at the ingredients you’ll need to make these French crullers with maple glaze. This recipe makes 12 crullers, and all the ingredients are easy to find at your local grocery store.
For the Crullers:
- 1 ⅓ cups whole milk
- ¾ cup unsalted butter, cubed
- 1 tablespoon granulated sugar
- 1 tablespoon light brown sugar (packed)
- ¾ teaspoon kosher salt
- 1 ⅔ cups all-purpose flour
- 3 large eggs
- 1 ½ egg whites
For the Maple Glaze:
- ½ cup powdered sugar
- 1 tablespoon maple syrup (or more to taste)
- ⅛ teaspoon kosher salt
- 1 tablespoon whole milk (or more to desired consistency)
Ingredient Alternatives
This recipe is quite flexible, so feel free to make substitutions based on your preferences or dietary needs:
- Butter: If you need a dairy-free version, you can substitute the butter with margarine or a plant-based butter alternative.
- Maple Syrup: You can experiment with different types of syrups, like honey or agave, for the glaze, though maple syrup provides the classic flavor.
- Egg Whites: If you prefer not to use egg whites, you can omit them entirely. However, they do help create that light and airy texture that is characteristic of French crullers.
Step-by-Step Instructions
Now that you have all the ingredients ready, let’s break the process down into manageable steps.
Step 1: Prepare the Dry Ingredients
In a large bowl, whisk together the granulated sugar, light brown sugar, salt, and flour. Set this mixture aside. This will ensure that all your dry ingredients are evenly distributed before you add them to the wet mixture.
Step 2: Heat the Milk and Butter
In a large, high-sided saucepot, combine the whole milk and cubed unsalted butter. Bring this mixture to a boil over medium-high heat, stirring occasionally to make sure the butter melts completely.
Be sure to let the butter melt fully before the milk comes to a boil. If you allow the milk to boil before the butter melts, the water in the milk will evaporate too quickly, which could affect the texture of your dough.
Step 3: Add the Dry Ingredients to the Pot
Once the milk and butter are boiling, immediately add the dry ingredients you prepared earlier. Stir constantly over medium heat, making sure the dry ingredients incorporate into the milk-butter mixture. Continue stirring until the mixture thickens and a residue begins to form on the bottom of the pot. This is a crucial step! You need to cook the mixture long enough to evaporate some of the liquid, which will help the dough hold its shape when piped and fried.
Step 4: Cool the Mixture and Add the Eggs
Next, pour the dough mixture into the bowl of a stand mixer. Attach the paddle attachment, and beat the dough on high speed for about 1 minute. This helps cool the dough down and allows some of the steam (moisture) to evaporate, which will create a firmer texture.
Once the mixture has cooled slightly, slowly add the eggs, one at a time. Make sure to beat the dough for at least a minute between each addition. Add the egg whites with the last egg. The mixture should eventually become smooth, emulsified, and glossy.
Step 5: Pipe the Crullers
Now it’s time to pipe the crullers! Scoop the dough into a pastry bag fitted with a large Ateco French star tip (869). Pipe rings of dough onto parchment paper, each ring about 2 ½ to 3 inches in diameter. You want to make sure the crullers are uniform in size for even frying.
Once piped, transfer the parchment paper with the crullers onto a baking sheet and place them in the freezer for at least 30 minutes. Freezing the crullers is essential to maintain their shape when fried. Don’t skip this step!
Step 6: Prepare the Glaze
While the crullers are chilling, it’s time to prepare the maple glaze. In a large bowl, combine the powdered sugar, maple syrup, kosher salt, and whole milk. Whisk the ingredients together until smooth. If the glaze is too thick, add more milk to reach the desired consistency. It should be thick enough to coat the crullers but still flow from the whisk like cold molasses.
Cover the bowl with plastic wrap to prevent a skin from forming on the surface of the glaze while you finish preparing the crullers.
Step 7: Fry the Crullers
Once the crullers are fully frozen, it’s time to fry them. Preheat a tabletop fryer to 335°F (or heat canola oil in a large skillet or Dutch oven). You want to make sure the oil temperature is consistent for even frying.
Now, get your frying setup ready. You’ll need a rimmed baking sheet with a wire rack inside to drain the crullers after frying, a slotted spoon or spider for transferring the crullers, and the glaze you’ve prepared.
To fry the crullers, gently place them, still on the parchment, into the hot oil. Be sure to delicately transfer them into the oil to avoid splashing. Fry the crullers until golden brown on one side, then flip them over and fry until golden brown on all sides.
Step 8: Glaze the Crullers
Once fried, carefully remove the crullers from the oil and place them on the wire rack to drain the excess oil. While they’re still hot, dip the crullers into the prepared maple glaze, then place them back on the wire rack to cool. Let the crullers cool to room temperature before serving, as they have the best texture once cooled. The glaze will help keep them fresh for up to three days.
Beginner Tips and Notes
Making French crullers from scratch might seem intimidating at first, but with these helpful tips, you’ll be able to handle any challenges that come your way:
- Troubleshooting Overcooked Veggies or Chicken: If your chicken or vegetables overcook, it’s easy to adjust. For chicken, simply slice the meat into smaller pieces to ensure even cooking. For vegetables, you can lightly sauté them in a pan to bring back their color and crispness.
- Piping Tips: Don’t worry if your piping isn’t perfect. Just take your time and make sure the rings are as even as possible. A little practice makes perfect!
- Frying: Frying from frozen is essential to maintaining the cruller’s shape. If they thaw before frying, the texture may become too loose, and the crullers won’t hold up well in the oil.
- Storage: If you have leftover crullers, store them in an airtight container for up to 3 days. The glaze will help keep the crullers fresh and delicious!
Serving Suggestions
French crullers are delicious on their own, but here are some ideas to take them to the next level:
- Serve them with a side of fresh fruit, like berries or sliced apples, for a light and refreshing contrast to the sweetness of the crullers.
- Pair your crullers with a cup of coffee or tea for a perfect afternoon treat.
- If you prefer a different glaze, try experimenting with citrus flavors like orange or lemon. The tangy citrus pairs wonderfully with the light, fluffy cruller texture.
Conclusion
Making French crullers at home is a rewarding experience, and with the right recipe, even beginner cooks can master the art of frying these delicate pastries. The texture is light and airy, and the maple glaze adds just the right amount of sweetness. Whether you’re baking for yourself, friends, or family, French crullers are sure to impress. Don’t hesitate to give this recipe a try—your taste buds (and your loved ones) will thank you! Let us know how it goes in the comments, and happy frying!