
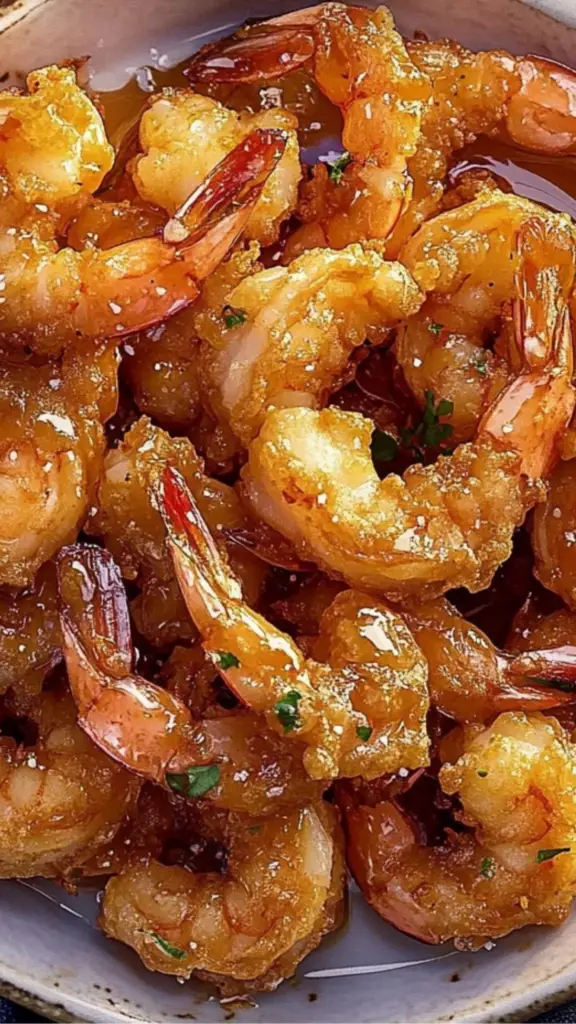
There’s something special about the perfect balance of crispy, juicy, sweet, and spicy, and that’s exactly what this Hot Honey Fried Shrimp delivers. I remember the first time I made fried shrimp at home—it felt like a restaurant-level dish, but it was surprisingly simple. The golden crunch of the shrimp, paired with the heat of the hot honey, made every bite unforgettable.
Print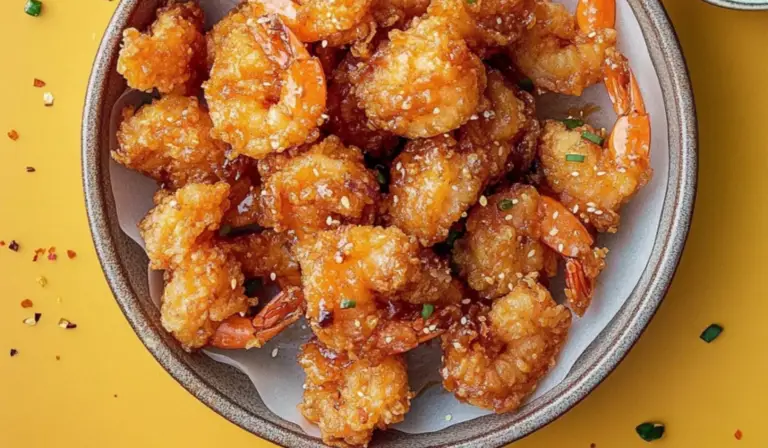
Hot Honey Fried Shrimp: A Beginner-Friendly Crispy Delight
These Hot Honey Fried Shrimp are golden, crunchy, and coated in a sticky, spicy-sweet glaze that packs a punch. A beginner-friendly recipe that delivers the perfect balance of heat and flavor in every bite!
- Total Time: 28 minutes
- Yield: 4 servings 1x
Ingredients
Main Ingredients:
- 1 pound large shrimp – Use fresh or thawed frozen shrimp, peeled and deveined, with the tail on for easier handling.
- 1 cup (245 g) buttermilk – This helps tenderize the shrimp and helps the flour coating stick. If unavailable, substitute with 1 cup of milk mixed with 1 tablespoon of lemon juice or vinegar.
Seasoned Coating:
- 1 cup (125 g) all-purpose flour – Creates the crispy texture when fried.
- 1 teaspoon paprika – Adds a mild, smoky flavor.
- 1 teaspoon garlic powder – Enhances depth of flavor.
- ½ teaspoon onion powder – Provides a subtle sweetness.
- ½ teaspoon kosher salt – Balances the seasoning.
- ¼ teaspoon black pepper – Adds a hint of spice.
- ¼ teaspoon cayenne pepper – Provides heat. Adjust according to spice preference.
For Frying:
- Vegetable oil – A neutral oil like canola or peanut oil works best for frying.
For the Hot Honey Glaze:
- ½ cup (170 g) hot honey – Store-bought or homemade. To make it at home, mix honey with a dash of chili flakes or hot sauce.
For Garnish:
- Chopped parsley – Adds freshness and color.
Instructions
Step 1: Marinate the Shrimp
Place the shrimp in a medium bowl and pour the buttermilk over them. Make sure all the shrimp are fully coated. Let them marinate at room temperature for at least 15 minutes. This step helps the coating stick better and keeps the shrimp tender.
Step 2: Prepare the Seasoned Flour Mixture
In another medium bowl, combine the flour, paprika, garlic powder, onion powder, salt, black pepper, and cayenne pepper. Mix well to distribute the seasonings evenly.
Step 3: Dredge the Shrimp
One at a time, remove the shrimp from the buttermilk, allowing excess liquid to drip off. Dredge each shrimp in the seasoned flour mixture, making sure to coat it completely. Press gently to ensure the flour sticks. Place the coated shrimp on a large baking sheet. Repeat for all shrimp.
Step 4: Heat the Oil
In a large pot or deep frying pan, pour about 2 inches of vegetable oil. Heat over medium until it reaches 350°F (175°C). A kitchen thermometer helps maintain the right temperature, ensuring even frying.
Step 5: Fry the Shrimp
Carefully place the coated shrimp into the hot oil in batches, avoiding overcrowding. Fry for 2-3 minutes, turning occasionally, until they are golden brown and crispy. If needed, let the oil reheat between batches.
Once done, remove the shrimp with a slotted spoon and place them on a paper towel-lined plate to drain excess oil.
Step 6: Coat with Hot Honey
Drizzle the fried shrimp with hot honey while they are still warm. This allows the flavors to meld together beautifully.
Step 7: Garnish and Serve
Sprinkle with freshly chopped parsley for a vibrant finish. Serve immediately for the best taste and texture.
Notes
How to Tell When Shrimp is Cooked
- Shrimp turn opaque and pink when fully cooked. Overcooking makes them tough, so remove them from the oil as soon as they are golden brown.
Troubleshooting Common Issues
- Coating falls off – Ensure the shrimp are well-drained before dredging and press the flour coating firmly.
- Shrimp are greasy – The oil temperature might be too low. Always fry at 350°F for best results.
- Too spicy? – Reduce or omit the cayenne pepper and use mild honey.
Efficient Cooking Tips
- Prep everything before frying – Have all ingredients measured and tools ready to avoid last-minute scrambling.
- Use a thermometer – This ensures oil stays at the right temperature for crispy results.
- Work in batches – Overcrowding lowers the oil temperature and affects crispiness
- Prep Time: 10 minutes
- Cook Time: 3 minutes
For beginners, this recipe is an excellent starting point. It’s quick, requires minimal ingredients, and introduces key cooking techniques like marinating, dredging, and frying. The beauty of this dish is its versatility. It can be an appetizer, a snack, or even a main course with the right sides. Whether you’re cooking for yourself or impressing guests, this recipe will be a hit.
Why This Recipe is Perfect for Beginners
- Simple Ingredients – Everything used in this dish is easy to find in most grocery stores.
- Quick Cooking Time – With only a few minutes of frying, this meal comes together fast.
- Straightforward Techniques – Marinating, dredging, and frying are essential skills for home cooks, and this recipe teaches them in a fun, rewarding way.
- Balanced Flavor – The crispy shrimp and spicy-sweet glaze create an irresistible contrast of textures and tastes.
Let’s dive into the details so you can make this dish with confidence.
Ingredients and Substitutions
Main Ingredients:
- 1 pound large shrimp – Use fresh or thawed frozen shrimp, peeled and deveined, with the tail on for easier handling.
- 1 cup (245 g) buttermilk – This helps tenderize the shrimp and helps the flour coating stick. If unavailable, substitute with 1 cup of milk mixed with 1 tablespoon of lemon juice or vinegar.
Seasoned Coating:
- 1 cup (125 g) all-purpose flour – Creates the crispy texture when fried.
- 1 teaspoon paprika – Adds a mild, smoky flavor.
- 1 teaspoon garlic powder – Enhances depth of flavor.
- ½ teaspoon onion powder – Provides a subtle sweetness.
- ½ teaspoon kosher salt – Balances the seasoning.
- ¼ teaspoon black pepper – Adds a hint of spice.
- ¼ teaspoon cayenne pepper – Provides heat. Adjust according to spice preference.
For Frying:
- Vegetable oil – A neutral oil like canola or peanut oil works best for frying.
For the Hot Honey Glaze:
- ½ cup (170 g) hot honey – Store-bought or homemade. To make it at home, mix honey with a dash of chili flakes or hot sauce.
For Garnish:
- Chopped parsley – Adds freshness and color.
Alternative Ingredients:
- Instead of shrimp – Use bite-sized chicken pieces for a crispy chicken version.
- Instead of buttermilk – Use plain yogurt thinned with a little water.
- For a milder version – Reduce or omit the cayenne pepper.
Step-by-Step Cooking Instructions
Step 1: Marinate the Shrimp
Place the shrimp in a medium bowl and pour the buttermilk over them. Make sure all the shrimp are fully coated. Let them marinate at room temperature for at least 15 minutes. This step helps the coating stick better and keeps the shrimp tender.
Step 2: Prepare the Seasoned Flour Mixture
In another medium bowl, combine the flour, paprika, garlic powder, onion powder, salt, black pepper, and cayenne pepper. Mix well to distribute the seasonings evenly.
Step 3: Dredge the Shrimp
One at a time, remove the shrimp from the buttermilk, allowing excess liquid to drip off. Dredge each shrimp in the seasoned flour mixture, making sure to coat it completely. Press gently to ensure the flour sticks. Place the coated shrimp on a large baking sheet. Repeat for all shrimp.
Step 4: Heat the Oil
In a large pot or deep frying pan, pour about 2 inches of vegetable oil. Heat over medium until it reaches 350°F (175°C). A kitchen thermometer helps maintain the right temperature, ensuring even frying.
Step 5: Fry the Shrimp
Carefully place the coated shrimp into the hot oil in batches, avoiding overcrowding. Fry for 2-3 minutes, turning occasionally, until they are golden brown and crispy. If needed, let the oil reheat between batches.
Once done, remove the shrimp with a slotted spoon and place them on a paper towel-lined plate to drain excess oil.
Step 6: Coat with Hot Honey
Drizzle the fried shrimp with hot honey while they are still warm. This allows the flavors to meld together beautifully.
Step 7: Garnish and Serve
Sprinkle with freshly chopped parsley for a vibrant finish. Serve immediately for the best taste and texture.
Beginner Tips and Notes
How to Tell When Shrimp is Cooked
- Shrimp turn opaque and pink when fully cooked. Overcooking makes them tough, so remove them from the oil as soon as they are golden brown.
Troubleshooting Common Issues
- Coating falls off – Ensure the shrimp are well-drained before dredging and press the flour coating firmly.
- Shrimp are greasy – The oil temperature might be too low. Always fry at 350°F for best results.
- Too spicy? – Reduce or omit the cayenne pepper and use mild honey.
Efficient Cooking Tips
- Prep everything before frying – Have all ingredients measured and tools ready to avoid last-minute scrambling.
- Use a thermometer – This ensures oil stays at the right temperature for crispy results.
- Work in batches – Overcrowding lowers the oil temperature and affects crispiness.
Serving Suggestions
This Hot Honey Fried Shrimp pairs well with a variety of sides and dips. Here are some ideas:
Side Dishes:
- Rice or Quinoa – A neutral base that complements the flavors.
- Roasted Vegetables – Try broccoli, asparagus, or sweet potatoes.
- Crispy Fries – Classic pairing for a casual meal.
Dipping Sauces:
- Extra Hot Honey – For those who love extra heat.
- Garlic Aioli – A creamy, garlicky contrast.
- Lemon Butter Sauce – Adds a refreshing tang.
Beverage Pairings:
- Iced Tea – A slightly sweet tea balances the spice.
- Lemonade – Refreshing and cooling.
- Sparkling Water with Lime – A light and crisp option.
Storage and Reheating Tips
- Refrigeration: Store leftover shrimp in an airtight container for up to 2 days.
- Reheating: To maintain crispiness, reheat in an air fryer or oven at 375°F (190°C) for 5-7 minutes. Avoid microwaving, as it makes the shrimp soggy.
- Freezing: Not recommended, as the texture may suffer.
Final Thoughts
Hot Honey Fried Shrimp is a fantastic recipe for beginners looking to master frying while enjoying a flavorful dish. The crispy shrimp, coated in sweet and spicy honey, make every bite irresistible. This dish is quick, easy, and versatile enough to serve as an appetizer or a main course.
I encourage you to try this recipe and make it your own. Experiment with different seasonings, spice levels, and sides to find your perfect combination. Let me know how it turns out, and don’t forget to share your experience in the comments.
Happy cooking!