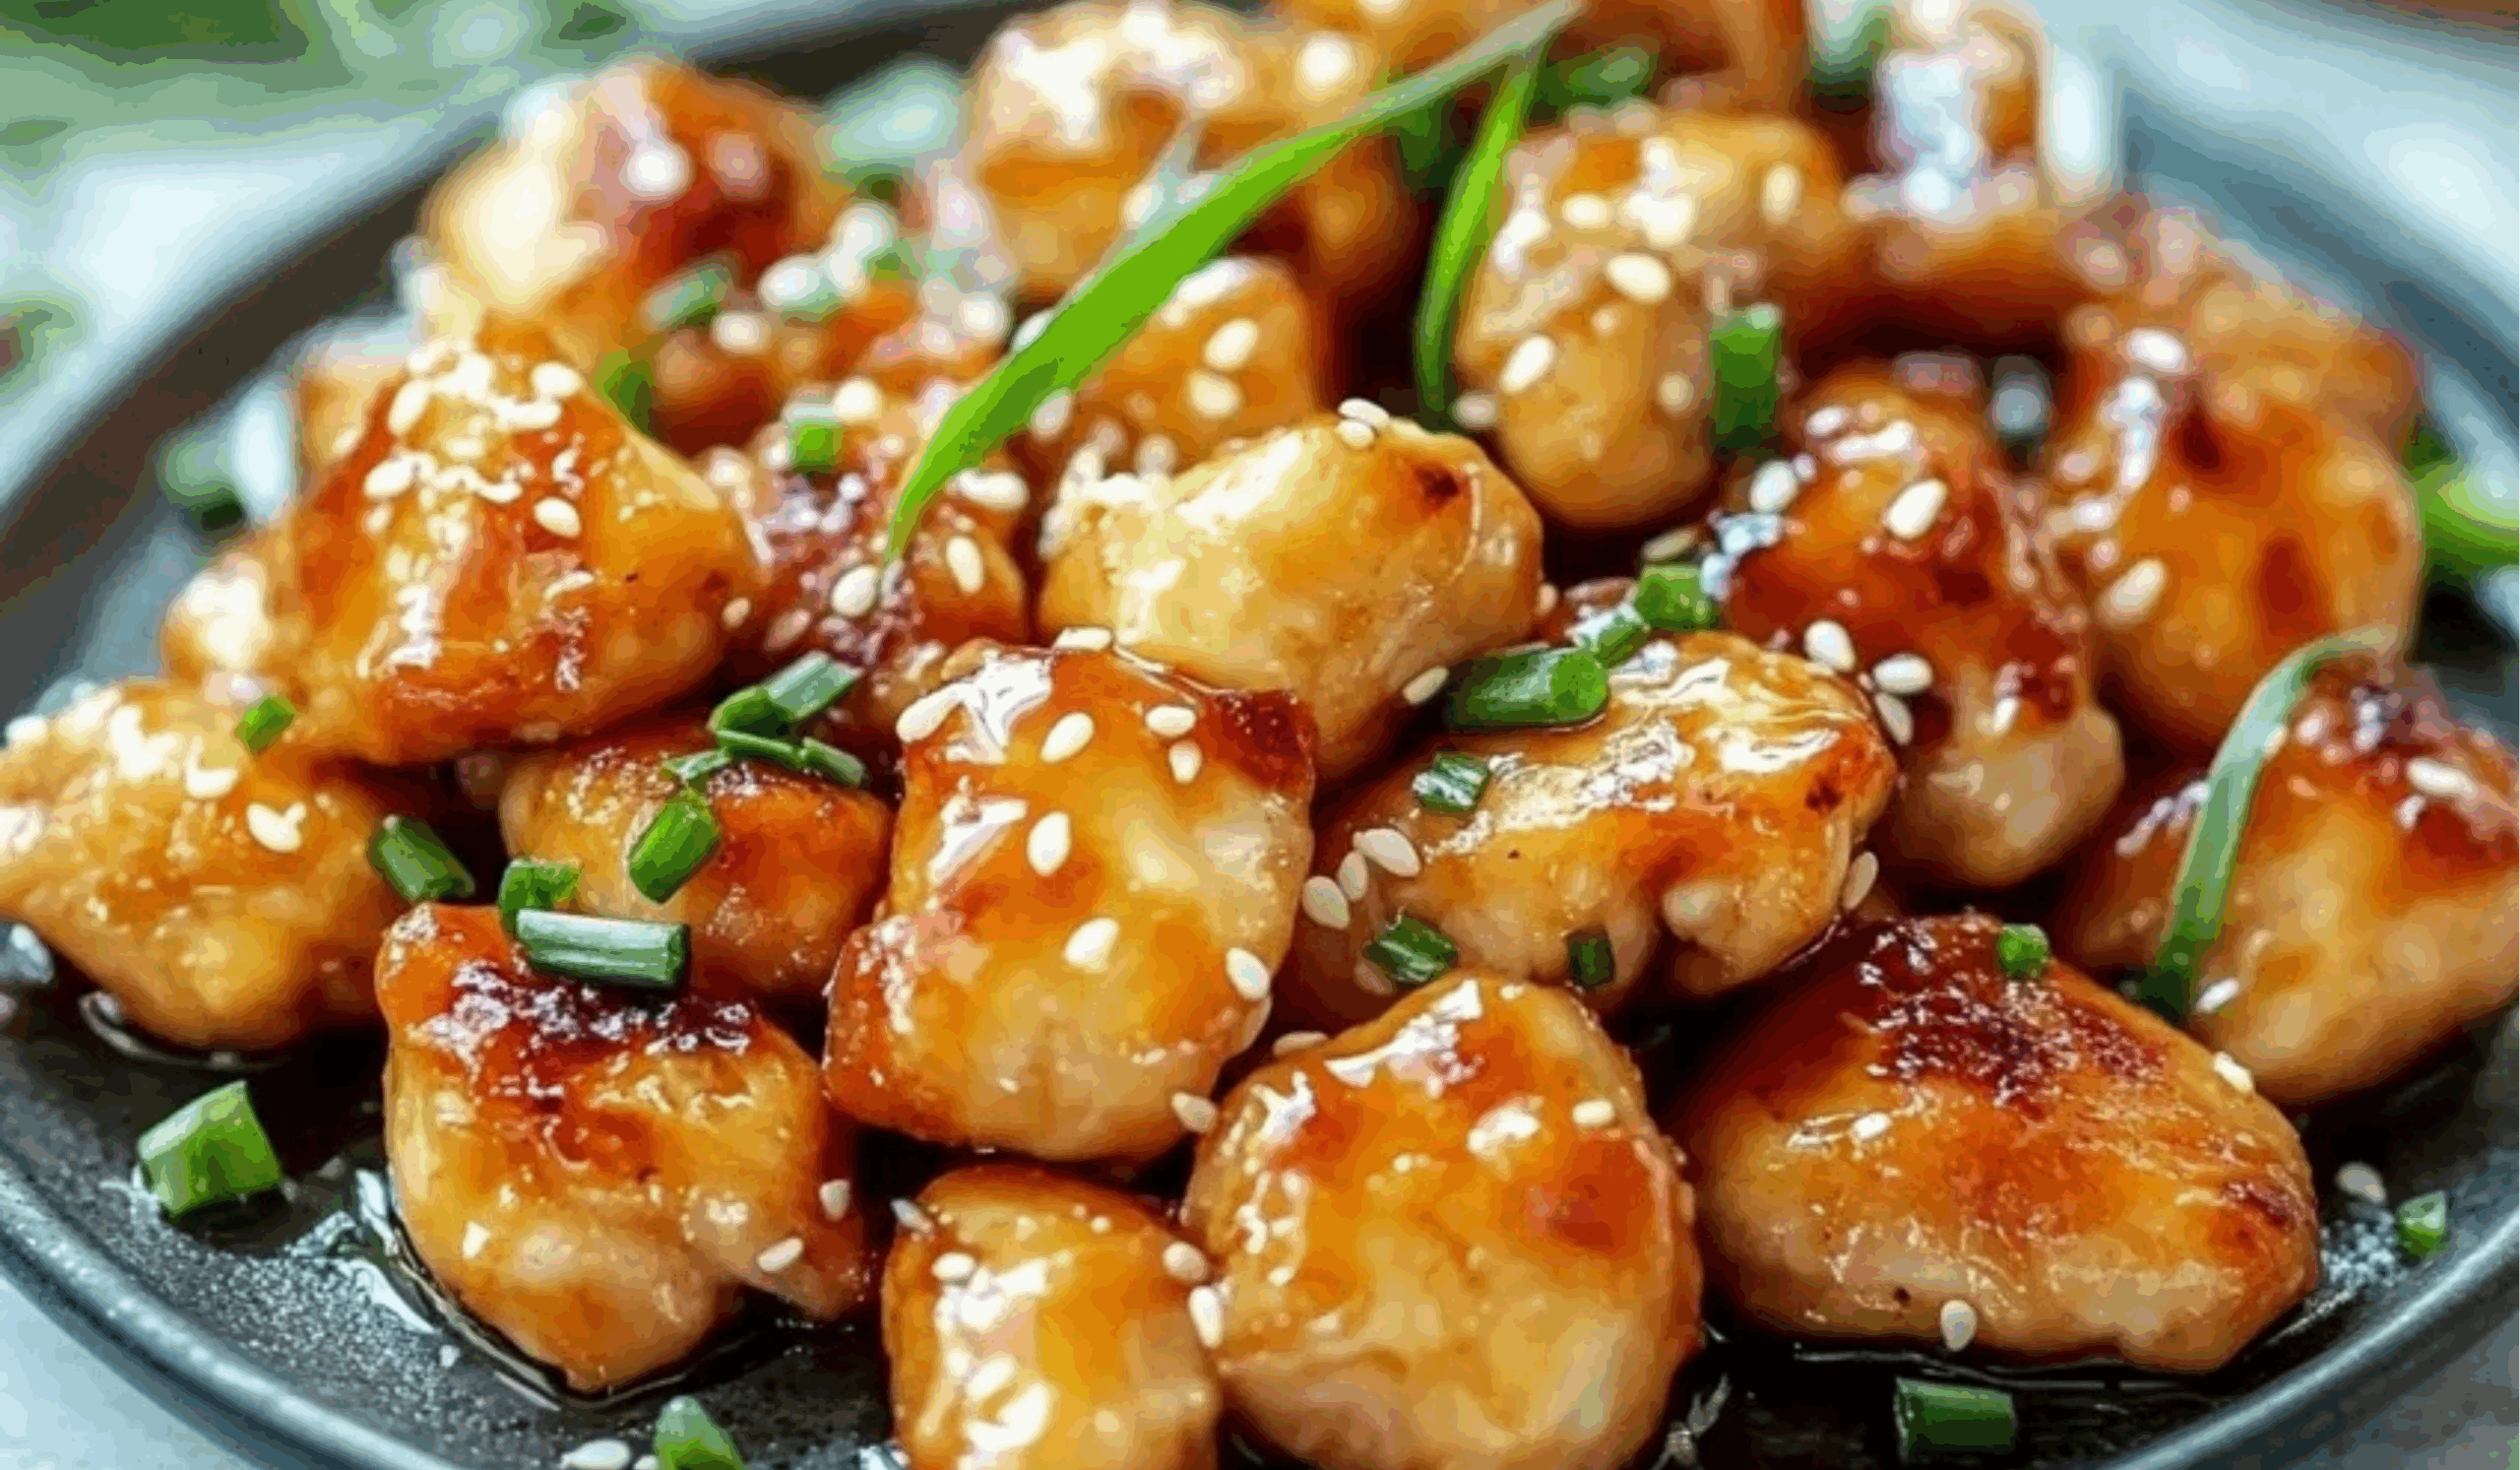
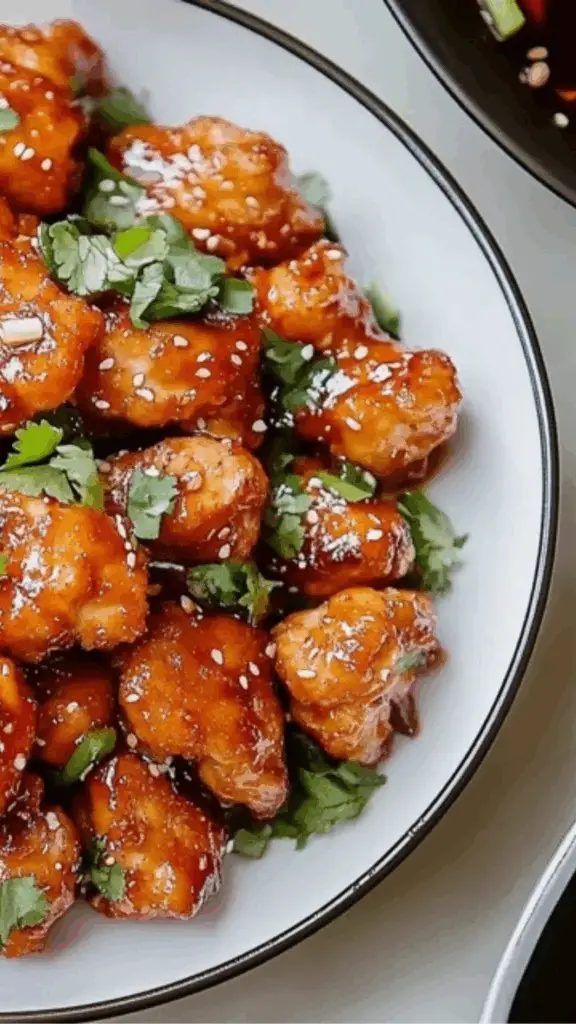
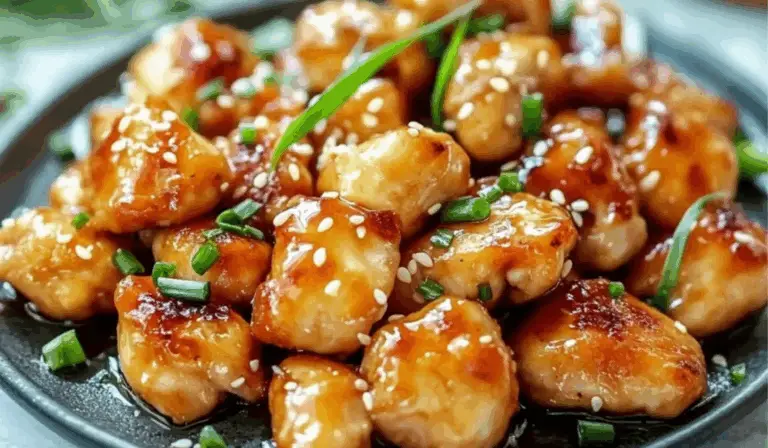
When you’re looking for a dish that’s both comforting and packed with flavor, Honey Garlic Chicken is the answer. It’s one of those meals that feel fancy enough for guests but simple enough for busy weeknights. This sweet and savory chicken dish is coated in a sticky glaze made with honey, soy sauce, and garlic—creating a flavor combination that’s universally loved. Whether you’re a beginner in the kitchen or a home cook looking to expand your go-to recipes, this dish offers a perfect balance of taste, simplicity, and satisfaction. Its golden caramelized glaze, juicy bites of chicken, and a hint of tang make it an instant family favorite.
Ingredients and Preparation
To prepare Honey Garlic Chicken, you’ll need a handful of pantry staples. The beauty of this recipe lies in its simplicity. You likely already have most of the ingredients at home. Here’s what you need:
Main Ingredients:
- 1½ pounds boneless, skinless chicken thighs or breasts (cut into bite-sized pieces)
- 2 tablespoons cornstarch (for light coating)
- 2 tablespoons vegetable oil (for frying)
For the Sauce:
- 4 cloves garlic (minced)
- ⅓ cup honey (adjust to taste)
- ¼ cup low-sodium soy sauce
- 2 tablespoons rice vinegar or apple cider vinegar
- 1 teaspoon sesame oil
- ½ teaspoon chili flakes (optional for heat)
Garnish (optional):
- Sesame seeds
- Chopped green onions
Preparation Tips:
- Cut the chicken into evenly sized pieces so they cook uniformly.
- If using chicken breasts, be careful not to overcook as they dry out faster than thighs.
- Mince the garlic finely to ensure it mixes well into the sauce.
Step-by-Step Instructions
This dish comes together quickly, especially once your ingredients are prepped. Follow these steps for a foolproof honey garlic chicken:
1. Prepare the Chicken:
- Cut chicken into bite-sized chunks.
- Place chicken pieces in a bowl and add cornstarch. Toss until the pieces are well coated. This coating helps create a crisp exterior and allows the sauce to cling better.
2. Cook the Chicken:
- Heat 2 tablespoons of vegetable oil in a large skillet over medium heat.
- Add the chicken in a single layer (avoid overcrowding the pan; cook in batches if needed).
- Fry for about 5-6 minutes, turning occasionally until the chicken is golden brown and cooked through.
- Remove the chicken from the pan and set it aside.
3. Make the Sauce:
- In the same pan, add minced garlic. Cook for about 30 seconds to 1 minute until fragrant—don’t let it burn.
- In a bowl, mix honey, soy sauce, vinegar, sesame oil, and chili flakes (if using).
- Pour the sauce mixture into the pan with garlic. Stir and bring it to a simmer.
4. Combine Chicken and Sauce:
- Return the cooked chicken to the pan.
- Toss to coat the chicken evenly with the sauce.
- Let it simmer for 2-3 minutes until the sauce thickens and glazes the chicken. Stir occasionally to ensure even coating.
5. Garnish and Serve:
- Sprinkle with sesame seeds and chopped green onions if desired.
- Serve hot over rice, noodles, or steamed vegetables.
Beginner Tips and Notes
If this is your first time making honey garlic chicken, here are a few helpful pointers to make the process smoother:
1. Chicken Cuts:
- Boneless, skinless chicken thighs are more forgiving and stay juicy even if slightly overcooked.
- Chicken breasts are leaner but can dry out if cooked too long—watch closely.
2. Sauce Thickness:
- The sauce will naturally thicken as it simmers with the chicken. If it’s too thick, add a tablespoon of water. If too thin, let it reduce slightly longer.
3. Cornstarch Coating:
- Coating the chicken with cornstarch gives it a light crisp that enhances texture and helps the sauce cling better. Skip this step for a lighter version, though the sauce may not stick as well.
4. Stirring Sauce:
- Stir constantly while the sauce is simmering to prevent burning and ensure even distribution of flavor.
5. Customizing Heat:
- The chili flakes add a nice mild kick, but they’re optional. You can also use fresh chili, hot sauce, or leave them out entirely for a milder flavor.
6. Garlic Usage:
- Don’t skip or skimp on garlic—it’s a key flavor in this dish. If you love a strong garlic taste, feel free to add an extra clove.
7. Double the Sauce:
- If you like your meals saucy, double the sauce portion. It’s great for pouring over rice or noodles.
Serving Suggestions
Honey Garlic Chicken is incredibly versatile and pairs well with a variety of sides. Here are a few delicious ways to serve it:
1. With Steamed Rice:
- The most classic choice. White or brown rice soaks up the sauce and balances the richness of the dish.
2. Over Noodles:
- Toss the glazed chicken with soba, rice, or egg noodles for an Asian-style noodle bowl.
3. With Stir-Fried Veggies:
- Broccoli, bell peppers, snap peas, carrots, or green beans are excellent choices. Sauté or steam them for a balanced plate.
4. In Lettuce Wraps:
- Spoon the chicken into crisp lettuce leaves for a low-carb and refreshing option.
5. On a Salad:
- Add cold honey garlic chicken to a mixed green salad for a flavorful protein boost.
6. With Fried Rice or Quinoa:
- Use leftovers to make a quick stir-fry by tossing chicken with fried rice or cooked quinoa.
Storage and Reheating Tips:
- Store leftovers in an airtight container in the fridge for up to 3 days.
- Reheat in a skillet over low heat or in the microwave. Add a splash of water if the sauce has thickened too much.
- This dish is not ideal for freezing due to the sauce’s texture, but freshly made or refrigerated versions reheat well.
Honey Garlic Chicken: A Sweet and Savory Classic for Every Home Cook
Craving something sweet, savory, and totally addictive? 🍯🧄 Say hello to Honey Garlic Chicken—the go-to dish every home cook needs! 🍗✨ Juicy chicken glazed in a sticky-sweet garlic sauce that’s packed with flavor in every bite. Perfect over rice, noodles, or veggies—it’s easy, comforting, and absolutely delicious! 😋🔥
- Total Time: 25 minutes
- Yield: 4 servings 1x
Ingredients
- 1½ pounds boneless, skinless chicken thighs or breasts (cut into bite-sized pieces)
- 2 tablespoons cornstarch (for light coating)
- 2 tablespoons vegetable oil (for frying)
For the Sauce:
- 4 cloves garlic (minced)
- ⅓ cup honey (adjust to taste)
- ¼ cup low-sodium soy sauce
- 2 tablespoons rice vinegar or apple cider vinegar
- 1 teaspoon sesame oil
- ½ teaspoon chili flakes (optional for heat)
Instructions
1. Prepare the Chicken:
- Cut chicken into bite-sized chunks.
- Place chicken pieces in a bowl and add cornstarch. Toss until the pieces are well coated. This coating helps create a crisp exterior and allows the sauce to cling better.
2. Cook the Chicken:
- Heat 2 tablespoons of vegetable oil in a large skillet over medium heat.
- Add the chicken in a single layer (avoid overcrowding the pan; cook in batches if needed).
- Fry for about 5-6 minutes, turning occasionally until the chicken is golden brown and cooked through.
- Remove the chicken from the pan and set it aside.
3. Make the Sauce:
- In the same pan, add minced garlic. Cook for about 30 seconds to 1 minute until fragrant—don’t let it burn.
- In a bowl, mix honey, soy sauce, vinegar, sesame oil, and chili flakes (if using).
- Pour the sauce mixture into the pan with garlic. Stir and bring it to a simmer.
4. Combine Chicken and Sauce:
- Return the cooked chicken to the pan.
- Toss to coat the chicken evenly with the sauce.
- Let it simmer for 2-3 minutes until the sauce thickens and glazes the chicken. Stir occasionally to ensure even coating.
5. Garnish and Serve:
- Sprinkle with sesame seeds and chopped green onions if desired.
- Serve hot over rice, noodles, or steamed vegetables.
Notes
1. Chicken Cuts:
- Boneless, skinless chicken thighs are more forgiving and stay juicy even if slightly overcooked.
- Chicken breasts are leaner but can dry out if cooked too long—watch closely.
2. Sauce Thickness:
- The sauce will naturally thicken as it simmers with the chicken. If it’s too thick, add a tablespoon of water. If too thin, let it reduce slightly longer.
3. Cornstarch Coating:
- Coating the chicken with cornstarch gives it a light crisp that enhances texture and helps the sauce cling better. Skip this step for a lighter version, though the sauce may not stick as well.
4. Stirring Sauce:
- Stir constantly while the sauce is simmering to prevent burning and ensure even distribution of flavor.
5. Customizing Heat:
- The chili flakes add a nice mild kick, but they’re optional. You can also use fresh chili, hot sauce, or leave them out entirely for a milder flavor.
6. Garlic Usage:
- Don’t skip or skimp on garlic—it’s a key flavor in this dish. If you love a strong garlic taste, feel free to add an extra clove.
7. Double the Sauce:
- If you like your meals saucy, double the sauce portion. It’s great for pouring over rice or noodles.
- Prep Time: 10 minutes
- Cook Time: 15 minutes
Engagement Features
If you’re sharing this recipe with others or keeping it in your collection, here are a few ways to get more from it:
1. Ask the Reader:
- Have you made honey garlic chicken before? What do you pair it with?
2. Invite Sharing:
- Share your version of this recipe or any twists you’ve tried—maybe using beef strips, tofu, or even shrimp.
3. Suggest Variations:
- Try swapping chicken for beef strips or firm tofu for a vegetarian version.
- Add vegetables directly into the skillet for a one-pan meal.
- Mix in cashews or almonds for a bit of crunch.
4. Make It a Meal Prep Favorite:
- This chicken reheats beautifully and is perfect for packed lunches. Pair with rice and steamed veggies in meal prep containers.
5. Encourage Experimenting:
- If you love experimenting with flavors, try adding a bit of ginger to the sauce or finish it with a splash of lime juice for brightness.
Conclusion
Honey Garlic Chicken is a dependable favorite for a reason. It’s simple, flavorful, and flexible enough to make it your own. Whether you’re feeding a family, meal prepping for the week, or cooking for one, this dish delivers comfort and taste with very little fuss. By using pantry staples and basic cooking techniques, even beginner cooks can feel confident in creating a delicious, satisfying meal. Keep this recipe on rotation—it’s one you’ll turn to again and again. Ready to give it a try? Let us know how it turns out or what variations you came up with.