Ingredients
Scale
For the Dough:
- 3 ¾ cups all-purpose flour (plus more for dusting)
- ½ teaspoon salt
- 2 ¼ teaspoons (1 packet) active dry or instant yeast
- 1 cup warm milk (around 110°F)
- ¼ cup granulated sugar
- 1 large egg
- ¼ cup unsalted butter, softened
For the Filling:
- ⅓ cup light brown sugar
- 2 teaspoons ground cinnamon
- 2 tablespoons unsalted butter, melted
For the Honey Glaze:
- 2 cups powdered sugar
- 2 tablespoons honey
- 3 tablespoons milk (adjust for consistency)
- 1 teaspoon vanilla extract
Instructions
1. Make the Dough
- In a small bowl, combine the warm milk and sugar. Sprinkle the yeast on top and let it sit for about 5–10 minutes until it becomes frothy.
- In a large mixing bowl or stand mixer, add flour and salt.
- Mix in the yeast mixture, egg, and softened butter.
- Knead the dough on a lightly floured surface (or using the dough hook of a stand mixer) for about 8–10 minutes until the dough is smooth and elastic.
- Place the dough in a greased bowl, cover with a damp cloth or plastic wrap, and let it rise in a warm place for 1 hour or until doubled in size.
2. Prepare the Filling
- In a small bowl, mix the brown sugar and cinnamon together.
- Set aside the melted butter separately for brushing.
3. Roll and Fill the Dough
- Once the dough has risen, punch it down and roll it out on a floured surface into a large rectangle—approximately 12×16 inches.
- Brush the surface of the dough with melted butter.
- Sprinkle the cinnamon-sugar mixture evenly across the top.
4. Shape the Buns
- Starting with the long edge, roll the dough tightly into a log.
- Slice into 12 even buns using a sharp knife or dental floss.
- For baking: Place the buns on a greased or parchment-lined baking sheet, leaving some space between each.
- For frying: Flatten each bun slightly and place them on a floured tray. Cover loosely and let them rise again for 20–30 minutes.
5. Bake or Fry the Buns
- To bake: Preheat your oven to 350°F (175°C). Bake the buns for 15–18 minutes or until lightly golden brown.
- To fry: Heat 2–3 inches of oil in a deep skillet to 350°F (175°C). Fry the buns one or two at a time, flipping halfway through, until golden brown on both sides (about 1–2 minutes per side). Drain on paper towels.
6. Make the Honey Glaze
- In a medium bowl, whisk together the powdered sugar, honey, milk, and vanilla extract until smooth. Add more milk for a thinner glaze or more powdered sugar for a thicker consistency.
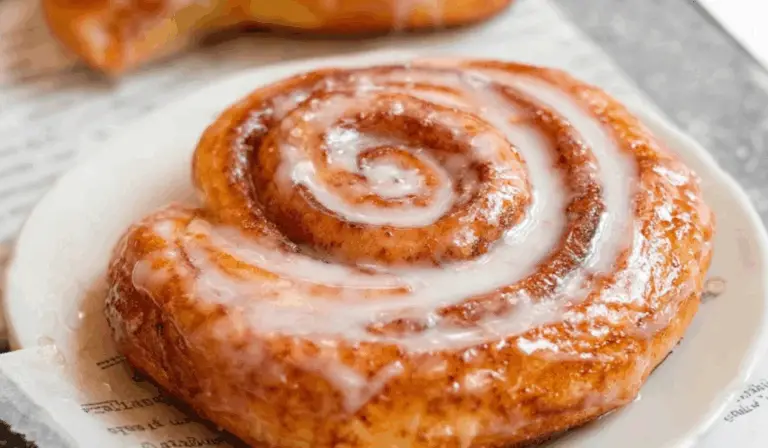
7. Glaze the Buns
- While the buns are still warm (but not hot), dip or spoon glaze generously over the tops.
- Allow glaze to set for 5–10 minutes before serving.
Notes
- Yeast matters: Be sure your milk isn’t too hot or it will kill the yeast. Aim for just warm to the touch (about 110°F).
- Flour control: Don’t add too much flour while kneading or the dough will become stiff. The dough should be slightly tacky but not sticky.
- Resting is key: If your kitchen is cool, place your dough in an oven with the light on or near a warm window to help it rise.
- Even slices: Use unflavored dental floss or a serrated knife for clean, even cuts.
- Frying tips: If you choose to fry, test the oil with a scrap piece first—if it sizzles and floats, you’re ready. Don’t overcrowd the pan.
- Storing buns: These are best the same day, but you can store them in an airtight container for up to 2 days. Reheat in the microwave for 10–15 seconds to soften.
- Freezing option: Freeze unglazed buns after baking or frying. Thaw and warm, then add glaze fresh.
- Prep Time: 20 minutes (plus 1 hour rising)
- Cook Time: 15 minutes