If you’re anything like me, the idea of caramel corn might bring back memories of those giant tins of popcorn people give as Christmas gifts. As a kid, I always loved digging through the layers to get to the caramel-coated goodness. Little did I know at the time, making this sweet, crunchy treat at home would be just as easy—and even more satisfying.
Print
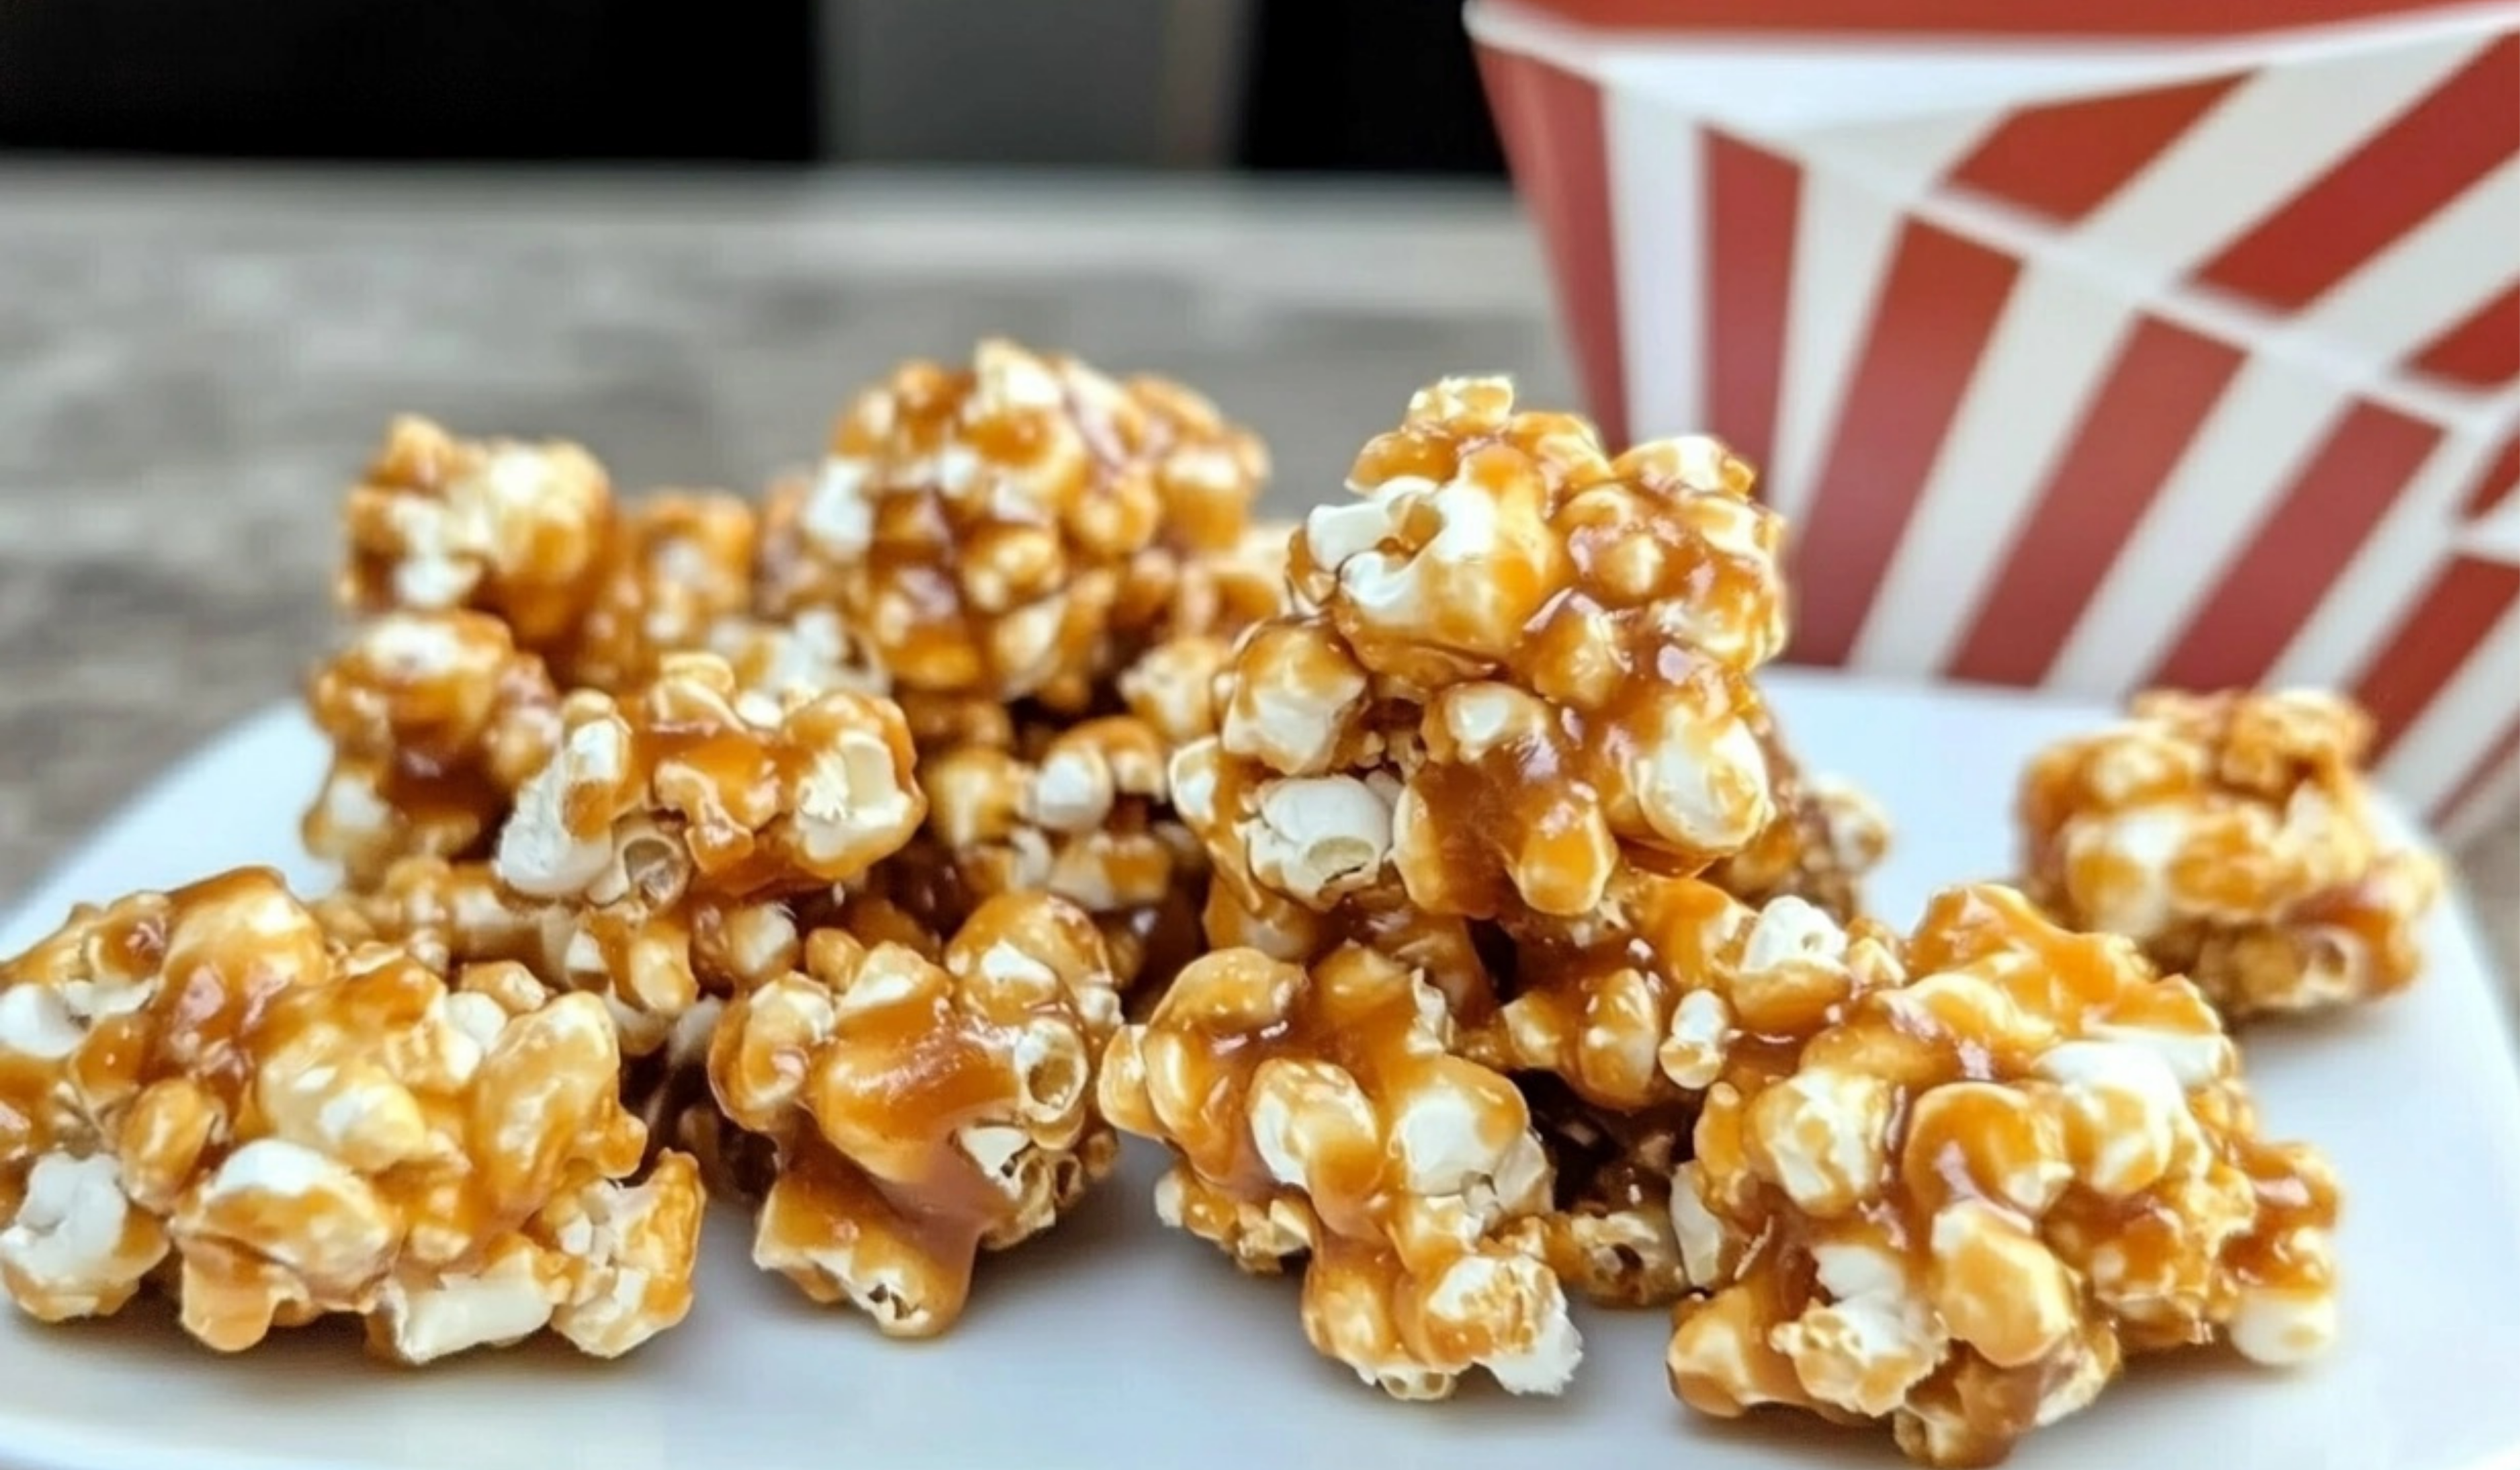
Homemade Caramel Corn: A Sweet Treat for Every Occasion
Crunchy, sweet, and oh-so-delicious! 🍿🍯 This Homemade Caramel Corn is the ultimate treat for any occasion! 😍 With golden caramel coating each fluffy kernel, it’s a perfect mix of sweet and crunchy. Whether for movie nights, holiday gatherings, or just because, it’s sure to be a hit with everyone! 🎉 Best part? It’s easy to make, and you can make it as sweet as your heart desires! 💛✨ Who’s ready for a bowl? 🙋♀️🍬 #CaramelCornGoodness #SweetAndCrunchy #HomemadeTreats #MovieNightSnacks #SweetCravings #SnackTimeFavorites #EasyRecipes #CaramelLovers #FestiveFlavors #CandyCornPerfection 🍿
- Total Time: 30 minutes
- Yield: 5 servings 1x
Ingredients
- 1 cup popcorn kernels (unpopped): You can use any popcorn kernels, but if you’re looking for something extra special, consider using organic kernels. You can also opt for microwave popcorn in a pinch, but air-popped kernels tend to provide the best texture and crunch for caramel corn.
- 2 cups unsalted butter (2 sticks): Unsalted butter allows you to control the salt content of your caramel. If you prefer salted caramel corn, feel free to use salted butter or increase the amount of kosher salt.
- ½ cup light corn syrup: This helps bind the sugar and gives caramel its signature chewy consistency. If you’re looking for an alternative, you can use honey or maple syrup, but the flavor and texture will vary slightly.
- 2 cups packed light brown sugar: Brown sugar gives the caramel its rich, molasses-like flavor. Light brown sugar is ideal for this recipe, but dark brown sugar can be used for a deeper flavor.
- 1 tsp. kosher salt: A touch of salt balances the sweetness of the caramel. If you don’t have kosher salt, regular table salt will work fine, though you might want to adjust the quantity.
- ½ tsp. baking soda: This ingredient creates a foamy reaction when added to the caramel, which makes the sauce puff up and become lighter, creating a crisp texture when baked.
- 1½ tsp. vanilla extract: Vanilla enhances the caramel flavor and adds depth. For a more complex flavor, you can use vanilla bean paste or even a splash of bourbon or rum for a fun twist.
Instructions
- Preheat the Oven
Preheat your oven to 250°F (120°C). This low heat will allow the caramel to slowly bake into the popcorn, creating a crispy coating without burning. Line two large baking sheets with parchment paper or silicone baking mats. These will catch the caramel sauce and prevent sticking during baking. - Pop the Popcorn
Pop your popcorn using your preferred method—whether it’s on the stovetop, with an air popper, or in the microwave. If using stovetop or air-popped kernels, aim for about 1 cup of unpopped kernels to get approximately 12 cups of popped popcorn. You’ll need enough room to toss the popcorn with the caramel sauce, so use large bowls if needed. - Make the Caramel Sauce
In a 2-quart saucepan, melt the butter over medium heat. Stir the butter occasionally to ensure it doesn’t burn. Once it’s melted, add the corn syrup, brown sugar, and salt. Stir the mixture together until combined.Pro Tip: Keep the heat at medium—too high, and the sugar can burn before it fully dissolves. Stir frequently until the mixture starts to come to a boil. - Boil the Caramel Mixture
Bring the caramel mixture to a gentle boil over medium-high heat. Allow it to boil without stirring for 5 minutes. You should see the mixture bubble up and thicken slightly. Don’t worry if it looks a bit bubbly or foamy at first; this is completely normal and will settle as it bakes. - Add Baking Soda and Vanilla
After 5 minutes of boiling, remove the saucepan from the heat. Stir in the baking soda and vanilla extract. The mixture will bubble up vigorously, but this is a good sign—it means the caramel is getting lighter and fluffier! Stir until fully incorporated. - Coat the Popcorn with Caramel
Pour the caramel sauce evenly over the popped popcorn in your large bowls. Use a rubber spatula or large spoons to gently toss the popcorn and coat it with the sticky caramel sauce. Be careful, as the sauce will be very hot. - Bake the Caramel Corn
Spread the caramel-coated popcorn evenly across the prepared baking sheets. It’s okay if the popcorn is in clumps; the caramel will spread out as it bakes. Place the baking sheets in the preheated oven. - Bake and Stir
Bake the caramel corn for 40-50 minutes, stirring every 10 minutes to ensure the caramel is evenly distributed. If after 40 minutes the popcorn still feels soft, bake it for an additional 10 minutes. The caramel should harden slightly and become crispy when cooled. - Cool and Store
Once done, remove the baking sheets from the oven and let the caramel corn cool completely on a wire rack. This step is crucial because it gives the caramel a chance to harden, resulting in a crunchy texture. Once cooled, store the caramel corn in airtight containers for up to two weeks.
Notes
- Don’t Rush the Boiling: Let the caramel mixture boil undisturbed for the full 5 minutes. This step is important for achieving the right consistency and flavor. Stirring too early can cause the sugar to crystallize, making the caramel grainy.
- Watch the Temperature: While it’s easy to think you can simply turn up the heat to speed things up, caramel is very sensitive to temperature. If the heat is too high, it can burn. Keep it on medium or medium-high heat and be patient!
- Testing for Crispiness: After the popcorn has baked, allow a small piece to cool before testing it. If it’s still soft, return the pans to the oven for another 10 minutes. The caramel should be crispy once cooled.
- Alternatives: If you’re out of corn syrup, you can use maple syrup or honey, but the flavor and texture might differ slightly. Similarly, for a richer flavor, try using dark brown sugar instead of light.
- Storage Tip: To keep your caramel corn fresh, store it in an airtight container at room temperature. For an extra-long shelf life, you can even freeze it—just make sure it’s fully cooled before storing.
- Prep Time: 15 minutes
- Cook Time: 15 minutes
Homemade caramel corn isn’t just for the holidays; it’s a versatile snack that can be enjoyed year-round. It’s perfect for movie nights, parties, or as a delightful homemade gift to share with friends and family. What makes this recipe stand out is how simple and quick it is to prepare—without sacrificing that rich, buttery caramel flavor. For beginner cooks, this recipe is ideal. It doesn’t require complicated techniques or fancy equipment, but the results are deliciously impressive. Let’s dive into how you can make this sweet treat right in your own kitchen!
Why Homemade Caramel Corn is Perfect for Beginners
- Simplicity: With just a handful of ingredients and straightforward steps, this recipe is beginner-friendly. It’s as easy as popping some popcorn and making a simple caramel sauce—no fancy skills needed.
- Time Efficiency: From start to finish, you’ll have caramel corn ready in 30 minutes. It’s a quick and rewarding recipe that doesn’t demand a lot of prep time.
- Healthier Than Store-bought: Unlike the caramel corn you find in tins at the store, homemade versions allow you to control the quality and quantity of ingredients. You’re avoiding preservatives and can make it as light or indulgent as you like.
Ingredients & Preparation
Before you begin, let’s make sure you have everything you need. Here’s a breakdown of the ingredients you’ll need for this recipe, along with a few suggestions for substitutions.
- 1 cup popcorn kernels (unpopped): You can use any popcorn kernels, but if you’re looking for something extra special, consider using organic kernels. You can also opt for microwave popcorn in a pinch, but air-popped kernels tend to provide the best texture and crunch for caramel corn.
- 2 cups unsalted butter (2 sticks): Unsalted butter allows you to control the salt content of your caramel. If you prefer salted caramel corn, feel free to use salted butter or increase the amount of kosher salt.
- ½ cup light corn syrup: This helps bind the sugar and gives caramel its signature chewy consistency. If you’re looking for an alternative, you can use honey or maple syrup, but the flavor and texture will vary slightly.
- 2 cups packed light brown sugar: Brown sugar gives the caramel its rich, molasses-like flavor. Light brown sugar is ideal for this recipe, but dark brown sugar can be used for a deeper flavor.
- 1 tsp. kosher salt: A touch of salt balances the sweetness of the caramel. If you don’t have kosher salt, regular table salt will work fine, though you might want to adjust the quantity.
- ½ tsp. baking soda: This ingredient creates a foamy reaction when added to the caramel, which makes the sauce puff up and become lighter, creating a crisp texture when baked.
- 1½ tsp. vanilla extract: Vanilla enhances the caramel flavor and adds depth. For a more complex flavor, you can use vanilla bean paste or even a splash of bourbon or rum for a fun twist.
Step-by-Step Instructions
Now that we have all our ingredients ready, let’s go through the step-by-step process to make this delicious homemade caramel corn. Don’t worry; we’ve broken it down into manageable steps to ensure everything goes smoothly!
- Preheat the Oven
Preheat your oven to 250°F (120°C). This low heat will allow the caramel to slowly bake into the popcorn, creating a crispy coating without burning. Line two large baking sheets with parchment paper or silicone baking mats. These will catch the caramel sauce and prevent sticking during baking. - Pop the Popcorn
Pop your popcorn using your preferred method—whether it’s on the stovetop, with an air popper, or in the microwave. If using stovetop or air-popped kernels, aim for about 1 cup of unpopped kernels to get approximately 12 cups of popped popcorn. You’ll need enough room to toss the popcorn with the caramel sauce, so use large bowls if needed. - Make the Caramel Sauce
In a 2-quart saucepan, melt the butter over medium heat. Stir the butter occasionally to ensure it doesn’t burn. Once it’s melted, add the corn syrup, brown sugar, and salt. Stir the mixture together until combined.Pro Tip: Keep the heat at medium—too high, and the sugar can burn before it fully dissolves. Stir frequently until the mixture starts to come to a boil. - Boil the Caramel Mixture
Bring the caramel mixture to a gentle boil over medium-high heat. Allow it to boil without stirring for 5 minutes. You should see the mixture bubble up and thicken slightly. Don’t worry if it looks a bit bubbly or foamy at first; this is completely normal and will settle as it bakes. - Add Baking Soda and Vanilla
After 5 minutes of boiling, remove the saucepan from the heat. Stir in the baking soda and vanilla extract. The mixture will bubble up vigorously, but this is a good sign—it means the caramel is getting lighter and fluffier! Stir until fully incorporated. - Coat the Popcorn with Caramel
Pour the caramel sauce evenly over the popped popcorn in your large bowls. Use a rubber spatula or large spoons to gently toss the popcorn and coat it with the sticky caramel sauce. Be careful, as the sauce will be very hot. - Bake the Caramel Corn
Spread the caramel-coated popcorn evenly across the prepared baking sheets. It’s okay if the popcorn is in clumps; the caramel will spread out as it bakes. Place the baking sheets in the preheated oven. - Bake and Stir
Bake the caramel corn for 40-50 minutes, stirring every 10 minutes to ensure the caramel is evenly distributed. If after 40 minutes the popcorn still feels soft, bake it for an additional 10 minutes. The caramel should harden slightly and become crispy when cooled. - Cool and Store
Once done, remove the baking sheets from the oven and let the caramel corn cool completely on a wire rack. This step is crucial because it gives the caramel a chance to harden, resulting in a crunchy texture. Once cooled, store the caramel corn in airtight containers for up to two weeks.
Beginner Tips & Notes
- Don’t Rush the Boiling: Let the caramel mixture boil undisturbed for the full 5 minutes. This step is important for achieving the right consistency and flavor. Stirring too early can cause the sugar to crystallize, making the caramel grainy.
- Watch the Temperature: While it’s easy to think you can simply turn up the heat to speed things up, caramel is very sensitive to temperature. If the heat is too high, it can burn. Keep it on medium or medium-high heat and be patient!
- Testing for Crispiness: After the popcorn has baked, allow a small piece to cool before testing it. If it’s still soft, return the pans to the oven for another 10 minutes. The caramel should be crispy once cooled.
- Alternatives: If you’re out of corn syrup, you can use maple syrup or honey, but the flavor and texture might differ slightly. Similarly, for a richer flavor, try using dark brown sugar instead of light.
- Storage Tip: To keep your caramel corn fresh, store it in an airtight container at room temperature. For an extra-long shelf life, you can even freeze it—just make sure it’s fully cooled before storing.

Serving Suggestions
Caramel corn is delicious on its own, but you can also get creative with how you serve it. Here are some fun ideas:
- Add Nuts: For added crunch and flavor, mix in some roasted peanuts, almonds, or cashews to the caramel corn before baking.
- Pair with Chocolate: If you love the sweet-salty combo, drizzle some melted chocolate over the cooled caramel corn for a decadent treat. You can also toss in chocolate chips just before baking for an easy chocolate-caramel blend.
- Perfect for Parties: Serve your homemade caramel corn in individual treat bags for party favors or create a large popcorn bowl for guests to enjoy during movie night.
Conclusion: A Sweet Success in the Kitchen
Whether you’re making this caramel corn for a special occasion or just to treat yourself, it’s bound to be a hit. The buttery, crunchy popcorn coated in a sweet, caramel glaze will have everyone coming back for more. Plus, with this beginner-friendly recipe, you can’t go wrong—no matter your experience level in the kitchen. I hope you enjoy making and sharing your homemade caramel corn as much as I do. Let me know how it turned out in the comments, and feel free to share your own twists on this classic treat!
Now, grab your ingredients, pop some popcorn, and let the caramel magic happen!