
A great chicken sandwich is more than just bread and filling—it’s a combination of textures, flavors, and a balance of richness and freshness. Gordon Ramsay’s chicken sandwich recipe is the perfect example of a simple yet refined dish that beginners can master with ease. This recipe is ideal for anyone looking for a quick, satisfying meal that delivers a restaurant-quality taste without complicated steps.
Print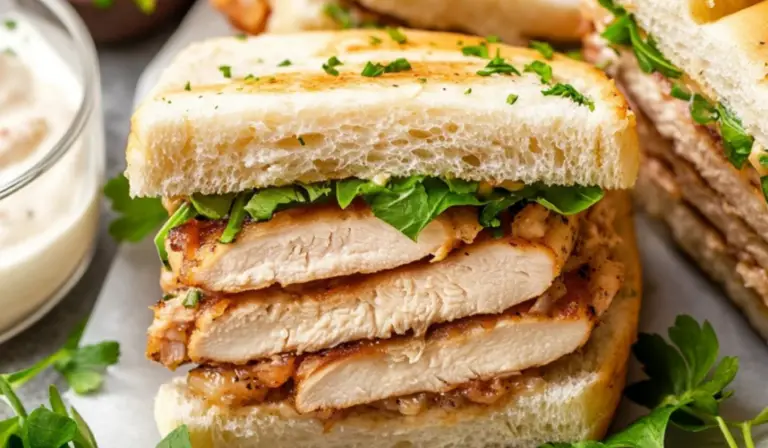
Gordon Ramsay’s Ultimate Chicken Sandwich Recipe: A Beginner’s Guide
This Ultimate Chicken Sandwich is inspired by Gordon Ramsay—crispy, juicy chicken layered with fresh toppings and bold flavors in every bite! 🍗🥪🔥 A beginner-friendly masterpiece that turns a simple sandwich into a gourmet delight!
- Total Time: 15 minutes
- Yield: 10 sandwiches 1x
Ingredients
Filling
- 500g cooked chicken meat from 1 large store-bought roast chicken
- 1 celery stem, finely chopped
- 1 green onion stem, finely sliced
- 75g walnuts, roughly chopped
- 3 tbsp finely chopped cornichon or dill pickle
- 1 tbsp finely chopped fresh dill
Sauce
- 160g whole egg mayonnaise
- 160g sour cream (or substitute full-fat yogurt)
- 2 tsp Dijon mustard
- 1 tbsp lemon juice (or substitute white wine or cider vinegar)
- ½ tsp onion powder (or more garlic powder)
- ¼ tsp garlic powder (or more onion powder)
- ¾ tsp cooking/kosher salt
- ¼ tsp black pepper
Sandwich Assembly
- Salted butter, for spreading on bread
- 20 slices white sandwich bread (preferably day-old, or use more slices for less filling)
Instructions
Shred the Chicken
Start by shredding the cooked chicken into small pieces. The easiest way to do this is by using a stand mixer fitted with a paddle attachment, which quickly breaks down the chicken into uniform shreds. If you do not have a stand mixer, using two forks or your hands works just as well. Avoid large chunks to ensure that the sauce evenly coats every piece.
Make the Sauce
In a medium-sized bowl, combine mayonnaise, sour cream, Dijon mustard, lemon juice, onion powder, garlic powder, salt, and black pepper. Stir until smooth and well incorporated. The sauce should be creamy with a slight tanginess from the lemon juice and mustard. Taste and adjust seasoning if necessary.
Combine the Filling
In a large mixing bowl, add the shredded chicken. Pour the prepared sauce over the chicken and mix well until everything is evenly coated. Stir in the finely chopped celery, sliced green onion, roughly chopped walnuts, pickles, and fresh dill. Mix gently to ensure an even distribution of ingredients. At this stage, the filling can be refrigerated for 10 to 15 minutes to allow the flavors to meld together.
Prepare the Bread
Lightly butter one side of each slice of bread. This step enhances the flavor while also preventing the bread from becoming soggy. If using fresh bread, toasting it slightly can add a pleasant crunch.
Assemble the Sandwich
Take one slice of bread and spread an even layer of the chicken mixture over it. Place another slice of bread on top, gently pressing down to secure the filling. Repeat until all sandwiches are assembled.
Cut and Serve
If desired, trim off the crusts for a more refined presentation. Use a sharp knife to slice each sandwich in half or into smaller triangles for serving. For a neater cut, refrigerate the sandwiches for 15 to 30 minutes before slicing to help firm up the filling.
Notes
Achieving the Best Texture
Shredding the chicken finely helps it absorb the sauce better, creating a smoother and more cohesive filling. If using a store-bought rotisserie chicken, remove the skin and shred only the meat to keep the sandwich light and moist.
Balancing Flavors
Taste the sauce before mixing it with the chicken. If you prefer a stronger tangy flavor, add a little more lemon juice or Dijon mustard. If the sauce is too thick, a splash of milk or an extra tablespoon of yogurt can loosen it up without compromising taste.
Keeping the Bread Fresh
Using day-old bread is ideal as it holds the filling better and is less likely to become soggy. If the bread is too fresh, lightly toasting it can improve the structure. Avoid overloading the sandwich with filling, as too much moisture can make the bread break apart.
Storage and Meal Prep
These sandwiches can be made ahead and stored in an airtight container in the refrigerator for up to 24 hours. For meal prep, the filling can be made in advance and stored separately, lasting up to three days in the refrigerator. Assemble the sandwiches just before serving for the best texture.
- Prep Time: 15 minutes
For those who are just starting out in the kitchen, this sandwich is a fantastic way to build confidence. It requires basic chopping, mixing, and assembling skills, making it approachable yet rewarding. The ingredients are easy to find, and the preparation time is minimal. Whether you are preparing lunch for yourself, making a meal for guests, or looking for a reliable sandwich recipe for meal prep, this one is sure to become a favorite.
What makes this recipe particularly special is the balance of textures. The shredded chicken is tender and juicy, while the walnuts provide a pleasant crunch. The creamy sauce binds everything together, enhancing the flavors with a tangy, slightly zesty touch. Fresh dill and finely chopped pickles add a bright note that cuts through the richness, making each bite well-rounded and satisfying.
This guide will walk you through every step, from ingredient selection to assembly, with helpful tips along the way.
Ingredients and Preparation
Filling
- 500g cooked chicken meat from 1 large store-bought roast chicken
- 1 celery stem, finely chopped
- 1 green onion stem, finely sliced
- 75g walnuts, roughly chopped
- 3 tbsp finely chopped cornichon or dill pickle
- 1 tbsp finely chopped fresh dill
Sauce
- 160g whole egg mayonnaise
- 160g sour cream (or substitute full-fat yogurt)
- 2 tsp Dijon mustard
- 1 tbsp lemon juice (or substitute white wine or cider vinegar)
- ½ tsp onion powder (or more garlic powder)
- ¼ tsp garlic powder (or more onion powder)
- ¾ tsp cooking/kosher salt
- ¼ tsp black pepper
Sandwich Assembly
- Salted butter, for spreading on bread
- 20 slices white sandwich bread (preferably day-old, or use more slices for less filling)
Ingredient Substitutions and Variations
For those with dietary preferences or limited pantry ingredients, here are some flexible options:
- Instead of walnuts, use almonds or pecans for a similar crunch.
- If fresh dill is unavailable, dried dill can be used, though fresh provides a brighter flavor.
- Greek yogurt can be used in place of sour cream for a lighter, tangier dressing.
- Whole grain or sourdough bread can replace white sandwich bread for added texture and depth of flavor.
Step-by-Step Instructions
Shred the Chicken
Start by shredding the cooked chicken into small pieces. The easiest way to do this is by using a stand mixer fitted with a paddle attachment, which quickly breaks down the chicken into uniform shreds. If you do not have a stand mixer, using two forks or your hands works just as well. Avoid large chunks to ensure that the sauce evenly coats every piece.
Make the Sauce
In a medium-sized bowl, combine mayonnaise, sour cream, Dijon mustard, lemon juice, onion powder, garlic powder, salt, and black pepper. Stir until smooth and well incorporated. The sauce should be creamy with a slight tanginess from the lemon juice and mustard. Taste and adjust seasoning if necessary.
Combine the Filling
In a large mixing bowl, add the shredded chicken. Pour the prepared sauce over the chicken and mix well until everything is evenly coated. Stir in the finely chopped celery, sliced green onion, roughly chopped walnuts, pickles, and fresh dill. Mix gently to ensure an even distribution of ingredients. At this stage, the filling can be refrigerated for 10 to 15 minutes to allow the flavors to meld together.
Prepare the Bread
Lightly butter one side of each slice of bread. This step enhances the flavor while also preventing the bread from becoming soggy. If using fresh bread, toasting it slightly can add a pleasant crunch.
Assemble the Sandwich
Take one slice of bread and spread an even layer of the chicken mixture over it. Place another slice of bread on top, gently pressing down to secure the filling. Repeat until all sandwiches are assembled.
Cut and Serve
If desired, trim off the crusts for a more refined presentation. Use a sharp knife to slice each sandwich in half or into smaller triangles for serving. For a neater cut, refrigerate the sandwiches for 15 to 30 minutes before slicing to help firm up the filling.
Beginner Tips and Notes
Achieving the Best Texture
Shredding the chicken finely helps it absorb the sauce better, creating a smoother and more cohesive filling. If using a store-bought rotisserie chicken, remove the skin and shred only the meat to keep the sandwich light and moist.
Balancing Flavors
Taste the sauce before mixing it with the chicken. If you prefer a stronger tangy flavor, add a little more lemon juice or Dijon mustard. If the sauce is too thick, a splash of milk or an extra tablespoon of yogurt can loosen it up without compromising taste.
Keeping the Bread Fresh
Using day-old bread is ideal as it holds the filling better and is less likely to become soggy. If the bread is too fresh, lightly toasting it can improve the structure. Avoid overloading the sandwich with filling, as too much moisture can make the bread break apart.
Storage and Meal Prep
These sandwiches can be made ahead and stored in an airtight container in the refrigerator for up to 24 hours. For meal prep, the filling can be made in advance and stored separately, lasting up to three days in the refrigerator. Assemble the sandwiches just before serving for the best texture.

Serving Suggestions
Pairing this sandwich with the right sides can turn it into a complete meal. Here are a few great options:
- A fresh green salad with a light vinaigrette balances the richness of the sandwich.
- A bowl of tomato soup complements the creamy filling with a hint of acidity.
- Crispy baked potato wedges or sweet potato fries make for a satisfying side.
- A fruit salad with citrus notes adds a refreshing contrast.
To elevate the sandwich further, consider adding fresh greens such as arugula, spinach, or romaine lettuce. A thin slice of tomato or a few cucumber slices can add a refreshing crunch.
Engaging with the Recipe
Cooking is a journey, and each step you take builds confidence in the kitchen. This recipe is perfect for beginners because it teaches essential skills like shredding, mixing, and assembling, all while creating a delicious, satisfying dish. Once you have mastered the basic version, experiment with different variations, such as using whole-grain mustard instead of Dijon or adding a touch of honey for sweetness.
If you try this recipe, take a moment to reflect on what you enjoyed most. Did you like the crunch of the walnuts, or would you prefer a different nut? Did the sauce have the perfect balance of tang and creaminess, or would you tweak it next time? Cooking is all about finding what works best for you and making adjustments along the way.
We encourage you to share your experience with this sandwich. What variations did you try? Did you discover any tips that made the process easier? Leave a comment and join the conversation. There is always something new to learn in the kitchen, and your insights could help others perfect their sandwich-making skills.
This Gordon Ramsay-inspired chicken sandwich is proof that simple ingredients, when combined thoughtfully, can create something truly delicious. Whether you are a beginner cook or someone looking for a quick, reliable recipe, this sandwich is one you will want to make again and again.