
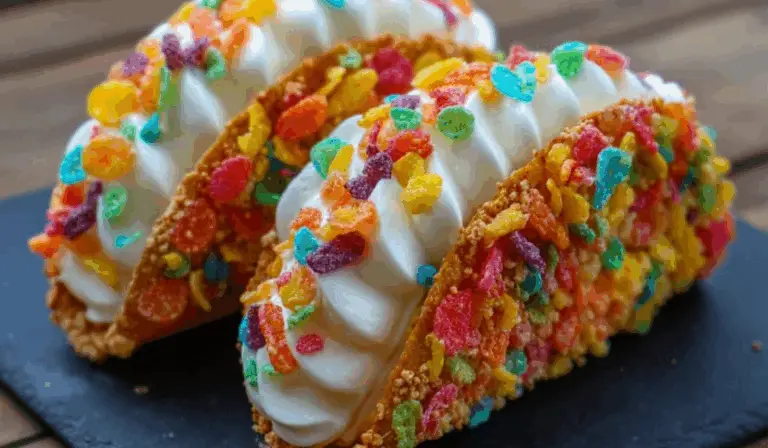
Dessert doesn’t always have to be traditional to be delicious—and these Fruity Pebbles Cheesecake Tacos are proof of that. They combine a playful presentation with creamy cheesecake filling and a vibrant, crunchy cereal shell that brings out the kid in everyone. This no-bake dessert is perfect for parties, weekend treats, or anytime you want a unique, fun sweet. Each taco shell is made from Fruity Pebbles cereal molded into shape and then filled with fluffy, whipped cheesecake cream.

The best part? This recipe is as easy to make as it is fun to serve. The texture contrast between the crisp shell and the silky filling is unforgettable, and the colors make the dessert table come to life. With just a few ingredients and some chill time, you’ll have an eye-catching and crowd-pleasing dessert ready to go.
Whether you’re a beginner in the kitchen or a seasoned baker looking for a no-bake option, these cheesecake tacos are stress-free and totally customizable.
Ingredients and Preparation
For the Cereal Taco Shells:
- 3 cups Fruity Pebbles cereal
- ½ cup unsalted butter, melted
For the Cheesecake Filling:
- 8 oz (225g) cream cheese, softened
- ½ cup powdered sugar (also known as confectioners’ sugar), sifted
- 1 teaspoon pure vanilla extract
- 1 cup heavy whipping cream, whipped to stiff peaks
For Garnish and Serving:
- Extra Fruity Pebbles cereal (for topping)
- Optional: fresh strawberries, blueberries, or mini chocolate chips
Preparation Notes:
- Allow cream cheese to sit at room temperature for about 30 minutes before using. This ensures a smooth, lump-free filling.
- Use cold heavy cream for easier whipping. A chilled mixing bowl helps achieve stiffer peaks faster.
- Fruity Pebbles should be fresh, as stale cereal will not hold its shape well when molded into taco shells.
- Prepare your shell molds or muffin tin in advance and lightly grease with nonstick spray if needed.
Step-by-Step Instructions
Step 1: Make the Cereal Shell Mixture
- In a large bowl, combine 3 cups of Fruity Pebbles cereal with ½ cup of melted butter.
- Stir thoroughly using a silicone spatula or wooden spoon, ensuring every piece of cereal is evenly coated.
- Work quickly, as the butter will start to cool and stiffen the mixture.
Step 2: Shape the Taco Shells
- Take small scoops of the coated cereal mixture and press them over the back of a muffin tin or into taco shell molds.
- Press firmly to ensure each shell holds its shape and is compact enough not to fall apart once cooled.
- You can also form them over a rolling pin or spoon handle to get a true taco shell shape, just be sure to line with parchment paper for easy removal.
Step 3: Chill the Shells
- Once the shapes are molded, place the trays into the refrigerator.
- Let the shells chill for at least 30 minutes, or until they’re firm and hold their shape when lifted.
- After setting, gently remove the shells from the molds and keep them chilled while you make the filling.
Step 4: Make the Cheesecake Filling
- In a mixing bowl, beat 8 oz of softened cream cheese until smooth using a hand or stand mixer.
- Add ½ cup of powdered sugar and 1 teaspoon of vanilla extract. Mix until well combined and fluffy.
- In a separate chilled bowl, whip 1 cup of cold heavy cream until stiff peaks form. This should take about 3–4 minutes on medium-high speed.
- Gently fold the whipped cream into the cream cheese mixture until fully incorporated. Be careful not to overmix—you want a light, airy texture.
Step 5: Fill the Taco Shells
- Using a piping bag or spoon, fill each chilled cereal taco shell with the cheesecake mixture.
- Top with extra Fruity Pebbles for a bright finish, or get creative with toppings like fresh fruit or mini chocolate chips.
- Serve immediately or refrigerate until ready to serve. These are best enjoyed the same day for maximum crunch.
Beginner Tips and Notes
- Work Quickly with the Shells: The cereal mixture begins to harden as it cools, so be prepared to mold the shells as soon as it’s mixed. If it becomes too firm, warm it slightly in the microwave for 10 seconds.
- Use Parchment or Wax Paper: When forming the cereal tacos, use parchment paper or lightly greased hands to prevent sticking.
- Don’t Skip Chilling: The shells need time to firm up, and the cheesecake filling also benefits from chilling to maintain its shape and flavor.
- Whipping Cream Tips: For best results, use cold heavy cream and a chilled mixing bowl. If your kitchen is warm, place the bowl and beaters in the fridge for 10 minutes before whipping.
- Make Ahead: You can prepare the shells and filling a day in advance, but keep them separate until just before serving to keep the cereal shells from becoming soggy.
- Alternate Shell Ideas: If you want to switch things up, you can try this same technique using Cocoa Pebbles or Rice Krispies. Just follow the same steps with different cereal flavors.
Fruity Pebbles Cheesecake Tacos – A No-Bake, Colorful Dessert for All Ages
🌈🧁 Sweet, crunchy, and totally no-bake—these Fruity Pebbles Cheesecake Tacos are the dessert party everyone will love! Crispy cereal shells filled with creamy cheesecake filling make each bite a rainbow of fun. 🎉🍓 Perfect for birthdays, holidays, or anytime you need a playful treat, they’re as eye-catching as they are delicious. Kid-approved, adult-adored, and endlessly Instagrammable! No oven, no stress—just pure dessert joy. 💖✨
- Total Time: 25 minutes
- Yield: 8 dessert tacos 1x
Ingredients
For the Cereal Taco Shells:
-
3 cups Fruity Pebbles cereal
-
½ cup unsalted butter, melted
For the Cheesecake Filling:
-
8 oz (225g) cream cheese, softened
-
½ cup powdered sugar (also known as confectioners’ sugar), sifted
-
1 teaspoon pure vanilla extract
-
1 cup heavy whipping cream, whipped to stiff peaks
For Garnish and Serving:
-
Extra Fruity Pebbles cereal (for topping)
-
Optional: fresh strawberries, blueberries, or mini chocolate chips
Preparation Notes:
-
Allow cream cheese to sit at room temperature for about 30 minutes before using. This ensures a smooth, lump-free filling.
-
Use cold heavy cream for easier whipping. A chilled mixing bowl helps achieve stiffer peaks faster.
-
Fruity Pebbles should be fresh, as stale cereal will not hold its shape well when molded into taco shells.
-
Prepare your shell molds or muffin tin in advance and lightly grease with nonstick spray if needed.
Instructions
Step 1: Make the Cereal Shell Mixture
- In a large bowl, combine 3 cups of Fruity Pebbles cereal with ½ cup of melted butter.
- Stir thoroughly using a silicone spatula or wooden spoon, ensuring every piece of cereal is evenly coated.
- Work quickly, as the butter will start to cool and stiffen the mixture.
Step 2: Shape the Taco Shells
- Take small scoops of the coated cereal mixture and press them over the back of a muffin tin or into taco shell molds.
- Press firmly to ensure each shell holds its shape and is compact enough not to fall apart once cooled.
- You can also form them over a rolling pin or spoon handle to get a true taco shell shape, just be sure to line with parchment paper for easy removal.
Step 3: Chill the Shells
- Once the shapes are molded, place the trays into the refrigerator.
- Let the shells chill for at least 30 minutes, or until they’re firm and hold their shape when lifted.
- After setting, gently remove the shells from the molds and keep them chilled while you make the filling.
Step 4: Make the Cheesecake Filling
- In a mixing bowl, beat 8 oz of softened cream cheese until smooth using a hand or stand mixer.
- Add ½ cup of powdered sugar and 1 teaspoon of vanilla extract. Mix until well combined and fluffy.
- In a separate chilled bowl, whip 1 cup of cold heavy cream until stiff peaks form. This should take about 3–4 minutes on medium-high speed.
- Gently fold the whipped cream into the cream cheese mixture until fully incorporated. Be careful not to overmix—you want a light, airy texture.
Step 5: Fill the Taco Shells
- Using a piping bag or spoon, fill each chilled cereal taco shell with the cheesecake mixture.
- Top with extra Fruity Pebbles for a bright finish, or get creative with toppings like fresh fruit or mini chocolate chips.
- Serve immediately or refrigerate until ready to serve. These are best enjoyed the same day for maximum crunch.
Notes
- Work Quickly with the Shells: The cereal mixture begins to harden as it cools, so be prepared to mold the shells as soon as it’s mixed. If it becomes too firm, warm it slightly in the microwave for 10 seconds.
- Use Parchment or Wax Paper: When forming the cereal tacos, use parchment paper or lightly greased hands to prevent sticking.
- Don’t Skip Chilling: The shells need time to firm up, and the cheesecake filling also benefits from chilling to maintain its shape and flavor.
- Whipping Cream Tips: For best results, use cold heavy cream and a chilled mixing bowl. If your kitchen is warm, place the bowl and beaters in the fridge for 10 minutes before whipping.
- Make Ahead: You can prepare the shells and filling a day in advance, but keep them separate until just before serving to keep the cereal shells from becoming soggy.
- Alternate Shell Ideas: If you want to switch things up, you can try this same technique using Cocoa Pebbles or Rice Krispies. Just follow the same steps with different cereal flavors.
- Prep Time: 25 minutes
Serving Suggestions
- Kids’ Parties: These colorful taco-shaped desserts are an instant hit with children. Serve on a large platter with other no-bake treats.
- Mini Dessert Buffet: Pair these tacos with small cups of chocolate pudding, mini fruit tarts, or cookie bites to create a dessert spread that offers variety.
- Holiday Twist: For special occasions, swap Fruity Pebbles with seasonal cereals—think red and green Christmas cereals or pastel ones for Easter.
- Add a Drizzle: Take it up a notch by drizzling white chocolate or caramel sauce on top.
- Serve with Fresh Fruit: Fresh strawberries, blueberries, or banana slices pair wonderfully with the creamy filling and balance out the sweetness.
Final Thought
Fruity Pebbles Cheesecake Tacos are more than just a whimsical treat—they’re a low-effort, no-bake dessert with big visual and flavor appeal. Whether you’re hosting a party or looking for a weekend project with your kids, these sweet tacos deliver both fun and satisfaction. They’re customizable, quick to assemble, and guaranteed to put a smile on anyone’s face.
Try different cereal combinations, switch up the toppings, or even add a swirl of chocolate or fruit jam into the filling. However you decide to enjoy them, one thing’s for sure—these colorful treats will be remembered long after the last bite. Keep them chilled, keep them crunchy, and most of all, keep them fun.