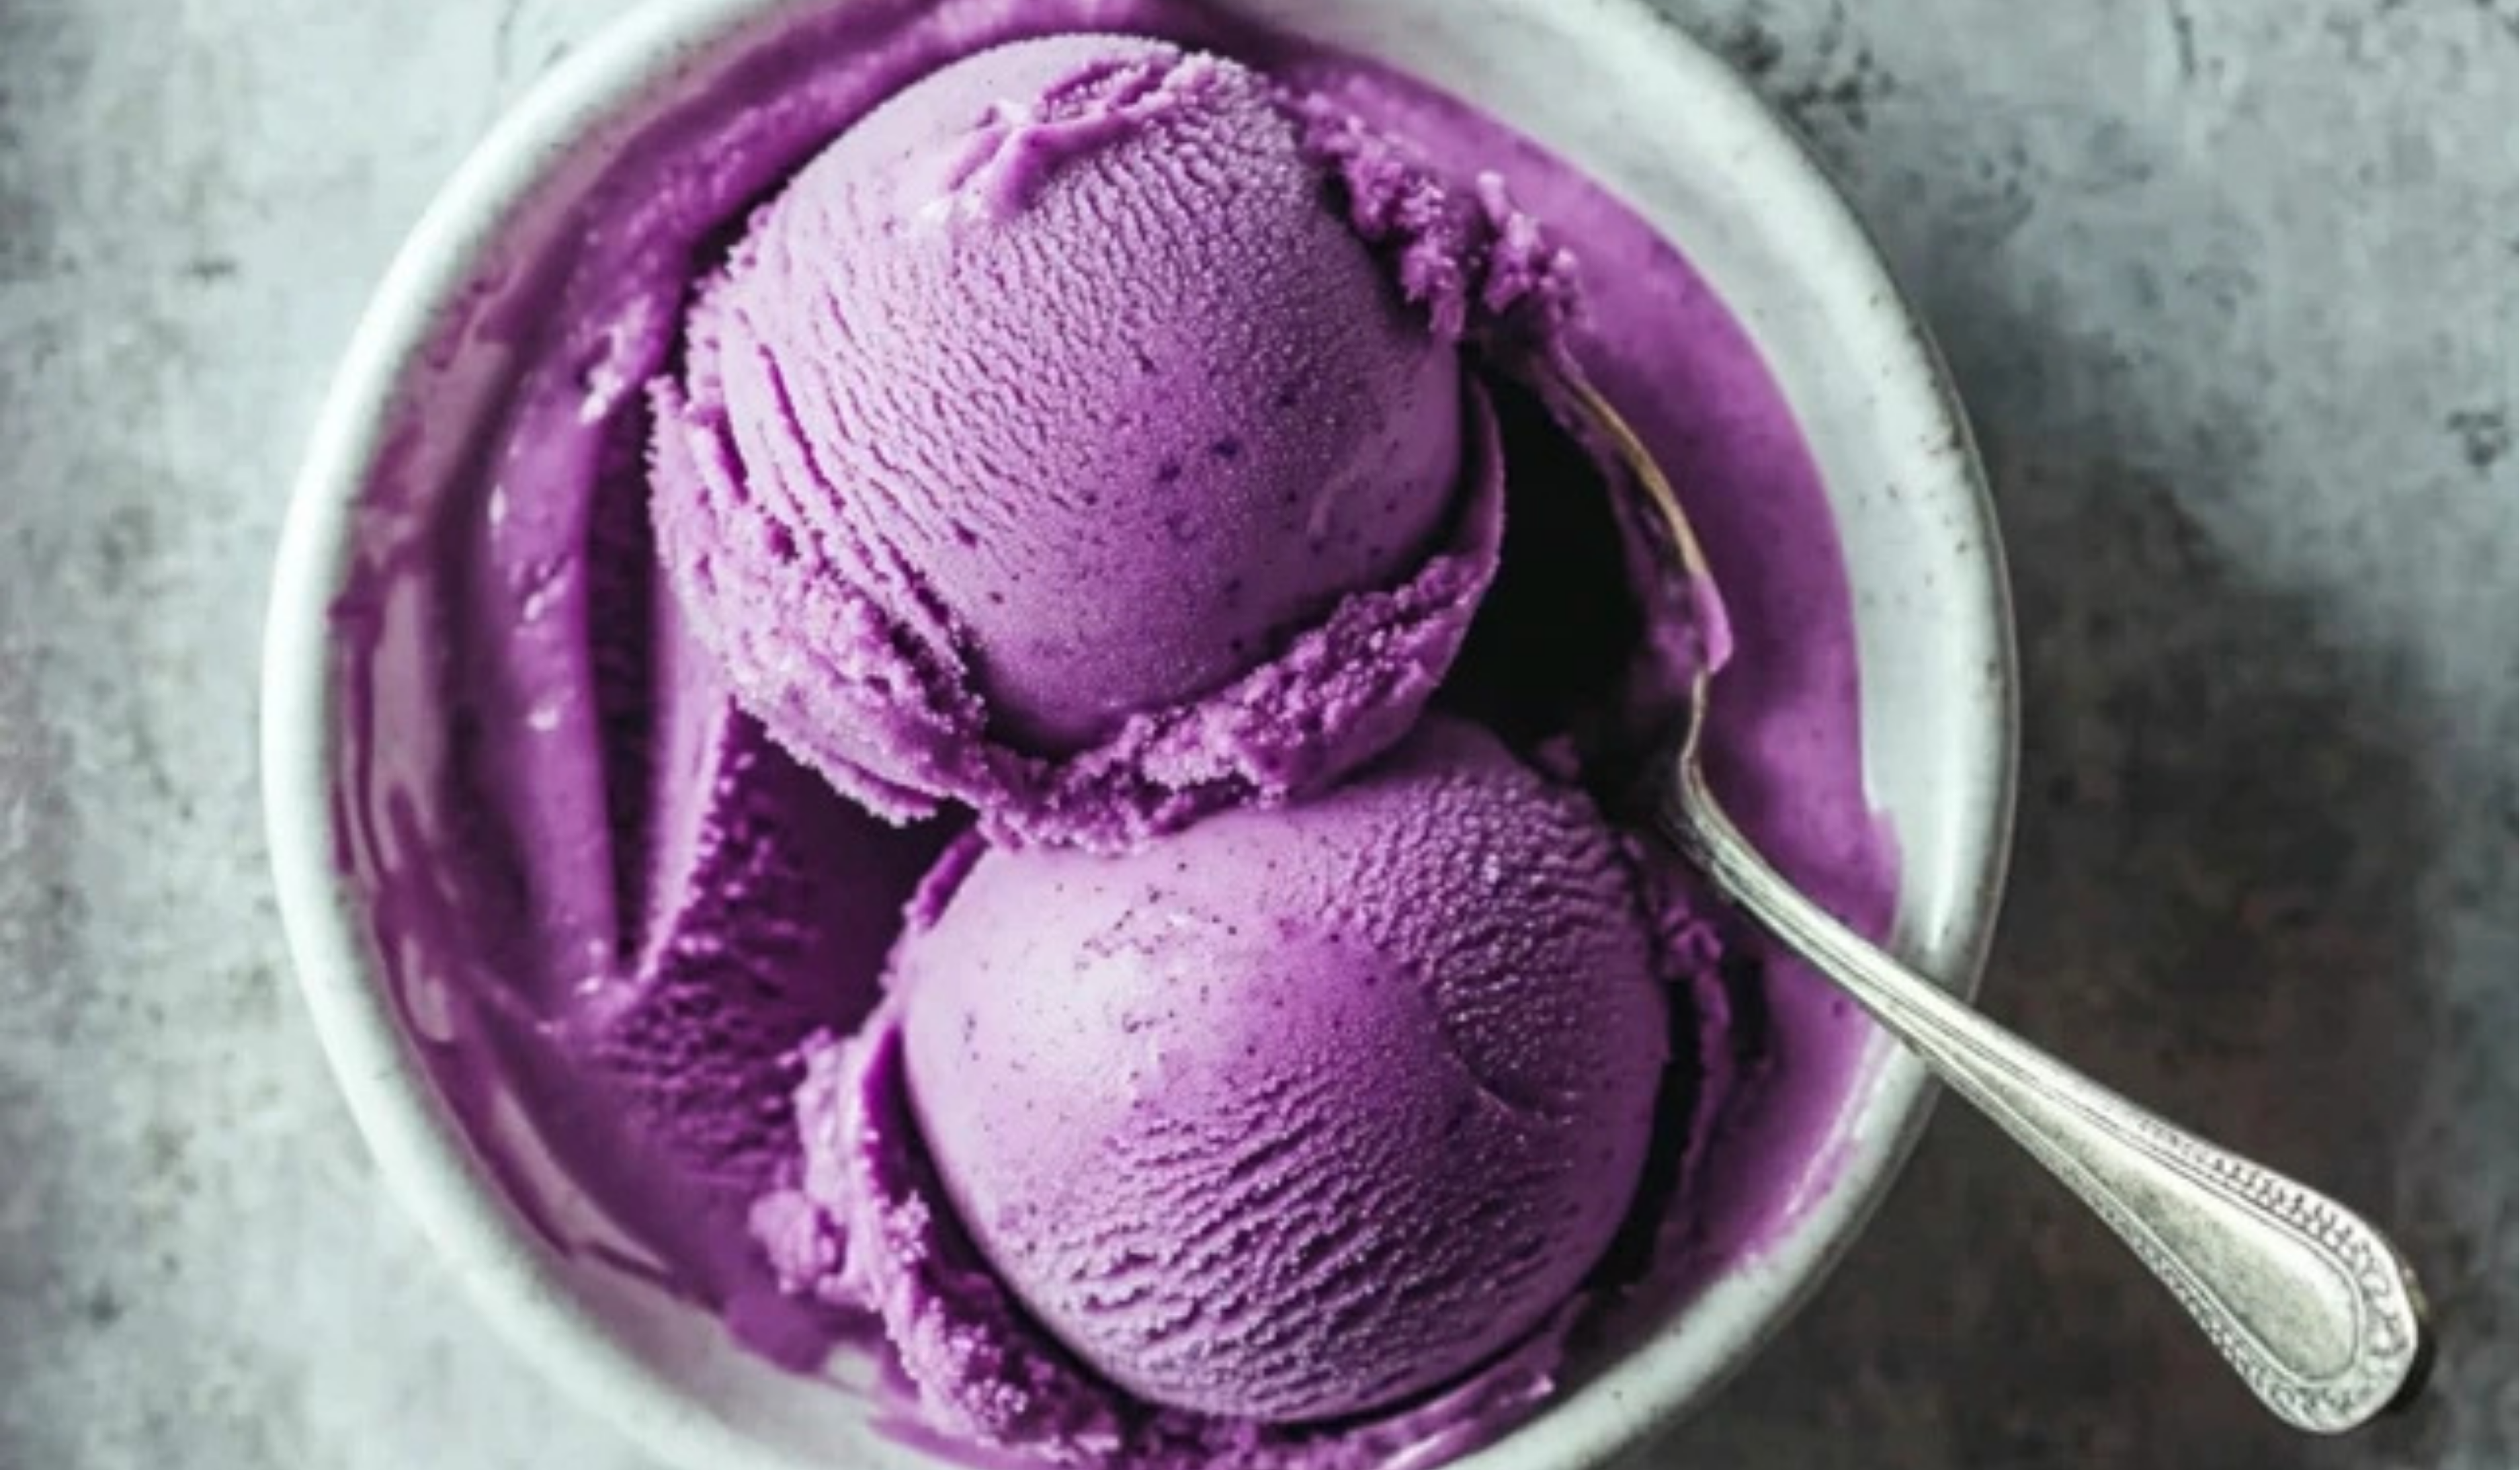
Ube, also known as purple yam, is a beloved ingredient in Filipino desserts, celebrated for its striking color and unique flavor. When I first tasted ube ice cream, I was captivated by its creamy, sweet, and slightly earthy taste that left a lasting impression. However, I quickly realized that making this beloved treat at home didn’t have to be difficult or time-consuming. With just a handful of ingredients and a little patience, anyone—whether you’re a beginner cook or a seasoned chef—can whip up this easy ube ice cream.
Print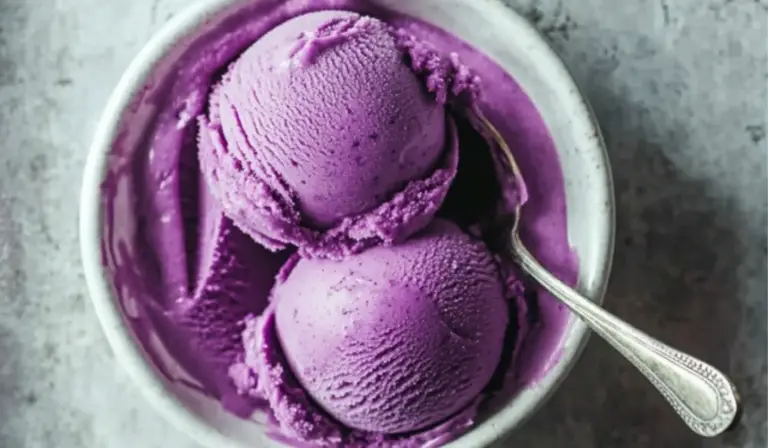
Easy Ube Ice Cream Recipe: A Sweet Filipino Delight for Beginners
Creamy baked feta meets tender broccoli in this easy, flavor-packed pasta dish! Perfect for beginners craving a comforting and healthy meal with minimal effort. 🧀🥦🍝
- Total Time: 5 hours 10 minutes
- Yield: 6 servings 1x
Ingredients
- 2 cups heavy whipping cream (36% fat or higher)
- 3/4 cup sweetened condensed milk
- 2 teaspoons ube flavoring extract
- 1 tablespoon ube powder
- 1/2 teaspoon vanilla extract
Instructions
Step 1: Whip the Heavy Cream
Start by pouring the 2 cups of cold heavy whipping cream into a large mixing bowl. It’s important that the cream is cold, as this will help it whip up better. Using an electric hand mixer (or stand mixer if you have one), whip the cream on high speed until stiff peaks form. This may take about 3-5 minutes. You’ll know it’s ready when the cream holds its shape and doesn’t fall back into the bowl when you lift the beaters. If you’re using a hand whisk, this will take a bit longer, but it’s certainly possible with some elbow grease.
Step 2: Add Sweetened Condensed Milk
Once your cream has reached stiff peaks, add 3/4 cup of sweetened condensed milk. Using the electric mixer, beat the mixture on high speed for another 1-2 minutes. The condensed milk will add both sweetness and richness to the ice cream. Make sure to mix it thoroughly with the whipped cream.
Step 3: Incorporate Ube and Vanilla
Next, add the 2 teaspoons of ube flavoring extract, 1 tablespoon of ube powder, and 1/2 teaspoon of vanilla extract. Using the mixer, gently blend everything together. The mixture will turn a lovely purple color, and the ube flavor will start to infuse the cream. Make sure everything is well-combined, but be careful not to overmix.
Step 4: Transfer to a Loaf Pan and Freeze
Once your ice cream mixture is smooth and uniform, transfer it into a loaf pan. You can also use a plastic container if you prefer. Smooth the top with a spatula and cover the pan tightly with plastic wrap or foil. This will prevent ice crystals from forming while the ice cream freezes.
Place the pan in the freezer for about 5 hours, or until the ice cream is firm. If you’re in a hurry, you can freeze it for a shorter period, but the longer it freezes, the creamier and firmer it will become. After 5 hours, your homemade ube ice cream is ready to serve!
Notes
1. Room Temperature Ingredients:
Make sure your heavy cream is cold, but your sweetened condensed milk and vanilla extract should be at room temperature. Cold condensed milk can make it harder to mix, so letting it warm up slightly will make the process smoother.
2. Don’t Overmix:
While it’s important to whip the cream to stiff peaks, be careful not to overwhip it. Overwhipping will cause the cream to turn into butter, which will not create the smooth and creamy texture you’re aiming for.
3. Adjust Sweetness:
If you prefer your ice cream to be sweeter, feel free to add more sweetened condensed milk or a little sugar to taste. Keep in mind that the ube flavor might become more subtle as you add sweetness, so taste as you go.
4. Freezing Time:
To avoid ice crystals, make sure the ice cream is covered tightly before freezing. If you don’t have plastic wrap, you can use wax paper or a lid for your container.
5. Ube Powder Substitution:
If you can’t find ube powder, you can opt for ube jam or ube purée. However, be aware that the texture might change slightly depending on the consistency of the jam or purée you use.
6. Storing Leftovers:
If you have leftover ice cream, store it in an airtight container in the freezer. Homemade ice cream can last up to a week or so, though it’s best when consumed within 5-7 days for optimal freshness.
- Prep Time: 10 minutes
This easy ube ice cream recipe is perfect for beginners because it requires minimal effort, involves ingredients that are easy to find, and delivers a mouthwatering result. The best part? It only takes 10 minutes of prep time and about 5 hours of chilling. This simple, no-churn method is ideal for those who want to enjoy a homemade, creamy ice cream without the hassle of complex techniques or equipment. Whether you’re new to cooking or just looking for a quick and delicious treat, this recipe is sure to be a hit.
Ingredients and Preparation
Before you dive into making your ice cream, it’s important to gather all the ingredients you’ll need. Thankfully, this recipe only calls for five key ingredients, most of which you might already have in your kitchen. Let’s take a look:
Ingredients:
- 2 cups heavy whipping cream (36% fat or higher)
- 3/4 cup sweetened condensed milk
- 2 teaspoons ube flavoring extract
- 1 tablespoon ube powder
- 1/2 teaspoon vanilla extract
Alternative Ingredients:
- Heavy Whipping Cream: If you can’t find heavy whipping cream, you can substitute it with a combination of full-fat milk and butter. For every cup of heavy cream, use 3/4 cup milk and 1/4 cup melted butter.
- Sweetened Condensed Milk: While this is a key ingredient for sweetness and creaminess, you could try using coconut condensed milk for a tropical twist.
- Ube Flavoring Extract: If you can’t find ube extract, you could use ube jam or a homemade ube purée (though the consistency might change slightly).
- Ube Powder: If you’re in a pinch and don’t have ube powder, you could skip it, but keep in mind that the ube flavor might be more subtle.
- Vanilla Extract: This ingredient is mostly for flavor enhancement and can be omitted if you want to keep the flavor purely focused on ube.
Once you have all your ingredients ready, it’s time to prepare and make this delightful ice cream!
Step-by-Step Instructions
Now comes the fun part: creating your delicious ube ice cream. Don’t worry if you’ve never made ice cream before. This process is simple, easy, and foolproof. Follow these steps, and you’ll have a refreshing homemade dessert to enjoy in no time.
Step 1: Whip the Heavy Cream
Start by pouring the 2 cups of cold heavy whipping cream into a large mixing bowl. It’s important that the cream is cold, as this will help it whip up better. Using an electric hand mixer (or stand mixer if you have one), whip the cream on high speed until stiff peaks form. This may take about 3-5 minutes. You’ll know it’s ready when the cream holds its shape and doesn’t fall back into the bowl when you lift the beaters. If you’re using a hand whisk, this will take a bit longer, but it’s certainly possible with some elbow grease.
Step 2: Add Sweetened Condensed Milk
Once your cream has reached stiff peaks, add 3/4 cup of sweetened condensed milk. Using the electric mixer, beat the mixture on high speed for another 1-2 minutes. The condensed milk will add both sweetness and richness to the ice cream. Make sure to mix it thoroughly with the whipped cream.
Step 3: Incorporate Ube and Vanilla
Next, add the 2 teaspoons of ube flavoring extract, 1 tablespoon of ube powder, and 1/2 teaspoon of vanilla extract. Using the mixer, gently blend everything together. The mixture will turn a lovely purple color, and the ube flavor will start to infuse the cream. Make sure everything is well-combined, but be careful not to overmix.
Step 4: Transfer to a Loaf Pan and Freeze
Once your ice cream mixture is smooth and uniform, transfer it into a loaf pan. You can also use a plastic container if you prefer. Smooth the top with a spatula and cover the pan tightly with plastic wrap or foil. This will prevent ice crystals from forming while the ice cream freezes.
Place the pan in the freezer for about 5 hours, or until the ice cream is firm. If you’re in a hurry, you can freeze it for a shorter period, but the longer it freezes, the creamier and firmer it will become. After 5 hours, your homemade ube ice cream is ready to serve!
Beginner Tips and Notes
Making ice cream at home is fun, but there are a few things to keep in mind to ensure your recipe turns out perfectly. Here are some helpful tips to make the process even easier:
1. Room Temperature Ingredients:
Make sure your heavy cream is cold, but your sweetened condensed milk and vanilla extract should be at room temperature. Cold condensed milk can make it harder to mix, so letting it warm up slightly will make the process smoother.
2. Don’t Overmix:
While it’s important to whip the cream to stiff peaks, be careful not to overwhip it. Overwhipping will cause the cream to turn into butter, which will not create the smooth and creamy texture you’re aiming for.
3. Adjust Sweetness:
If you prefer your ice cream to be sweeter, feel free to add more sweetened condensed milk or a little sugar to taste. Keep in mind that the ube flavor might become more subtle as you add sweetness, so taste as you go.
4. Freezing Time:
To avoid ice crystals, make sure the ice cream is covered tightly before freezing. If you don’t have plastic wrap, you can use wax paper or a lid for your container.
5. Ube Powder Substitution:
If you can’t find ube powder, you can opt for ube jam or ube purée. However, be aware that the texture might change slightly depending on the consistency of the jam or purée you use.
6. Storing Leftovers:
If you have leftover ice cream, store it in an airtight container in the freezer. Homemade ice cream can last up to a week or so, though it’s best when consumed within 5-7 days for optimal freshness.

Serving Suggestions
Ube ice cream is delightful on its own, but there are plenty of ways to elevate the dish for a more decadent treat. Here are a few ideas:
1. Serve in a Cone:
One of the simplest and most enjoyable ways to serve ube ice cream is in a cone. The combination of the crispy cone with the creamy, sweet ube ice cream is unbeatable.
2. Add Nuts for Crunch:
For added texture and flavor, serve your ube ice cream in a bowl with a sprinkle of chopped nuts. Pistachios work especially well, as their nutty flavor complements the creamy sweetness of the ube.
3. Drizzle with White Chocolate:
White chocolate and ube make an incredible pairing. Consider topping your ice cream with white chocolate chips or drizzling it with a little white chocolate syrup for a smooth, sweet contrast.
4. Top with Coconut Flakes:
For a traditional twist, sprinkle some toasted coconut flakes on top of your ube ice cream. This adds a tropical flavor that pairs beautifully with the ube’s earthiness.
5. Ube Glaze:
If you can’t get enough of the ube flavor, you can make a simple ube glaze to drizzle on top of your ice cream. This will intensify the ube taste and make the dessert even more indulgent.
Engagement Features
We hope this easy ube ice cream recipe inspires you to get creative in the kitchen! Making your own ice cream at home is a fun and rewarding experience, and the results are absolutely delicious. If you try this recipe, let us know how it turned out! Feel free to share your thoughts, tips, and any variations you made in the comments below. We’d love to hear about your experience and how you personalized this recipe to suit your taste.
Whether you’re making this ice cream for a special occasion or simply craving a sweet treat, we’re confident you’ll enjoy the process and the result. Don’t be afraid to experiment with different toppings or flavors. Ice cream is all about having fun and enjoying the creative process. So gather your ingredients, follow these simple steps, and treat yourself to a delightful, homemade Filipino-inspired dessert. Enjoy!