
When it comes to desserts, few options can match the versatility and charm of No-Bake Whipped Cream Mini Cakes. These bite-sized treats are light, creamy, and perfectly elegant, making them ideal for everything from casual get-togethers to formal events. Best of all, they don’t require an oven, which means you can whip them up quickly without breaking a sweat.
In this article, we’ll dive into the details of crafting these delightful mini cakes. From the ingredients you’ll need to expert tips for perfecting them, this guide will ensure your no-bake cakes are as beautiful as they are delicious. Whether you’re a seasoned baker or a novice in the kitchen, these easy desserts are guaranteed to impress.
Print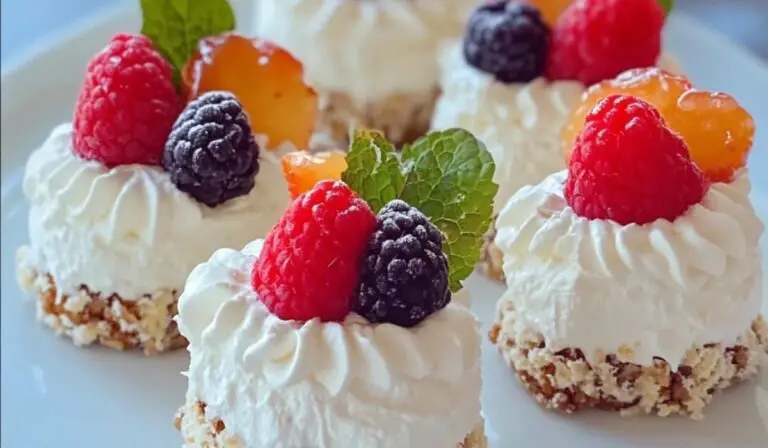
Easy and Elegant No-Bake Whipped Cream Mini Cakes: A Delightful Dessert for Every Occasion
Light, creamy, and irresistibly elegant, these No-Bake Whipped Cream Mini Cakes are the perfect dessert for any occasion! With a buttery graham cracker crust, luscious whipped cream layers, and your choice of fresh fruit or chocolate toppings, these mini cakes are as delicious as they are beautiful. Quick and easy to make, they require no oven, making them ideal for warm days or stress-free entertaining. Customize them to suit your taste and impress your guests with this simple yet stunning dessert!
- Total Time: 2 hours 20 minutes (includes 2 hours chilling time)
- Yield: 8 mini cakes 1x
Ingredients
For the Base:
- Graham Crackers or Digestive Biscuits: 1½ cups, finely crushed.
- Unsalted Butter: 5 tablespoons, melted, to bind the crust.
For the Whipped Cream Filling:
- Heavy Whipping Cream: 2 cups, chilled.
- Powdered Sugar: ⅓ cup, for sweetness.
- Vanilla Extract: 1 teaspoon, for flavor.
For the Layers and Toppings:
- Fresh fruit (strawberries, raspberries, blueberries, or kiwi).
- Chocolate shavings or drizzle.
- Crushed cookies or nuts.
- Edible flowers or sprinkles for decoration.
Tools Required
- Mixing bowls
- Electric mixer or stand mixer
- Food processor or rolling pin (to crush biscuits)
- Small round molds, cookie cutters, or ramekins
- Piping bag (optional, for precise cream application)
- Spatula or spoon for smoothing
Instructions
1. Prepare the Base
- Crush the graham crackers or digestive biscuits into fine crumbs using a food processor or by placing them in a zip-top bag and crushing with a rolling pin.
- In a mixing bowl, combine the crumbs with melted butter until the mixture resembles wet sand.
- Press the mixture into the bottom of your chosen molds or ramekins to form the base layer. Use a spoon or the bottom of a glass to press it down firmly.
- Place the molds in the refrigerator for at least 15 minutes to set.
2. Whip the Cream
- In a chilled mixing bowl, whip the heavy cream using an electric mixer on medium-high speed until it begins to thicken.
- Add powdered sugar and vanilla extract, then continue whipping until stiff peaks form. Be careful not to overwhip, as the cream can turn grainy.
3. Assemble the Mini Cakes
- Remove the molds with the set crust from the refrigerator.
- Spoon or pipe a layer of whipped cream over the crust.
- Add a layer of fresh fruit, chocolate shavings, or crushed cookies for texture and flavor.
- Repeat the process, layering whipped cream and toppings until the molds are full or you achieve the desired height.
4. Chill and Set
- Place the assembled mini cakes in the refrigerator for at least 2 hours to allow the layers to set and meld together. For best results, chill overnight.
5. Decorate and Serve
- Carefully remove the mini cakes from their molds or ramekins. If using cookie cutters, gently slide them out using a knife or spatula.
- Garnish with additional whipped cream, fresh fruit, chocolate drizzle, or edible flowers.
- Serve chilled and enjoy the creamy, light perfection!
- Prep Time: 20 minutes
- Cook Time: 0 minutes (no baking required)
Why No-Bake Whipped Cream Mini Cakes Are a Perfect Choice
No-bake desserts have gained popularity for their simplicity and ease, and no-bake whipped cream mini cakes are no exception. Here’s why they’re a crowd favorite:
- Time-Saving: With no oven required, these cakes come together in a fraction of the time it takes to bake traditional cakes.
- Elegant Presentation: Their petite size and layered design make them visually appealing and perfect for special occasions.
- Customizable: From flavors to toppings, you can tailor these cakes to suit any taste or theme.
- Light and Airy: The whipped cream filling keeps them light, making them an excellent choice for warmer days or when you want something less rich.
Ingredients and Tools for No-Bake Whipped Cream Mini Cakes
Ingredients
For the Base:
- Graham Crackers or Digestive Biscuits: 1½ cups, finely crushed.
- Unsalted Butter: 5 tablespoons, melted, to bind the crust.
For the Whipped Cream Filling:
- Heavy Whipping Cream: 2 cups, chilled.
- Powdered Sugar: ⅓ cup, for sweetness.
- Vanilla Extract: 1 teaspoon, for flavor.
For the Layers and Toppings:
- Fresh fruit (strawberries, raspberries, blueberries, or kiwi).
- Chocolate shavings or drizzle.
- Crushed cookies or nuts.
- Edible flowers or sprinkles for decoration.
Tools Required
- Mixing bowls
- Electric mixer or stand mixer
- Food processor or rolling pin (to crush biscuits)
- Small round molds, cookie cutters, or ramekins
- Piping bag (optional, for precise cream application)
- Spatula or spoon for smoothing
Step-by-Step Guide to Making No-Bake Whipped Cream Mini Cakes
1. Prepare the Base
- Crush the graham crackers or digestive biscuits into fine crumbs using a food processor or by placing them in a zip-top bag and crushing with a rolling pin.
- In a mixing bowl, combine the crumbs with melted butter until the mixture resembles wet sand.
- Press the mixture into the bottom of your chosen molds or ramekins to form the base layer. Use a spoon or the bottom of a glass to press it down firmly.
- Place the molds in the refrigerator for at least 15 minutes to set.
2. Whip the Cream
- In a chilled mixing bowl, whip the heavy cream using an electric mixer on medium-high speed until it begins to thicken.
- Add powdered sugar and vanilla extract, then continue whipping until stiff peaks form. Be careful not to overwhip, as the cream can turn grainy.
3. Assemble the Mini Cakes
- Remove the molds with the set crust from the refrigerator.
- Spoon or pipe a layer of whipped cream over the crust.
- Add a layer of fresh fruit, chocolate shavings, or crushed cookies for texture and flavor.
- Repeat the process, layering whipped cream and toppings until the molds are full or you achieve the desired height.
4. Chill and Set
- Place the assembled mini cakes in the refrigerator for at least 2 hours to allow the layers to set and meld together. For best results, chill overnight.
5. Decorate and Serve
- Carefully remove the mini cakes from their molds or ramekins. If using cookie cutters, gently slide them out using a knife or spatula.
- Garnish with additional whipped cream, fresh fruit, chocolate drizzle, or edible flowers.
- Serve chilled and enjoy the creamy, light perfection!
Tips for Perfect No-Bake Whipped Cream Mini Cakes
Even the simplest recipes can benefit from a few expert tricks. Here’s how to ensure your mini cakes turn out perfectly every time:
For the Base
- Firm Crust: Press the crumb mixture firmly into the molds to prevent it from crumbling during assembly.
- Add Flavor: Mix a pinch of cinnamon or cocoa powder into the crust for an extra layer of flavor.
For the Whipped Cream
- Chill Everything: Ensure the cream, bowl, and beaters are well-chilled before whipping to achieve the best consistency.
- Stabilize: For longer-lasting whipped cream, add a tablespoon of powdered gelatin dissolved in water to the mixture.
For Assembly
- Neat Layers: Use a piping bag for clean, even layers of whipped cream.
- Keep It Cool: Work quickly to prevent the whipped cream from softening.
Variations and Customizations
One of the best things about no-bake whipped cream mini cakes is their versatility. Here are some ideas to customize your cakes:
Flavor Variations
- Chocolate Delight: Add cocoa powder or melted chocolate to the whipped cream for a rich, chocolatey version.
- Citrus Twist: Fold in lemon or orange zest for a refreshing flavor.
- Coffee Infusion: Mix in a teaspoon of instant coffee or espresso powder for a mocha-inspired dessert.
Presentation Ideas
- Layered Jars: Assemble the mini cakes in mason jars for a rustic, portable option.
- Heart-Shaped Molds: Use heart-shaped cookie cutters for romantic occasions.
- Themed Toppings: Match your decorations to the event, such as pastel sprinkles for Easter or gold flakes for a luxurious touch.
Dietary Modifications
- Gluten-Free: Use gluten-free cookies or biscuits for the crust.
- Vegan Option: Replace heavy cream with coconut cream and use plant-based butter.
Serving and Storage Suggestions
Serving
- Serve these mini cakes chilled for the best flavor and texture.
- Pair them with tea, coffee, or a light dessert wine for an elegant finish to any meal.
Storage
- Refrigeration: Store in an airtight container in the refrigerator for up to 3 days.
- Freezing: Freeze the assembled mini cakes (without fresh fruit toppings) for up to 1 month. Thaw in the refrigerator before serving.
Why You’ll Love No-Bake Whipped Cream Mini Cakes
These no-bake mini cakes are more than just a dessert—they’re a stress-free way to elevate any occasion. Their light, creamy texture and endless customization options make them a go-to recipe for everything from casual dinners to grand celebrations. Plus, their no-bake nature means you can enjoy them year-round without worrying about heating up your kitchen.
Frequently Asked Questions
Can I Make These Mini Cakes Ahead of Time?
Absolutely! These cakes taste even better after chilling overnight, making them perfect for prepping in advance.
What If I Don’t Have Molds or Ramekins?
You can use cupcake liners in a muffin tin, small bowls, or even assemble the layers in glasses for a parfait-style dessert.
How Do I Remove the Cakes from the Molds?
Run a warm knife or damp cloth around the edges of the mold to loosen the cakes before gently sliding them out.
Final Thoughts
Easy and elegant, No-Bake Whipped Cream Mini Cakes are the perfect dessert for any occasion. Their simple preparation, stunning presentation, and customizable flavors make them a must-try for dessert lovers of all skill levels. Whether you’re serving them at a party or enjoying them as a sweet treat at home, these mini cakes are sure to impress.
So, gather your ingredients, let your creativity shine, and whip up a batch of these delightful no-bake mini cakes. They’re guaranteed to leave everyone asking for seconds! 🎂✨
4o