Springtime gatherings often call for something sweet, colorful, and festive. When I first started hosting Easter brunches, I was overwhelmed by the idea of crafting a picture-perfect dessert. I wanted something that looked impressive but was easy enough for my beginner cooking skills at the time. That is when I found the Easter Dirt Cake, a delightful no-bake recipe that quickly became a family favorite.
Print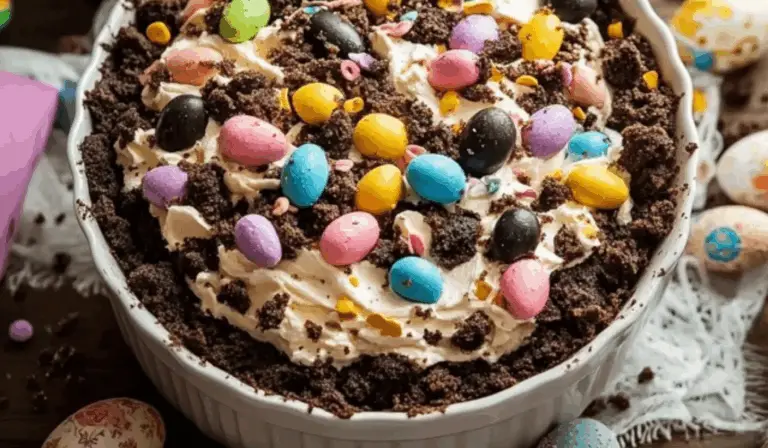
Easter Dirt Cake Casserole: A Simple and Festive No-Bake Dessert for Beginners
Easter Dirt Cake Casserole 🐰🌸🍰 — the ultimate no-bake treat for beginner bakers! 🎉🌼 Layers of creamy pudding, crushed cookies, and festive Easter candies come together in this fun, colorful dessert. 🥄💛 Perfect for parties, family gatherings, or just celebrating springtime joy! 🌷✨ Easy to make, impossible to resist!
- Total Time: 2 hours 15 minutes (including chilling time)
- Yield: 10–12 servings 1x
Ingredients
- Oreo Cookies (14 oz package): Crushed to create the crunchy base and topping
- Cream Cheese (8 oz, softened): Adds richness and slight tang to balance the sweetness
- Unsalted Butter (¼ cup, softened): Helps create a smooth, creamy texture
- Powdered Sugar (1 cup): Sweetens the cream cheese mixture without graininess
- Instant Vanilla Pudding Mix (3.4 oz package): Gives lightness and fluff to the filling
- Cold Milk (2 cups): Needed to set the pudding properly
- Whipped Topping (such as Cool Whip) (8 oz, thawed): Provides airy creaminess
- Pastel-Colored Candy-Coated Chocolates (1 cup, such as M&M’s): Adds color and crunch
- Mini Oreo Cookies (½ cup): For decorative topping
Instructions
1. Prepare the Cookie Base
- Crush the Oreos: Place the Oreo cookies in a food processor and pulse until finely crushed. Alternatively, place them in a zip-top bag and crush with a rolling pin for a more rustic texture.
- Reserve Some for Topping: Scoop out about ½ cup of crushed Oreos and set aside for later.
- Layer the Base: Spread the remaining crushed Oreos evenly across the bottom of a 9×13-inch baking dish. Press lightly to form a stable base.
2. Make the Cream Cheese Layer
- Blend Cream Cheese, Butter, and Sugar: In a medium mixing bowl, beat the softened cream cheese, unsalted butter, and powdered sugar together until smooth and creamy. Use a handheld or stand mixer for best results.
- Fold in Whipped Topping: Gently fold the thawed whipped topping into the cream cheese mixture. Be careful not to overmix; you want to keep the mixture light and fluffy.
3. Prepare the Pudding Mixture
- Mix Pudding and Milk: In a separate bowl, whisk together the instant vanilla pudding mix and cold milk until thickened, about 2 minutes.
- Let It Set: Allow the pudding to sit for about 5 minutes. This will help it firm up slightly, making it easier to combine.
4. Combine Fillings
- Blend Together: Gently fold the thickened pudding into the cream cheese and whipped topping mixture. Stir carefully until fully incorporated and smooth.
5. Assemble the Cake
- Spread the Filling: Carefully spread the creamy pudding mixture over the Oreo base in the baking dish, smoothing out the top with a spatula.
- Add the Toppings: Sprinkle the reserved ½ cup of crushed Oreos evenly over the surface.
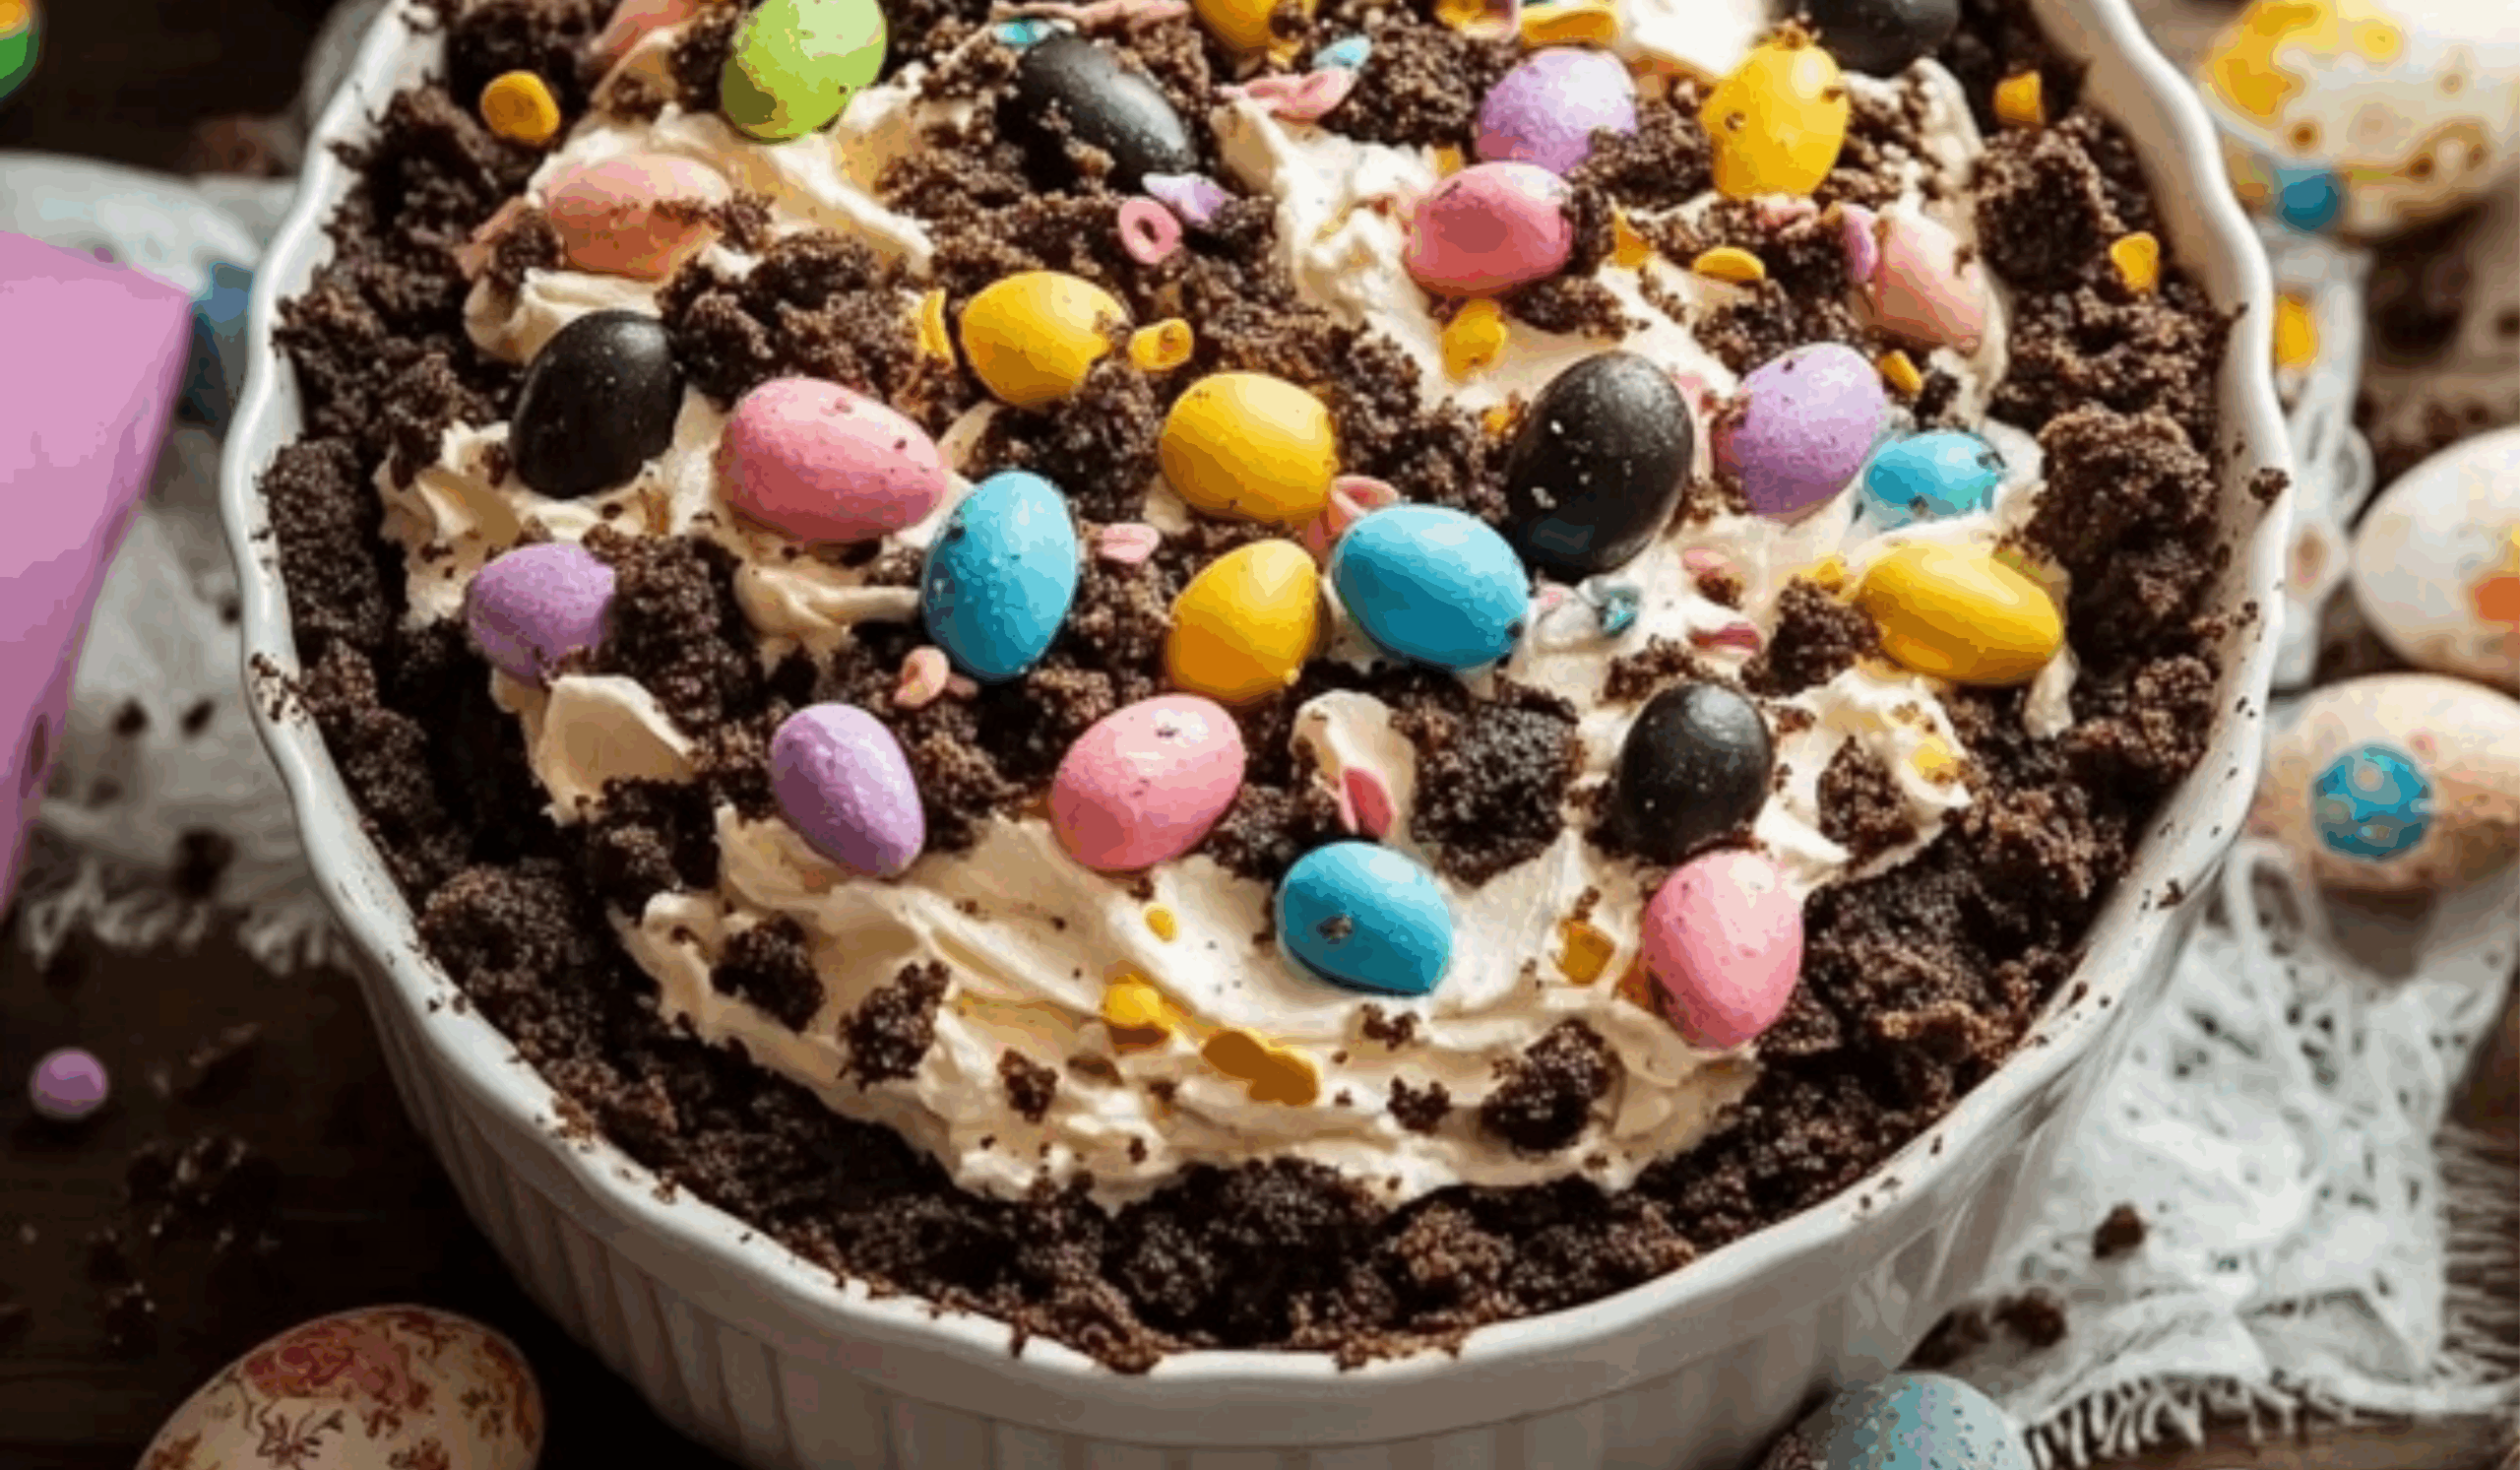
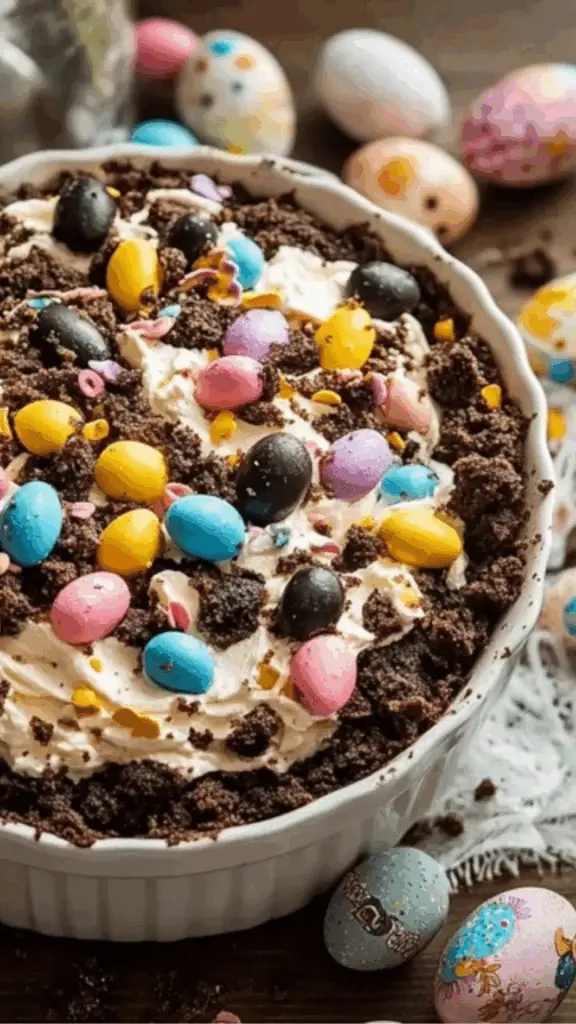
- Decorate: Scatter pastel-colored candy-coated chocolates and mini Oreos over the top for a festive, colorful finish.
6. Chill the Dessert
- Refrigerate: Cover the baking dish with plastic wrap or a lid and refrigerate for at least 2 hours. Chilling allows the layers to firm up and the flavors to meld together beautifully.
Notes
Common Troubleshooting
- Lumpy Filling: If the cream cheese layer is lumpy, it usually means the cream cheese or butter was too cold. Always soften both at room temperature before mixing.
- Runny Pudding: Make sure to use instant pudding mix, not cook-and-serve pudding. Also, cold milk is essential for proper thickening.
- Soggy Base: Crushing the Oreos finely helps create a tighter, less soggy base. Press lightly into the dish but do not overpack.
Helpful Kitchen Tips
- Prep in Advance: You can prepare the dessert a day ahead and store it covered in the refrigerator.
- Efficient Crushing: Crushing Oreos in a food processor saves time and ensures even crumbs.
- Layer Carefully: Spreading the filling slowly over the crumb base helps keep the layers neat and prevents crumbling.
- Prep Time: 15 minutes
This Easter Dirt Cake Casserole is perfect for beginners. It requires no oven, minimal ingredients, and very little prep time. Best of all, it is nearly impossible to mess up. Even if your mixing or layering is a little uneven, the dessert still looks charming and tastes delicious. With a crunchy Oreo base and a light, creamy filling, it is festive, flavorful, and forgiving for first-time dessert makers. Plus, it is a fun recipe to make with kids, making it a wonderful choice for family celebrations.
Ingredients and Preparation
Essential Ingredients
- Oreo Cookies (14 oz package): Crushed to create the crunchy base and topping
- Cream Cheese (8 oz, softened): Adds richness and slight tang to balance the sweetness
- Unsalted Butter (¼ cup, softened): Helps create a smooth, creamy texture
- Powdered Sugar (1 cup): Sweetens the cream cheese mixture without graininess
- Instant Vanilla Pudding Mix (3.4 oz package): Gives lightness and fluff to the filling
- Cold Milk (2 cups): Needed to set the pudding properly
- Whipped Topping (such as Cool Whip) (8 oz, thawed): Provides airy creaminess
- Pastel-Colored Candy-Coated Chocolates (1 cup, such as M&M’s): Adds color and crunch
- Mini Oreo Cookies (½ cup): For decorative topping
Ingredient Notes and Alternatives
- Cookies: Chocolate graham crackers can substitute Oreos if needed, though the flavor will be slightly different.
- Pudding Flavor: While vanilla is traditional, white chocolate or cheesecake pudding mixes also work beautifully.
- Whipped Topping: Homemade whipped cream can replace store-bought Cool Whip for a more natural version.
- Candy Alternatives: Jellybeans or chocolate eggs can replace candy-coated chocolates for a more Easter-themed look.
- Dairy-Free Option: Use plant-based milk and dairy-free whipped topping and cream cheese substitutes.
Preparing all your ingredients ahead of time makes the assembly smooth and stress-free. Measure and have everything ready before you start layering.
Step-by-Step Instructions
1. Prepare the Cookie Base
- Crush the Oreos: Place the Oreo cookies in a food processor and pulse until finely crushed. Alternatively, place them in a zip-top bag and crush with a rolling pin for a more rustic texture.
- Reserve Some for Topping: Scoop out about ½ cup of crushed Oreos and set aside for later.
- Layer the Base: Spread the remaining crushed Oreos evenly across the bottom of a 9×13-inch baking dish. Press lightly to form a stable base.
2. Make the Cream Cheese Layer
- Blend Cream Cheese, Butter, and Sugar: In a medium mixing bowl, beat the softened cream cheese, unsalted butter, and powdered sugar together until smooth and creamy. Use a handheld or stand mixer for best results.
- Fold in Whipped Topping: Gently fold the thawed whipped topping into the cream cheese mixture. Be careful not to overmix; you want to keep the mixture light and fluffy.
3. Prepare the Pudding Mixture
- Mix Pudding and Milk: In a separate bowl, whisk together the instant vanilla pudding mix and cold milk until thickened, about 2 minutes.
- Let It Set: Allow the pudding to sit for about 5 minutes. This will help it firm up slightly, making it easier to combine.
4. Combine Fillings
- Blend Together: Gently fold the thickened pudding into the cream cheese and whipped topping mixture. Stir carefully until fully incorporated and smooth.
5. Assemble the Cake
- Spread the Filling: Carefully spread the creamy pudding mixture over the Oreo base in the baking dish, smoothing out the top with a spatula.
- Add the Toppings: Sprinkle the reserved ½ cup of crushed Oreos evenly over the surface.
- Decorate: Scatter pastel-colored candy-coated chocolates and mini Oreos over the top for a festive, colorful finish.
6. Chill the Dessert
- Refrigerate: Cover the baking dish with plastic wrap or a lid and refrigerate for at least 2 hours. Chilling allows the layers to firm up and the flavors to meld together beautifully.
Beginner Tips and Notes
Common Troubleshooting
- Lumpy Filling: If the cream cheese layer is lumpy, it usually means the cream cheese or butter was too cold. Always soften both at room temperature before mixing.
- Runny Pudding: Make sure to use instant pudding mix, not cook-and-serve pudding. Also, cold milk is essential for proper thickening.
- Soggy Base: Crushing the Oreos finely helps create a tighter, less soggy base. Press lightly into the dish but do not overpack.
Helpful Kitchen Tips
- Prep in Advance: You can prepare the dessert a day ahead and store it covered in the refrigerator.
- Efficient Crushing: Crushing Oreos in a food processor saves time and ensures even crumbs.
- Layer Carefully: Spreading the filling slowly over the crumb base helps keep the layers neat and prevents crumbling.
Serving Suggestions
Easter Dirt Cake is a versatile dessert that pairs well with several springtime treats and beverages.
- Fresh Fruit: Serve with a bowl of fresh strawberries, blueberries, or raspberries to add a refreshing contrast to the rich dessert.
- Lighter Sides: A crisp green salad or a fruit salad on the side can help balance a heavier Easter meal.
- Beverage Pairings: Lightly sweetened iced tea, lemonade, or a crisp white wine complements the dessert well.
- Plating Tips: Serve scoops of the dirt cake in small cups or bowls for easy portion control and a neat presentation at parties.
Storage Tips
- Refrigeration: Store any leftovers covered in the refrigerator for up to 3 days.
- Freezing: While you can technically freeze Dirt Cake, it is best enjoyed fresh, as the texture may become icy and less creamy upon thawing.
- Portioning: Pre-slice the cake into squares before chilling if you plan to serve it at a gathering. It makes plating faster and keeps presentation tidy.
Engagement Features
There is something special about sharing homemade desserts with friends and family, especially when the recipe is as approachable and festive as this Easter Dirt Cake. Whether you are a beginner baker or someone just looking for a reliable no-bake option, this recipe invites creativity and celebration without stress.
If you try making this Easter Dirt Cake, I would love to hear how it turned out for you. Did you add your own creative twists with different toppings or candy? Maybe you involved your kids in decorating it. Share your experience in the comments below. Your feedback and ideas not only help other beginners but also make our cooking community stronger and more fun.