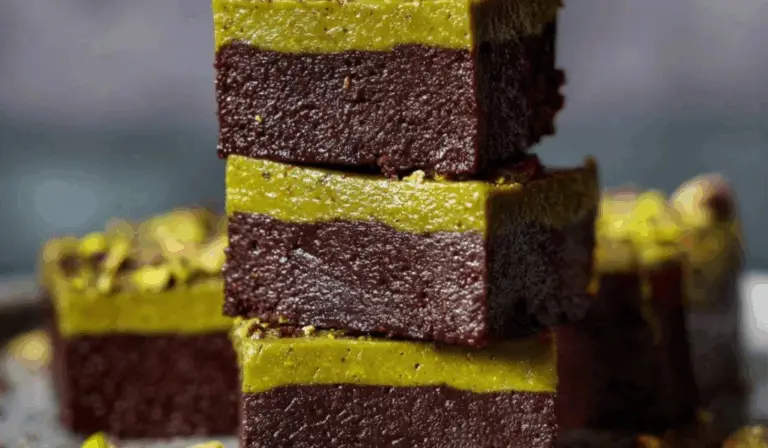
Ingredients
Scale
Main Ingredients
- 220 g Medjool dates, pitted
- If your dates are dry, soak them in warm water for 10 minutes and drain well before using.
- 150 g pistachio butter
- You’ll use some for the base and the rest for the creamy middle layer.
- 40 g unsweetened cocoa powder
- This gives the brownies their deep chocolate flavor.
- A pinch of fine sea salt
- Just enough to enhance flavor and balance the sweetness.
- 100 g dark chocolate, chopped
- Use high-quality dark chocolate (70% cocoa or more) for best results.
Optional Add-ins
- 2 teaspoons greens powder (optional)
- Adds a subtle sweet-earthy flavor and a bonus of vitamins and minerals.
- ¼ cup chopped pistachios (optional)
- Fold into the base mixture for added texture and crunch.
Equipment Needed
- Food processor or high-speed blender
- 22 × 12 cm loaf tin (or a small square/rectangular dish)
- Baking/parchment paper
- Small saucepan or microwave-safe bowl (for melting chocolate)
- Spatula or spoon for spreading layers
Prep Steps
- Line your loaf tin with parchment paper so the brownies are easy to remove once set.
- Make sure all ingredients are measured and ready before starting, especially if you’re working quickly or in a warm kitchen where chocolate may firm up fast.
Instructions
1. Blend the brownie base
- Place the pitted dates into the food processor and blend until a smooth paste begins to form.
- Add in 150 g of pistachio butter and unsweetened cocoa powder.
- Add the pinch of salt and blend again until everything is fully incorporated.
- Scrape down the sides as needed to ensure all ingredients are well combined.
2. Press the base into the tin
- Transfer the blended mixture to your prepared tin.
- Use the back of a spoon or spatula to press the mixture evenly into the base, making sure it’s compact and level.
- Chill the base layer in the freezer while you prepare the next step.
3. Make the pistachio layer
- In a bowl, mix the remaining pistachio butter with optional greens powder until smooth.
- Spread this mixture carefully over the chilled brownie base. Use a spatula to smooth the top evenly.
- Return the tin to the freezer for 1 to 2 hours, or until the pistachio layer is firm to the touch.
4. Prepare and add the chocolate topping
- Melt the chopped dark chocolate gently, either in a microwave (in 30-second increments) or using a double boiler on the stove.
- Once melted, pour the chocolate over the firm pistachio layer.
- Use a spoon or spatula to spread the chocolate evenly over the top.
5. Let the brownies set
- Allow the top layer to cool and harden at room temperature, or return the tin to the freezer for quicker setting (about 20–30 minutes).
- Once fully set, lift the entire block out of the tin using the parchment paper.
6. Slice and serve
- Use a sharp knife to cut the brownies into squares or bars.
- For clean cuts, wipe the knife between slices.
- Serve immediately or store as desired.
Notes
- Softening dates: Always soak your dates if they feel dry or firm. Soft dates help create a smoother, more cohesive base.
- Texture test: The base should stick together when pressed but shouldn’t be too wet. If it’s too sticky, add a teaspoon of cocoa. If too dry, add a teaspoon of water or more pistachio butter.
- Layering tip: Freeze between each step to make sure each layer sets firmly before adding the next.
- Melting chocolate: Don’t overheat it. Stir frequently and stop heating once it’s 80% melted. Residual heat will finish the job.
- Pistachio butter: If your pistachio butter is too runny, refrigerate it briefly before spreading the middle layer to avoid it mixing with the base.
- No greens powder? Skip it entirely. The flavor and texture will still be excellent.
- Nut-free alternative: Try sunflower seed butter for a different spin.
- Chocolate substitutes: You can also use vegan chocolate chips or mix in a teaspoon of coconut oil to make the topping smoother.
- Prep Time: 25 minutes