
If you’re looking for a quick and easy way to satisfy your craving for tacos without frying or a mess in the kitchen, this oven-baked chicken taco recipe is your next go-to dish. Perfectly crisp taco shells are loaded with juicy shredded chicken, a savory spice mix, and gooey melted cheese, then baked until golden brown. They’re perfect for busy weeknights, game day snacks, casual parties, or when you simply want to make dinner feel special without spending hours in the kitchen.
These tacos are a brilliant balance of simplicity and flavor. Everything is assembled and baked on a sheet pan, meaning fewer dishes and more time to enjoy the meal. You can also customize the toppings to suit different palates, from creamy avocado slices to tangy pickled onions or spicy jalapeños. This dish is a crowd-pleaser for both kids and adults and can be scaled up or down depending on how many mouths you need to feed.
Ingredients and Preparation
Main Ingredients:
- 2 cups shredded cooked chicken (rotisserie chicken or home-cooked works well)
- 1 tablespoon olive oil
- 1 small yellow onion, finely diced
- 1 packet taco seasoning (or 2 tablespoons homemade blend – see tip below)
- ½ cup tomato sauce or salsa
- 10–12 crunchy taco shells (store-bought or homemade)
- 2 cups shredded cheese (cheddar, Monterey Jack, or a blend)
Optional Toppings (for serving):
- Chopped fresh cilantro
- Sour cream or Greek yogurt
- Sliced jalapeños
- Diced avocado or guacamole
- Lime wedges
- Shredded lettuce
- Diced tomatoes or pico de gallo
Quick Prep Notes:
- Preheat oven to 400°F (200°C).
- Line a large baking sheet with foil or parchment for easy cleanup.
- Use pre-cooked chicken to make prep faster.
Step-by-Step Instructions
1. Prepare the Chicken Filling
- In a medium skillet, heat olive oil over medium heat.
- Add diced onion and sauté until softened and slightly translucent, about 4–5 minutes.
- Stir in shredded chicken and taco seasoning.
- Add tomato sauce or salsa, stir well to combine, and let the mixture simmer for 4–5 minutes to blend the flavors.
- Remove from heat and set aside.
2. Assemble the Tacos
- Stand the taco shells upright in a large baking dish or directly on a baking sheet lined with foil.
- If your shells don’t stay upright, crumple small balls of foil to help prop them up.
- Spoon a generous amount of the chicken mixture into each taco shell, filling them about halfway.
- Top each taco evenly with shredded cheese.
3. Bake Until Golden and Crispy
- Place the filled tacos in the preheated oven.
- Bake for 10–12 minutes, or until the cheese is melted and bubbly, and the shells are crisp.
4. Add Fresh Toppings and Serve
- Carefully remove tacos from the oven.
- Add your favorite toppings such as chopped cilantro, sour cream, avocado, or jalapeños.
- Serve warm with lime wedges on the side.
Beginner Tips and Notes
- Use rotisserie chicken: This saves cooking time and adds extra flavor. Simply shred the meat from a store-bought rotisserie chicken.
- Make your own taco seasoning: Mix 1 tsp chili powder, ½ tsp cumin, ½ tsp smoked paprika, ½ tsp garlic powder, ¼ tsp onion powder, ¼ tsp oregano, and a pinch of salt and pepper.
- Double the batch: These tacos reheat surprisingly well. Make a double batch and reheat leftovers in the oven for a quick lunch or next-day dinner.
- Crisp up shells before filling: If your taco shells are a bit stale or you like extra crunch, bake them empty for 3–5 minutes before filling.
- Don’t overstuff: Resist the urge to fill tacos to the top—overstuffing can make them soggy and harder to eat.
- Avoid soggy shells: Let the chicken mixture cool slightly before assembling the tacos so that moisture doesn’t soak the bottom of the shell.
- Make it spicier: Add a pinch of cayenne pepper or mix in diced green chilies if you love heat.
- Vegetarian variation: Substitute the chicken with canned black beans, pinto beans, or sautéed mushrooms for a meatless version.
- Cheese matters: Freshly shredded cheese melts better and gives a creamier texture than pre-shredded varieties.

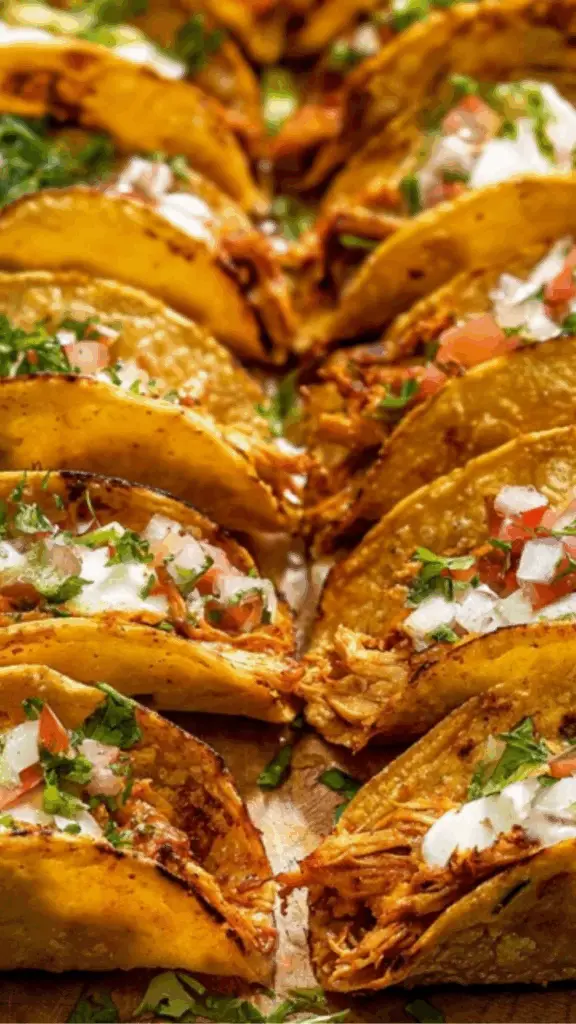
Crispy Oven-Baked Chicken Tacos with Melty Cheese and Flavorful Fillings
Taco night just got an upgrade! 🌮🔥 These Crispy Oven-Baked Chicken Tacos are stuffed with juicy seasoned chicken, melty cheese, and your favorite bold fillings—then baked to golden, crunchy perfection. 🧀🍗 No frying needed, just big flavor in every bite! Perfect for parties, weeknight dinners, or game-day snacks.
- Total Time: 27 minutes
- Yield: 10–12 tacos 1x
Ingredients
- 2 cups shredded cooked chicken (rotisserie chicken or home-cooked works well)
- 1 tablespoon olive oil
- 1 small yellow onion, finely diced
- 1 packet taco seasoning (or 2 tablespoons homemade blend – see tip below)
- ½ cup tomato sauce or salsa
- 10–12 crunchy taco shells (store-bought or homemade)
- 2 cups shredded cheese (cheddar, Monterey Jack, or a blend)
Optional Toppings (for serving):
- Chopped fresh cilantro
- Sour cream or Greek yogurt
- Sliced jalapeños
- Diced avocado or guacamole
- Lime wedges
- Shredded lettuce
- Diced tomatoes or pico de gallo
Quick Prep Notes:
- Preheat oven to 400°F (200°C).
- Line a large baking sheet with foil or parchment for easy cleanup.
- Use pre-cooked chicken to make prep faster.
Instructions
1. Prepare the Chicken Filling
-
In a medium skillet, heat olive oil over medium heat.
-
Add diced onion and sauté until softened and slightly translucent, about 4–5 minutes.
-
Stir in shredded chicken and taco seasoning.
-
Add tomato sauce or salsa, stir well to combine, and let the mixture simmer for 4–5 minutes to blend the flavors.
-
Remove from heat and set aside.
2. Assemble the Tacos
-
Stand the taco shells upright in a large baking dish or directly on a baking sheet lined with foil.
-
If your shells don’t stay upright, crumple small balls of foil to help prop them up.
-
Spoon a generous amount of the chicken mixture into each taco shell, filling them about halfway.
-
Top each taco evenly with shredded cheese.
3. Bake Until Golden and Crispy
-
Place the filled tacos in the preheated oven.
-
Bake for 10–12 minutes, or until the cheese is melted and bubbly, and the shells are crisp.
4. Add Fresh Toppings and Serve
-
Carefully remove tacos from the oven.
-
Add your favorite toppings such as chopped cilantro, sour cream, avocado, or jalapeños.
-
Serve warm with lime wedges on the side.
Notes
- Use rotisserie chicken: This saves cooking time and adds extra flavor. Simply shred the meat from a store-bought rotisserie chicken.
- Make your own taco seasoning: Mix 1 tsp chili powder, ½ tsp cumin, ½ tsp smoked paprika, ½ tsp garlic powder, ¼ tsp onion powder, ¼ tsp oregano, and a pinch of salt and pepper.
- Double the batch: These tacos reheat surprisingly well. Make a double batch and reheat leftovers in the oven for a quick lunch or next-day dinner.
- Crisp up shells before filling: If your taco shells are a bit stale or you like extra crunch, bake them empty for 3–5 minutes before filling.
- Don’t overstuff: Resist the urge to fill tacos to the top—overstuffing can make them soggy and harder to eat.
- Avoid soggy shells: Let the chicken mixture cool slightly before assembling the tacos so that moisture doesn’t soak the bottom of the shell.
- Make it spicier: Add a pinch of cayenne pepper or mix in diced green chilies if you love heat.
- Vegetarian variation: Substitute the chicken with canned black beans, pinto beans, or sautéed mushrooms for a meatless version.
- Cheese matters: Freshly shredded cheese melts better and gives a creamier texture than pre-shredded varieties.
- Prep Time: 15 minutes
- Cook Time: 12 minutes
Serving Suggestions
These oven-baked tacos are delicious on their own but can be elevated into a full meal with the right side dishes and garnishes. Here are some simple serving ideas:
- With a side of rice:
- Cilantro lime rice
- Mexican rice with tomato and onion
- Add beans:
- Refried beans
- Black beans tossed with cumin and garlic
- Fresh salads to balance the richness:
- Simple cucumber and tomato salad with lime
- Cabbage slaw with a tangy vinaigrette
- Dips for sharing:
- Classic guacamole
- Salsa roja or salsa verde
- Queso dip made with cheddar and cream
- For a fun family-style spread:
- Set up a taco bar with various toppings and let everyone customize their tacos.
To drink, serve these tacos with refreshing options like:
- Sparkling water with lime
- Mango juice
- Agua fresca (like watermelon or pineapple)
- Iced tea with lemon
And for dessert? A light finish like:
- Fresh fruit salad with honey-lime dressing
- Mini churros
- Baked cinnamon chips with whipped yogurt dip
Final Thought
This baked chicken taco recipe is proof that you don’t need a complicated process or deep-frying to create crispy, cheesy, satisfying tacos at home. It’s a kitchen-friendly recipe that streamlines the taco-making process while keeping all the fun and flavor. With minimal prep and a flexible list of toppings, it fits just as well into a family weeknight dinner as it does into a casual get-together with friends.
What makes this dish special is how approachable it is—even for beginner cooks. It invites creativity with toppings and add-ins, but never loses its appeal with its tried-and-true base of savory chicken and melted cheese in a crunchy shell. Whether you’re serving a crowd or feeding yourself, baked chicken tacos are a reliable hit.
Feel free to experiment with spice levels, cheese types, or even shell shapes (try boats or cups for a twist). Once you master the basics, this recipe will become a favorite in your rotation—a warm, crunchy, and flavor-packed meal that’s always welcome on the table.
Let these baked tacos inspire your next mealtime with their unbeatable combo of ease and taste.