
There’s something incredibly satisfying about a crispy, cheesy potato skin fresh out of the oven. The contrast between the crunchy shell, gooey melted cheese, and savory toppings makes this appetizer an irresistible favorite. Whether you’re hosting a party, looking for a game-day snack, or simply craving a comforting bite, homemade potato skins are an easy and delicious choice.
Print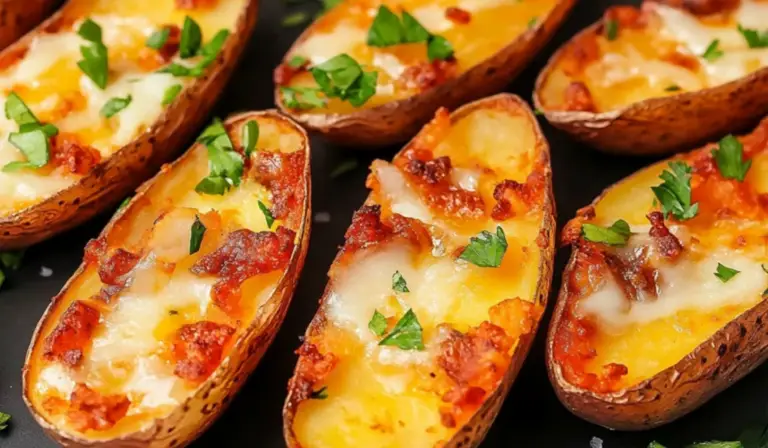
Crispy Loaded Potato Skins: A Beginner-Friendly Appetizer
These Crispy Loaded Potato Skins are the ultimate appetizer! Perfectly baked until golden and crunchy, then packed with gooey cheese, savory toppings, and a touch of seasoning. Whether it’s game night or a casual snack, these bites are pure comfort food bliss!
- Total Time: 1 hour 35 minutes
- Yield: 8 servings 1x
Ingredients
Potatoes
- 4 large russet potatoes, washed (or 5 Yukon potatoes)
- Olive oil
- Kosher salt
- Freshly ground black pepper
Butter Coating
- 2–3 tablespoons unsalted butter, melted
Toppings
- 1–2 cups shredded cheddar cheese (or more as needed)
- 4–6 slices cooked and crumbled beef bacon or shredded grilled chicken (about ½ cup)
Optional Garnishes
- Sour cream
- Sliced green onions
Instructions
1. Preheat the Oven
Set your oven to 400°F (200°C). Line a baking sheet with aluminum foil for easy cleanup.
2. Prepare the Potatoes
Give the potatoes a good scrub under running water to remove any dirt. Dry them completely with a paper towel to ensure the skins crisp up properly.
3. Bake the Potatoes
Place the whole potatoes on the baking sheet. Brush them all over with olive oil and sprinkle with kosher salt. This helps create a crispy exterior. Bake for about 1 hour, or until they are soft when pierced with a fork. Let them cool until they are safe to handle.
4. Scoop Out the Flesh
Increase the oven temperature to 450°F (230°C). Cut each potato in half lengthwise. Using a spoon, carefully scoop out the flesh, leaving about ¼ inch of potato inside the skin. This ensures the skins hold their shape and remain sturdy. Save the scooped-out potato flesh for another dish like mashed potatoes or potato pancakes.
5. Crisp the Potato Skins
Brush the inside and outside of the potato halves with melted butter. Sprinkle with salt and pepper. Place them back on the baking sheet, cut side down, and bake for 10 minutes. Flip them over and bake for another 5-10 minutes until the edges start to turn golden brown and crispy.
6. Add the Toppings
Sprinkle each potato half with shredded cheddar cheese and your choice of cooked, crumbled beef bacon or shredded grilled chicken. Return the skins to the oven for 3-5 minutes, or until the cheese is melted and bubbly.
7. Garnish and Serve
Remove from the oven and top with a dollop of sour cream and sliced green onions, if desired. Serve immediately while hot and crispy.
Notes
How to Get Extra Crispy Potato Skins
- Make sure to dry the potatoes completely after washing. Any excess moisture can make them soggy instead of crispy.
- Don’t skip the second bake after scooping out the flesh. This step helps the skins firm up and develop a crunchier texture.
- If you have an air fryer, you can crisp up the skins even more by air frying them at 400°F for 3-5 minutes after the final baking step.
What to Do if Your Potato Skins Aren’t Crispy
If your potato skins aren’t as crispy as you’d like, try baking them a little longer or brushing them with additional butter before the final crisping step.
How to Prevent Overcooking the Cheese
Cheese melts quickly, so keep an eye on the oven during the last few minutes to avoid overcooking. You want the cheese to be melted and gooey, not dry and crispy.
Can You Make These Ahead of Time?
Yes! You can bake and scoop out the potatoes ahead of time, then store them in the fridge for up to two days. When you’re ready to serve, brush with butter, crisp them up in the oven, add toppings, and bake until the cheese melts.
- Prep Time: 10 minutes
- Cook Time: 25 minutes (plus 1 hour for baking potatoes)
I still remember the first time I attempted to make potato skins at home. I was intimidated at first—how do you get them crispy? What if they turn out too dry? But after some trial and error, I realized that this dish is one of the most forgiving and beginner-friendly appetizers you can make. It requires minimal ingredients, and once you master a few simple techniques, you’ll have restaurant-quality potato skins every time.
This recipe is perfect for beginners because it requires no special kitchen skills, takes minimal effort, and is incredibly versatile. With just a few pantry staples and an oven, you can create a delicious appetizer that will impress your guests or serve as a satisfying snack. Plus, it’s a great way to use leftover baked potatoes, reducing food waste and maximizing flavor.
Ingredients and Preparation
Ingredients
Potatoes
- 4 large russet potatoes, washed (or 5 Yukon potatoes)
- Olive oil
- Kosher salt
- Freshly ground black pepper
Butter Coating
- 2-3 tablespoons unsalted butter, melted
Toppings
- 1-2 cups shredded cheddar cheese (or more as needed)
- 4-6 slices cooked and crumbled beef bacon or shredded grilled chicken (about ½ cup)
Optional Garnishes
- Sour cream
- Sliced green onions
Alternative Ingredient Suggestions
- Potatoes: Russet potatoes work best because their thick skins crisp up beautifully, but Yukon gold potatoes are a good alternative for a creamier texture.
- Butter: You can use olive oil instead of butter for a slightly lighter version.
- Cheese: While cheddar is the classic choice, you can experiment with other cheeses like Monterey Jack, mozzarella, or a smoky gouda.
- Meat Toppings: If you prefer a different protein, swap the beef bacon for shredded grilled chicken, ground turkey, or even sautéed mushrooms for a vegetarian option.
- Garnishes: Sour cream and green onions add a fresh contrast, but you can also try diced tomatoes, jalapeños, or a drizzle of ranch dressing.
Step-by-Step Instructions
1. Preheat the Oven
Set your oven to 400°F (200°C). Line a baking sheet with aluminum foil for easy cleanup.
2. Prepare the Potatoes
Give the potatoes a good scrub under running water to remove any dirt. Dry them completely with a paper towel to ensure the skins crisp up properly.
3. Bake the Potatoes
Place the whole potatoes on the baking sheet. Brush them all over with olive oil and sprinkle with kosher salt. This helps create a crispy exterior. Bake for about 1 hour, or until they are soft when pierced with a fork. Let them cool until they are safe to handle.
4. Scoop Out the Flesh
Increase the oven temperature to 450°F (230°C). Cut each potato in half lengthwise. Using a spoon, carefully scoop out the flesh, leaving about ¼ inch of potato inside the skin. This ensures the skins hold their shape and remain sturdy. Save the scooped-out potato flesh for another dish like mashed potatoes or potato pancakes.
5. Crisp the Potato Skins
Brush the inside and outside of the potato halves with melted butter. Sprinkle with salt and pepper. Place them back on the baking sheet, cut side down, and bake for 10 minutes. Flip them over and bake for another 5-10 minutes until the edges start to turn golden brown and crispy.
6. Add the Toppings
Sprinkle each potato half with shredded cheddar cheese and your choice of cooked, crumbled beef bacon or shredded grilled chicken. Return the skins to the oven for 3-5 minutes, or until the cheese is melted and bubbly.
7. Garnish and Serve
Remove from the oven and top with a dollop of sour cream and sliced green onions, if desired. Serve immediately while hot and crispy.
Beginner Tips and Notes
How to Get Extra Crispy Potato Skins
- Make sure to dry the potatoes completely after washing. Any excess moisture can make them soggy instead of crispy.
- Don’t skip the second bake after scooping out the flesh. This step helps the skins firm up and develop a crunchier texture.
- If you have an air fryer, you can crisp up the skins even more by air frying them at 400°F for 3-5 minutes after the final baking step.
What to Do if Your Potato Skins Aren’t Crispy
If your potato skins aren’t as crispy as you’d like, try baking them a little longer or brushing them with additional butter before the final crisping step.
How to Prevent Overcooking the Cheese
Cheese melts quickly, so keep an eye on the oven during the last few minutes to avoid overcooking. You want the cheese to be melted and gooey, not dry and crispy.
Can You Make These Ahead of Time?
Yes! You can bake and scoop out the potatoes ahead of time, then store them in the fridge for up to two days. When you’re ready to serve, brush with butter, crisp them up in the oven, add toppings, and bake until the cheese melts.

Serving Suggestions
Perfect Pairings
Potato skins are a great appetizer, but they can also be served as part of a larger meal. Here are a few great pairings:
- Dipping Sauces: Serve with ranch dressing, barbecue sauce, or a spicy sriracha mayo for extra flavor.
- Soup and Salad: Pair with a bowl of warm tomato soup or a fresh garden salad for a balanced meal.
- Grilled Meats: These potato skins go well with grilled chicken, steak, or even a simple veggie stir-fry.
How to Store and Reheat Leftovers
- Refrigeration: Store leftover potato skins in an airtight container in the refrigerator for up to 3 days.
- Reheating in the Oven: Preheat the oven to 375°F (190°C) and bake for 10-15 minutes until heated through.
- Reheating in the Air Fryer: Air fry at 375°F for 5-7 minutes for a crispier finish.
- Microwave Method: While not ideal, you can microwave them for 30-60 seconds, but they may lose some crispiness.
Conclusion
Making homemade potato skins is a rewarding and simple process, perfect for beginner cooks who want to impress their guests with minimal effort. With crispy edges, melted cheese, and flavorful toppings, this dish is guaranteed to be a hit at any gathering. Plus, the recipe is versatile, allowing you to customize the toppings to suit your preferences.
If you’ve never made potato skins before, this is the perfect time to try. Once you get the hang of it, you’ll see just how easy and delicious homemade appetizers can be. Give this recipe a go, and don’t forget to share your experience in the comments—what toppings did you try? Did you discover any new flavor combinations? Happy cooking!