There’s something deeply satisfying about biting into a piece of crispy, flavorful chicken. It brings back memories of family dinners, weekend gatherings, and classic comfort food. Traditionally, achieving that perfect crunch means deep-frying, but for beginners, frying can be daunting—not to mention the extra oil and mess involved. That’s where this cornflake-crusted baked chicken comes in.
Print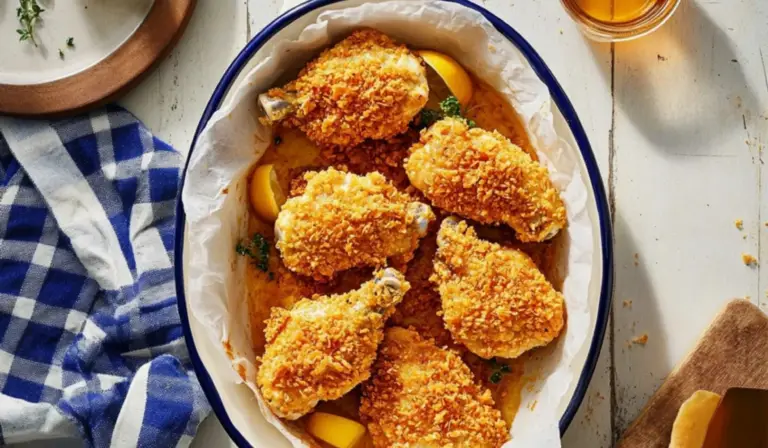
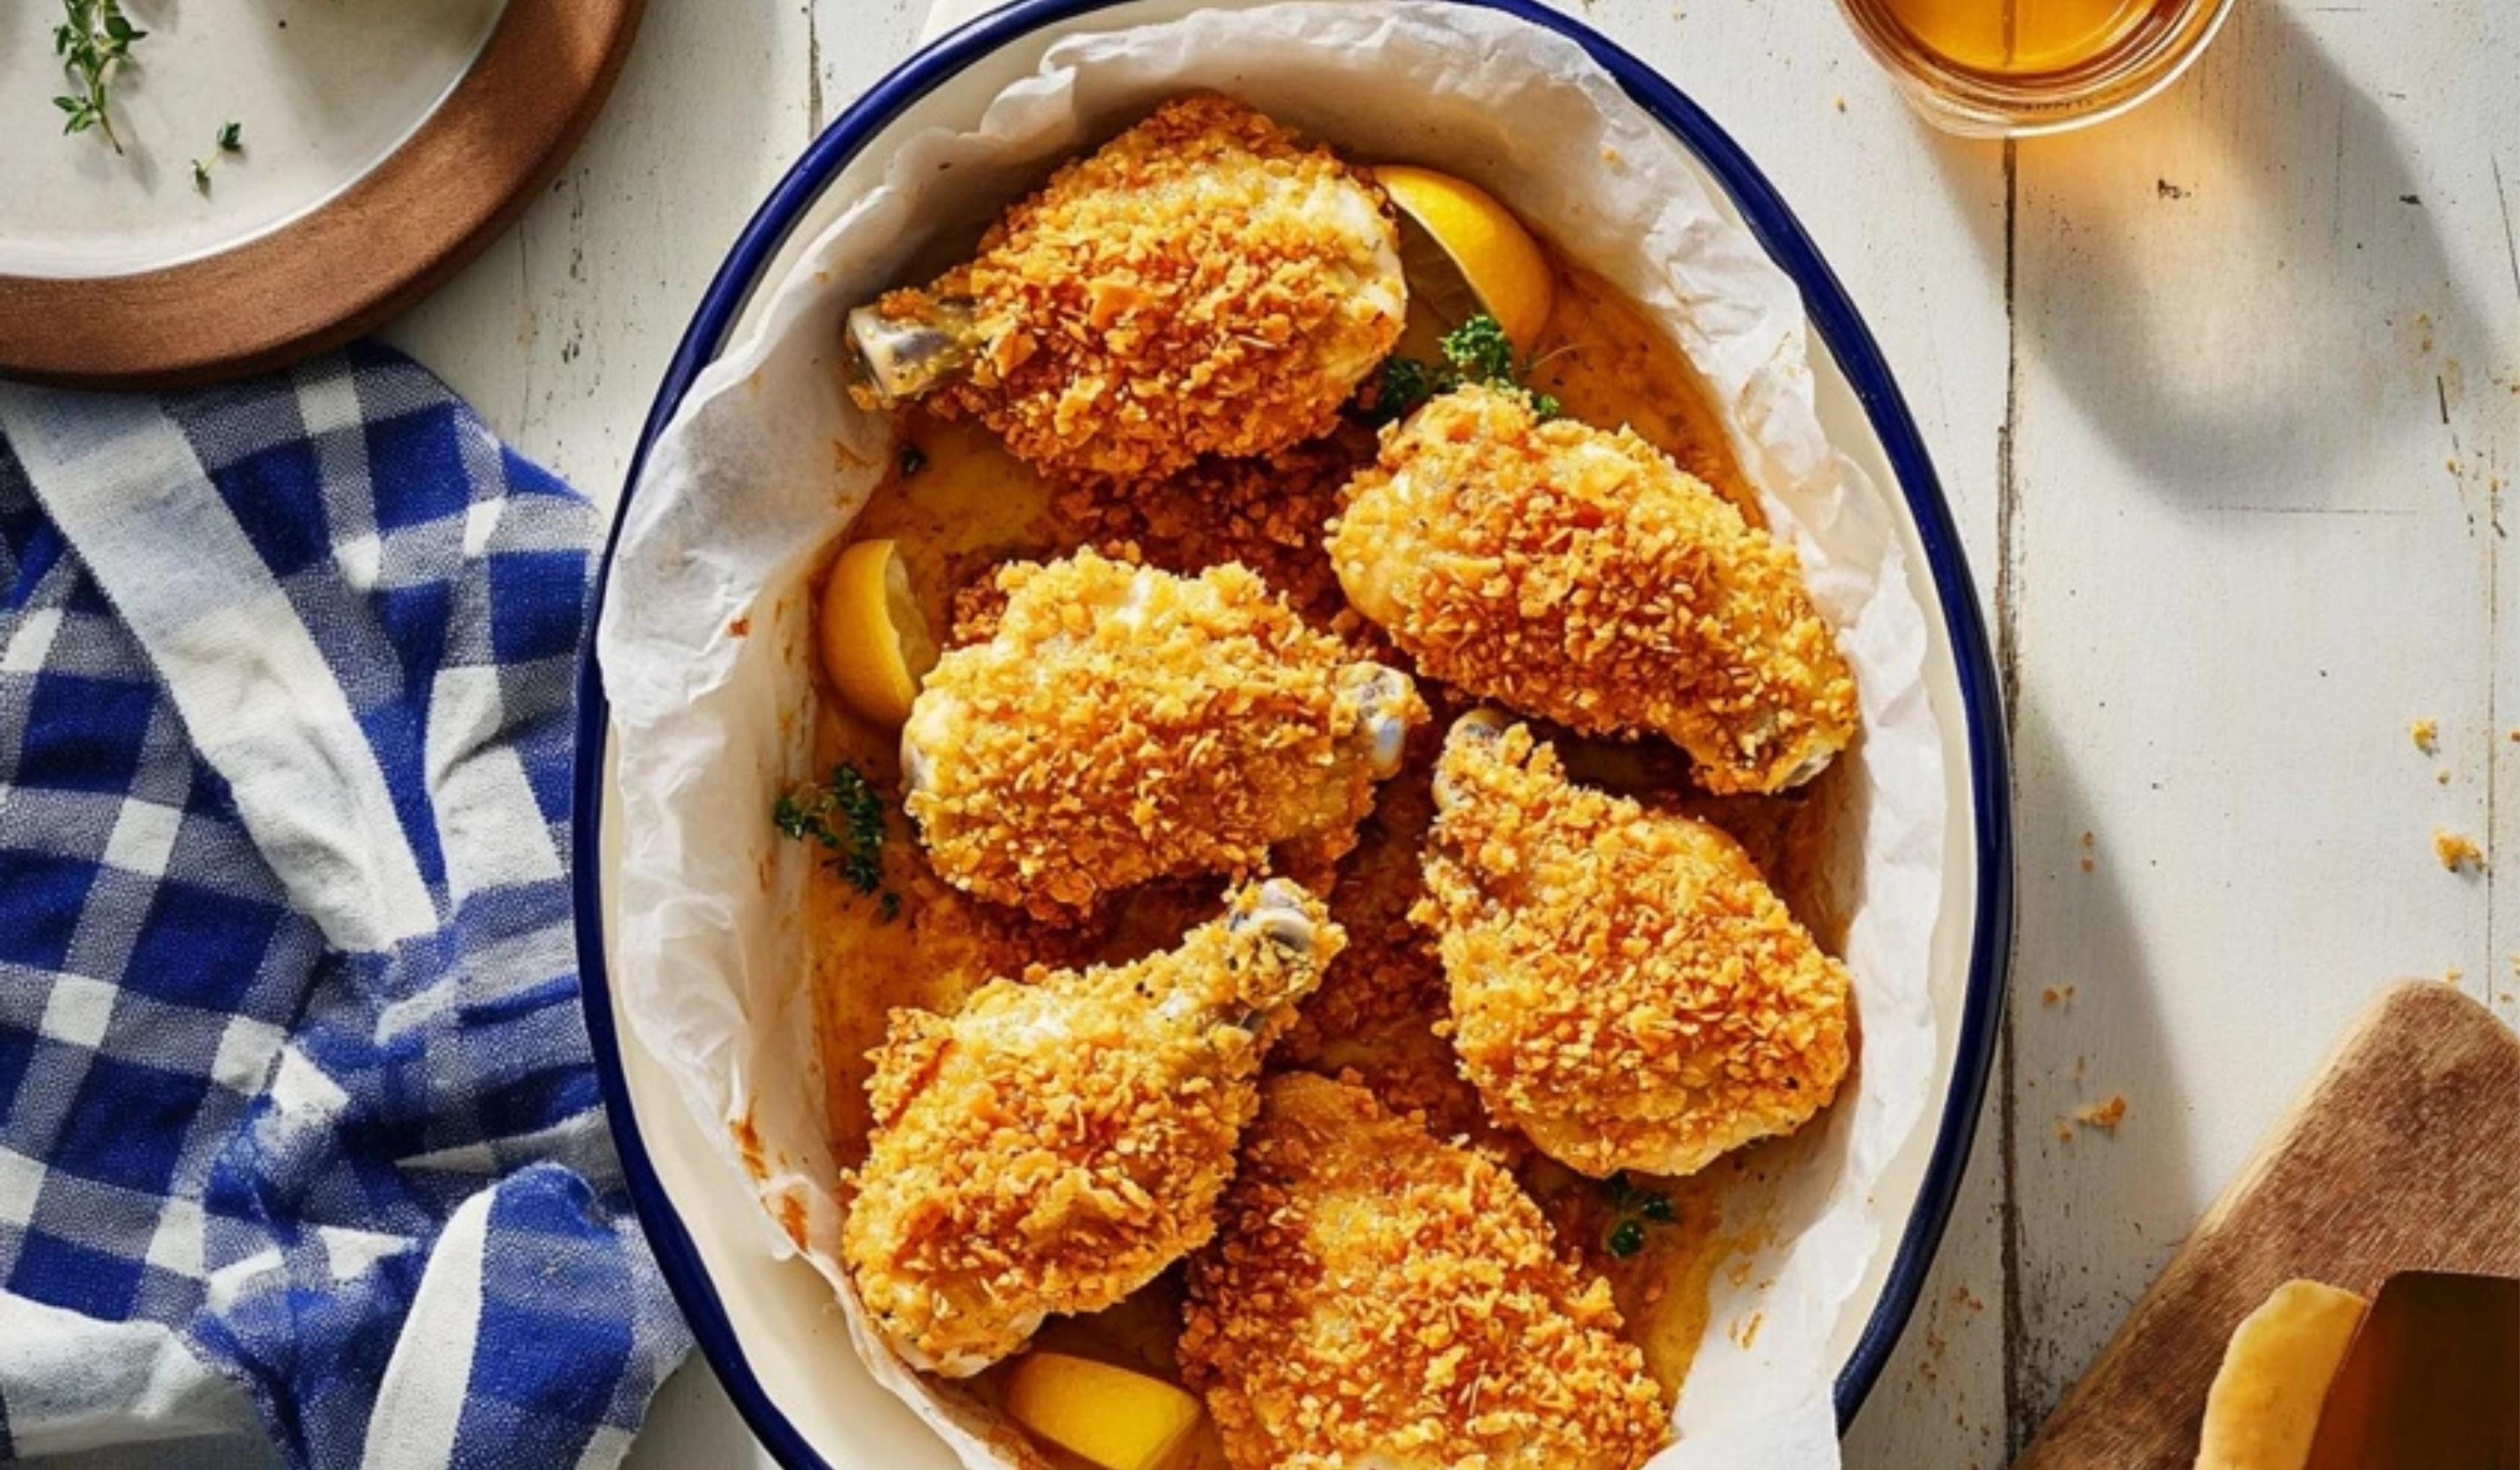
Cornflake-Crusted Baked Chicken: A Crispy Delight for Beginner Cooks
Skip the fryer and enjoy ultra-crispy Cornflake-Crusted Baked Chicken! With a golden, crunchy coating and juicy, tender inside, this easy recipe is perfect for beginners looking for a healthier way to enjoy crispy chicken.
- Total Time: 57 minutes
- Yield: 4 servings 1x
Ingredients
- 1 teaspoon garlic powder
- 2 ½ cups buttermilk, divided
- 1 teaspoon celery seed, divided
- ½ teaspoon cayenne pepper, plus a pinch, divided (adjust for spice preference)
- Kosher salt and freshly ground black pepper, to taste
- 4 small chicken drumsticks, skin removed
- 4 small bone-in chicken thighs, skin removed
- 1 cup all-purpose flour
- 4 cups cornflakes cereal, crushed
- Sliced dill pickles, for serving
Instructions
Step 1: Marinate the Chicken
- In a large bowl, whisk together 1 ½ cups buttermilk, garlic powder, ½ teaspoon celery seed, ½ teaspoon cayenne pepper, and salt.
- Add the chicken drumsticks and thighs, making sure each piece is fully coated.
- Cover the bowl and refrigerate for at least 30 minutes. This step helps the chicken stay moist while allowing the flavors to develop. If you have extra time, marinating for up to 8 hours will enhance the taste even more.
Step 2: Prepare the Breading Stations
- Preheat the oven to 425°F (220°C).
- Line a large rimmed baking sheet with heavy-duty foil and place a wire rack on top. This setup allows air to circulate around the chicken, helping it bake evenly and stay crispy.
- Set up three separate bowls:
- Bowl 1: Combine flour, a pinch of cayenne pepper, the remaining ½ teaspoon celery seed, salt, and black pepper.
- Bowl 2: Pour the remaining 1 cup of buttermilk and season it with salt and pepper.
- Bowl 3: Place crushed cornflakes in the final bowl.
Step 3: Coat the Chicken
- Remove the chicken from the marinade, allowing any excess buttermilk to drip off. Discard the marinade.
- Dredge each piece of chicken in the flour mixture, coating it evenly.
- Dip it into the buttermilk, ensuring the entire surface is moistened.
- Press the chicken into the crushed cornflakes, pressing gently to help the coating adhere.
- Arrange the coated chicken pieces on the prepared baking rack, ensuring they do not touch.
Step 4: Bake the Chicken
- Place the baking sheet in the preheated oven and bake for 25–27 minutes, or until the chicken reaches an internal temperature of 165°F (75°C) when tested with a meat thermometer.
- If the coating is browning too quickly, loosely cover the chicken with foil for the last 10 minutes.
Step 5: Serve and Enjoy
- Let the chicken rest for 5 minutes before serving.
- Serve hot with sliced dill pickles and your favorite side dishes.
Notes
How to Tell If the Chicken is Cooked Through
- The easiest and safest way to check is by using a meat thermometer. Insert it into the thickest part of the chicken—when it reads 165°F (75°C), it’s done.
- If you don’t have a thermometer, slice into a piece—the juices should run clear, and the meat should be opaque with no pink inside.
Troubleshooting Tips
- If the coating falls off: Make sure the chicken is properly dredged in the flour before dipping in buttermilk. Press the cornflakes firmly onto the chicken to help them stick.
- If the chicken browns too quickly: Cover loosely with foil and continue baking.
- If the chicken isn’t crispy enough: Ensure your oven is fully preheated before baking, and use a wire rack to allow air circulation.
Kitchen Efficiency Tips
- Crushing the Cornflakes: Place them in a zip-top bag and use a rolling pin to crush them easily.
- Prepping in Advance: You can marinate the chicken overnight for deeper flavor.
- Prep Time: 30 minutes
- Cook Time: 27 minutes
This recipe offers the best of both worlds: the crunch and texture of fried chicken but with the ease and health benefits of baking. The secret? A coating of crushed cornflakes that turns golden and crisp in the oven. It’s a foolproof way to create a delicious, satisfying meal without needing advanced cooking skills or special equipment.
Perfect for beginner cooks, this recipe is straightforward, requires minimal ingredients, and eliminates the guesswork of frying. Whether you’re making dinner for your family or experimenting in the kitchen for the first time, this dish is a great starting point. Plus, it’s versatile—pair it with your favorite sides or sauces to customize the flavors to your liking.
Now, let’s dive into the recipe, breaking it down step by step so that anyone can master it.
Ingredients and Preparation
Ingredients (Serves 4)
- 1 teaspoon garlic powder
- 2 ½ cups buttermilk, divided
- 1 teaspoon celery seed, divided
- ½ teaspoon cayenne pepper, plus a pinch, divided (adjust for spice preference)
- Kosher salt and freshly ground black pepper, to taste
- 4 small chicken drumsticks, skin removed
- 4 small bone-in chicken thighs, skin removed
- 1 cup all-purpose flour
- 4 cups cornflakes cereal, crushed
- Sliced dill pickles, for serving
Alternative Ingredient Suggestions
- Buttermilk Substitute: If you don’t have buttermilk, you can mix 2 ½ cups of milk with 2 tablespoons of lemon juice or white vinegar. Let it sit for 5–10 minutes before using.
- Chicken Substitutes: You can use boneless, skinless chicken breasts or chicken tenders instead of drumsticks and thighs for a quicker cooking time.
- Spice Adjustments: If you prefer a milder version, reduce or omit the cayenne pepper. For extra heat, add a dash of smoked paprika or hot sauce to the buttermilk marinade.
- Gluten-Free Option: Use gluten-free all-purpose flour and gluten-free cornflakes to make this dish accessible to those with dietary restrictions.
Step-by-Step Instructions
Step 1: Marinate the Chicken
- In a large bowl, whisk together 1 ½ cups buttermilk, garlic powder, ½ teaspoon celery seed, ½ teaspoon cayenne pepper, and salt.
- Add the chicken drumsticks and thighs, making sure each piece is fully coated.
- Cover the bowl and refrigerate for at least 30 minutes. This step helps the chicken stay moist while allowing the flavors to develop. If you have extra time, marinating for up to 8 hours will enhance the taste even more.
Step 2: Prepare the Breading Stations
- Preheat the oven to 425°F (220°C).
- Line a large rimmed baking sheet with heavy-duty foil and place a wire rack on top. This setup allows air to circulate around the chicken, helping it bake evenly and stay crispy.
- Set up three separate bowls:
- Bowl 1: Combine flour, a pinch of cayenne pepper, the remaining ½ teaspoon celery seed, salt, and black pepper.
- Bowl 2: Pour the remaining 1 cup of buttermilk and season it with salt and pepper.
- Bowl 3: Place crushed cornflakes in the final bowl.
Step 3: Coat the Chicken
- Remove the chicken from the marinade, allowing any excess buttermilk to drip off. Discard the marinade.
- Dredge each piece of chicken in the flour mixture, coating it evenly.
- Dip it into the buttermilk, ensuring the entire surface is moistened.
- Press the chicken into the crushed cornflakes, pressing gently to help the coating adhere.
- Arrange the coated chicken pieces on the prepared baking rack, ensuring they do not touch.
Step 4: Bake the Chicken
- Place the baking sheet in the preheated oven and bake for 25–27 minutes, or until the chicken reaches an internal temperature of 165°F (75°C) when tested with a meat thermometer.
- If the coating is browning too quickly, loosely cover the chicken with foil for the last 10 minutes.
Step 5: Serve and Enjoy
- Let the chicken rest for 5 minutes before serving.
- Serve hot with sliced dill pickles and your favorite side dishes.
Beginner Tips and Notes
How to Tell If the Chicken is Cooked Through
- The easiest and safest way to check is by using a meat thermometer. Insert it into the thickest part of the chicken—when it reads 165°F (75°C), it’s done.
- If you don’t have a thermometer, slice into a piece—the juices should run clear, and the meat should be opaque with no pink inside.
Troubleshooting Tips
- If the coating falls off: Make sure the chicken is properly dredged in the flour before dipping in buttermilk. Press the cornflakes firmly onto the chicken to help them stick.
- If the chicken browns too quickly: Cover loosely with foil and continue baking.
- If the chicken isn’t crispy enough: Ensure your oven is fully preheated before baking, and use a wire rack to allow air circulation.
Kitchen Efficiency Tips
- Crushing the Cornflakes: Place them in a zip-top bag and use a rolling pin to crush them easily.
- Prepping in Advance: You can marinate the chicken overnight for deeper flavor.

Serving Suggestions
This crispy baked chicken pairs well with a variety of side dishes. Here are a few ideas:
Classic Pairings
- Mashed potatoes and gravy for a hearty meal.
- Coleslaw for a refreshing crunch.
- Corn on the cob for a touch of sweetness.
Healthier Sides
- Roasted vegetables such as carrots, broccoli, or Brussels sprouts.
- Quinoa or brown rice for a nutritious grain option.
- Mixed green salad with a light vinaigrette.
Sauce Pairings
- Honey mustard for a sweet and tangy contrast.
- Ranch dressing for a creamy dip.
- Spicy buffalo sauce for heat lovers.
Storing Leftovers
- Store leftovers in an airtight container in the refrigerator for up to 3 days.
- To reheat, bake at 350°F (175°C) for 10–15 minutes to maintain crispiness.
- Avoid microwaving, as it can make the coating soggy.
Conclusion
This cornflake-crusted baked chicken is a perfect recipe for beginner cooks who want to create a crispy, flavorful dish without the hassle of frying. With simple ingredients, easy-to-follow steps, and beginner-friendly techniques, it’s a great way to build confidence in the kitchen.
Whether you’re cooking for yourself, your family, or a group of friends, this dish is sure to impress. Try it out, experiment with different seasonings, and make it your own. If you enjoyed this recipe, let us know how it turned out. Happy cooking!