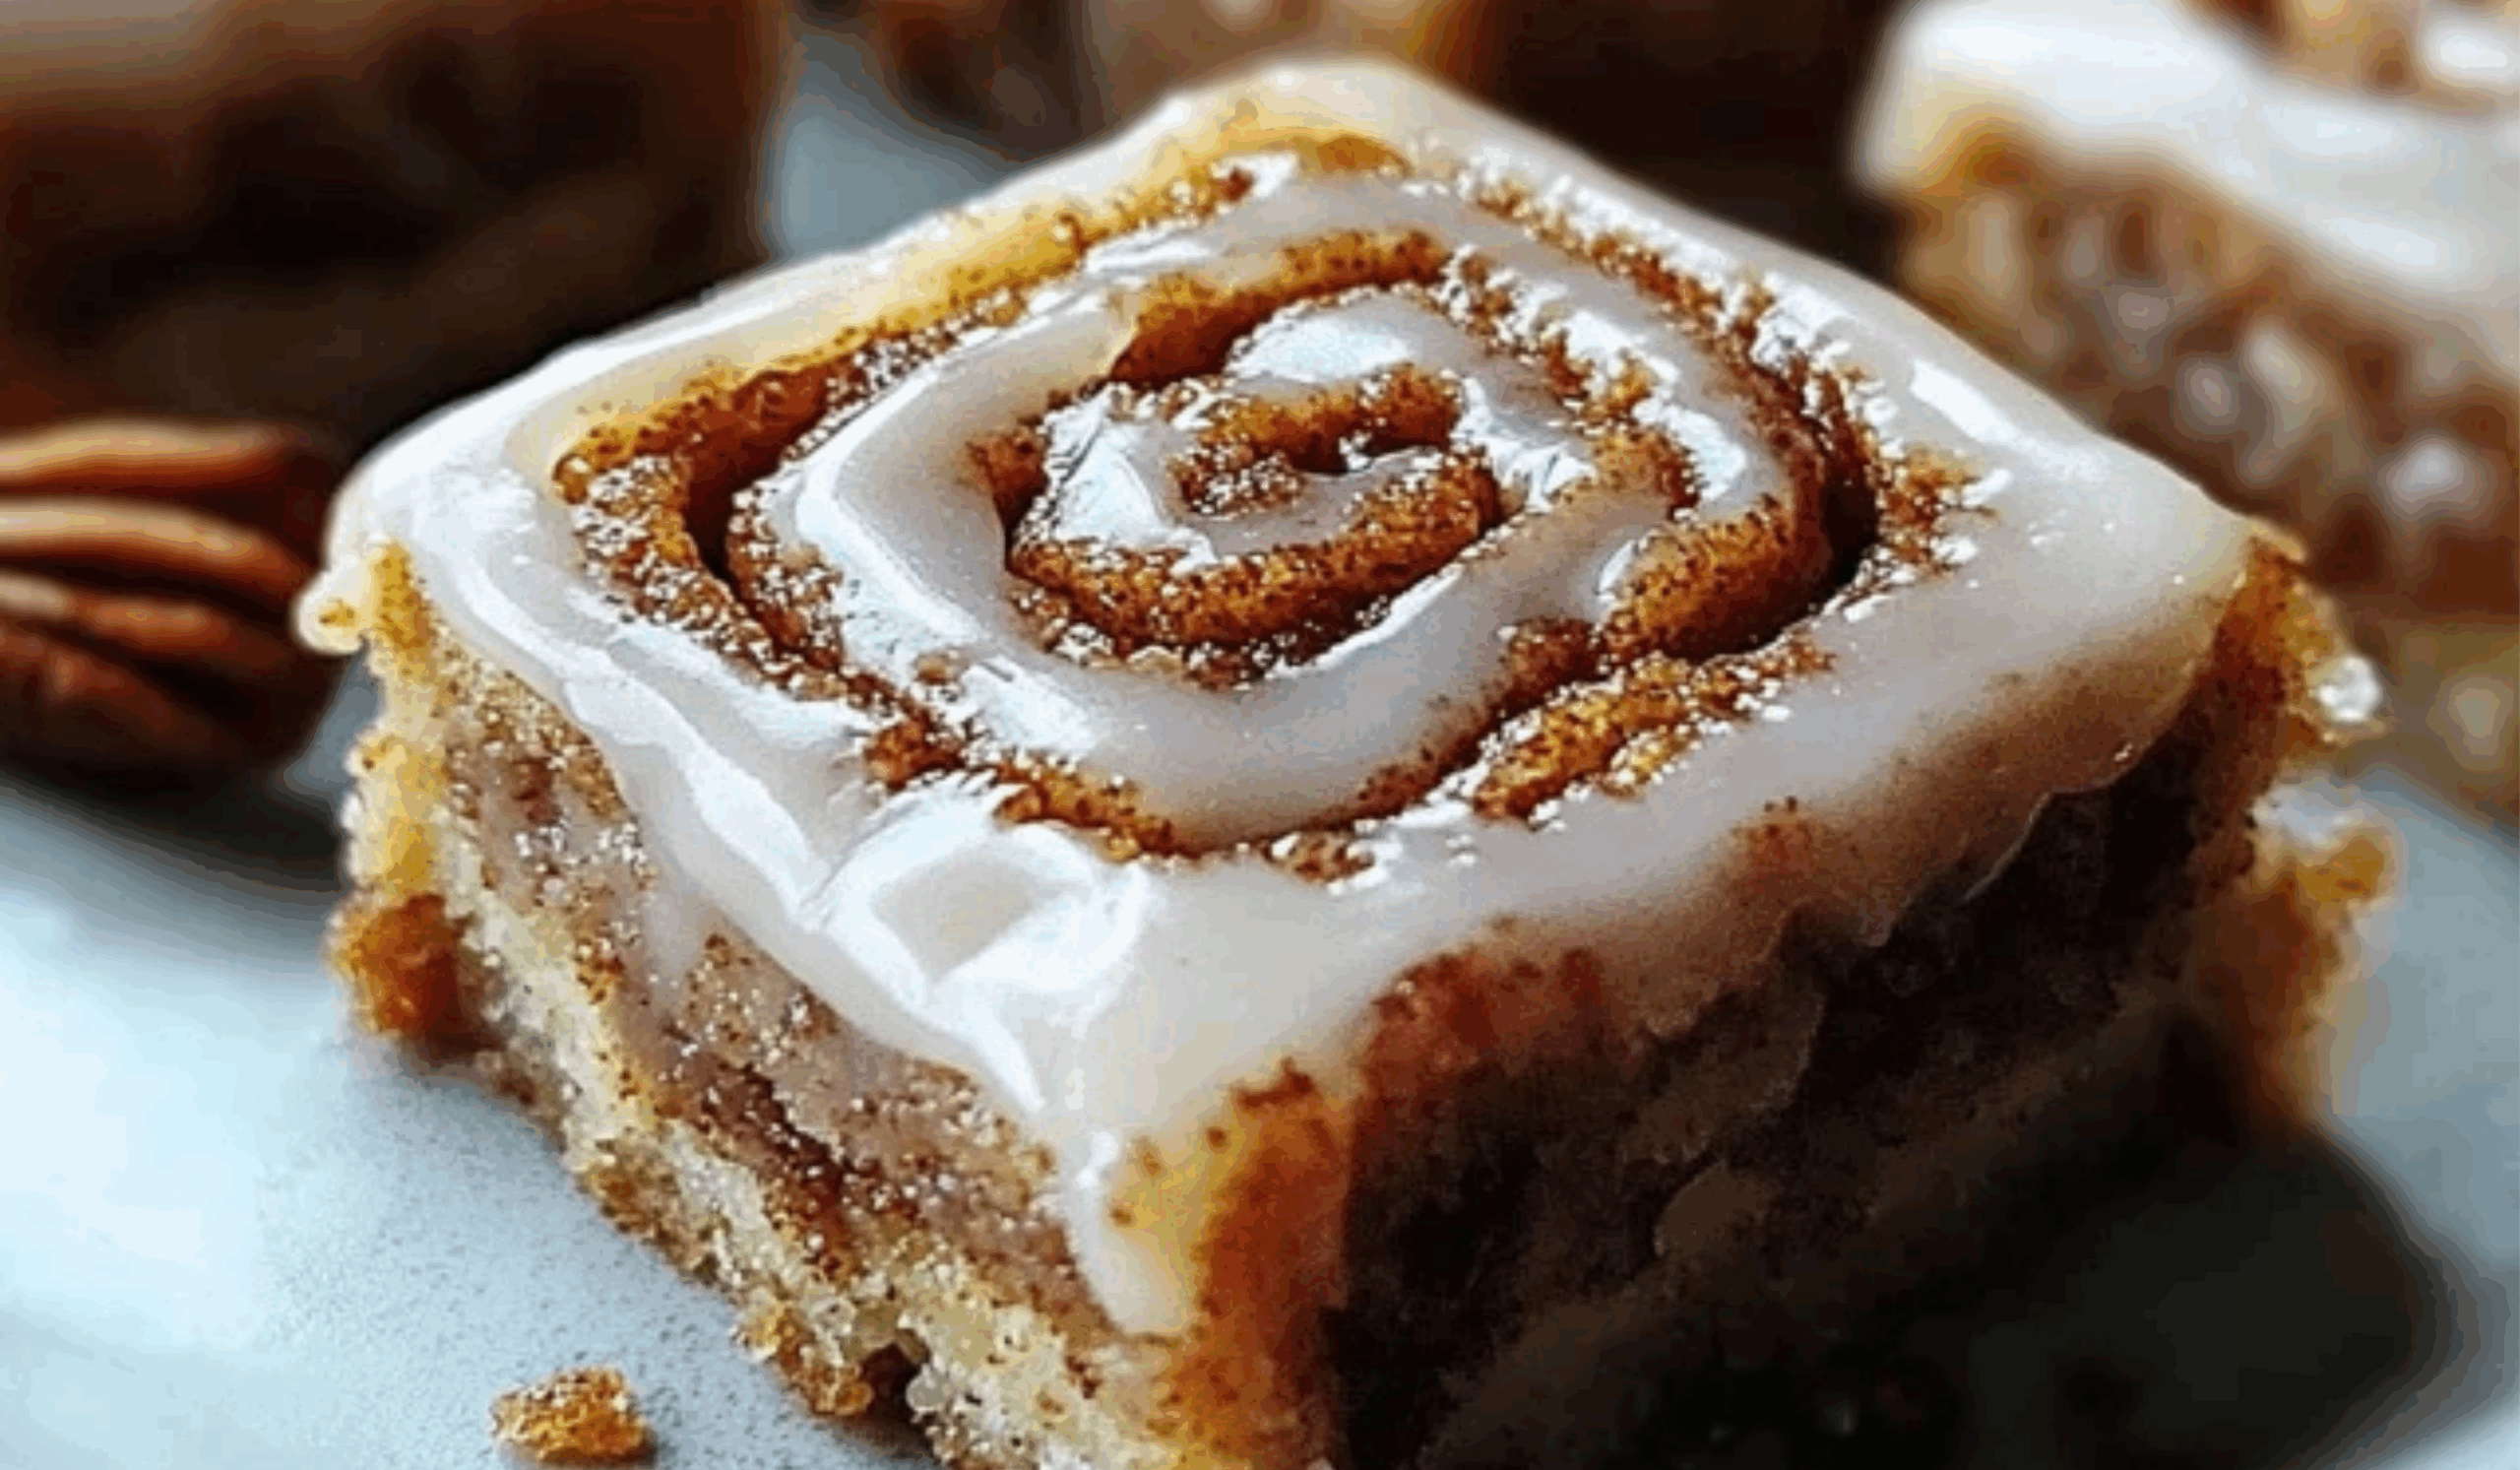
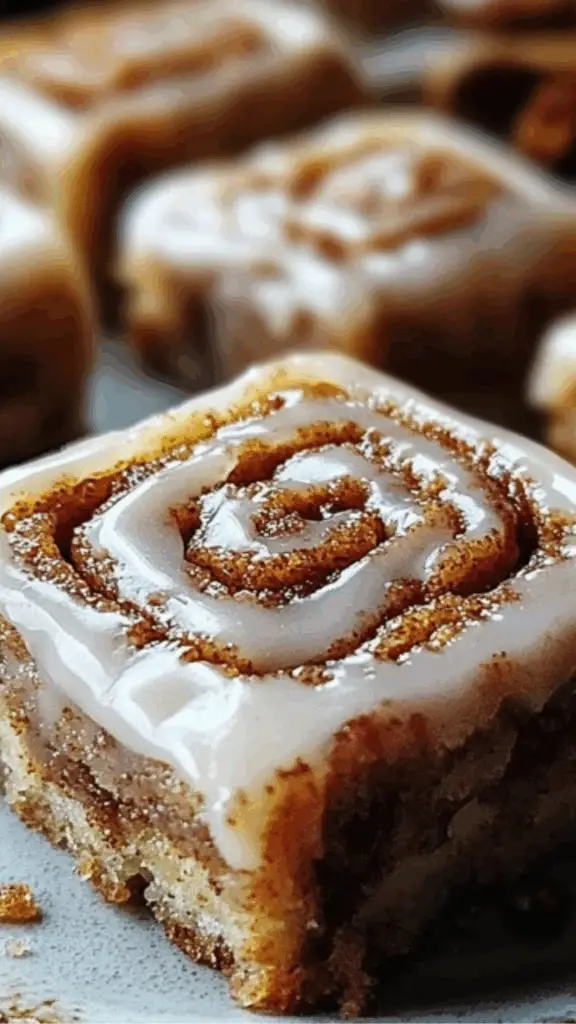
There’s something universally nostalgic about the scent of cinnamon baking in the oven. For me, it brings back memories of lazy weekend mornings, wrapped in a blanket on the couch while my mom prepared her famous cinnamon rolls. The whole house would fill with that sweet, spicy aroma, and we’d all hover near the kitchen, waiting for the timer to ding. Now, as life gets busier and time feels shorter, I find myself drawn to recipes that evoke the same warmth and comfort but are quicker to make. That’s where these Cinnamon Roll Bliss Bars come in. They offer all the flavor and coziness of traditional cinnamon rolls but without the yeast, the rising time, or the rolling. Perfect for beginner bakers or anyone short on time, this recipe is not only easy to follow but also incredibly rewarding. With their soft, golden base and a sweet glaze drizzled on top, these bars feel like a hug in dessert form. Whether you’re baking for a family brunch, a potluck, or just craving something homemade and delicious, these bars are bound to become a go-to favorite. They’re budget-friendly, time-efficient, and can be made with pantry staples, making them ideal for novice home bakers looking to gain confidence in the kitchen.
Print
Cinnamon Roll Bliss Bars: A Beginner’s Guide to Sweet, Swirly Perfection
Get ready for swirls of joy! 💫 These Cinnamon Roll Bliss Bars are everything you love about gooey cinnamon rolls—but easier, quicker, and just as dreamy! 🧁✨ With sweet cinnamon sugar layers, rich cream cheese drizzle, and a soft, buttery base, they’re beginner-friendly and full of cozy flavor. 🎉💕
- Total Time: 45 minutes
- Yield: 12 servings 1x
Ingredients
For the Bars:
- All-Purpose Flour: 2 cups. You can substitute with whole wheat flour for a nuttier flavor, though the texture will be denser.
- Granulated Sugar: 1 cup. Brown sugar can be used for a deeper, molasses-like sweetness.
- Baking Powder: 1 teaspoon. Make sure it’s fresh to ensure the bars rise properly.
- Ground Cinnamon: 1 tablespoon. Adjust to taste if you prefer a milder or stronger cinnamon flavor.
- Salt: ½ teaspoon. Helps balance sweetness and enhances flavor.
- Unsalted Butter: ½ cup (1 stick), melted. If using salted butter, reduce added salt slightly.
- Eggs: 2 large. Room temperature eggs mix more evenly into the batter.
- Vanilla Extract: 1 teaspoon. Adds warmth and depth to the flavor.
For the Glaze:
- Powdered Sugar: 1 cup. Also known as confectioners’ sugar, this provides a smooth finish.
- Milk: 2 tablespoons. Any dairy or plant-based milk will work, including almond or oat milk.
- Vanilla Extract: ½ teaspoon. Rounds out the glaze with a touch of sweetness.
Optional Add-Ins:
- Chopped nuts such as pecans or walnuts for added crunch.
- A handful of raisins or dried cranberries for extra texture.
- A pinch of nutmeg to add warmth.
Instructions
- Preheat your oven to 350°F (175°C) and grease a 9×13-inch baking dish. A light coating of butter or nonstick spray works well. You can also line the dish with parchment paper for easier removal.
- In a large mixing bowl, whisk together the dry ingredients: all-purpose flour, granulated sugar, baking powder, cinnamon, and salt. This ensures an even distribution and prevents clumps later on.
- Melt the butter in a microwave-safe bowl and allow it to cool slightly before adding. Pour it into the dry mixture and stir until partially combined.
- Add in the eggs, one at a time, followed by the vanilla extract. Mix until just combined. Avoid overmixing to ensure the bars stay soft and tender.
- Pour the batter into the prepared baking dish. Use a spatula to spread it evenly across the bottom. The batter will be thick, so take your time to smooth it out.
- If you want a cinnamon swirl topping, mix a couple of tablespoons of melted butter with some sugar and cinnamon until crumbly, then sprinkle it evenly over the top of the batter. This adds a little texture and extra flavor.
- Bake for 25 to 30 minutes, or until the top is golden and a toothpick inserted in the center comes out clean. Ovens vary, so start checking around the 25-minute mark.
- Allow the bars to cool completely in the baking dish. This helps them set and makes slicing cleaner and easier.
- While the bars are cooling, prepare the glaze by whisking together powdered sugar, milk, and vanilla extract in a small bowl. The glaze should be smooth and pourable. If it’s too thick, add a tiny bit more milk. If too thin, add a bit more powdered sugar.
- Drizzle the glaze over the cooled bars using a spoon or fork. Let the glaze set for about 10 minutes before slicing and serving.
Notes
- Measure ingredients carefully. Baking is a science, and even small deviations can affect the outcome. Use measuring cups for dry ingredients and a liquid measuring cup for milk and melted butter.
- Don’t skip preheating the oven. Baking in a cold oven can alter the texture and baking time.
- Room temperature eggs blend better into the batter. If you forget to take them out early, place them in a bowl of warm (not hot) water for a few minutes.
- Check doneness with a toothpick. It should come out mostly clean, with a few moist crumbs but no raw batter.
- If the edges are browning too fast, loosely cover the dish with foil halfway through baking.
- For an extra indulgent twist, top the bars with a cream cheese frosting instead of glaze. Just blend softened cream cheese with powdered sugar, milk, and vanilla.
- Want to add a bit of protein or a more filling option? Serve with a side of scrambled eggs or grilled chicken strips for a balanced brunch.
- Prep Time: 15 minutes
- Cook Time: 30 minutes
Ingredients and Preparation
To make these Cinnamon Roll Bliss Bars, you’ll need ingredients that are easy to find and likely already in your kitchen. If not, all of them are readily available at any grocery store. This simplicity is what makes the recipe so approachable for beginners. There are no hard-to-pronounce items or complicated techniques involved. Here’s a full list, along with a few suggested substitutions to provide flexibility based on dietary needs or what you have on hand.
For the Bars:
- All-Purpose Flour: 2 cups. You can substitute with whole wheat flour for a nuttier flavor, though the texture will be denser.
- Granulated Sugar: 1 cup. Brown sugar can be used for a deeper, molasses-like sweetness.
- Baking Powder: 1 teaspoon. Make sure it’s fresh to ensure the bars rise properly.
- Ground Cinnamon: 1 tablespoon. Adjust to taste if you prefer a milder or stronger cinnamon flavor.
- Salt: ½ teaspoon. Helps balance sweetness and enhances flavor.
- Unsalted Butter: ½ cup (1 stick), melted. If using salted butter, reduce added salt slightly.
- Eggs: 2 large. Room temperature eggs mix more evenly into the batter.
- Vanilla Extract: 1 teaspoon. Adds warmth and depth to the flavor.
For the Glaze:
- Powdered Sugar: 1 cup. Also known as confectioners’ sugar, this provides a smooth finish.
- Milk: 2 tablespoons. Any dairy or plant-based milk will work, including almond or oat milk.
- Vanilla Extract: ½ teaspoon. Rounds out the glaze with a touch of sweetness.
Optional Add-Ins:
- Chopped nuts such as pecans or walnuts for added crunch.
- A handful of raisins or dried cranberries for extra texture.
- A pinch of nutmeg to add warmth.
Step-by-Step Instructions
The process of making Cinnamon Roll Bliss Bars is as straightforward as it gets, making it perfect for first-time bakers. Each step builds on the last, and you’ll be surprised at how quickly these bars come together.
- Preheat your oven to 350°F (175°C) and grease a 9×13-inch baking dish. A light coating of butter or nonstick spray works well. You can also line the dish with parchment paper for easier removal.
- In a large mixing bowl, whisk together the dry ingredients: all-purpose flour, granulated sugar, baking powder, cinnamon, and salt. This ensures an even distribution and prevents clumps later on.
- Melt the butter in a microwave-safe bowl and allow it to cool slightly before adding. Pour it into the dry mixture and stir until partially combined.
- Add in the eggs, one at a time, followed by the vanilla extract. Mix until just combined. Avoid overmixing to ensure the bars stay soft and tender.
- Pour the batter into the prepared baking dish. Use a spatula to spread it evenly across the bottom. The batter will be thick, so take your time to smooth it out.
- If you want a cinnamon swirl topping, mix a couple of tablespoons of melted butter with some sugar and cinnamon until crumbly, then sprinkle it evenly over the top of the batter. This adds a little texture and extra flavor.
- Bake for 25 to 30 minutes, or until the top is golden and a toothpick inserted in the center comes out clean. Ovens vary, so start checking around the 25-minute mark.
- Allow the bars to cool completely in the baking dish. This helps them set and makes slicing cleaner and easier.
- While the bars are cooling, prepare the glaze by whisking together powdered sugar, milk, and vanilla extract in a small bowl. The glaze should be smooth and pourable. If it’s too thick, add a tiny bit more milk. If too thin, add a bit more powdered sugar.
- Drizzle the glaze over the cooled bars using a spoon or fork. Let the glaze set for about 10 minutes before slicing and serving.
Beginner Tips and Notes
When you’re new to baking, even a simple recipe can feel overwhelming. Here are some tips to make the process smoother and ensure your Cinnamon Roll Bliss Bars come out perfectly every time.
- Measure ingredients carefully. Baking is a science, and even small deviations can affect the outcome. Use measuring cups for dry ingredients and a liquid measuring cup for milk and melted butter.
- Don’t skip preheating the oven. Baking in a cold oven can alter the texture and baking time.
- Room temperature eggs blend better into the batter. If you forget to take them out early, place them in a bowl of warm (not hot) water for a few minutes.
- Check doneness with a toothpick. It should come out mostly clean, with a few moist crumbs but no raw batter.
- If the edges are browning too fast, loosely cover the dish with foil halfway through baking.
- For an extra indulgent twist, top the bars with a cream cheese frosting instead of glaze. Just blend softened cream cheese with powdered sugar, milk, and vanilla.
- Want to add a bit of protein or a more filling option? Serve with a side of scrambled eggs or grilled chicken strips for a balanced brunch.
Serving Suggestions
These Cinnamon Roll Bliss Bars are delicious on their own, but you can elevate them further with a few thoughtful pairings. Whether you’re serving them for breakfast, dessert, or an afternoon snack, here are some ways to enhance the experience.
- Serve warm with a drizzle of extra glaze or a small scoop of vanilla ice cream.
- Pair with freshly brewed coffee, chai tea, or a cold glass of milk.
- Add a fruit salad on the side for a refreshing contrast. Fresh berries or orange slices work beautifully.
- These bars are great for brunch spreads. Serve alongside egg muffins, roasted chicken sausages, or a simple vegetable frittata.
- To turn them into a gift or potluck item, slice into neat squares and package in parchment-lined boxes or tins.
- For leftovers, store in an airtight container at room temperature for up to three days. For longer storage, refrigerate for up to a week or freeze for up to two months. Let frozen bars thaw at room temperature before serving.
Engagement Features
There’s something incredibly rewarding about baking something from scratch, especially when the results are as delicious and comforting as these Cinnamon Roll Bliss Bars. If you’re new to baking, consider this recipe your confidence booster. It’s simple, forgiving, and delivers amazing flavor without a steep learning curve. Once you’ve made it once, you might start experimenting with variations—maybe a drizzle of chocolate, a layer of apple slices, or even a sprinkle of chopped nuts on top. We’d love to hear how your version turns out. Did you make any changes? Share your experience in the comments below. Let us know how you served them, who you shared them with, and what you might try next time. Recipes like these are meant to be enjoyed and adapted, so make them your own. Whether this is your first baking adventure or your hundredth, we hope these bars bring joy to your kitchen and to those you share them with. Happy baking.