
When the holiday season rolls around, there’s no better way to celebrate than with homemade treats that bring warmth, joy, and a sense of togetherness. Among the festive lineup of cookies, cakes, and pies, Christmas Cherry Bars stand out as a classic yet versatile dessert that’s easy to prepare and perfect for sharing. Their buttery base, luscious cherry topping, and optional vanilla glaze make them a showstopper at any holiday gathering. This in-depth guide will help you craft the perfect batch of Christmas Cherry Bars, ensuring they become a staple in your seasonal baking traditions.
Print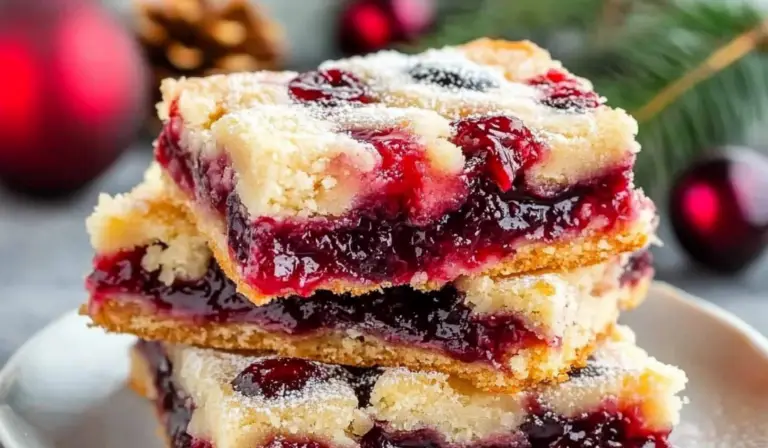
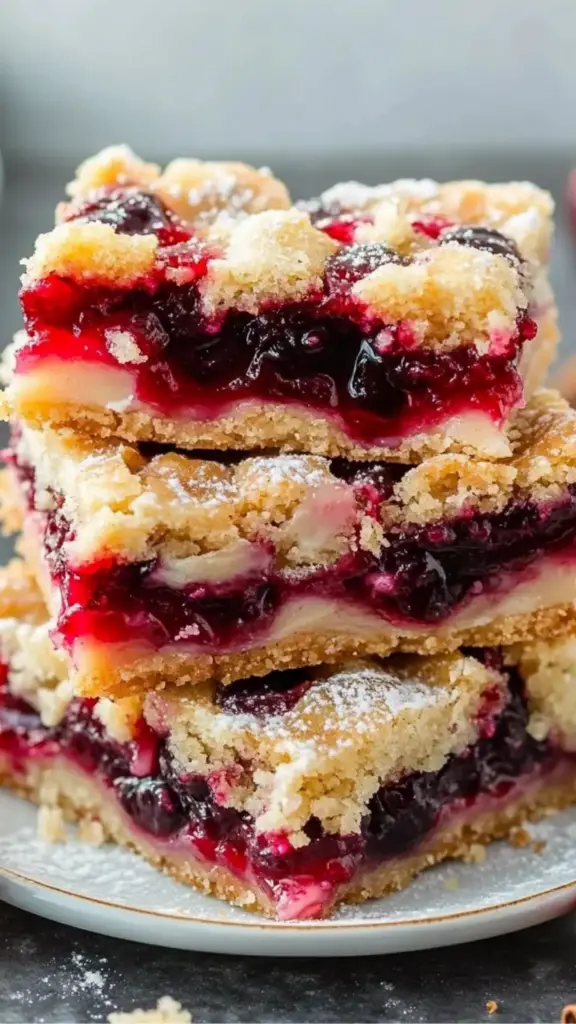
Christmas Cherry Bars
🎄🍒 Add a pop of festive cheer to your dessert table with Christmas Cherry Bars! ✨ These buttery bars are packed with bright, sweet cherries and a touch of holiday magic. 💖 Perfect for parties, gift-giving, or a cozy night in, they’re as beautiful as they are delicious. One bite, and it’s pure Christmas joy! 🍪🎅
#ChristmasCherryBars #HolidayBaking #FestiveFlavors #CherryLovers #SweetAndButtery #DessertGoals #HolidayTreats #BakingJoy #CherryDelight #ChristmasDesserts 🎄🍒✨
- Total Time: 55 minutes
Ingredients
For the Bars:
- 1 cup butter, softened: The cornerstone of a tender, melt-in-your-mouth crust. Using high-quality butter ensures a rich flavor.
- 2 cups sugar: Adds sweetness and helps achieve a tender crumb.
- 4 eggs: Provides structure and richness, creating a smooth batter.
- 1 tsp vanilla extract: Enhances the flavor profile with warm, aromatic notes.
- 3 cups all-purpose flour: The primary dry ingredient that holds everything together.
- 1 tsp salt: Balances the sweetness and intensifies the other flavors.
- 1 can (21 ounces) cherry pie filling: The star of the show, delivering vibrant color and a burst of tangy-sweet flavor.
Optional Vanilla Glaze:
- 1 cup powdered sugar: The base for a smooth, glossy glaze.
- 2–3 Tbsp milk: Adjusts the consistency of the glaze.
- ½ tsp vanilla extract: Adds a sweet, fragrant finish.
Instructions
Step 1: Preheat and Prepare
- Preheat your oven: Set it to 350°F (175°C). Proper preheating ensures even baking.
- Prepare your pan: Lightly grease a 9×13 inch baking pan to prevent sticking. For easier removal, consider lining the pan with parchment paper.
Step 2: Create the Batter
- Cream the butter and sugar: In a large mixing bowl, beat softened butter and sugar until light and fluffy. This process incorporates air, contributing to a tender crust.
- Add the eggs: Beat in the eggs one at a time, ensuring each is fully incorporated before adding the next.
- Mix in the vanilla: Stir in the vanilla extract to enhance the batter’s flavor.
Step 3: Combine Dry Ingredients
- In a separate bowl, whisk together the flour and salt.
- Gradually add the dry ingredients to the creamed mixture, mixing until fully combined. Be careful not to overmix, as this can result in dense bars.
Step 4: Assemble the Layers
- Create the base layer: Spread about 3 cups of the batter evenly into the prepared pan, smoothing it out with a spatula.
- Add the cherry filling: Spoon the cherry pie filling over the base, spreading it gently to cover.
- Top it off: Drop small clumps of the remaining batter over the cherry filling. This creates a rustic, cobbled effect when baked.
Step 5: Bake
- Place the pan in the preheated oven and bake for 35-40 minutes, or until the top is golden brown and a toothpick inserted into the center comes out clean.
Step 6: Cool Completely
- Remove the pan from the oven and let the bars cool on a wire rack. Cooling is crucial for the bars to set properly.
Step 7: Add the Glaze (Optional)
- Make the glaze: In a small bowl, whisk together the powdered sugar, milk, and vanilla extract until smooth. Adjust the milk for your desired consistency.
- Drizzle the glaze: Once the bars are completely cooled, drizzle the glaze over the top using a spoon or piping bag.
Step 8: Slice and Serve
- Cut the dessert into 24 bars and arrange them on a festive platter.
Notes
- Use Room Temperature Ingredients: Allow butter and eggs to come to room temperature before mixing. This ensures a smoother batter.
- Don’t Overmix: Overmixing the batter can lead to dense or tough bars. Mix just until ingredients are combined.
- Spread Carefully: Handle the cherry pie filling gently to keep it distinct from the batter layers.
- Cool Before Glazing: If you’re using the optional glaze, make sure the bars are fully cooled to avoid melting the glaze.
- Experiment with Add-Ins: Consider adding chopped nuts, shredded coconut, or mini chocolate chips to the batter for extra texture and flavor.
- Prep Time: 20 minutes
- Cook Time: 35 minutes
Why You’ll Fall in Love with Christmas Cherry Bars
Christmas Cherry Bars are more than just a dessert—they’re a memory waiting to be made. Whether you’re baking with loved ones, creating gifts for friends and neighbors, or simply indulging in a moment of holiday cheer, these bars capture the spirit of the season.
- Festive Appeal: The bright red cherry topping evokes the colors of Christmas, making these bars a visual treat.
- Balanced Flavor: The buttery, slightly salty crust perfectly complements the sweet and tangy cherry filling.
- Simplicity Meets Elegance: With just a handful of ingredients and straightforward steps, you’ll achieve bakery-worthy results.
- Versatility: These bars can be customized with different toppings, glazes, or additions like nuts or chocolate chips.
Ingredients: The Building Blocks of Perfection
Let’s take a closer look at the ingredients that make this recipe shine. Each one plays a crucial role in creating the rich flavors and textures that define these bars.
For the Bars:
- 1 cup butter, softened: The cornerstone of a tender, melt-in-your-mouth crust. Using high-quality butter ensures a rich flavor.
- 2 cups sugar: Adds sweetness and helps achieve a tender crumb.
- 4 eggs: Provides structure and richness, creating a smooth batter.
- 1 tsp vanilla extract: Enhances the flavor profile with warm, aromatic notes.
- 3 cups all-purpose flour: The primary dry ingredient that holds everything together.
- 1 tsp salt: Balances the sweetness and intensifies the other flavors.
- 1 can (21 ounces) cherry pie filling: The star of the show, delivering vibrant color and a burst of tangy-sweet flavor.
Optional Vanilla Glaze:
- 1 cup powdered sugar: The base for a smooth, glossy glaze.
- 2-3 Tbsp milk: Adjusts the consistency of the glaze.
- ½ tsp vanilla extract: Adds a sweet, fragrant finish.
Step-by-Step Instructions: Your Path to Baking Success
With this detailed guide, you’ll master the art of baking Christmas Cherry Bars, ensuring consistent results every time.
Step 1: Preheat and Prepare
- Preheat your oven: Set it to 350°F (175°C). Proper preheating ensures even baking.
- Prepare your pan: Lightly grease a 9×13 inch baking pan to prevent sticking. For easier removal, consider lining the pan with parchment paper.
Step 2: Create the Batter
- Cream the butter and sugar: In a large mixing bowl, beat softened butter and sugar until light and fluffy. This process incorporates air, contributing to a tender crust.
- Add the eggs: Beat in the eggs one at a time, ensuring each is fully incorporated before adding the next.
- Mix in the vanilla: Stir in the vanilla extract to enhance the batter’s flavor.
Step 3: Combine Dry Ingredients
- In a separate bowl, whisk together the flour and salt.
- Gradually add the dry ingredients to the creamed mixture, mixing until fully combined. Be careful not to overmix, as this can result in dense bars.
Step 4: Assemble the Layers
- Create the base layer: Spread about 3 cups of the batter evenly into the prepared pan, smoothing it out with a spatula.
- Add the cherry filling: Spoon the cherry pie filling over the base, spreading it gently to cover.
- Top it off: Drop small clumps of the remaining batter over the cherry filling. This creates a rustic, cobbled effect when baked.
Step 5: Bake
- Place the pan in the preheated oven and bake for 35-40 minutes, or until the top is golden brown and a toothpick inserted into the center comes out clean.
Step 6: Cool Completely
- Remove the pan from the oven and let the bars cool on a wire rack. Cooling is crucial for the bars to set properly.
Step 7: Add the Glaze (Optional)
- Make the glaze: In a small bowl, whisk together the powdered sugar, milk, and vanilla extract until smooth. Adjust the milk for your desired consistency.
- Drizzle the glaze: Once the bars are completely cooled, drizzle the glaze over the top using a spoon or piping bag.
Step 8: Slice and Serve
- Cut the dessert into 24 bars and arrange them on a festive platter.
Tips for Perfect Christmas Cherry Bars
Achieving the best results requires attention to detail. Here are some tips to elevate your baking experience:
- Use Room Temperature Ingredients: Allow butter and eggs to come to room temperature before mixing. This ensures a smoother batter.
- Don’t Overmix: Overmixing the batter can lead to dense or tough bars. Mix just until ingredients are combined.
- Spread Carefully: Handle the cherry pie filling gently to keep it distinct from the batter layers.
- Cool Before Glazing: If you’re using the optional glaze, make sure the bars are fully cooled to avoid melting the glaze.
- Experiment with Add-Ins: Consider adding chopped nuts, shredded coconut, or mini chocolate chips to the batter for extra texture and flavor.
Variations and Customizations
The beauty of Christmas Cherry Bars lies in their adaptability. Here are a few ways to make the recipe your own:
- Switch the Filling: Substitute cherry pie filling with blueberry, raspberry, or apple pie filling for a different flavor profile.
- Add Almond Extract: Swap vanilla extract with almond extract for a nutty twist that complements cherries beautifully.
- Top with Crumbles: Replace the remaining batter with a streusel topping made from butter, flour, sugar, and oats.
- Glaze Options: Add a hint of citrus to the glaze by incorporating lemon or orange zest.
Storing and Serving Suggestions
Storage Tips:
- Store the bars in an airtight container at room temperature for up to 3 days or in the refrigerator for up to 1 week.
- For longer storage, freeze unglazed bars in an airtight container for up to 2 months. Thaw overnight and glaze before serving.
Serving Suggestions:
- Serve the bars as part of a holiday dessert table alongside cookies, fudge, and other treats.
- Pair with a scoop of vanilla ice cream or a dollop of whipped cream for an indulgent dessert.
- Wrap individual bars in decorative cellophane and tie with ribbon for a charming homemade gift.
Why These Bars Are a Must-Try
Christmas Cherry Bars are more than just a dessert—they’re a reflection of the joy, warmth, and togetherness that define the holiday season. Their vibrant appearance, delectable flavor, and ease of preparation make them a crowd-pleaser for any festive occasion. Whether you’re a seasoned baker or a beginner, these bars are sure to impress.
Final Thoughts
This holiday season, let Christmas Cherry Bars be the centerpiece of your dessert spread. With their irresistible flavor and festive flair, they’ll quickly become a beloved tradition in your home. Gather your ingredients, preheat the oven, and get ready to spread some holiday cheer—one delicious bar at a time.