
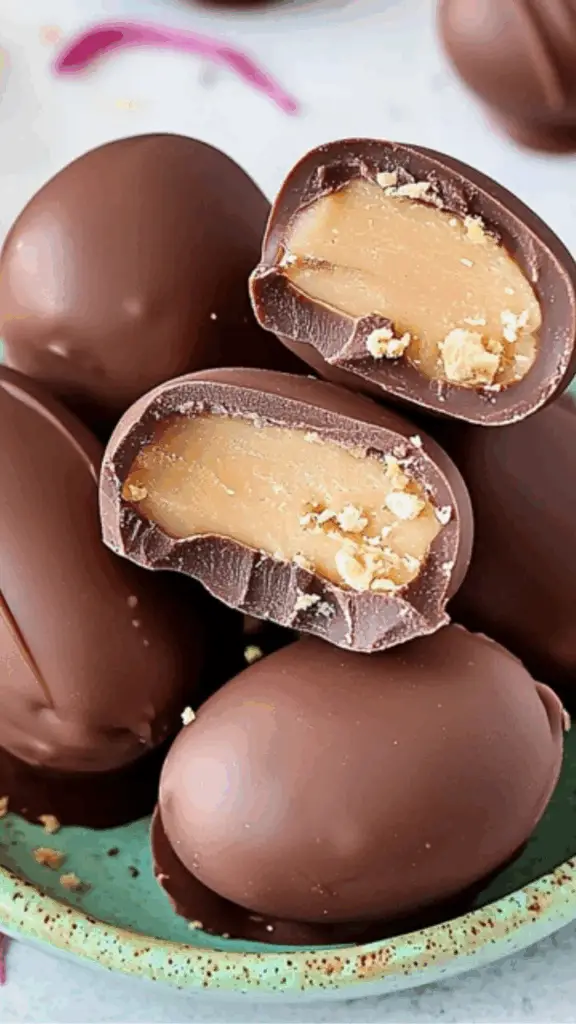
There’s something universally comforting about the fusion of chocolate and peanut butter. It’s rich, creamy, and a little indulgent—perfect for satisfying a sweet craving or impressing guests with a treat that tastes like it came straight from a specialty shop. Chocolate peanut butter eggs are often associated with Easter, but their irresistible taste makes them ideal for any time of year. Homemade versions offer better quality, fresher flavor, and the ability to avoid unnecessary preservatives or allergens. Even better, this no-bake dessert is simple enough for beginners but polished enough to be holiday-table-worthy. This guide walks you through how to create your own chocolate peanut butter eggs using easy-to-find ingredients and step-by-step instructions to ensure a perfect batch every time.
Ingredients and Preparation
These chocolate peanut butter eggs require only a few pantry staples. Here’s what you’ll need to get started:
Peanut Butter Filling:
- 1 ½ cups creamy peanut butter (avoid natural brands with oil separation unless stirred thoroughly)
- ½ cup unsalted butter, softened (room temperature for easy blending)
- 1 teaspoon pure vanilla extract
- 3 cups powdered sugar (sifted for smooth consistency)
- 2 tablespoons milk (dairy or non-dairy alternative)
Chocolate Coating:
- 2 cups semi-sweet chocolate chips or finely chopped chocolate bars
- 2 tablespoons coconut oil or vegetable shortening (for smooth melting and shine)
Optional Additions:
- ¼ teaspoon salt (enhances the peanut butter flavor)
- Chopped toasted nuts for texture
- Crushed cereal or cookie bits for extra crunch
Tools Needed:
- Electric mixer or mixing bowl with spoon
- Parchment paper
- Baking sheet
- Microwave-safe bowl or double boiler
- Forks or dipping tools
- Airtight container for storage
Step-by-Step Instructions
1. Prepare Your Workspace
Before you begin, line a large baking sheet with parchment paper. Make sure your kitchen is not too warm, as peanut butter and chocolate are temperature-sensitive.
2. Make the Peanut Butter Mixture
- In a large bowl, combine the softened butter and creamy peanut butter.
- Use an electric mixer or spoon to beat the mixture until smooth and creamy.
- Add vanilla extract and mix to combine.
- Gradually add the powdered sugar, one cup at a time, mixing thoroughly after each addition.
- Add the milk one tablespoon at a time until the mixture forms a soft but firm dough that holds its shape when pressed.
3. Shape the Eggs
- Scoop out small portions of the peanut butter mixture (about 1½ to 2 tablespoons each).
- Roll into balls, then gently press into an oval, egg-like shape.
- Place each shaped piece onto the prepared baking sheet.
- Once all eggs are shaped, place the baking sheet in the freezer for 30 minutes to firm up.
4. Melt the Chocolate Coating
- Combine chocolate chips and coconut oil in a microwave-safe bowl.
- Heat in 30-second intervals, stirring after each, until the chocolate is completely melted and smooth.
- Alternatively, use a double boiler for a more controlled melt.
5. Dip the Peanut Butter Eggs
- Remove the peanut butter eggs from the freezer.
- Use a fork or dipping tool to lower each egg into the melted chocolate, coating it fully.
- Let the excess chocolate drip off, then place the coated egg back on the parchment paper.
- Repeat until all eggs are coated.
6. Optional Garnishing
- While the chocolate is still wet, sprinkle chopped nuts, a pinch of salt, or crushed cereal on top if desired.
- For a striped effect, drizzle contrasting chocolate (like white or dark) over the top using a spoon or piping bag.
7. Chill Until Set
- Place the dipped eggs back in the refrigerator for about 20–30 minutes, or until the chocolate is fully set.
- Once set, transfer the eggs to an airtight container and store in the refrigerator.
Beginner Tips and Notes
- Use smooth peanut butter for the best texture. If you prefer natural peanut butter, make sure it’s thoroughly stirred and not too runny.
- Don’t skip the chilling steps. Freezing the eggs before dipping helps them hold their shape and ensures the chocolate sets properly.
- Room temperature butter blends easier with peanut butter than cold butter, creating a smooth base for the filling.
- To make the recipe dairy-free, substitute the butter and milk with plant-based alternatives such as vegan butter and almond milk.
- For a neater dipping process, use two forks or a candy dipping tool to lift and coat the eggs, letting excess chocolate drip back into the bowl.
- Make ahead of time. These store well for up to 2 weeks in the refrigerator and can be frozen for up to 2 months in airtight containers.
Serving Suggestions
- Gift-Worthy Treats: Wrap them individually in wax paper or place them in small boxes for a personal and impressive homemade gift.
- Party Desserts: Display them on a tiered dessert tray alongside cookies and brownies for an easy no-bake addition to your sweet table.
- Lunchbox or Snack Add-On: Cut them in half and add them to lunchboxes as a fun treat.
- Dessert Garnish: Chop them and sprinkle over ice cream or use as a topping for cakes and cupcakes.
- Holiday Platter Addition: Add variety by making multiple sizes or using white and dark chocolate coatings to create visual contrast.
Chocolate Peanut Butter Eggs: A Homemade Delight That Never Disappoints
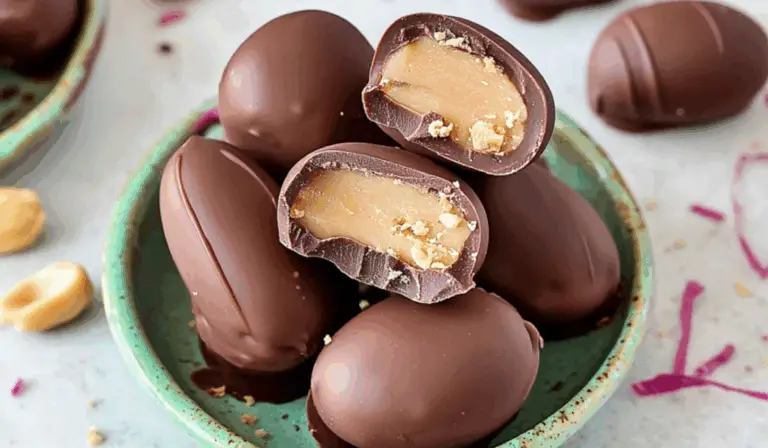
Get ready to fall in love with these Chocolate Peanut Butter Eggs! 🍫🥜 Creamy, rich peanut butter centers coated in a smooth chocolate shell—this homemade treat is pure bliss in every bite. Perfect for Easter, gifting, or a sweet pick-me-up any day! 🐣💖 Easy to make and even easier to devour. Trust us, they’ll never disappoint! 🎯✨
- Total Time: 40 minutes
- Yield: 20 chocolate peanut butter eggs 1x
Ingredients
Peanut Butter Filling:
- 1 ½ cups creamy peanut butter (avoid natural brands with oil separation unless stirred thoroughly)
- ½ cup unsalted butter, softened (room temperature for easy blending)
- 1 teaspoon pure vanilla extract
- 3 cups powdered sugar (sifted for smooth consistency)
- 2 tablespoons milk (dairy or non-dairy alternative)
Chocolate Coating:
- 2 cups semi-sweet chocolate chips or finely chopped chocolate bars
- 2 tablespoons coconut oil or vegetable shortening (for smooth melting and shine)
Optional Additions:
- ¼ teaspoon salt (enhances the peanut butter flavor)
- Chopped toasted nuts for texture
- Crushed cereal or cookie bits for extra crunch
Tools Needed:
- Electric mixer or mixing bowl with spoon
- Parchment paper
- Baking sheet
- Microwave-safe bowl or double boiler
- Forks or dipping tools
- Airtight container for storage
Instructions
1. Prepare Your Workspace
Before you begin, line a large baking sheet with parchment paper. Make sure your kitchen is not too warm, as peanut butter and chocolate are temperature-sensitive.
2. Make the Peanut Butter Mixture
- In a large bowl, combine the softened butter and creamy peanut butter.
- Use an electric mixer or spoon to beat the mixture until smooth and creamy.
- Add vanilla extract and mix to combine.
- Gradually add the powdered sugar, one cup at a time, mixing thoroughly after each addition.
- Add the milk one tablespoon at a time until the mixture forms a soft but firm dough that holds its shape when pressed.
3. Shape the Eggs
- Scoop out small portions of the peanut butter mixture (about 1½ to 2 tablespoons each).
- Roll into balls, then gently press into an oval, egg-like shape.
- Place each shaped piece onto the prepared baking sheet.
- Once all eggs are shaped, place the baking sheet in the freezer for 30 minutes to firm up.
4. Melt the Chocolate Coating
- Combine chocolate chips and coconut oil in a microwave-safe bowl.
- Heat in 30-second intervals, stirring after each, until the chocolate is completely melted and smooth.
- Alternatively, use a double boiler for a more controlled melt.
5. Dip the Peanut Butter Eggs
- Remove the peanut butter eggs from the freezer.
- Use a fork or dipping tool to lower each egg into the melted chocolate, coating it fully.
- Let the excess chocolate drip off, then place the coated egg back on the parchment paper.
- Repeat until all eggs are coated.
6. Optional Garnishing
- While the chocolate is still wet, sprinkle chopped nuts, a pinch of salt, or crushed cereal on top if desired.
- For a striped effect, drizzle contrasting chocolate (like white or dark) over the top using a spoon or piping bag.
7. Chill Until Set
- Place the dipped eggs back in the refrigerator for about 20–30 minutes, or until the chocolate is fully set.
- Once set, transfer the eggs to an airtight container and store in the refrigerator.
Notes
- Use smooth peanut butter for the best texture. If you prefer natural peanut butter, make sure it’s thoroughly stirred and not too runny.
- Don’t skip the chilling steps. Freezing the eggs before dipping helps them hold their shape and ensures the chocolate sets properly.
- Room temperature butter blends easier with peanut butter than cold butter, creating a smooth base for the filling.
- To make the recipe dairy-free, substitute the butter and milk with plant-based alternatives such as vegan butter and almond milk.
- For a neater dipping process, use two forks or a candy dipping tool to lift and coat the eggs, letting excess chocolate drip back into the bowl.
- Make ahead of time. These store well for up to 2 weeks in the refrigerator and can be frozen for up to 2 months in airtight containers.
- Prep Time: 40 minutes
Engagement Features
- What’s your favorite chocolate and nut butter combination—classic peanut butter, almond butter, or something new?
- If you’ve tried this recipe, how did you customize your eggs? Did you add any fun toppings or use different chocolate?
- Let us know how they turned out and what you’d do differently next time. Do you prefer smaller bite-sized pieces or full-size eggs?
- Want a nut-free version? Try substituting sunflower seed butter or cookie butter and share how it worked out.
Chocolate peanut butter eggs are the kind of dessert that make any occasion feel a little more special. They’re beginner-friendly, deliciously rich, and incredibly satisfying to make from scratch. Whether you’re whipping up a batch for a celebration or just treating yourself to a sweet bite, this homemade recipe delivers everything you love about store-bought versions with the bonus of knowing exactly what goes into each one. Simple steps, no baking, and loads of flavor—these eggs are proof that some of the best desserts come from just a few basic ingredients. Try them today and see why homemade always wins.