The holiday season is the perfect time to unleash your creativity in the kitchen, and Chocolate Christmas Tree Sticks are a delightful way to spread festive cheer. These whimsical treats, shaped like Christmas trees and decorated with colorful toppings, are a fun and delicious addition to any holiday celebration. Easy to prepare and customizable to suit all tastes, these treats are perfect for parties, gifts, or cozy family gatherings.
This article will explore everything you need to know about Chocolate Christmas Tree Sticks—from what they are to step-by-step instructions on making them, plus tips and variations to ensure your creations stand out. Let’s dive into the holiday spirit with this sweet, festive dessert!
Print
Chocolate Christmas Tree Sticks – Miss Wish: A Festive Delight for the Holidays
Delight in the festive spirit with these easy-to-make Chocolate Christmas Tree Sticks! Crafted with rich, melted chocolate and decorated with sprinkles, candy, and edible glitter, these whimsical treats bring holiday cheer to your table. Perfect for parties, gifts, or family fun, they’re customizable to suit all tastes and dietary needs. Whether you use dark, milk, or white chocolate, these adorable tree-shaped sweets are a delicious way to celebrate the season. Simple, fun, and irresistible—this recipe is your go-to for a magical Christmas treat!
- Total Time: 20 minutes
- Yield: 12 Chocolate Christmas Tree Sticks 1x
Ingredients
Ingredients:
- Chocolate: High-quality chocolate bars or chips (milk, dark, or white chocolate as preferred).
- Lollipop sticks or wooden skewers: Essential for creating the “stick” effect.
- Sprinkles and decorations: Edible glitter, candy stars, colored sugar, or crushed candy canes.
- Optional: Edible gold or silver dust for an extra festive touch.
Tools:
- Baking sheet or tray
- Parchment paper or silicone mat
- Piping bags (or a plastic bag with the tip cut off)
- Microwave-safe bowl or double boiler for melting chocolate
- Small spatula or spoon for spreading
Instructions
1. Prepare Your Workspace
- Line a baking sheet with parchment paper or a silicone mat. This will prevent the chocolate from sticking and make cleanup easy.
- Arrange lollipop sticks on the tray, spacing them a few inches apart to allow room for the tree shapes.
2. Melt the Chocolate
- Break the chocolate into small pieces and place them in a microwave-safe bowl.
- Microwave in 20-second intervals, stirring between each, until fully melted. Alternatively, use a double boiler for gentle, even melting.
3. Create the Tree Shapes
- Transfer the melted chocolate into a piping bag. If you don’t have one, use a plastic bag and snip off a small corner.
- Pipe the chocolate onto the sticks in zigzag patterns, starting wider at the base and narrowing towards the top to form a tree shape.
4. Decorate the Trees
- Before the chocolate sets, sprinkle your chosen decorations over the trees. Add a candy star or edible glitter at the top for a festive touch.
5. Set the Chocolate
- Place the tray in the refrigerator for 20–30 minutes, or until the chocolate is completely hardened.
6. Serve and Enjoy!
- Once set, carefully remove the trees from the parchment paper. Arrange them on a platter or wrap them individually for gifts.
- Prep Time: 15 minutes
- Cook Time: 5 minutes
What Are Chocolate Christmas Tree Sticks?
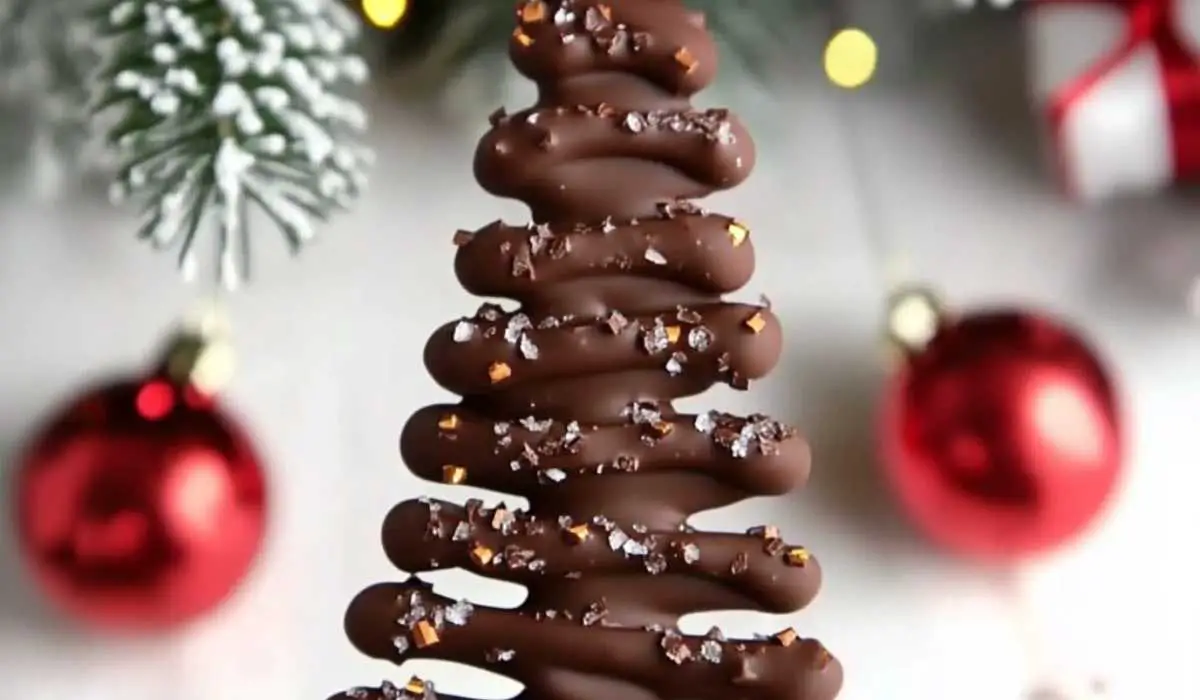
Chocolate Christmas Tree Sticks are a creative dessert made by shaping melted chocolate into festive tree forms on sticks, then decorating them with sprinkles, candy, or edible glitter. These treats combine the visual charm of a Christmas tree with the rich flavors of chocolate, making them a hit for kids and adults alike.
Why Chocolate Christmas Tree Sticks Are Perfect for the Holidays
- Fun and Engaging: They are an excellent activity for families, allowing kids to participate in decorating their own edible Christmas trees.
- Quick and Easy: With just a few ingredients and minimal tools, you can create a batch in under an hour.
- Customizable: Use different types of chocolate (dark, milk, or white) and toppings to suit your taste and dietary preferences.
Ingredients and Tools Needed
Here’s a quick checklist of what you’ll need to create Chocolate Christmas Tree Sticks:
Ingredients:
- Chocolate: High-quality chocolate bars or chips (milk, dark, or white chocolate as preferred).
- Lollipop sticks or wooden skewers: Essential for creating the “stick” effect.
- Sprinkles and decorations: Edible glitter, candy stars, colored sugar, or crushed candy canes.
- Optional: Edible gold or silver dust for an extra festive touch.
Tools:
- Baking sheet or tray
- Parchment paper or silicone mat
- Piping bags (or a plastic bag with the tip cut off)
- Microwave-safe bowl or double boiler for melting chocolate
- Small spatula or spoon for spreading
Step-by-Step Guide to Making Chocolate Christmas Tree Sticks
Follow these simple steps to create your own Chocolate Christmas Tree Sticks:
1. Prepare Your Workspace
- Line a baking sheet with parchment paper or a silicone mat. This will prevent the chocolate from sticking and make cleanup easy.
- Arrange lollipop sticks on the tray, spacing them a few inches apart to allow room for the tree shapes.
2. Melt the Chocolate
- Break the chocolate into small pieces and place them in a microwave-safe bowl.
- Microwave in 20-second intervals, stirring between each, until fully melted. Alternatively, use a double boiler for gentle, even melting.
3. Create the Tree Shapes
- Transfer the melted chocolate into a piping bag. If you don’t have one, use a plastic bag and snip off a small corner.
- Pipe the chocolate onto the sticks in zigzag patterns, starting wider at the base and narrowing towards the top to form a tree shape.
4. Decorate the Trees
- Before the chocolate sets, sprinkle your chosen decorations over the trees. Add a candy star or edible glitter at the top for a festive touch.
5. Set the Chocolate
- Place the tray in the refrigerator for 20–30 minutes, or until the chocolate is completely hardened.
6. Serve and Enjoy!
- Once set, carefully remove the trees from the parchment paper. Arrange them on a platter or wrap them individually for gifts.
Tips for Perfect Chocolate Christmas Tree Sticks
- Choose Quality Chocolate: Using high-quality chocolate ensures a smooth melt and rich flavor.
- Work Quickly: Decorations need to be added while the chocolate is still soft, so have your toppings ready beforehand.
- Experiment with Colors: Use white chocolate tinted with food-safe coloring to create vibrant Christmas trees.
- Add Texture: Incorporate crushed nuts, coconut flakes, or pretzel pieces for a crunchy twist.
- Storage: Store in an airtight container in a cool place to keep them fresh and crisp.
Variations and Customizations
One of the best things about Chocolate Christmas Tree Sticks is their versatility. Here are some fun ideas to make your creations unique:
Flavor Twists
- Peppermint Trees: Add a drop of peppermint extract to the melted chocolate for a refreshing holiday flavor.
- Spiced Chocolate: Mix in a pinch of cinnamon or nutmeg for a warm, festive taste.
Decoration Ideas
- Minimalist Elegance: Stick to a monochromatic theme, using gold or silver edible dust.
- Candy Cane Stripes: Drizzle white chocolate over dark chocolate trees to create a striped effect.
- Kids’ Favorite: Use gummy candies or mini marshmallows for a playful look.
Dietary Modifications
- Vegan Option: Use dairy-free chocolate and plant-based decorations.
- Sugar-Free: Opt for sugar-free chocolate and natural sweeteners.
Creative Uses for Chocolate Christmas Tree Sticks
These treats aren’t just for eating—they can also add a decorative touch to your holiday celebrations:
- Table Centerpieces: Arrange them in a festive jar or vase to serve as an edible centerpiece.
- Gift Packaging: Wrap them individually in clear cellophane and tie with a holiday ribbon for thoughtful homemade gifts.
- Party Favors: Hand them out to guests at holiday parties as a sweet takeaway.
Why You Should Try Making Chocolate Christmas Tree Sticks
Whether you’re a seasoned baker or a beginner in the kitchen, Chocolate Christmas Tree Sticks are a foolproof way to add some festive magic to your holidays. They’re affordable, customizable, and guaranteed to bring smiles to everyone who sees or tastes them.
Common Questions About Chocolate Christmas Tree Sticks
Can I Make Them Ahead of Time?
Yes! These treats can be made up to a week in advance. Just store them in an airtight container in a cool, dry place.
What if I Don’t Have a Piping Bag?
No worries—a plastic sandwich bag works just as well. Snip off a tiny corner to mimic a piping bag.
Can I Use Pre-Made Chocolate Shapes?
While making your own shapes adds a personal touch, you can use pre-made chocolate trees as a shortcut. Simply decorate and attach them to sticks.
Final Thoughts
Chocolate Christmas Tree Sticks are more than just a dessert—they’re an experience that brings joy and creativity to the holiday season. Whether you’re making them as gifts, party favors, or decorations, these festive treats are sure to impress. With endless possibilities for customization and decoration, you can make them uniquely yours.
So grab some chocolate, gather your favorite toppings, and let the holiday fun begin. Your Chocolate Christmas Tree Sticks will surely be the talk of the season, spreading sweet cheer wherever they go.
Happy Holidays! 🎄🍫
4o