
Cheesy Jalapeño Popper Bites are a game-changer for anyone who loves bold flavors, a crispy bite, and creamy, cheesy goodness. These little bites pack the perfect combination of heat from jalapeños, sharp cheddar’s richness, and a crispy phyllo shell that shatters with every bite. If you’re someone who enjoys a jalapeño popper but wants an easier way to make them without the hassle of stuffing and frying peppers, this is the perfect solution. I remember the first time I made these for a gathering. I was looking for a quick, crowd-pleasing appetizer that didn’t require deep-frying. These came together in no time and were gone even faster. They offer the best of both worlds—crispy on the outside, creamy on the inside, and just the right amount of spice. What makes this recipe beginner-friendly? First, it requires minimal prep. Instead of stuffing whole jalapeños, we mix everything into a creamy filling and spoon it into store-bought phyllo shells, making it incredibly easy. Second, there’s no frying involved, which means less mess and a more straightforward cooking process. Plus, it bakes in just 10-15 minutes. For those who enjoy meal prep, these bites can be assembled in advance and baked when needed. The recipe is also versatile. You can easily adjust the spice level, swap ingredients based on preference, or make it vegetarian. Whether you’re a beginner in the kitchen or an experienced home cook looking for a fast and flavorful appetizer, these jalapeño popper bites are a must-try.
Print
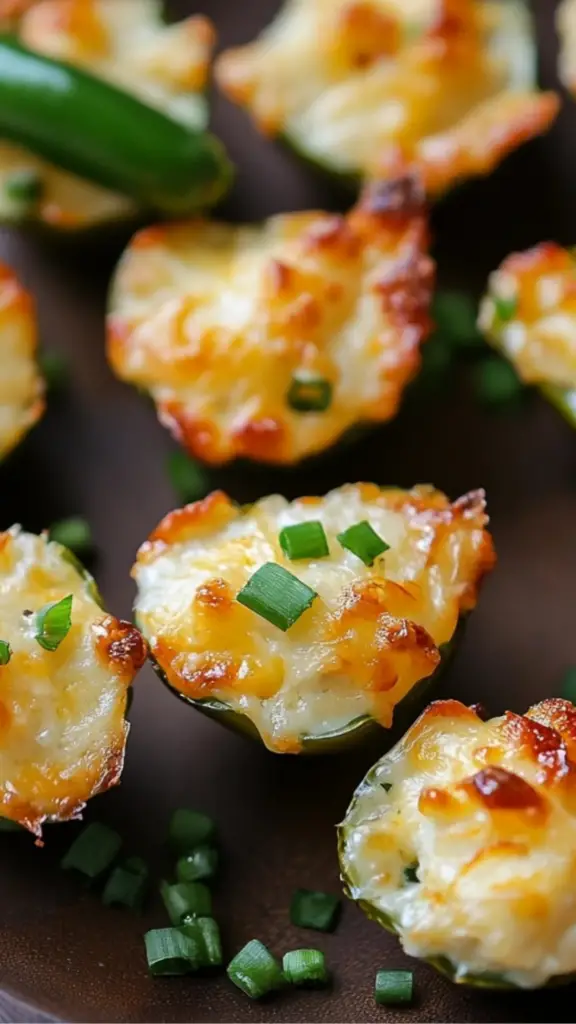
Cheesy Jalapeño Popper Bites
Get ready for a flavor explosion with these Cheesy Jalapeño Popper Bites! Crispy on the outside and gooey on the inside, each bite is packed with spicy jalapeños, melty cheese, and savory goodness. Perfect for a party appetizer or a fun snack, these poppers combine just the right amount of heat with rich, creamy cheese to satisfy your cravings. Serve them with a dipping sauce for extra indulgence. One bite and you’ll be hooked!
#CheesyGoodness #JalapenoPoppers #SnackTime #SpicyTreats #AppetizerIdeas #PartySnacks #CheeseLovers #EasyAppetizers #CrispyBites #FlavorExplosion
- Total Time: 30 minutes
- Yield: 30 bites 1x
Ingredients
- 30 frozen phyllo shells (two 15-count packages)
- 4 oz cream cheese, softened
- 2 tablespoons mayonnaise
- 1 cup grated sharp cheddar cheese
- 1 fresh jalapeño pepper, finely minced (remove seeds for less heat)
- 3 tablespoons jarred diced jalapeño
- ⅛ teaspoon garlic powder
- ⅛ teaspoon salt
- 2–3 tablespoons crumbled cooked chicken or crispy seasoned chickpeas (substituting for bacon)
Instructions
- Preheat the Oven: Set your oven to 375°F (190°C). Line a baking sheet with parchment paper or a silicone baking mat to prevent sticking.
- Prepare the Phyllo Shells: Arrange the phyllo shells on the baking sheet. There’s no need to pre-bake them, as they will crisp up perfectly in the oven.
- Soften the Cream Cheese: If your cream cheese is too firm, microwave it for 15-20 seconds to make mixing easier.
- Make the Cheese Mixture: In a bowl, combine the softened cream cheese, grated sharp cheddar, and mayonnaise. Stir until smooth and well combined.
- Prepare the Jalapeños: Remove the stem and seeds from the fresh jalapeño and finely mince. If you love spice, keep some seeds in. Drain and finely chop the jarred jalapeños.
- Season the Filling: Add both the fresh and jarred jalapeños to the cheese mixture. Stir in the garlic powder and salt. Mix well until evenly distributed.
- Fill the Phyllo Shells: Using a small spoon or piping bag, fill each phyllo shell with the jalapeño cheese mixture. Be careful not to overfill to avoid spilling while baking.
- Add the Topping: Sprinkle the crumbled crispy chickpeas or cooked, crumbled chicken over each filled shell for added texture and flavor.
- Bake to Perfection: Place the baking sheet in the preheated oven and bake for 10-15 minutes, or until the filling is melty and the shells are crispy and golden brown.
- Serve and Enjoy: Let the bites cool slightly before serving. Enjoy them warm for the best texture and flavor.
Notes
- How to Handle Jalapeños: If you have sensitive skin, wear gloves when handling fresh jalapeños to avoid irritation. Always wash your hands thoroughly after cutting them.
- Adjusting Spice Levels: For a milder version, use only jarred jalapeños. If you love heat, add a pinch of cayenne pepper or crushed red pepper flakes.
- Making in Advance: You can prepare the filling up to a day ahead and store it in the fridge. Assemble the bites just before baking to keep the shells crisp.
- Crispier Phyllo Shells: If you want extra crunch, pre-bake the phyllo shells for 5 minutes before filling them.
- No Mayo Option: If you prefer, you can swap the mayonnaise with sour cream or Greek yogurt for a tangier taste.
- Prep Time: 15 minutes
- Cook Time: 15 minutes
Ingredients and Preparation
- 30 frozen phyllo shells (two 15-count packages)
- 4 oz cream cheese, softened
- 2 tablespoons mayonnaise
- 1 cup grated sharp cheddar cheese
- 1 fresh jalapeño pepper, finely minced (remove seeds for less heat)
- 3 tablespoons jarred diced jalapeño
- ⅛ teaspoon garlic powder
- ⅛ teaspoon salt
- 2-3 tablespoons crumbled cooked chicken or crispy seasoned chickpeas (substituting for bacon)
Ingredient Substitutions and Notes:
- Phyllo Shells: These can be found in the freezer section. If unavailable, you can use mini tart shells or even scoop the mixture into small pieces of toasted bread.
- Cheese Choices: Sharp cheddar works best for flavor, but you can mix in Monterey Jack or Pepper Jack for extra creaminess.
- Jalapeños: The combination of fresh and jarred jalapeños adds layers of flavor. If you prefer milder bites, stick with just the jarred variety.
- Bacon Alternative: Since we’re avoiding bacon, you can substitute with crispy seasoned chickpeas for a crunchy texture or cooked, crumbled chicken for added protein.
Step-by-Step Instructions
- Preheat the Oven: Set your oven to 375°F (190°C). Line a baking sheet with parchment paper or a silicone baking mat to prevent sticking.
- Prepare the Phyllo Shells: Arrange the phyllo shells on the baking sheet. There’s no need to pre-bake them, as they will crisp up perfectly in the oven.
- Soften the Cream Cheese: If your cream cheese is too firm, microwave it for 15-20 seconds to make mixing easier.
- Make the Cheese Mixture: In a bowl, combine the softened cream cheese, grated sharp cheddar, and mayonnaise. Stir until smooth and well combined.
- Prepare the Jalapeños: Remove the stem and seeds from the fresh jalapeño and finely mince. If you love spice, keep some seeds in. Drain and finely chop the jarred jalapeños.
- Season the Filling: Add both the fresh and jarred jalapeños to the cheese mixture. Stir in the garlic powder and salt. Mix well until evenly distributed.
- Fill the Phyllo Shells: Using a small spoon or piping bag, fill each phyllo shell with the jalapeño cheese mixture. Be careful not to overfill to avoid spilling while baking.
- Add the Topping: Sprinkle the crumbled crispy chickpeas or cooked, crumbled chicken over each filled shell for added texture and flavor.
- Bake to Perfection: Place the baking sheet in the preheated oven and bake for 10-15 minutes, or until the filling is melty and the shells are crispy and golden brown.
- Serve and Enjoy: Let the bites cool slightly before serving. Enjoy them warm for the best texture and flavor.
Beginner Tips and Notes
- How to Handle Jalapeños: If you have sensitive skin, wear gloves when handling fresh jalapeños to avoid irritation. Always wash your hands thoroughly after cutting them.
- Adjusting Spice Levels: For a milder version, use only jarred jalapeños. If you love heat, add a pinch of cayenne pepper or crushed red pepper flakes.
- Making in Advance: You can prepare the filling up to a day ahead and store it in the fridge. Assemble the bites just before baking to keep the shells crisp.
- Crispier Phyllo Shells: If you want extra crunch, pre-bake the phyllo shells for 5 minutes before filling them.
- No Mayo Option: If you prefer, you can swap the mayonnaise with sour cream or Greek yogurt for a tangier taste.
Serving Suggestions
- Pair with Dips: Serve with a side of sour cream, ranch dressing, or a zesty avocado dip for extra creaminess.
- Perfect Party Appetizer: These bites make an excellent addition to any gathering, from game nights to holiday parties. They are easy to eat and packed with flavor.
- Spicy-Sweet Twist: Drizzle a touch of honey over the bites before serving to balance the spice with a hint of sweetness.
- Add a Side: These go great with a fresh salad, a bowl of tortilla chips, or a simple cucumber and tomato salsa for a refreshing contrast.
Storage Tips
- Refrigeration: If you have leftovers, store them in an airtight container in the fridge for up to 3 days. Reheat in the oven at 350°F (175°C) for 5-7 minutes to restore crispiness.
- Freezing Option: You can freeze unbaked popper bites for up to a month. Arrange them on a baking sheet, freeze until solid, then transfer to a freezer bag. Bake straight from frozen, adding a couple of extra minutes to the baking time.
Conclusion
Cheesy Jalapeño Popper Bites are the perfect balance of crispy, creamy, spicy, and cheesy goodness. They are easy to make, bake quickly, and offer a delicious appetizer option for any occasion. Whether you’re making them for a party, a snack, or just a fun treat, they are sure to be a hit. The recipe is beginner-friendly, requiring minimal effort while delivering maximum flavor. Plus, it’s highly customizable—adjust the spice level, swap ingredients, or add your favorite toppings to make them your own. Have you tried making these? Let us know your thoughts and any variations you’ve tried in the comments. Happy cooking!